Battery compartment(s)
This came as quite a surprise to several people I spoke
to and shows that the S1 Pro is still really two systems, although they
communicate they still require separate power supplies. Thus the first
battery compartment housed on the left side of the camera’s base contains
4 x AA batteries (NiMH rechargeables supplied) which drive the digital
side of the camera (and the function & main LCD). The second battery
compartment is in the base of the handgrip and contains two (pricey) CR123A
Lithium batteries which drive the camera engine (top LCD, focusing, shutter
release, flash, AF assist light).
The status of each set of batteries also appear in different
places. The Lithium batteries status is shown on the top information LCD.
The AA’s batteries status is shown on the rear information LCD. Oh, and
there’s actually a third battery, a small CR2025 button style battery
for maintaining camera memory and date & time.
I personally think it’s a shame that FujiFilm didn’t
tackle this well enough… Digital Cameras are all about zero shot cost,
the ability to shoot and shoot and only need to recharge your batteries.
In effect the Lithium batteries place a cost-per-shot on the S1 Pro, although
it’s likely to be so tiny as not to be important, it’s still there (and
indeed the Lithium batteries in our loan camera did fail about half way
through the review.. Although that’s not «typical use» and we
didn’t know the status of the batteries before receiving the camera).
S1 Pro USB driver (downloading)
Via
the record setup menu you can put the USB connector on the S1 Pro into
either Downloading or Shooting mode. Connect the S1 Pro in Downloading
mode and (assuming you’ve installed the USB driver) the storage media
in the camera will appear as new drive on your computer. Copying files
directly from this new drive we timed transfer rates of about 400 KB/s
which was quite a bit slower than my normal USB card reader which manages
about 660 KB/s.
Another thing which we found interesting (odd?) was that
this new drive was write protected, that is although you can copy images
from the card in the camera you cannot copy to it, delete files or format
the card. This means a normal download sequence using the S1’s built in
USB conenctor would be: Connect USB, transfer images, disconnect USB,
enter PLAY mode, format card (or erase all images).
Internal Flash
The pop-up flash built into the S1 Pro means that you
don’t have to lug a separate flash system around with you, just pop it
up and shoot.. Good news, it performed really well.. Skin tones are especially
natural, coverage is good and strong colours don’t lose any of their
pizzazz. Samples resolution: 1440 x 960 FINE (1.3 megapixel ~ 620 KB).
| Skin tone test | Strong colour test |
| Colour test #2 | Wood.. |
(Yes our wall really is that colour, and the S1 Pro is
the first camera to have rendered it correctly, most digital cameras turn
it white). We couldn’t do our normal coverage test as we didn’t have the
required lens (would have needed an 18 mm lens to test the 28 mm claimed
coverage of the internal flash).
Обзор Fujifilm FinePix X-S1
Среди потребителей фототехники (как любителей, так и профессионалов) образовался достаточно большой и устойчивый контингент пользователей, предпочитающих аппараты с большим, более 10 кратным зумом. Когда производители осознали этот факт, началась новая гонка, сравнимая с гонкой за пиксельность – гонка зумов. Практически все фирмы-производители стали насыщать эту нишу – ультразумы, суперзумы, гиперзумы…
На фоне ныне достигнутых 40х – 50х зумов фотоаппарат FinePix X-S1 c 26-кратным объективом может показаться неактуальным. Но не будем спешить с выводами. Не зря же Fujifilm считается лидером в этой нише фототехники.
Fujifilm X-S1, как и все прочие аппараты этого класса, выглядит и весит как зеркалка, по размеру также практически не отличается от зеркалки с китовым объективом. На этом сравнение с зеркалкой и закончим, ввиду бессмысленности такового из-за различных целей и назначений этих фотоаппаратов.
Приведём основные характеристики X-S1: МАТРИЦА: CMOS 2/3» EXR, кроп-фактор 3.93, 12 Мp МАКС. РАЗРЕШЕНИЕ: 4000×3000 точек ОБЪЕКТИВ: 24-624 мм в 35-мм эквиваленте, F2.8-F5.6 ЧУВСТВИТЕЛЬНОСТЬ: 100-3200 ISO, ISO6400, ISO12800, Auto ISO ВЫДЕРЖКА: 30-1/4000 сек ЭКРАН: 3″, 460 000 пикселей СКОРОСТЬ СЕРИИ от 3 до 10 полноразмерных кадров в секунду ФОРМАТ ИЗОБРАЖЕНИЯ: JPEG, RAW, RAW+ JPEG ИНТЕРФЕЙС: USB2.0, видео HDMI, аудио ГАБАРИТЫ: 135x109x149 мм ВЕС: 945 г
Из особенностей дизайна стоит обратить внимание на корпус аппарата, полностью покрытый пластиком с характерной «резиновой» фактурой. Большая эргономичная рукоятка удобно лежит в руке, создавая ощущение лёгкости в хвате фотоаппарата
Ручное управление зумом выполняется широким рифленым кольцом. Метки фокусного расстояния, нанесенные на трубе объектива, показывают фокусное расстояние — в действующих единицах и в пересчете на 35-миллиметровый эквивалент. Кольцо фокусировки сделано шире, чем в других аналогичных моделях, и более удобно для установки фокуса вручную. Трёхдюймовый дисплей можно откинуть вверх на 90 градусов или опустить вниз до 45 градусов.
«Изюминка» электронного видоискателя – встроенный датчик, переключающий изображение с экрана на видоискатель при подносе окуляра к глазу фотографа. Большое разрешение (800х600) дает высококачественную картинку на экране видоискателя. Ещё одна особенность конструктивного исполнения – часто используемые функции выведены на кнопки, расположенные с левой стороны. Кроме того есть программируемая кнопка и три сохраняемых пользовательских режима.
Но главная особенность этого фотоаппарата – использование матрицы EXR размером 2/3» с 26-кратным объективом. Все матрицы предыдущих моделей ультразумов, в том числе и по технологии EXR, имеют меньшие размеры. При 12 Мр эта матрица имеет больший размер пикселя, обеспечивая более высокое качество снимка.
За счет разворота на 45 градусов пиксельной структуры относительно обычных матриц и несколько иного расположения самих цветовых пикселей возможно три режима работы матрицы – высокое отношение сигнал/шум, расширение динамического диапазона или высокое разрешение. Нужный режим выбирается автоматически, исходя из конкретной ситуации съёмки, либо выставляется вручную.
Кроме того, достаточно размерная матрица при таком большом фокусе позволяет хорошо размыть задний план, несмотря на относительно небольшую светосилу (f/5.6 на дальнем конце). Как показывают многочисленные тесты, коих множество есть в Интернете, камера, уже традиционно для фотоаппаратов от Fujifilm, хорошо снимает в JPEG. Однако для получения более высокой детализации стоит повозиться над «проявкой» RAW файлов.
В небольшой статье трудно рассказать обо всех как положительных, так и отрицательных сторонах любой техники. Отметим лишь, что в X-S1 плюсов всё-таки много больше, нежели минусов. Верится, что эта камера со временем станет такой же популярной и любимой у фотографов, какими до сих пор остаются камеры S100FS и S200Exr от Fujifilm. Tags:Fujifilm Finepix, Компактные фотокамеры
Play mode LCD display
Switching to play mode (by pressing the PLAY button)
displays the last image shot and changes the top LCD panel to play functions
(detailed above). Pushing the 4-way controller left or right moves through
each image on the storage card.
| Default play mode review image, no information overlaid. | Pressing the histogram button on the function LCD panel toggles between overlaid histograms of: Master (gray levels), Red Channel, Green Channel or Blue Channel. |
|
Pushing the 4-way controller up zooms into the image, all the way |
Pressing the PLAY button when zoomed in changes the function of the 4-way controller to a pan control allow you to smoothly scroll around the zoomed image (at any zoom level). |
|
Pressing the PLAY button when not zoomed switches to a thumbnail |
But you can set a 9 thumbnail (3 x 3) mode through the play menu. |
Cleaning the CCD
On a normal non-removable lens digital camera we don’t
(hardly ever) have to worry about getting dust or dirt on the CCD. However,
on digital SLRs it’s more of a problem, constantly changing lenses allows
tiny dust particles (and dirt) to enter the cavity containing the lens
/ shutter, the next shot you take and that dust could make its way onto
your CCD. This dirt is visible at small apertures (large F numbers) as
dark smudges, black marks or rings. For an example click
here to see what the CCD on our loan camera looked like at F22 (me
thinks this camera had done the rounds already).
So, the debate continues.. If you spend just a little
time on our Pro Digital Talk forum you’ll find one of the most discussed
items is how best to clean the CCD in Digital SLRs.. Many Nikon D1 owners
have now taken to regularly locking the mirror up to give the CCD a quick
blast (whether dirt is visible or not) with a can of compressed air, this
will remove surface dust but not dirt with any stickiness (this will have
to be cleaned by a FujiFilm service facility). FujiFilm do not recommend
using any kind of cleaning device which actually touches the CCD surface
(as this can lead to permanent scratching).
Timings & File Sizes
As you’d expect the S1 Pro is a fast camera, especially
compared to even the best prosumer digital cameras. At it’s heart it’s
still an F60 body which means that as soon as you’ve turned on the power
you can shoot. And because the it’s a «shooting priority» camera
we don’t have to time things like switching from play to record modes,
the «camera» side of the unit seems to operate as a separate
entity to the digital side and you’re nearly always able to simply pick
up the camera and shoot.
Operationally it’s quite fast too, flicking in and out
of menus, changing basic settings (such as white balance and ISO) are
quick once you get used to the function menu. My only niggle was the amount
of time it took to display an image in Play mode (3.5 seconds might not
sound bad but there are easy ways to make it much faster and you’d really
expect to be able to flick through the images in a Digital SLR).
Timing Notes: All times calculated as an average
of three operations. Unless otherwise stated all timings were made on
a 3040 x 2016 FINE JPEG image (around 2.2 MB per image).
File Size Notes: All file sizes are an average
of three files. As is the case with JPEG it’s difficult to predict the
size of an image because it will vary a fair amount depending on the content
of the image (especially the amount of detail captured). For example,
take a photograph of a fairly empty wall and you’ll get a small JPEG,
take a photograph of a bush with a lot of detail and you’ll get a larger
image. File sizes here are closer to the later, the larger size of file
you should expect.
Symbols: ~ = roughly / approximately.
| Action | Details | Time taken
(seconds) |
Notes |
| Off to On | <1.0 | Virtually instant |
|
| On to Off |
<1.0 | Virtually instant |
|
| Play: Display image | 3040 x 2016 TIFF-RGB |
27.8 | |
| Play: Display image | 3040 x 2016 TIFF-YC |
11.9 | |
| Play: Display image | 3040 x 2016 FINE JPEG |
3.5 | |
| Play: Display image | 2304 x 1536 FINE JPEG |
2.5 | |
| Play: Display image | 1440 x 960 FINE JPEG |
1.7 | |
| Play: Thumbnail view | 2 x 2 | <1.0 | Virtually instant |
| Play: Zoom-in | <1.0 | Virtually instant |
|
| Auto Focus LAG | n/a | Depends on lens |
|
| Shutter Release LAG | <0.1 | Very Fast |
In the delay before an image is displayed in play mode
(an animated hourglass appears) you can interrupt the display by pressing
either the left or right arrows on the 4-way controller. It’s interesting
as it seems as though the S1 Pro doesn’t utilise the trick of a small
thumbnail embedded into the JPEG / TIFF header (something which most prosumer
digital cameras do) which allows for quick display of images without having
to load the whole image from the storage card (which the S1 Pro obviously
is having to do — check the TIFF timings).
Rear LCD Display
|
The rear LCD is large (2″), bright and clear with bags of Strangely the LCD has a 4:3 image ratio which means that the image |
A few suggested improvements: (1) Anti-reflective coating
for screen (2) Display of a standard grayscale when adjusting brightness
— sometimes it’s difficult to tell if you just underexposed the image
or you didn’t set the brightness correctly. (3) A clip-on cover «D1
style» to protect the LCD for those photographers who don’t use it
all the time or for transporting the camera.
File Flush Timing
Timings shown below are the time taken for the camera
to process and «flush» the image out to the storage media (when
REC activity indicator on the rear LCD panel stops flashing). The S1 Pro
continues to process images in the buffer and write data out to the storage
media in parallel to you shooting the next shot.
| Action | Time taken (seconds) |
Average
File size |
Approx. images on an IBM Microdrive (340 MB) |
| Store 3040 x 2016 TIFF-RGB |
14.3 | 18,019 KB | 19 |
| Store 3040 x 2016 TIFF-YC |
9.8 | 12,034 KB |
28 |
| Store 3040 x 2016 FINE JPEG |
4.0 | ~ 2,400 KB |
144 |
| Store 2304 x 1536 FINE JPEG |
4.0 | ~ 1,400 KB |
249 |
| Store 1440 x 960 FINE JPEG |
3.2 | ~ 660 KB |
528 |
Вводные
Ранее мне довелось лишь поверхностно познакомиться со средним форматом. Это также был Fujifilm, знаменитая огромная «сотка» — GFX100. Камера очень большая, тяжёлая и дорогая: комплект, находившийся у нас в студии примерно неделю, на тот момент стоил более миллиона рублей.
Цена в тот момент меня поражала (тогда я не слишком интересовался стоимостью обвесов Sony, если что). И пусть я не подходил к изучению этой камеры осмысленно, мне было ясно одно: фотоаппарат потрясающий. Однако по достоинству я не мог оценить Fuji по многим причинам. Во-первых, его дали не мне. Во-вторых, по-настоящему интересоваться камерами я начал лишь некоторое время спустя. Сделал несколько снимков и был таков.
 Иллюстрация: Светлана Чувилёва / Wylsacom Media
К этому февралю я был уже стопроцентным фуджибоем: прошло полтора года после начала моей любви, и она лишь усиливалась. За это время я отправился в незабываемое путешествие во Вьетнам с X100F, провёл пандемийные полгода с потрясающим X100V, ходил несколько месяцев в комплекте X-T4 + Fujinon XF56mmF1.2, взяв его с собой в короткое рабочее путешествие в Стамбул.
И вот тут компания показала новый средний формат — GFX100S.
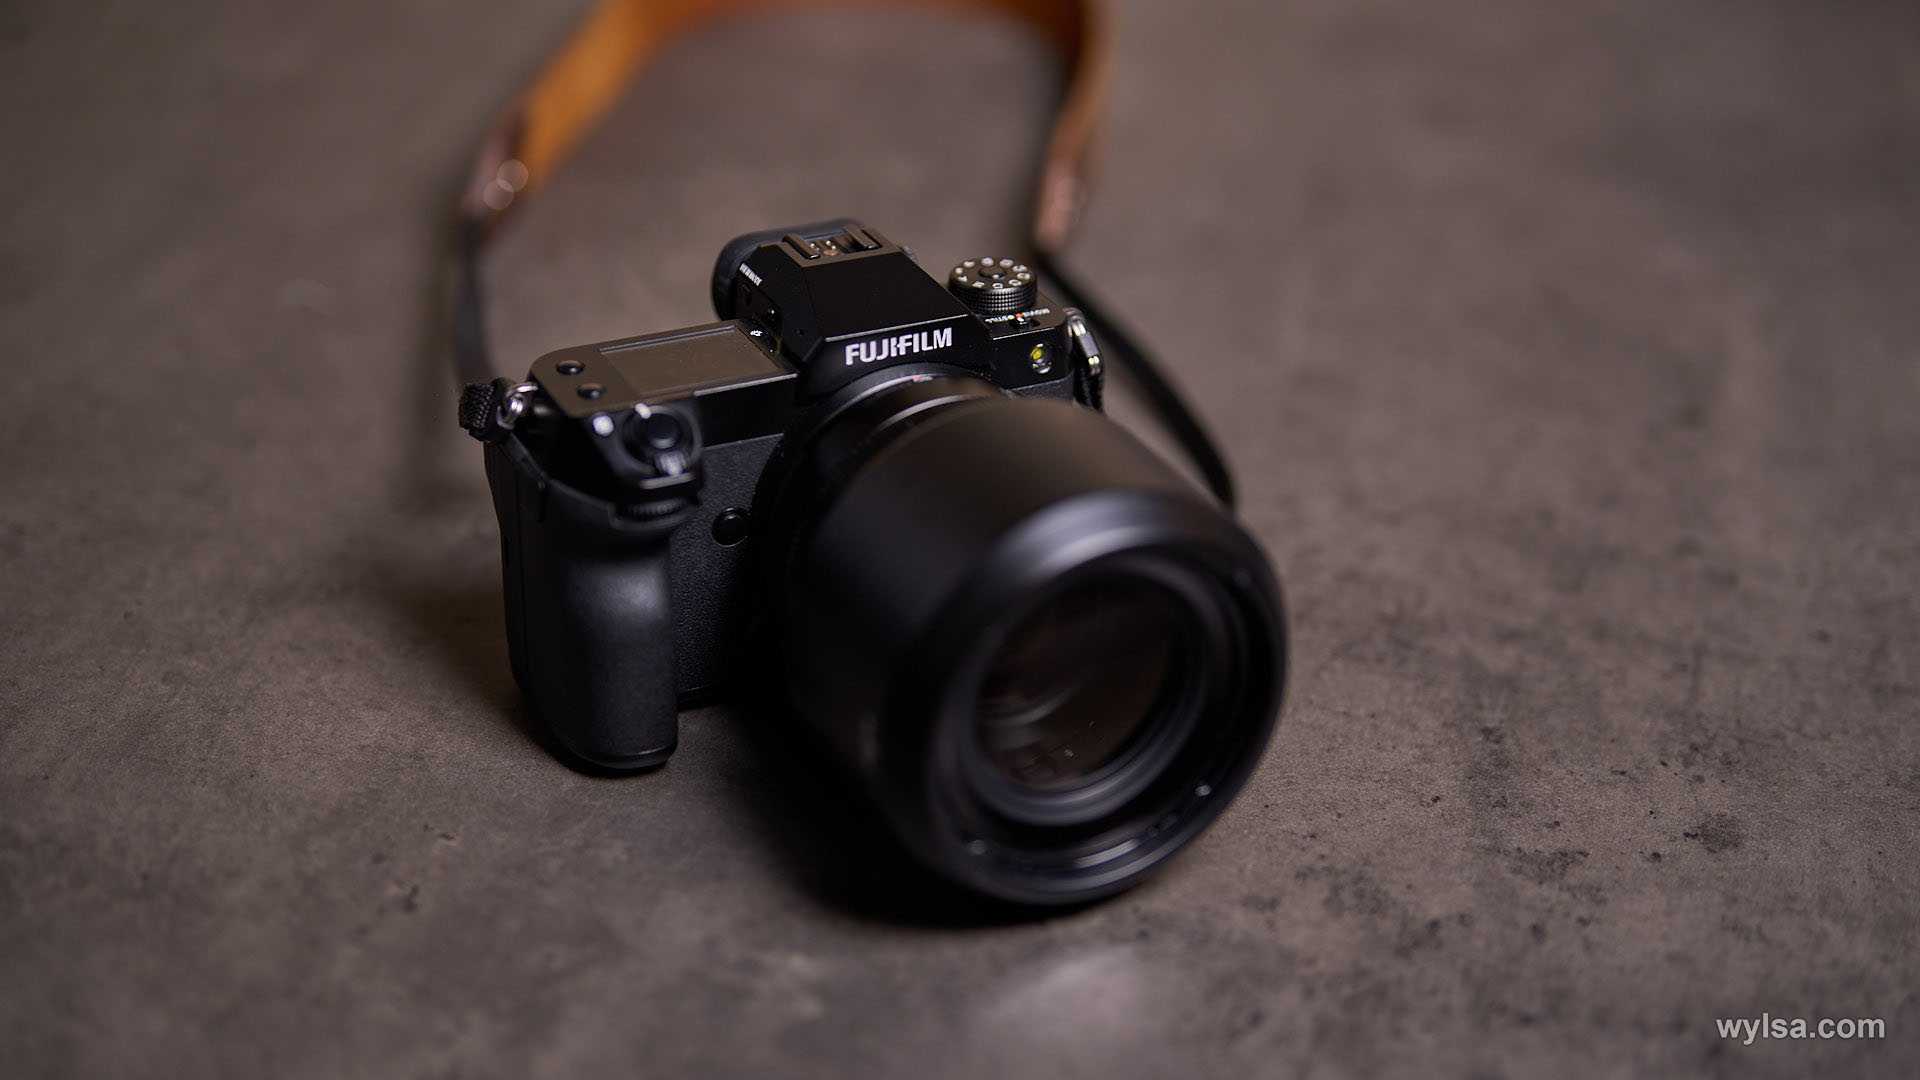
У меня были с ним неожиданные пять дней, за которые я понял несколько вещей:
- Субъективно: это лучшая камера этого года;
- Объективно: это одна из двух лучших камер этого года;
- Этот фотоаппарат проверяет своего владельца, и я эти проверки ещё не прохожу — слишком малый опыт;
- Я безумно хочу этот фотоаппарат себе. И сейчас, набирая этот текст, понимаю, как сильно скучаю по тем дням, когда ходил по Москве с ним наперевес.
Record mode LCD display (preview enabled)
As the S1 Pro is an SLR this means that we can’t have
a live preview image on the rear LCD (as the CCD is covered until the
shutter opens) this means that the only time the main LCD is used in record
mode is if you have Preview set to Auto Rec (image is previewed but automatically
recorded) or Manual Rec (image is previewed but must be confirmed before
it is recorded).
| Default preview image, no information overlaid. | Preview image with histogram (only available in Manual Rec Preview mode), pressing the histogram button several times toggles the histogram display of: Master (gray levels), Red, Green or Blue. |
|
Preview image with standard gray & colour bars (only available |
Ощущение и управление
Многим людям важны тактильные ощущения: как вещь лежит в руках, как двигаются её части, насколько она монолитна, насколько её вес приятен пользователю
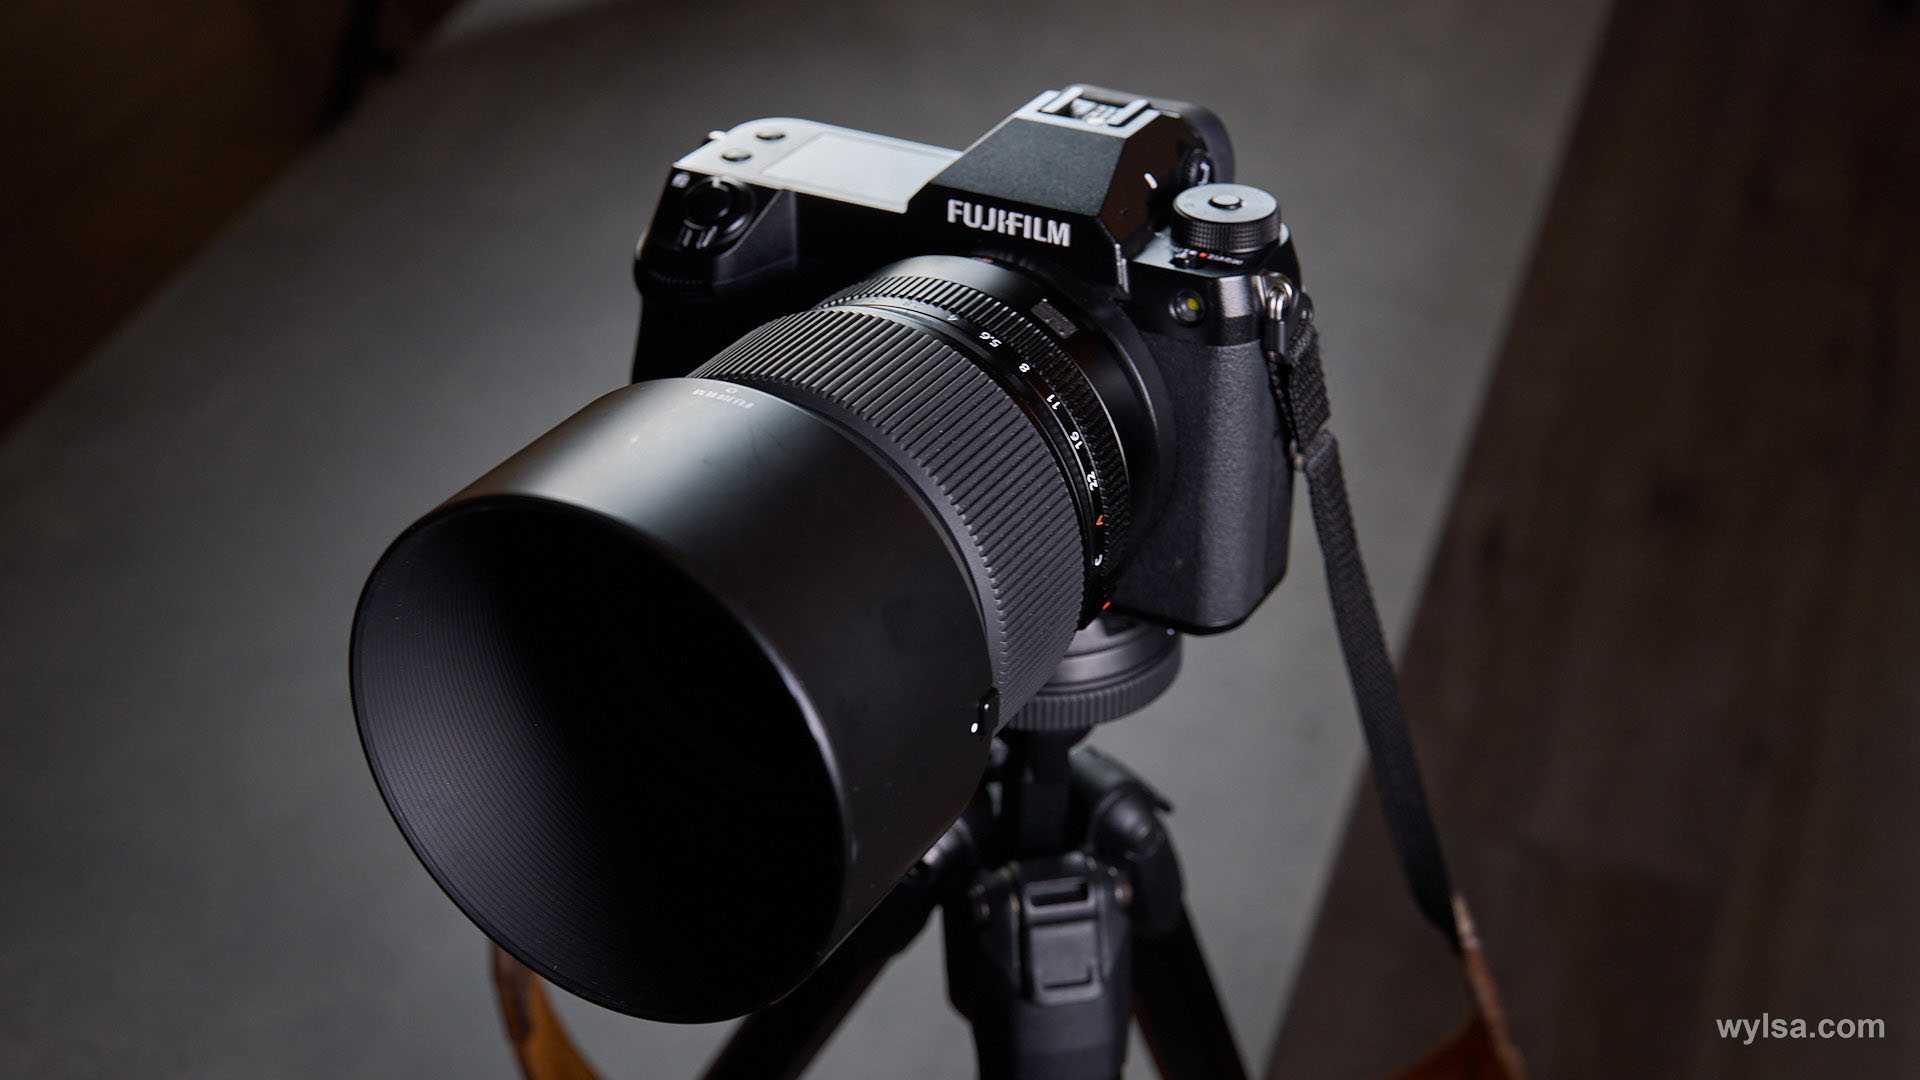
Многие же этого кайфа не поймут: им неважно, с какой плавностью и какой уверенностью двигается кольцо диафрагмы на Fujinon GF80mmF1.7
Они вряд ли обратят внимание на то, насколько камера удобно лежит в руках. Я же от всего этого получал оргазм
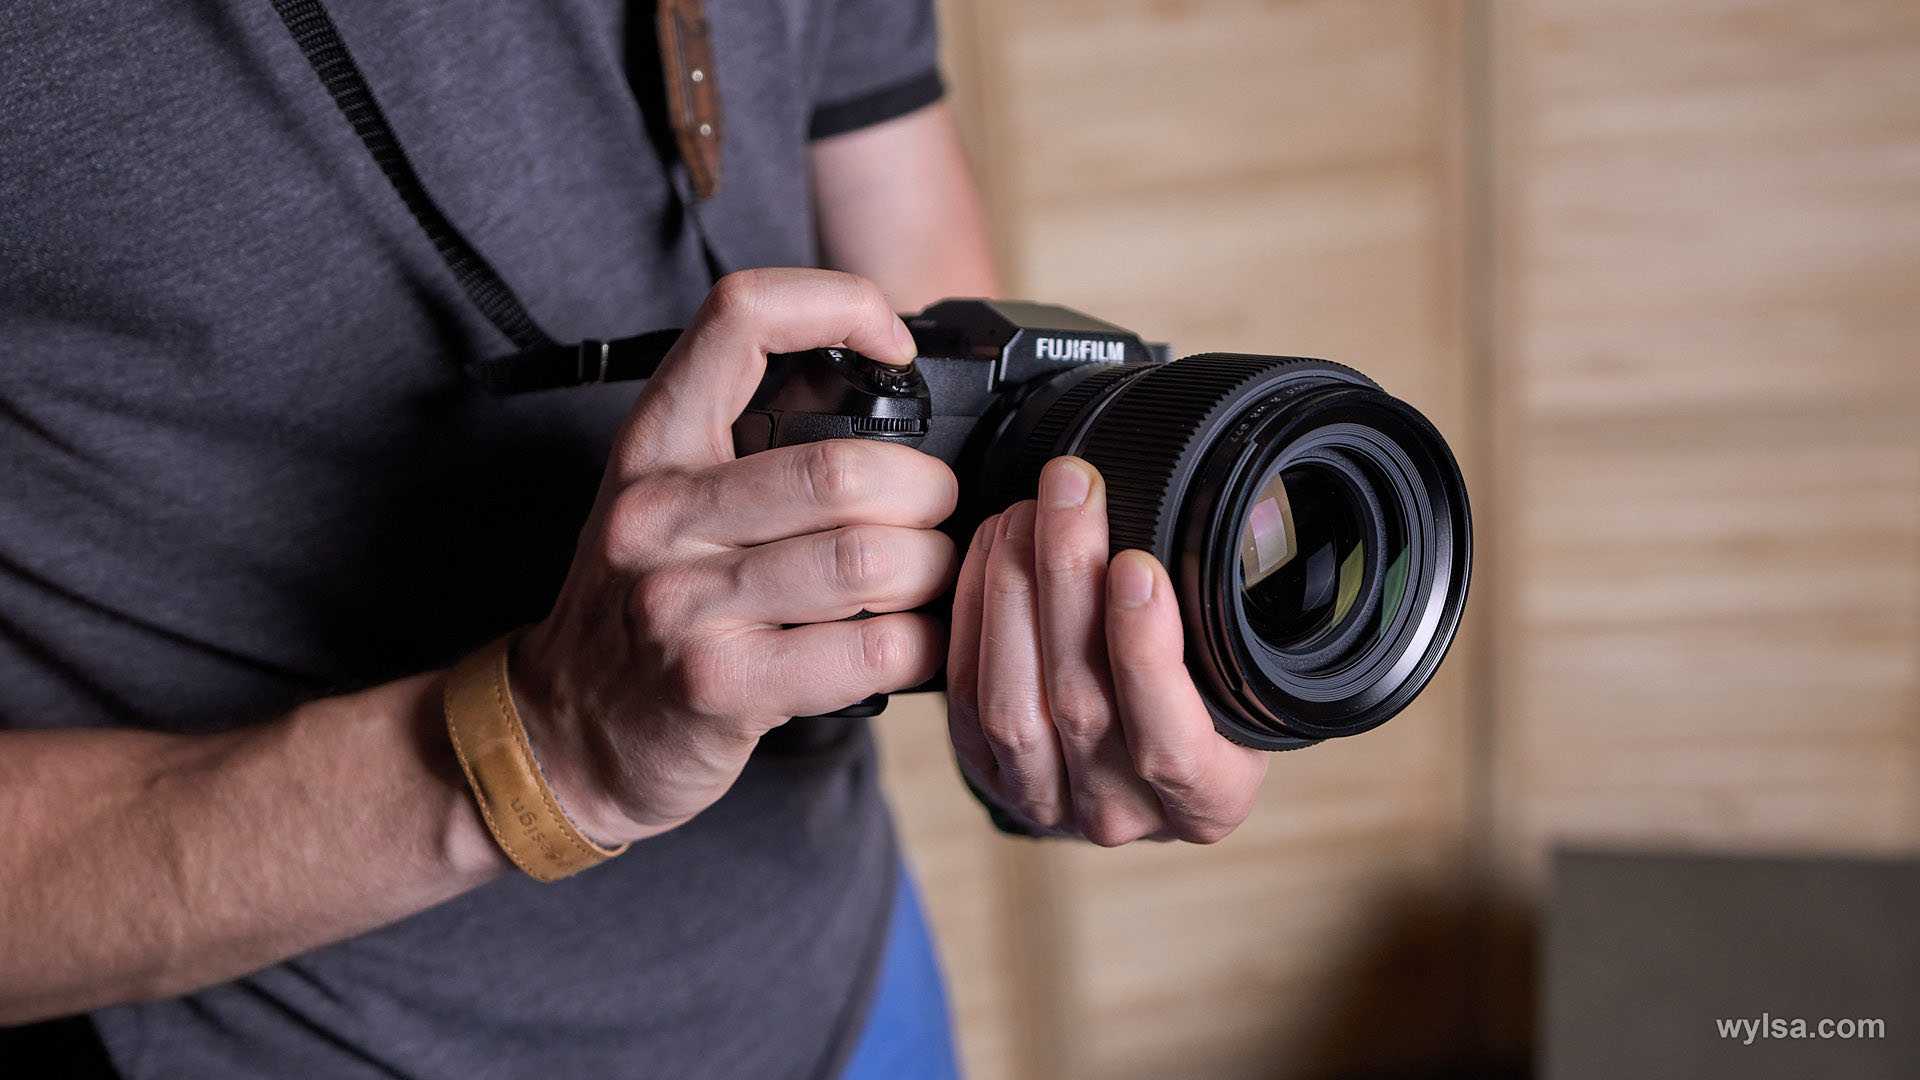
Я обожаю дисплей этого фотоаппарата. Это очень крутой IPS-экран, который невероятно удобен в использовании. Он наклонно-поворотный. И именно такой формат лучше всего подходит для съёмки фотографий.
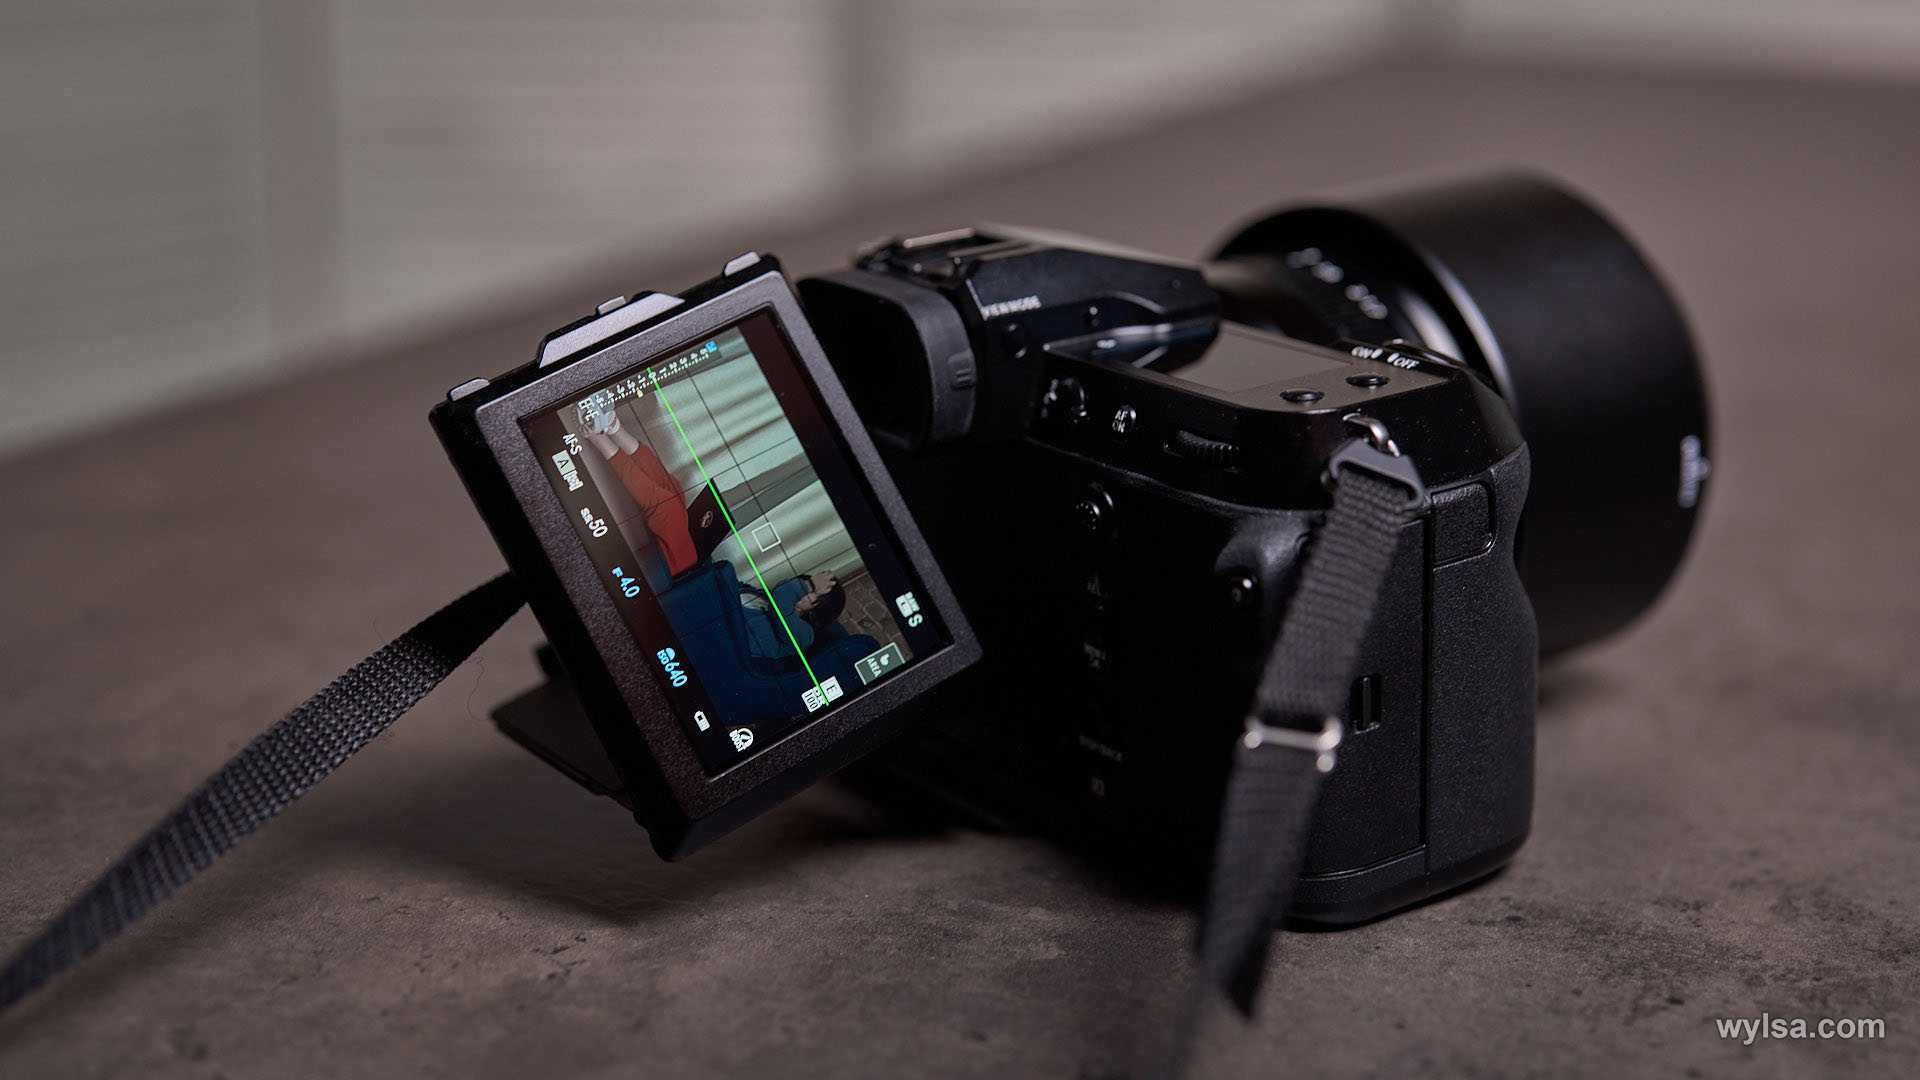 Поворачивается экран только в одну сторону, но из-за этого очень удобно снимать «с земли», держа фотоаппарат в правой руке. Фото: Илья Кичаев / Wylsacom Media
В одном из обзоров я прочитал, что возможны случайные нажатия на кнопку вызова быстрого меню Q. Но у меня такого не было. Предполагаю, что GFX100S сделана под тонкие ладони и длинные пальцы, аналогичные моим. А у человека, который жаловался на эту проблему, руки большего размера.
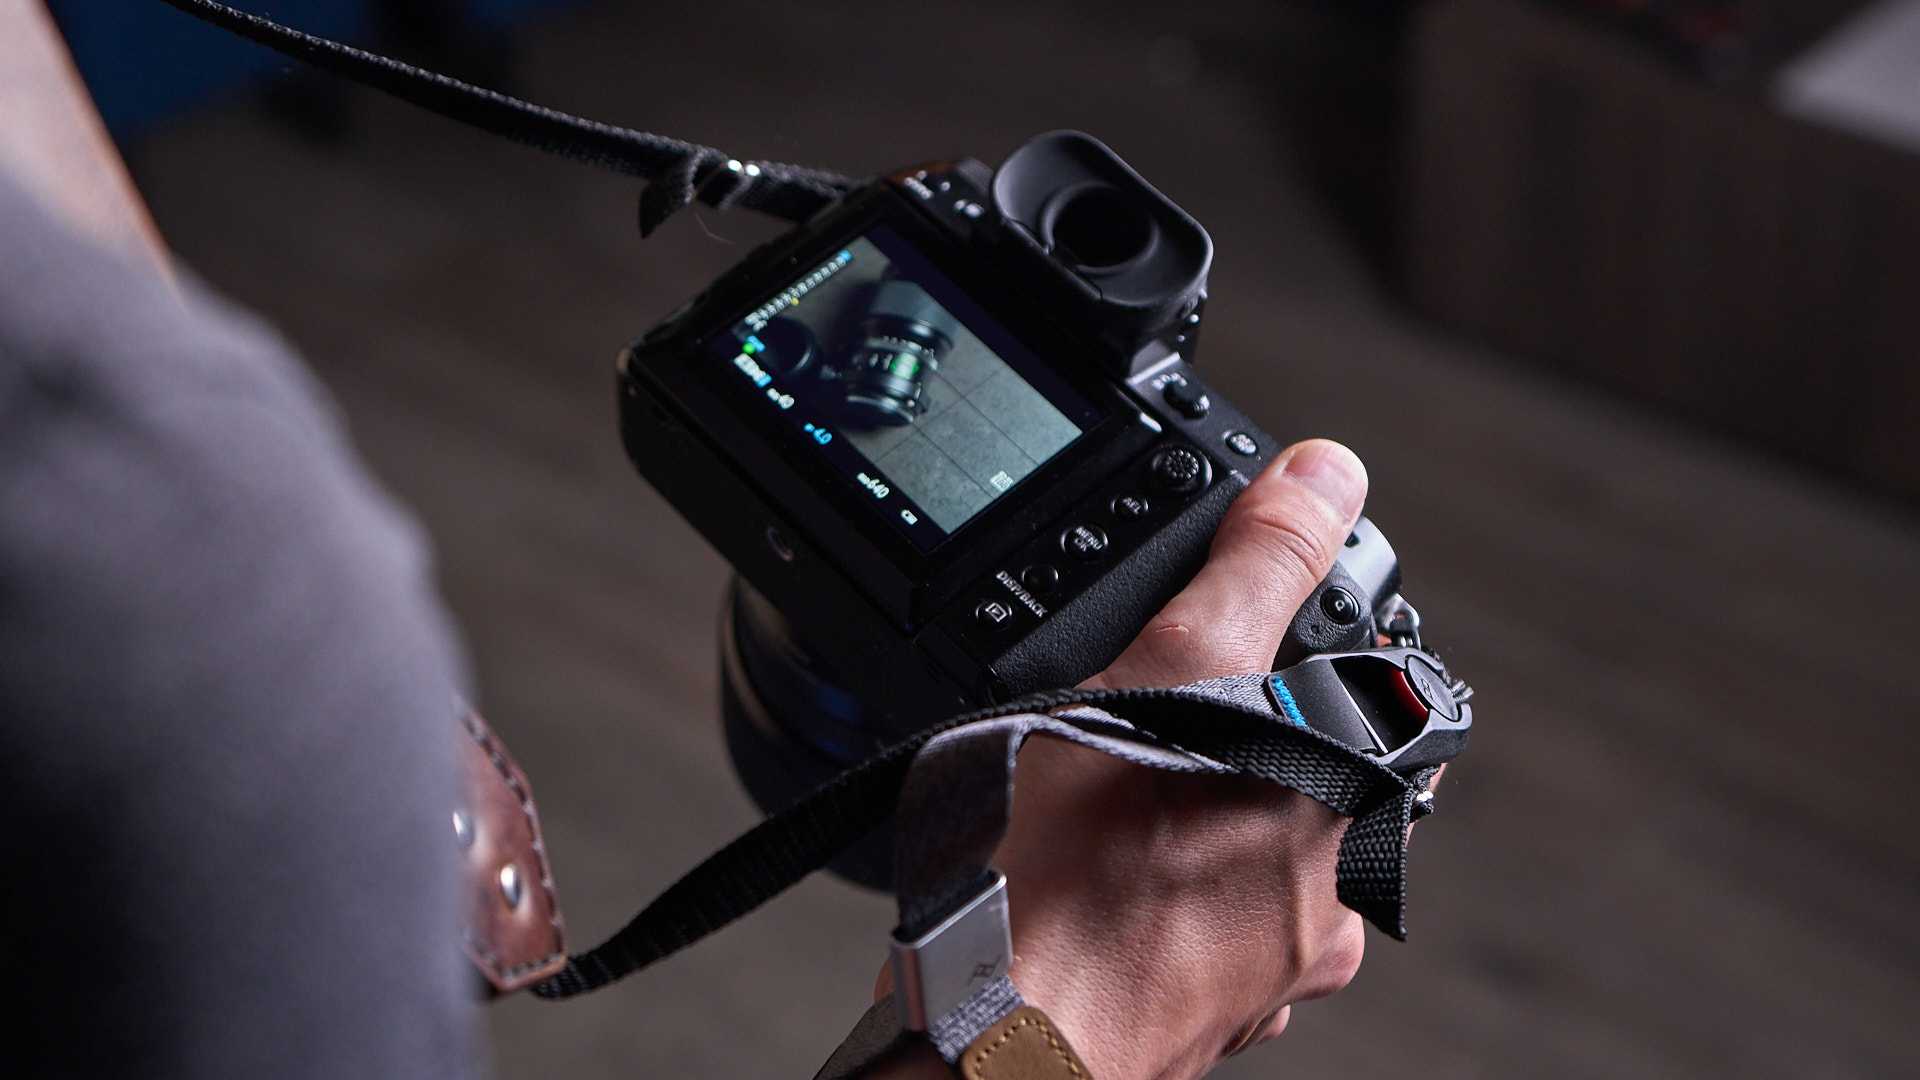
Если вы знакомы с фотоаппаратами Fujifilm, то знаете одну из главных фишек камер компании: никаких привычных режимов. Все необходимые параметры нужно настраивать непосредственно на объективе и самой камере. Под каждый из них выделена определённая кнопка или диск, которые вы также можете настроить.
Логика GFX100S отличается. Камера даёт пользователю возможность выбора режимов. Я, например, всё фотографировал на «A».
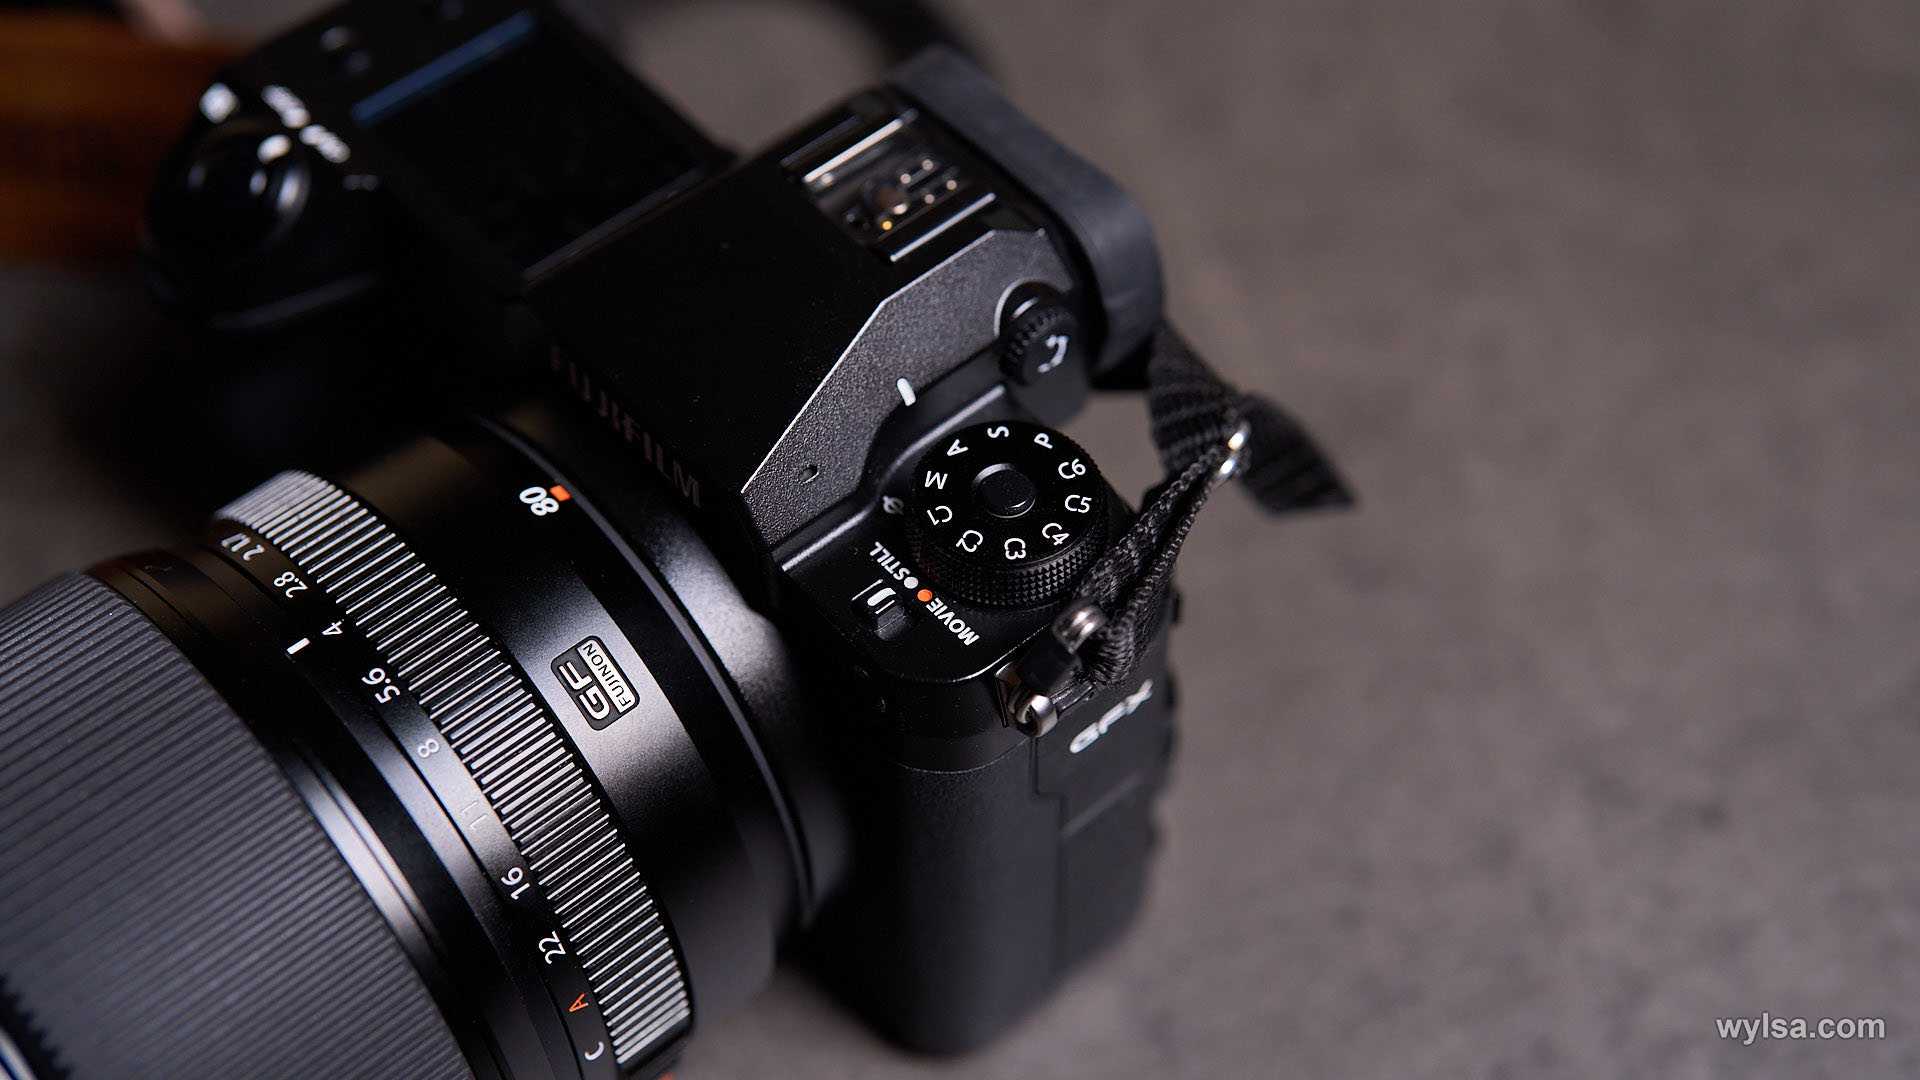
Назвать это «автоматом» язык не поворачивается, поскольку у меня была возможность настраивать все параметры, не переключая камеру на другой тумблер. Вот я и фотографировал с приоритетом диафрагмы.
Но спустя пять дней я начал настраивать буквально всё. Из ленивого фотографа она меня сделала другим человеком. Теперь я на всех камерах кручу экспокоррекцию, настраиваю нужное значение ISO в данном сценарии. Fujifilm, что ты со мной сделала? Мне и до этого было нормально!
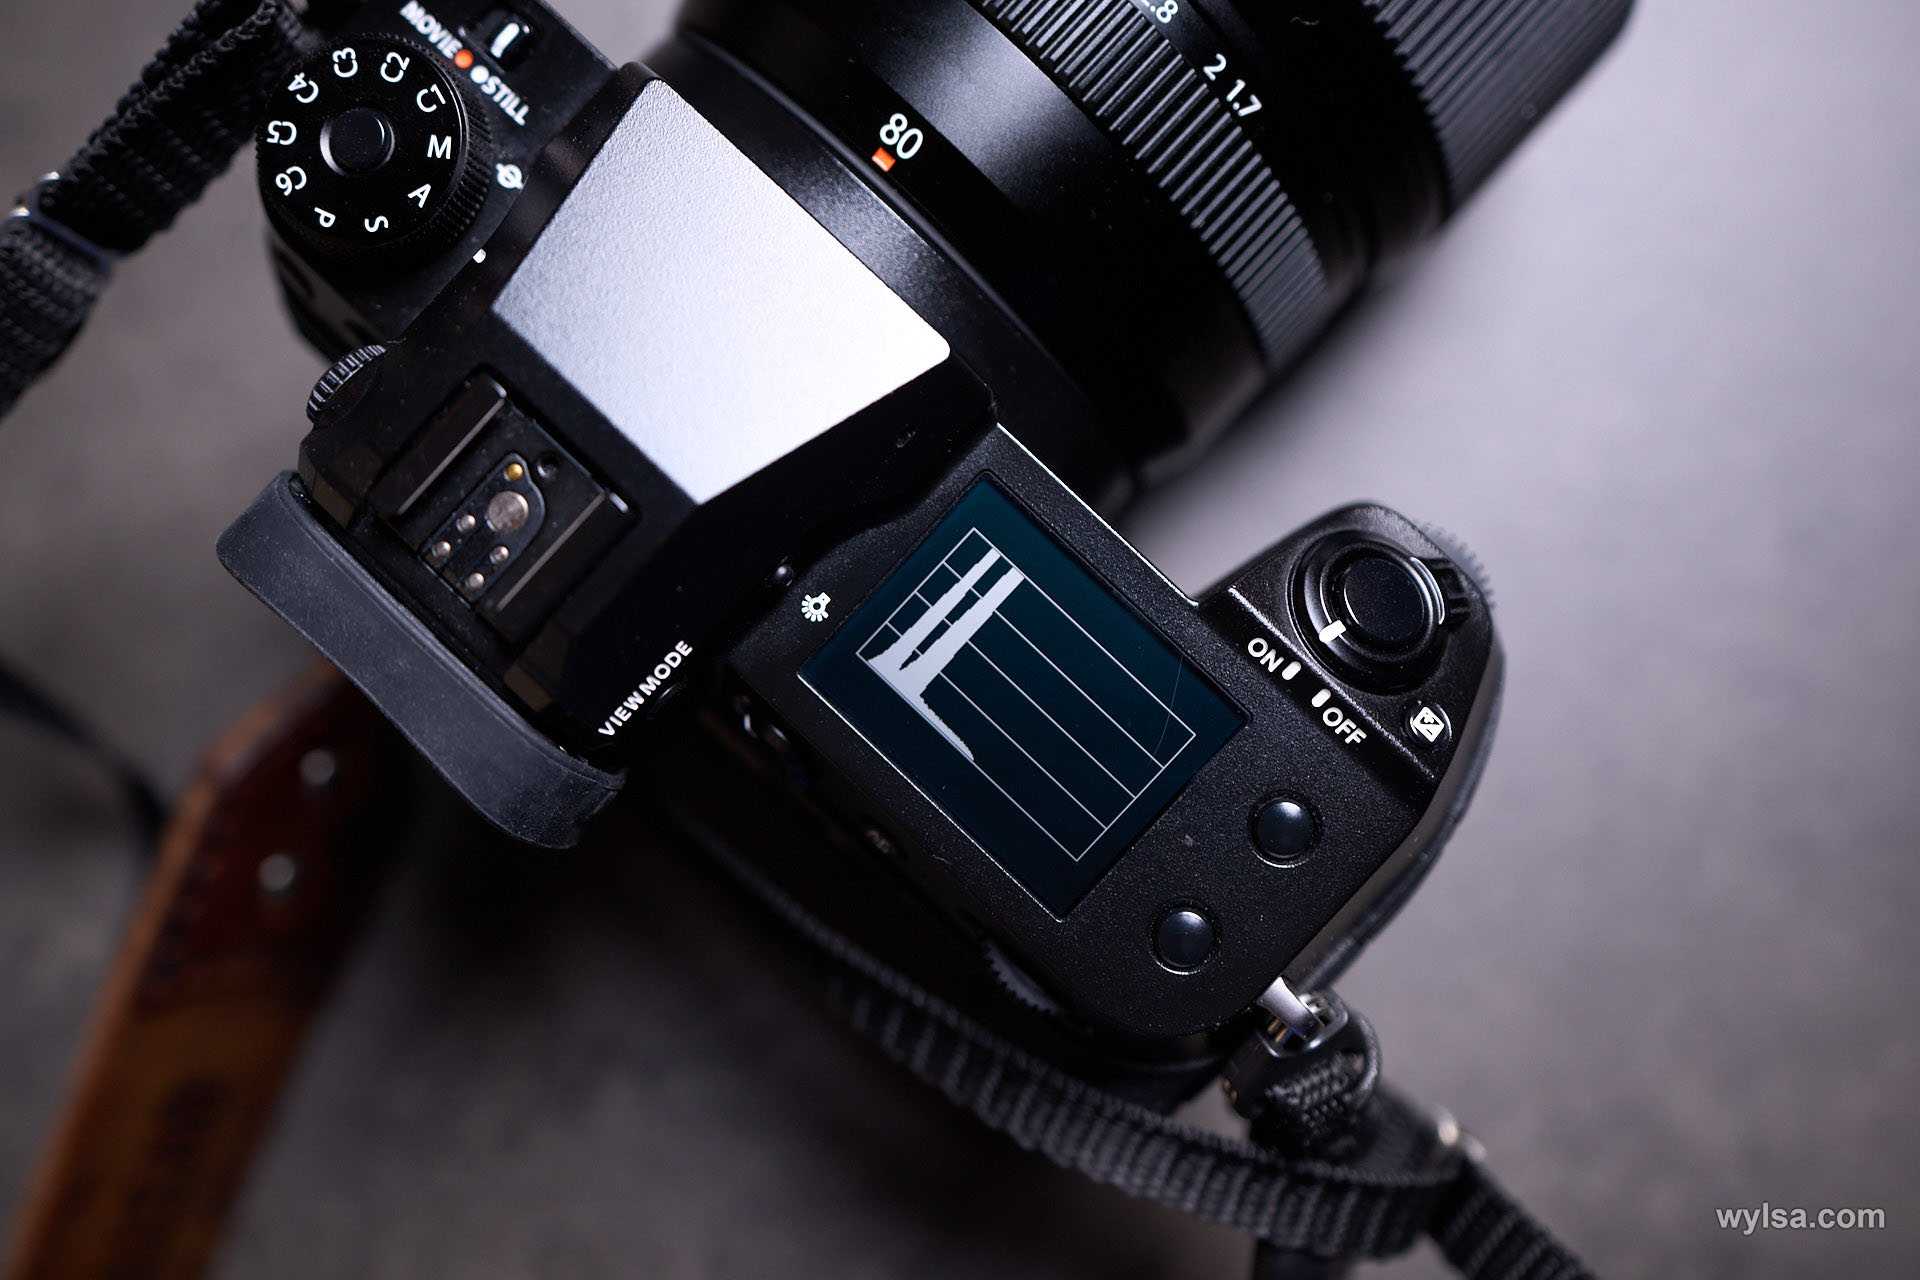
Отдавая камеру, я тогда подумал, что пока ещё слишком неопытен, слишком юн для среднего формата. Я даже смирился с этой мыслью. Но чёрт! Спустя несколько дней я снова захотел ещё больше испытаний от неё! Она стала для меня отличным морем, в котором я учился плавать. Я восхищён тем, что камера пробудила во мне, поскольку ещё ни одно устройство не вызывало во мне такие чувства.
Вру. Всё-таки было дело. Это был 2012 год, я приехал в Москву погостить к друзьям. У нас была велотусовка, где мне предложили поездить на «фиксе». Это такой велосипед, у которого нет тормозов, а педали крутятся всегда, когда крутится заднее колесо. Теоретически на нём можно ехать даже задом. Неудобно, но можно.
Проехавшись первый раз, я чуть не погиб под колёсами автомобиля, потому что мне не объяснили, как ноги вдевать в футстрепы (это ремни для ног) и как тормозить. Я сказал, что больше никогда не сяду на «фикс». Спустя год я купил себе такой же велосипед. Безрассудный парень.
 Иллюстрация: Светлана Чувилёва / Wylsacom Media
И это чувство безрассудства во мне вызвала Fujifilm GFX100S. Она объективно хороша. С ней Fujifilm переманит на свою сторону многих полнокадровых фотографов, не смотревших на фотоаппараты компании из-за «кропа» APS-C.
С ней же Fujifilm обратит на себя внимание фотографов, которые боятся размеров среднего формата. И с ней Fujifilm обратит на себя внимание фотографов, которых пугала медлительность среднего формата
С Sony α1 я не смог найти общий язык. Мне не нравится, как она лежит в руке, мне не нравится, как крутится кольцо диафрагмы безумно дорогого «полтинника». Про меню я вообще молчу — вы и так всё прекрасно знаете. Мне непонятна эта камера, да и изучать её желания не возникает.
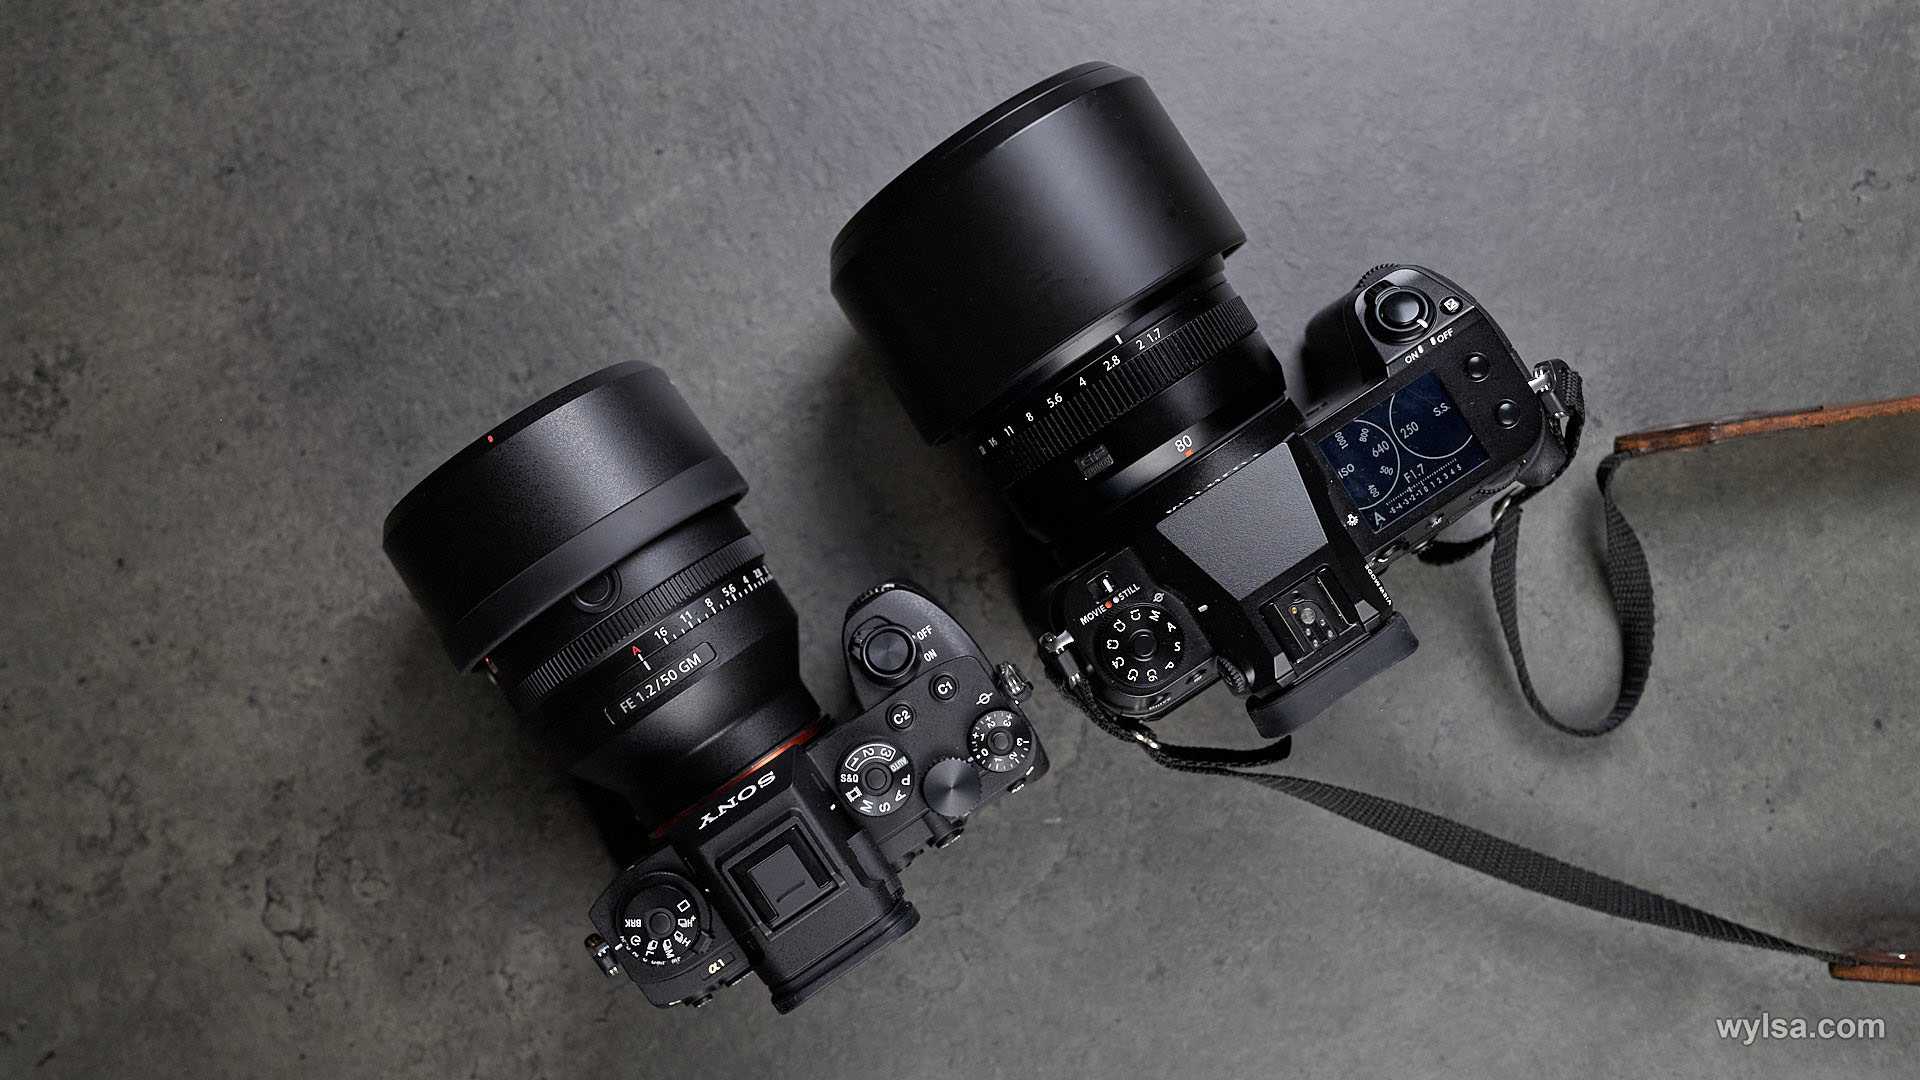
С GFX100S история другая. Её я понимаю, пусть и осознаю, что до уровня этого фотоаппарата ещё нужно расти. Мне безумно интересно попробовать GFX50S II, который покажут завтра. По сути, это та же 100S, но только, если верить слухам, на тысячу долларов дешевле, а сенсор делает снимки в разрешении 52 Мп.
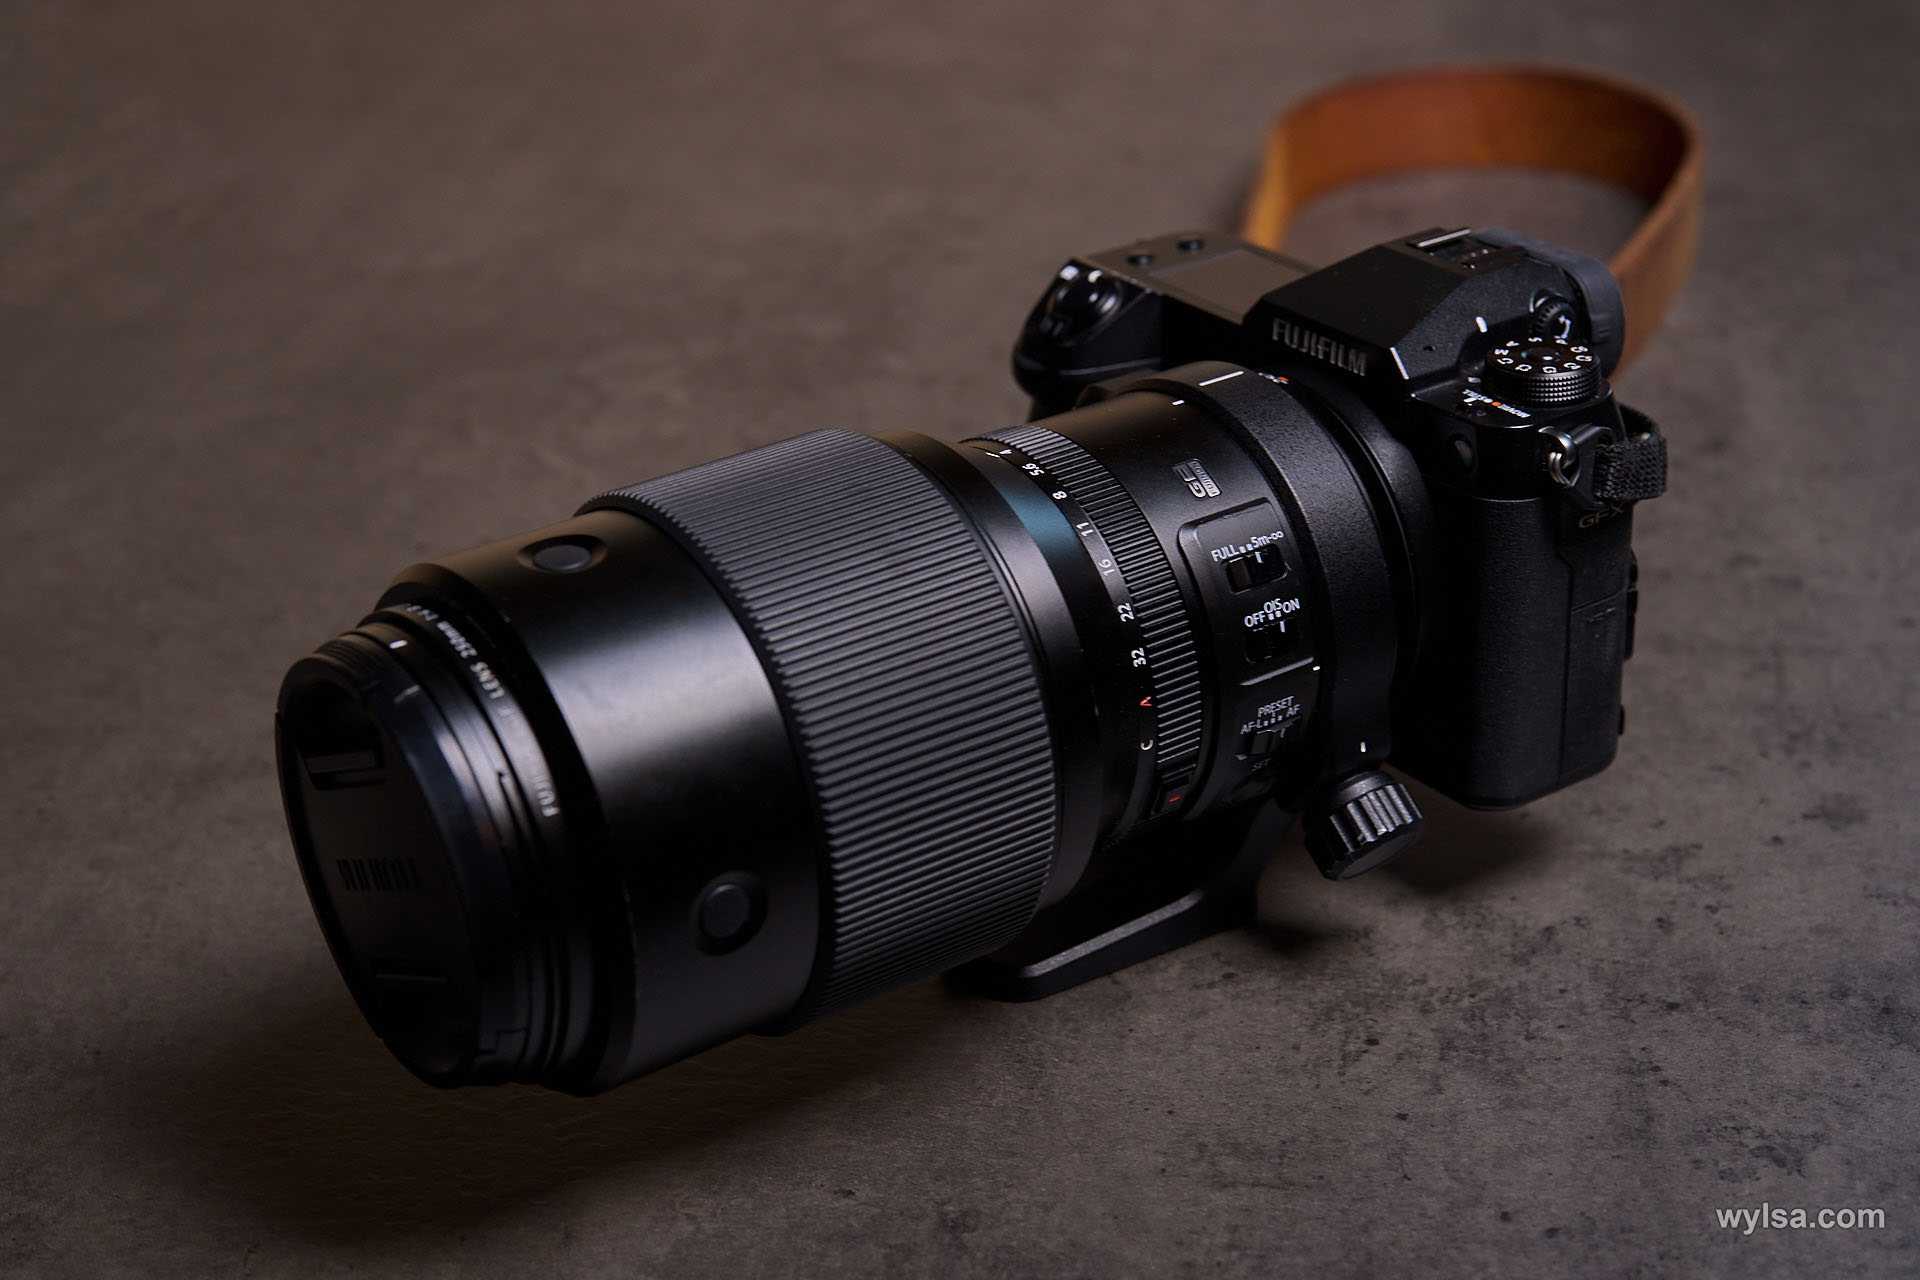
Много ли существует устройств, потенциально способных изменить рынок? Я не могу вспомнить больше пяти. GFX100S и будущий GFX50S II выглядят такими устройствами. И это тот момент, который делает их великими фотоаппаратами.
Dynamic Range
Dynamic range simply defines the range of light the camera
is able to capture before it either loses detail in darkness (shadows
for example) or blows out a highlight (edges of chromed metals are good
examples of this). Most consumer digital cameras only have a 8-bit analog
to digital converters, plus their CCD’s are not built to have a particularly
large dynamic range. FujiFilm clearly stated when they announced the SuperCCD
that its design specifically enhances dynamic range..
Metering was excellent, on many occasions I simply pointed
and shot, only later examining the image and realising how well the S1
Pro had metered the scene, accurate as not to lose shadow detail but
also not to blow-out highlights.. It looks to me as though there are two
metering systems at work, the first being the standard Nikon meter which
calculates the shutter speed and aperture, the second being the processing
algorithms which take the data off the CCD and produce the final image
which are always able to ensure the complete dynamic range of the CCD
is fully expoloited.
Well I’d not argue with that, samples showed a good dynamic
range, however it’s a shame the camera only has JPEG and an 8-bit TIFF
format, if we’d had a RAW format we probably would have had more opportunity
to compensate badly exposed images later in software (as you can with
Kodak DCS RAW TIFF’s). The samples below (attempt to) show the cameras
ability to capture both hard highlights (without blowing them out) and
detail in shadows.
|
(100% crop) |
|
|
(100% crop) |
(100% crop) |
The last two crops have had their levels pushed upwards
a little (in Photoshop) to show that the camera is still capturing colour
and detail in shadows.. Unfortunately due to the nature of the SuperCCD
and the fact that it’s locked at a minimum ISO of 320 there’s also pattern
noise combined with this shadow detail.
Again, a fairly good job of capturing the strong highlights
of this chrome object without generating the nasty blown-out pixel effect
we see in most prosumer digital cameras. Again, the last two crops have
had their levels pushed up to show the detail available in what at first
appears to be blackness, and again unfortunately this detail has been
added to by pattern noise (why didn’t FujiFilm provide a lower ISO?).
Colour adjustment
The S1 Pro allows control over the internal image processing
algorithms, the first setting being Colour output (it’s got a «u»
in it because I’m British). The four colour settings are: Standard (applies
a standard colour enhancement to the image as it’s processed), High (applies
a strong colour enhancement), Original (almost like a raw colour without
any enhancement) and B&W (converts colours to black and white). Other
camera settings for these samples were: Tone: Standard, Sharpening: Standard,
Resolution: 2304 x 1536 FINE (3.5 megapixel ~ 1.4 MB).
| Standard colour setting | High colour setting |
| Original colour setting | Black & White colour setting |
Image Size / File Quality
The FujiFilm S1 Pro offers a total of twelve different
image / resolution combinations. It’s default resolution is 3040 x 2016
which is a «processed output» from the 3.07 megapixel of effective
output from the SuperCCD. The closest resolution to the native pixel count
would be the 2304 x 1536 size which works out at 3.5 megapixels (which
of course wouldn’t map directly to the SuperCCD because the pixels on
a SuperCCD are in a honeycomb pattern, not square).
Camera settings: ISO 320, Aperture Priority set at F4.8,
shutter speed 1/99 sec (+0.7 EV compensation), Colour: Standard, Tone:
Original, Sharpening: Standard. Lens used was a 35 — 70 mm (equiv. to
52 mm — 105 mm on the S1 Pro) f/2.8D AF Zoom-Nikkor.
|
Standard Test Scene |
To give an impression of what each combination of image
size and quality produces the table below is a cross reference of image
size against quality. Original images are available for all but the TIFF
format (simply because the TIFF images weren’t seen to be significantly
better than the 2.5 MB JPEG format and they’re between 18 and 12 MB..
not a sensible download. If you have a justifiable reason to require these
original TIFF files then contact
us.
Crops below are of a 480 x 200 area of each image.
| 3040 x 2016 |
|
| TIFF RGB |
18,019 KB |
| TIFF YC |
12,034 KB |
| JPEG FINE |
2,445 KB |
| JPEG NORM |
1,107 KB |
| JPEG BASIC |
464 KB |
| 2304 x 1536 |
|
| JPEG FINE |
1,438 KB |
| 1440 x 960 |
|
| JPEG FINE |
695 KB |
Big files.. At 3040 x 2016 FINE JPEG you’re looking at
around 2.5 MB per image, a Microdrive becomes something of a natural choice
for storage (a 64 MB SmartMedia card would be a little pointless). I know
what you’re thinking, «Hmm, image quality doesn’t look that good»,
bear in mind that the default 3040 x 2016 is processed from the 3.07 megapixels
of data (which FujiFilm would argue against, and something I’m not a fan
of) however these images look great if you reduce them a little, in any
case we’ll talk about image quality in the image quality section of the
review…
FujiFilm Camera Shooting Software
|
This interesting application allows you to control the S1 Pro from |
Main Application Window: previews of images taken
are shown in a scrolling frame in the bottom of the window, if you have
the full screen review window open a larger size image is displayed in
it as you select images (or shoot). You can choose to shoot using the
shutter release button on the camera or from the Host. When «Shoot»
is in Host mode clicking on the Shoot button will actually take a photograph,
if Auto Acquire is selected that image will be transferred and saved automatically
to your local hard disk. You can even print or review
a histogram of the image.
Shooting Conditions: Setup the camera settings for
the next shot, everything from sensitivity to exposure mode, shutter speed,
aperture, compensation and white balance can be set here. Clicking on
Apply will see these settings transferred to the camera (you’ll see them
appear on the top LCD of the camera).
Time-Lapse settings: Shoot between 1 and 9999 images
at intervals between 15 seconds and 120 minutes, you can select the output
folder, image format and output image size. When enabled the computer
will wake up the camera for each shot.
Что такое средний формат?
Существует несколько видов цифровых фотоаппаратов, разделяемых по размерам их матриц.
«Полный кадр», или Full-Frame, — это своего рода «золотой стандарт». Матрица такой камеры по размеру примерно эквивалента 35-мм плёнке. Размер сенсора полнокадровых камер составляет 36 × 24 мм. В качестве примера можно привести Sony α1 или условный Canon 5D, ну или же Leica Q2, про опыт использования которой я пишу уже несколько месяцев и надеюсь его всё-таки добить.
Есть кроп-матрицы. Они значительно меньше полнокадровых. Например, формат APS-C, выпуском которых также занимается Fujifilm. У компании это матрицы размером 23,6 × 15,6 мм. Аналогичного размера сенсоры типа APS-C использует в некоторых своих камерах Sony. А вот у Canon формат, называющийся точно так же, слегка меньше: 22,2 × 14,8 мм.

У среднего формата размер матрицы гораздо больше двух перечисленных выше. И тут так же, как и с матрицами APS-C, есть небольшая неразбериха. Например, размер фуджифильмовского «медиума», а также размер матрицы в Hasselblad X1D-50C и всех среднеформатных Pentax составляет 43,8 × 32,9 мм, что на 67 % больше обычного полнокадрового сенсора. Но у Phase One или Hasselblad H6D-100C матрица ещё больше — 53,4 × 40 мм. И это тоже средний формат.
Удивительным, конечно, является тот факт, что сенсоры для всех этих фотоаппаратов, за исключением Canon, делает одна компания — Sony.
Больший размер матрицы обычно влияет на итоговый результат. Считается, что средний формат выигрывает по цветам, тональным переходам и резкости у полнокадровых камер, а те выигрывают по тем же параметрам у кроп-матриц.
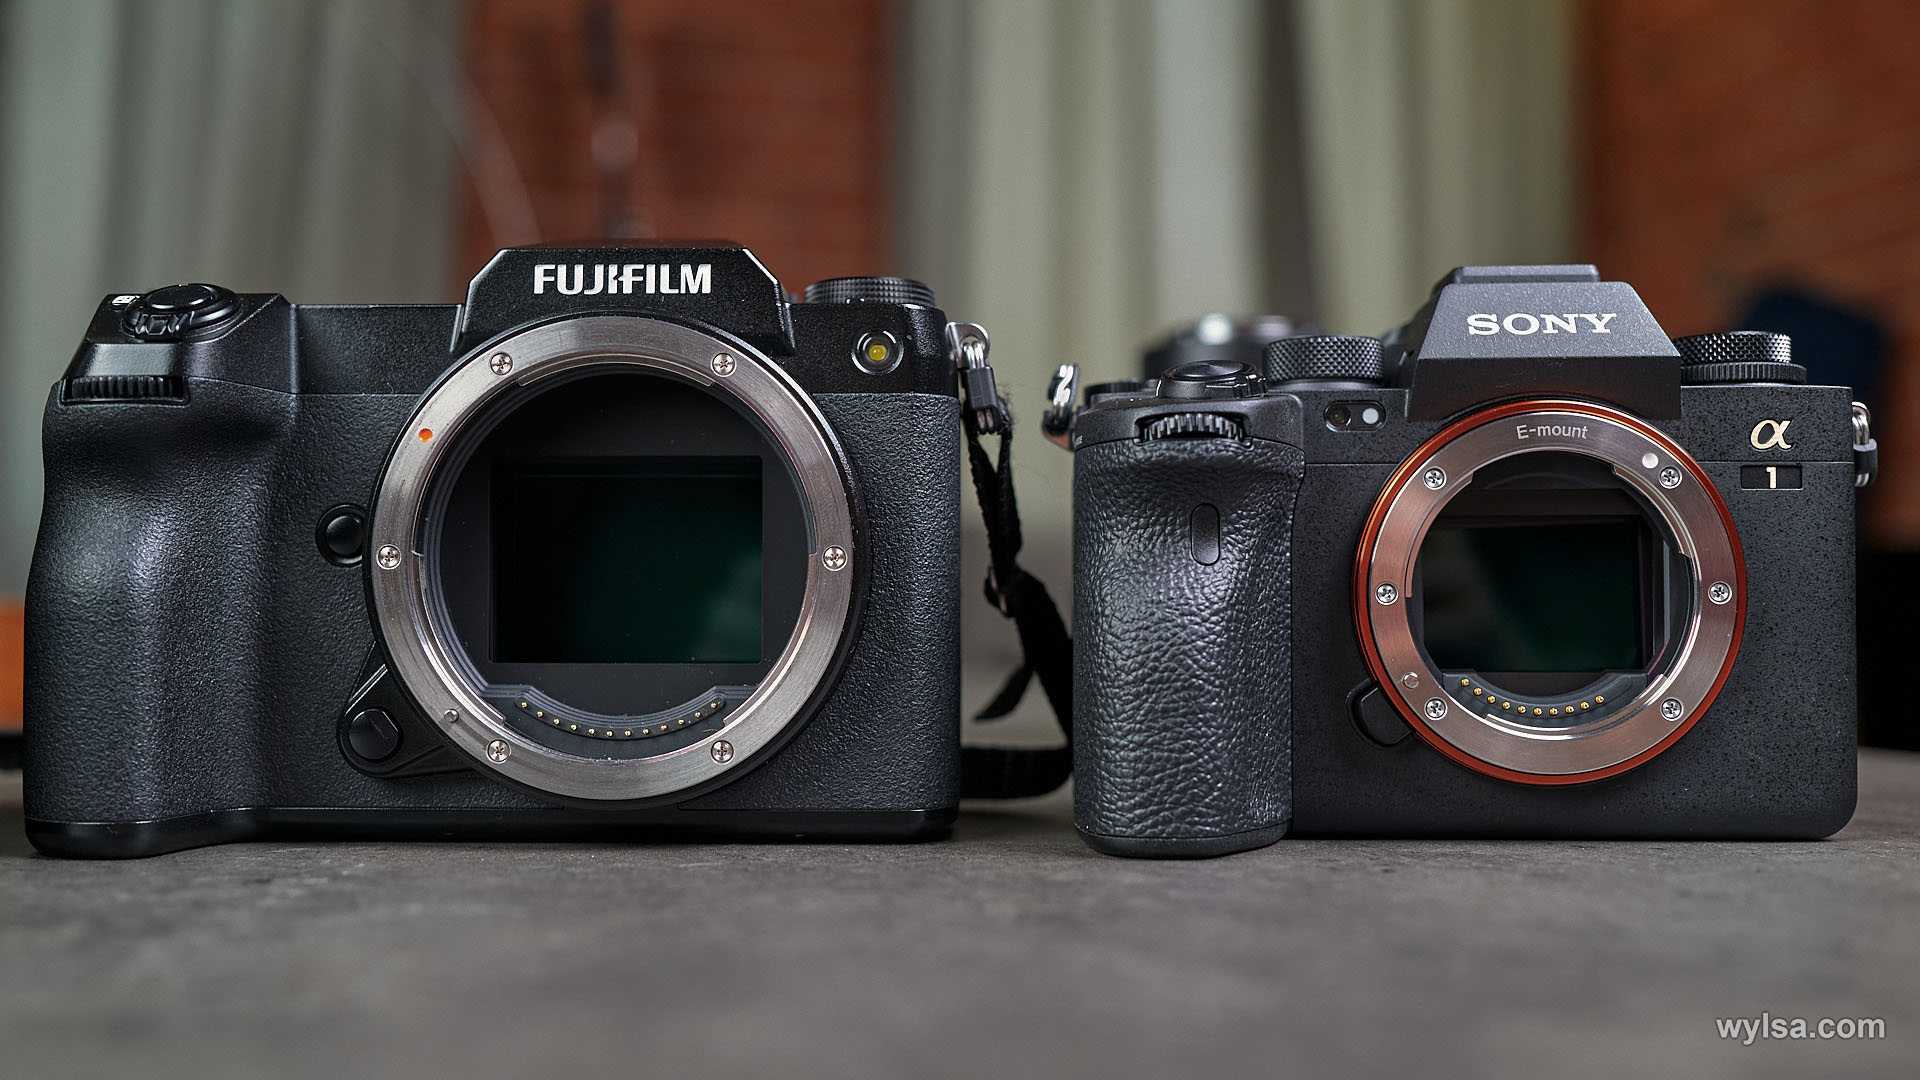 А вот и реальное сравнение сенсоров двух камер: среднеформатного Fujifilm GFX100S и Sony α1. Фото: Илья Кичаев / Wylsacom Media
Однако у среднего формата есть несколько недостатков. Главный — цена. Второй — медлительность автофокуса. Третий — размеры. По крайней мере, так было раньше.
