
Conclusion — Pros
- Good resolution, better than the average six megapixel
- Good color and tonal balance, vibrant ‘pleasing’ color response, can be toned down
- Unique extended dynamic range SuperCCD, although crippled by in-camera algorithms
- Low noise throughout the sensitivity range although softer images at higher ISO’s
- Nice body design, integral vertical grip, soft rubbers, feels robust
- Instantly recognizable control system (as it’s based on the F80/N80)
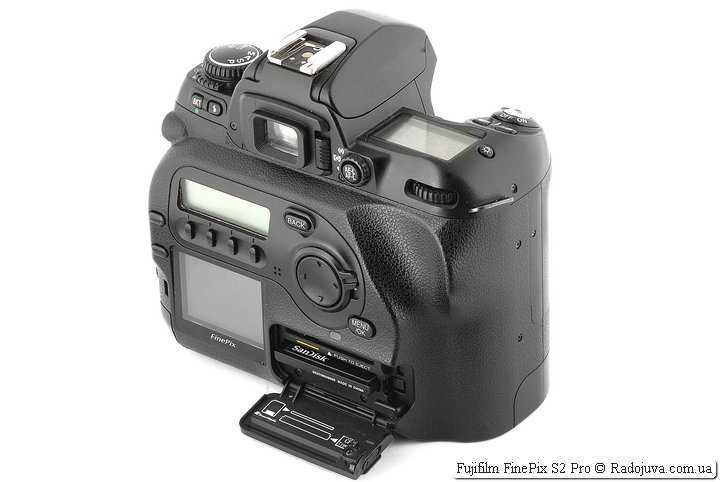
- Rear panel plus soft buttons design is useful for quickly changing settings
- Fast in use, near instant power on, CF interface slower than we would have liked
- Good auto focus, works well even in low light, AF assist lamp
- Image parameter adjustment (color, tone, sharpness), although limited
- Selectable color space (sRGB / Adobe RGB)
- RAW mode provides the ‘digital negative’ (although very large in wide dyn. range mode)
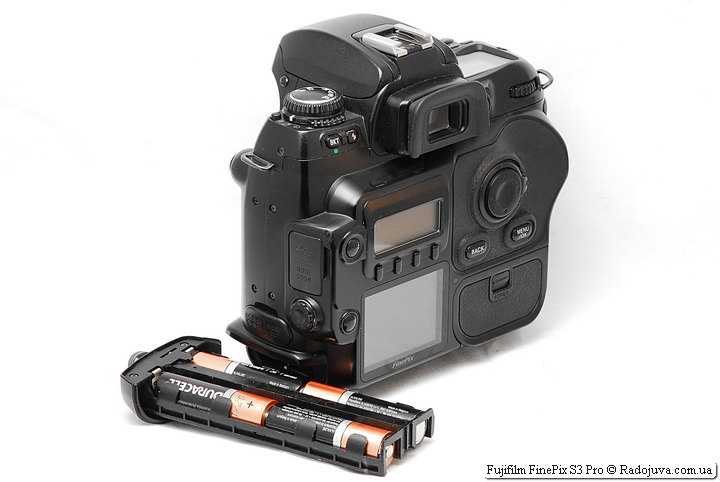
- Now single battery solution, a single Lithium-Ion rechargeable would have been better
- Large high resolution LCD monitor
- Dual data connectivity; USB 2.0 and Firewire (IEEE 1394)
- Built-in PC Sync terminal
Displays
Record Review (immediately after shutter release)
The S3 Pro provides two different record review display modes, I’ve described them separately because they work in quite different ways:
Postview (menu: Image Disp: On)
In this mode the camera will display the review image for two seconds immediately after shutter release. You can not delete/cancel the image in this mode nor can you display histogram or blinking highlights (as is common on many other cameras). If you tap the shutter release (half press) the screen is cleared immediately.
Preview (menu: Image Disp: Preview)
In this mode the camera will show the review image and enable a menu of options on the LCD Control Panel, the review image will stay on the LCD monitor until the ‘OK’ button is pressed or you half-press the shutter release. You can magnify the review image using the up/down arrows. The control panel options are:
- OK (store image, clear screen)
- Delete (cancel the image, don’t save)
- Histogram (master, red, green or blue) *
- Brightness warning (blinking highlights, standard chart) *
* These display settings are remembered and will be used for the next image display
One of the biggest drawbacks of Preview mode is (a) it doesn’t timeout and remove the image from the display, you must half-press the shutter or select OK and (b) it reduces the amount of buffer space available for continuous shooting.
Ideal of course would have been just the one review mode based on ‘Preview’ which didn’t affect buffer space, didn’t have the OK option (as it’s superfluous to use) and could be set to timeout after a customizable number of seconds.
Play display
| Press the PLAY button to display the last image taken (or the last image on the storage card). Just like the S2 Pro you can’t enter play mode until currently buffered images have been saved. | Select the histogram option from the control panel to display a histogram for the image, the first histogram page is Master (luminance). At least we now have a border around the histogram. |
|---|---|
| Press again for Red channel histogram. | Press again for Green channel histogram. |
| Press again for Blue channel histogram. | Press again for blinking highlight warning. |
| Press the 4-way controller upwards to magnify the image. Magnification is available up to a fairly high level (not specified). Once at the desired magnification press the PLAY button to pan (scroll) the image using the 4-way controller. | |
| Select thumbnail from the control panel to display a 3×3 index. | An example of the ‘erase image’ animation, looks cute but slows the operation of the camera. |
Record: Live Image mode
No other digital SLR has ever been able to provide a live view on the LCD monitor, until now. The S3 Pro has a unique (if slightly pointless) feature. You can switch to a ‘Live Image’ mode which provides a video-like B&W live view feed direct from the sensor to the LCD monitor (just like a consumer digital camera). In this mode you can also magnify the center portion of the frame. The important limitations however are: (a) its for display only, you can not trigger the shutter release in this mode, (b) the viewfinder is blacked out because the mirror must swing up and shutter open, (c) the display is in black and white, (d) the display can only be provided for a maximum of 30 seconds. All in all this mode seems to be more of a technology stunt than a useful feature.
| During ‘Live Image’ | Press the UP arrow in Live Image to magnify the center portion of the frame |
|---|
Play: Control Panel Information
By default in play mode the control panel provides four options of histogram, erase, protect and thumbnail index. Press the FUNC button and this display will then change to provide image information, press again for the second page of information.
ISO Sensitivity / Noise levels
|
Standard Test |
To measure noise levels we take a sequence of images of a GretagMacBeth ColorChecker chart (controlled artificial daylight lighting). The exposure is matched to the ISO (ie. ISO 200, 1/200 sec for consistency of length of exposure between cameras). Note that this wasn’t exactly possible on the S3 Pro because of its 0.5 EV exposure steps (we got as close as we could).
The image sequence is run through our own proprietary measurement tool which measures the standard deviation (normalized) of the middle gray patch (indicated by the red rectangle above). Additionally we now have a ‘detail crop’, this is currently a postage stamp (lots of fine detail) but we may replace this at a future date. Note that noise values indicated on
the graphs below should not be compared to those in other reviews.
Fujifilm S3 Pro vs. Canon EOS 20D
(ISO 100 — 3200)
-
Fujifilm S3 Pro: Nikkor 50 mm F1.4 lens, Aperture Priority, Manual WB,
Default Parameters, JPEG Fine, Standard Dynamic Range -
Canon EOS 20D: Canon 50 mm F1.4 lens, Aperture Priority, Manual WB,
Parameters 1 (default), JPEG Large / Fine
|
Fujifilm S3 Pro @ 6 mp ISO 100, 1/90 sec, F3.3 |
Fujifilm S3 Pro @ 12 mp ISO 100, 1/90 sec, F3.3 |
Canon EOS 20D ISO 100, 1/100 sec, F4 |
|---|---|---|
|
Fujifilm S3 Pro @ 6 mp ISO 200, 1/180 sec, F3.3 |
Fujifilm S3 Pro @ 12 mp ISO 200, 1/180 sec, F3.3 |
Canon EOS 20D ISO 200, 1/200 sec, F4 |
| Fujifilm S3 Pro @ 6 mpISO 400, 1/350 sec, F3.3 | Fujifilm S3 Pro @ 12 mpISO 400, 1/350 sec, F3.3 |
Canon EOS 20D ISO 400, 1/400 sec, F4 |
|
Fujifilm S3 Pro @ 6 mp ISO 800, 1/750 sec, F3.3 |
Fujifilm S3 Pro @ 12 mp ISO 800, 1/750 sec, F3.3 |
Canon EOS 20D ISO 800, 1/800 sec, F4 |
|
Fujifilm S3 Pro @ 6 mp ISO 1600, 1/1500 sec, F3.3 |
Fujifilm S3 Pro @ 12 mp ISO 1600, 1/1500 sec, F3.3 |
Canon EOS 20D ISO 1600, 1/1600 sec, F4 |
| Fujifilm S3 Pro @ 6 mpn/a | Fujifilm S3 Pro @ 12 mpn/a |
Canon EOS 20D ISO 3200, 1/3200 sec, F4 |
One of the S3 Pro’s biggest competitors (assuming you’re not locked into the Nikon lens mount) is the Canon EOS 20D. If you scan down the gray patch comparison you can see that from ISO 100 to 400 noise levels are as good as identical and at ISO 800 and 1600 the S3 Pro appears cleaner. Look at the detail crop however and the reason becomes evident, the S3 Pro’s aggressive high ISO noise reduction takes its toll on image detail, while areas of continuous tone are smooth, detail is lost elsewhere in the image. It’s a tradeoff that Fujifilm should perhaps have left in the hands of the photographer (user controllable noise reduction).
Fujifilm S3 Pro vs. Nikon D70 (ISO 100 — 1600)
-
Fujifilm S3 Pro: Nikkor 50 mm F1.4 lens, Aperture Priority, Manual WB,
Default Parameters, JPEG Fine, Standard Dynamic Range -
Nikon D70: Nikkor 50 mm F1.4 lens, Aperture Priority, Manual WB,
Default Parameters, JPEG Large / Fine
|
Fujifilm S3 Pro @ 6 mp ISO 100, 1/90 sec, F3.3 |
Fujifilm S3 Pro @ 12 mp ISO 100, 1/90 sec, F3.3 |
Nikon D70 n/a |
|---|---|---|
|
Fujifilm S3 Pro @ 6 mp ISO 200, 1/180 sec, F3.3 |
Fujifilm S3 Pro @ 12 mp ISO 200, 1/180 sec, F3.3 |
Nikon D70 ISO 200, 1/200 sec, F3.5 |
| Fujifilm S3 Pro @ 6 mpISO 400, 1/350 sec, F3.3 | Fujifilm S3 Pro @ 12 mpISO 400, 1/350 sec, F3.3 |
Nikon D70 ISO 400, 1/400 sec, F3.5 |
|
Fujifilm S3 Pro @ 6 mp ISO 800, 1/750 sec, F3.3 |
Fujifilm S3 Pro @ 12 mp ISO 800, 1/750 sec, F3.3 |
Nikon D70 ISO 800, 1/800 sec, F3.5 |
|
Fujifilm S3 Pro @ 6 mp ISO 1600, 1/1500 sec, F3.3 |
Fujifilm S3 Pro @ 12 mp ISO 1600, 1/1500 sec, F3.3 |
Nikon D70 ISO 1600, 1/1600 sec, F3.5 |
Much cheaper but no less competitive the Nikon D70 delivers an impressive performance in maintaining detail all the way through its sensitivity range however its noise levels are noticeably higher from ISO 800 to 1600. This was a choice made by Nikon, rather than use strong noise reduction which would affect image detail they decided to maintain it. The other thing that’s noteworthy is that the D70’s noise is more luminance based (like film grain) rather than colored blotches.
Changing the dynamic range setting on the S3 Pro had only a subtle effect on noise as can be seen in the graph below, most noticeable was a slight increase in luminance noise at ISO 200. We can surmise that the smaller R-Pixels have a lower signal to noise ratio (higher noise) and hence must also have noise reduction applied at higher sensitivities, in this case we’re probably near the crossover between little noise reduction and ‘some’.
Luminance noise graph
Indicated ISO sensitivity is on the horizontal axis of this graph, standard
deviation of luminosity (normalized image) on the vertical axis.
Overall conclusion
There’s plenty to like about the S3 Pro, there’s a new body design which is comfortable, includes a portrait grip and feels robust. There’s the image quality, resolution which for a six megapixel is really fairly impressive (if you can ignore some of SuperCCD artifacts), a color response with real ‘pop’, low noise (although softer images at high ISO’s) and slightly better dynamic range than other D-SLR’s.
The S3 Pro’s unique selling feature, its extended dynamic range, really does exist and does work. We measured up to 10 stops of dynamic range in the camera’s «Wide 2» mode, however it’s seldom that this would be obvious in everyday shots. The reason for this is that in wide dynamic range mode you get the gain only in the highlights, it would have made sense to instead have the option of a completely different tone curve and expose for shadows to spread the additional dynamic range across the tonal scale rather than just in highlights (we often don’t mind clipped highlights as long as the roll-off is smooth).
More interesting however were the results we got from Adobe Camera RAW, this revealed that there is quite a lot more dynamic range information available in the S3 Pro’s RAW files than are being extracted by either the camera’s processing (JPEG) or Fujifilm’s own Hyper-Utility2. This is in effect crippling the apparently more impressive capability of the SuperCCD SR II sensor.
We really liked the S2 Pro, so much so that we gave it a Highly Recommended, at the time it was a great camera compared to the competition. We’re now two and a half years on from that point in time and the digital SLR market has moved on. Prices have plummeted, features and image quality improved, the market’s expectations of what this level of D-SLR should be capable of has shifted noticeably, at its price the S3 Pro is going to struggle to compete.
Above Average
Overall Image Quality / Specifics
Color reproduction was as ever vivid and bright, very ‘pleasing’ to the eye (especially skin tones) although some may find it a little too saturated, you can get over this by selecting the ‘Org’ color setting. Overall however the S3 Pro produces very nice, sharp and detailed images which have ‘punch’ straight out of the camera.
SuperCCD artifacts
One thing we noted on the S2 Pro was the visibility of moire in 45 degree detail (‘hair moire’), this does appear to have improved on the S3 Pro but can still be seen in some images. We also noted the SuperCCD equivalent of ‘bridge pixel artifacting’, where the interpolation algorithm thinks it has detected a 45 degree straight line and ‘bridges’ a pixel, this can lead to a noticeable pattern of 45 degree lines which weren’t in the original scene. Note that most of these artifacts are invisible at the 6 mp image size. Examples of these artifacts can be seen in the studio test shot below (taken in 12 mp mode).
| Thumbnail (12 mp image) | Moire pattern on slanted lines |
|---|---|
| Moire pattern / bridge pixels | Moire pattern / dotted line artifact (bayer) |
| 45 degree patterning (bridge pixels) | 45 degree patterning (bridge pixels) |
Twelve or Six megapixels?
Just like the S2 Pro the S3 Pro has six million effective photosites (‘input pixels’), because of Fujifilm’s SuperCCD honeycomb layout these are first interpolated up to a twelve megapixel image. If the camera is in twelve megapixel output mode this is then sharpened and saved, if in a lower resolution mode the image is downsampled, sharpened and saved. A simplified in-camera workflow can be seen below for 12 mp and 6 mp images:
- 6 mp RAW honeycomb -> 12 mp square -> sharpen -> save
- 6 mp RAW honeycomb -> 12 mp square -> 6 mp downsample -> sharpen -> save
The S3 Pro’s twelve megapixel images do appear to offer slightly more detailed than six megapixel images, most of this is down to the quality of the camera’s downsampling algorithm (and at what point sharpening is applied). The rule of thumb (in my opinion) is that while 12 mp images may exhibit slightly more detail the gain isn’t significant or worthwhile shooting in 12 mp mode all the time (it’s often very hard to distinguish the difference between a 6 mp and 12 mp).
Place your mouse over the label below the image to see the difference between 12 mp from the camera, 6 mp from the camera and resizing each.
| 12 mp comparison | 6 mp comparison | ||
| 12 mp from camera | 6 mp from * camera -> 12mp | 6 mp from camera | 12 mp from * camera -> 6 mp |
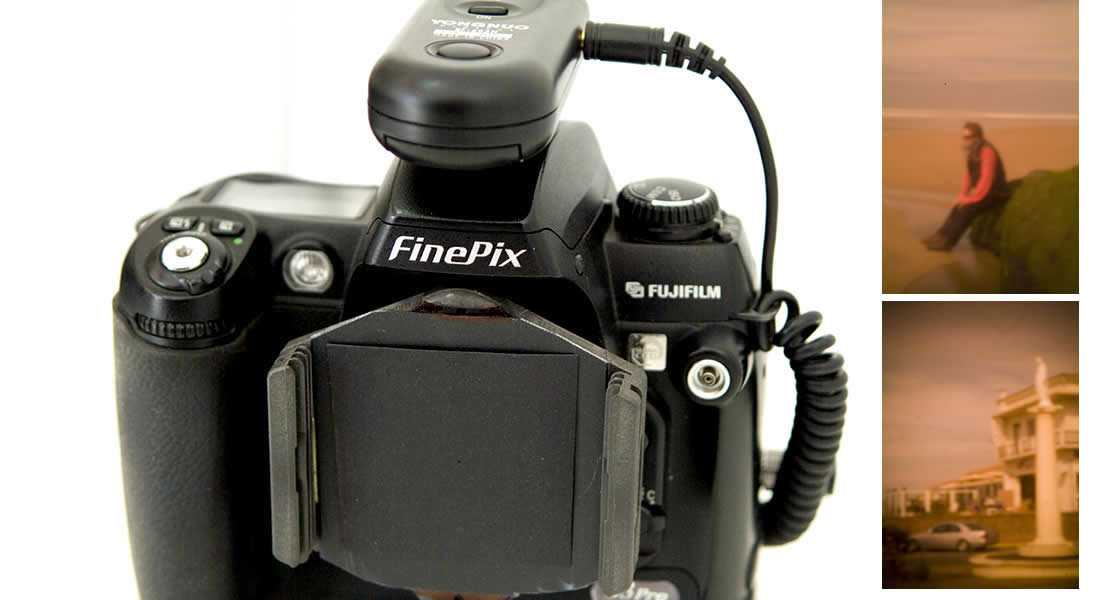
Update: My New (Used) Fujifilm FinePix S2 Pro
I recently purchased another vintage Fujifilm FinePix S2 Pro (Sept. 2017) after lingering regrets over selling my first one a couple of years ago. In fact, I purchased three because they were priced well under $50 each. Why? Even now, there are few cameras I have seen that can match the lovely out-of-camera color rendition of the FinePix S2 Pro. Also, a new photo-editing software I tested, Affinity Photo, does an excellent job of rendering the famed Fuji colors from my raw camera files.

I purchased my used FinePix S2 Pro on eBay with an excellent Tamron 28-75mm XR Di F:2.8 lens for only $65.00 and second Finepix S2 body in working condition for only $45.00. What a deal! Most of the photos added to posts in the past year on this website have been shot with the FinePix S2. I’m in frugal photography paradise!

I currently own three FinePix S2 Pro DSLR bodies. One recently stopped working without warning. So now, I’m down to two working bodies. No one repairs these any longer (not even Fuji) so if you want to shoot with this camera, have a backup. They are so cheap that you can generally find them for well under $50.00 on eBay.
Should You Buy a Fujifilm FinePix S2 Pro?
I would not recommend it as your first or main camera for professional work because of its age. It is noisy (grain in photos) above ISO 400, and lacks modern features such as video recording. Also, due to age and wear it may have reliability issues. If you plan to use it as your main camera, buy two S2 bodies since you are unlikely to find anyone who has the parts to repair this camera if needed. They sell for well below $100.00 used on eBay.

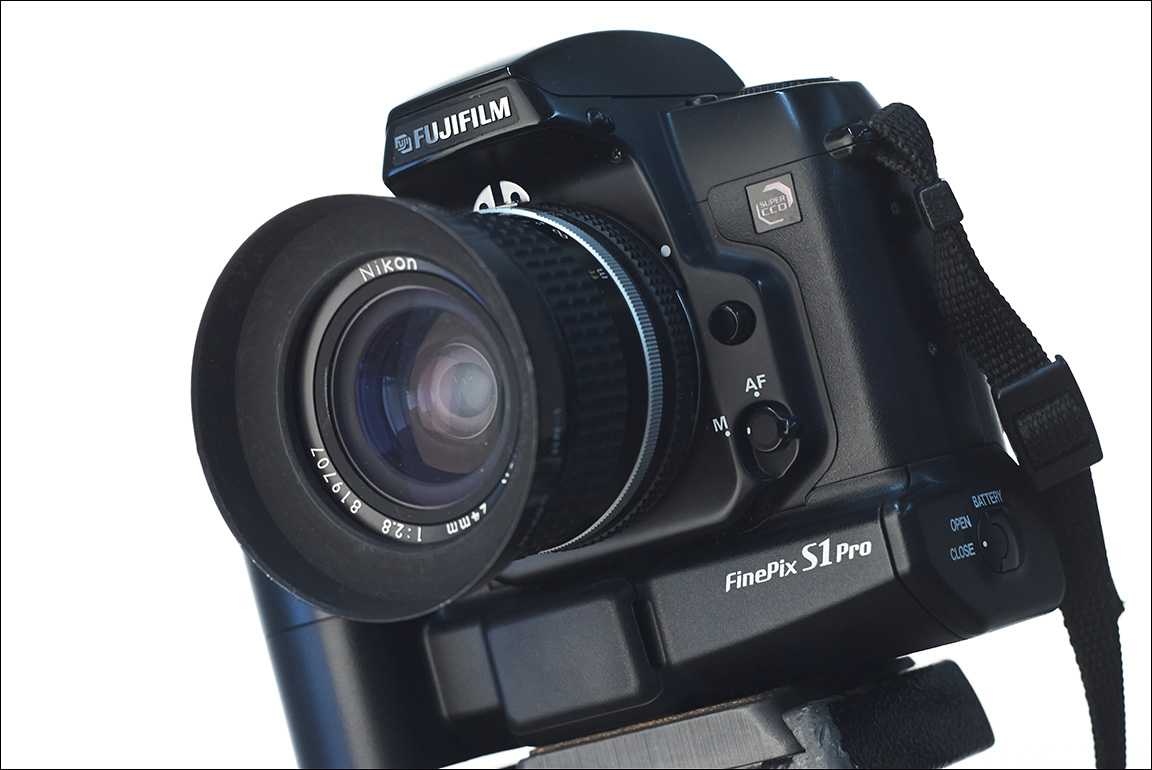
It makes a great secondary camera (or main camera with a backup), especially if you already own Nikon lenses (it uses the Nikon F lens mount). If you find a fully working model, you will be pleasantly surprised at how good its images look. Its image quality at base ISO is competitive with some of the best cameras currently available. For that reason alone, the FinePix S2 Pro is worth searching out.
 Shot with FinePix S2 Pro – Edited with Affinity Photo
If you shoot raw files, match it with Affinity Photo for excellent raw photo conversions. Affinity Photo, in my opinion, produces much better skin tones and ‘Velvia’ color than Adobe Lightroom by default when converting images from raw. I use it solely for that purpose while doing final editing in Adobe Photoshop. Phase One Capture One is also quite good at doing raw file conversions from the FinePix S2.
 Photo shot with FujiFilm FinePix S2 Pro. Raw file converted with Affinity Photo
The Fujifilm FinePix S2 Pro is a true digital photography classic!
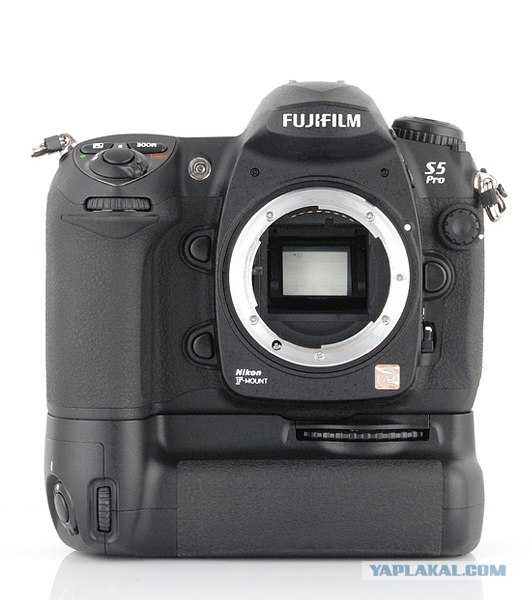
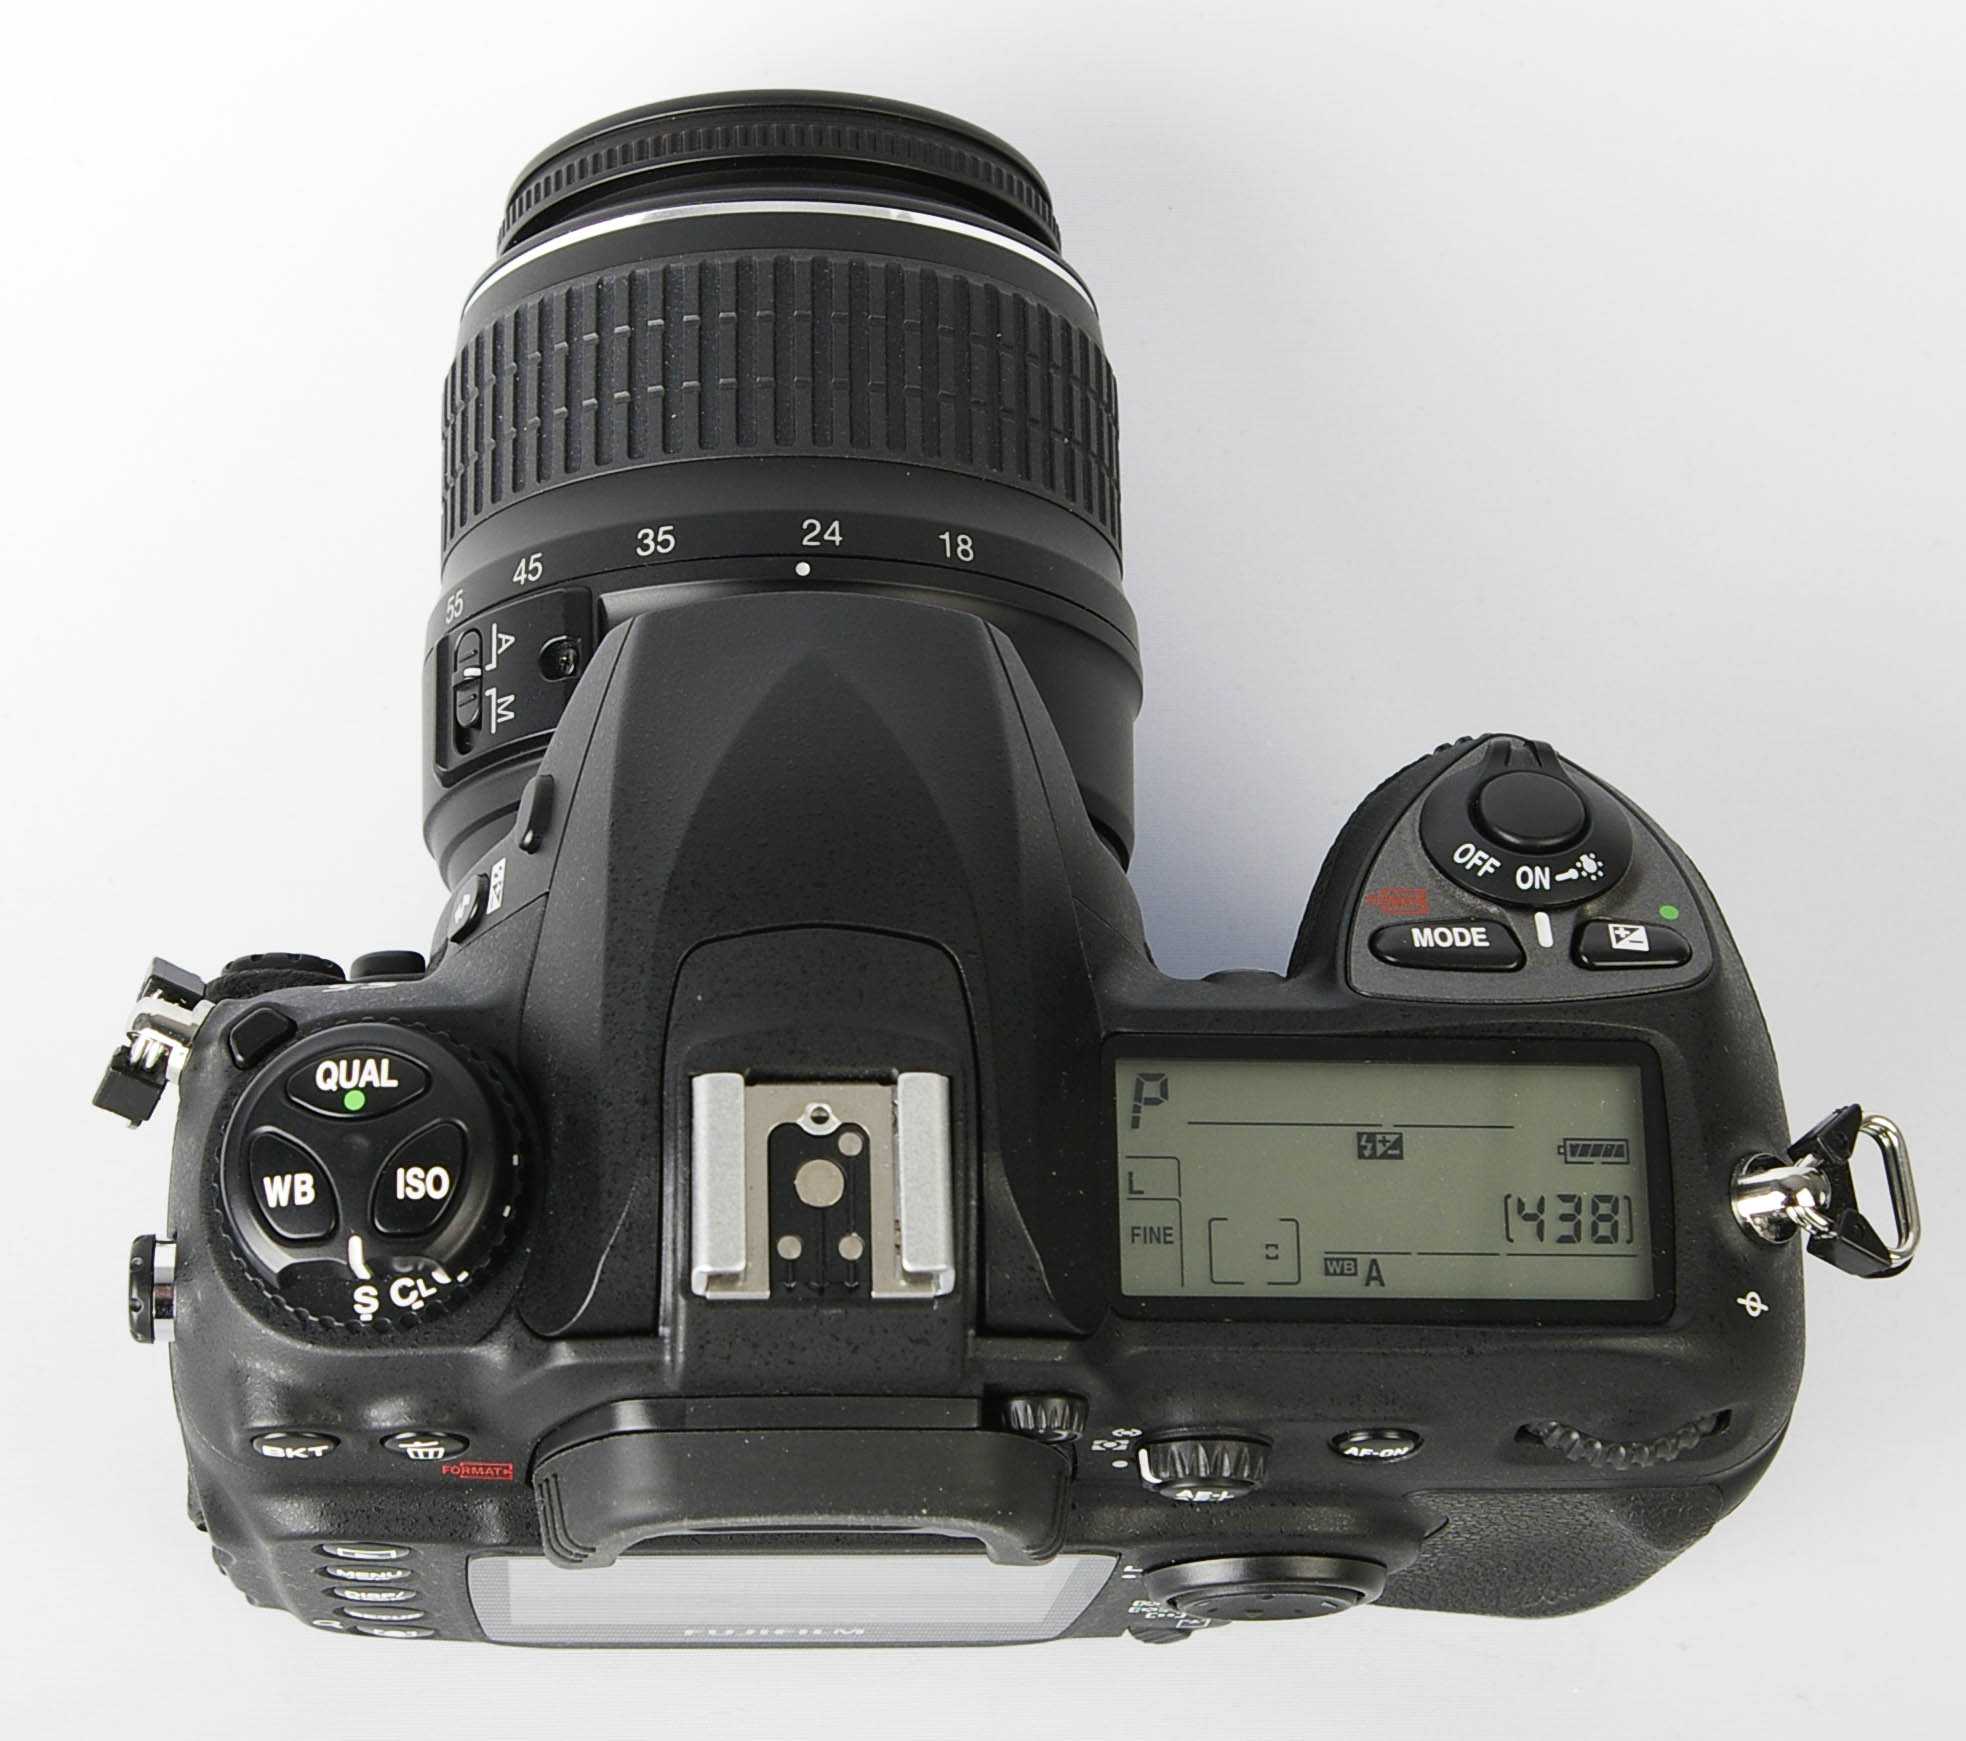
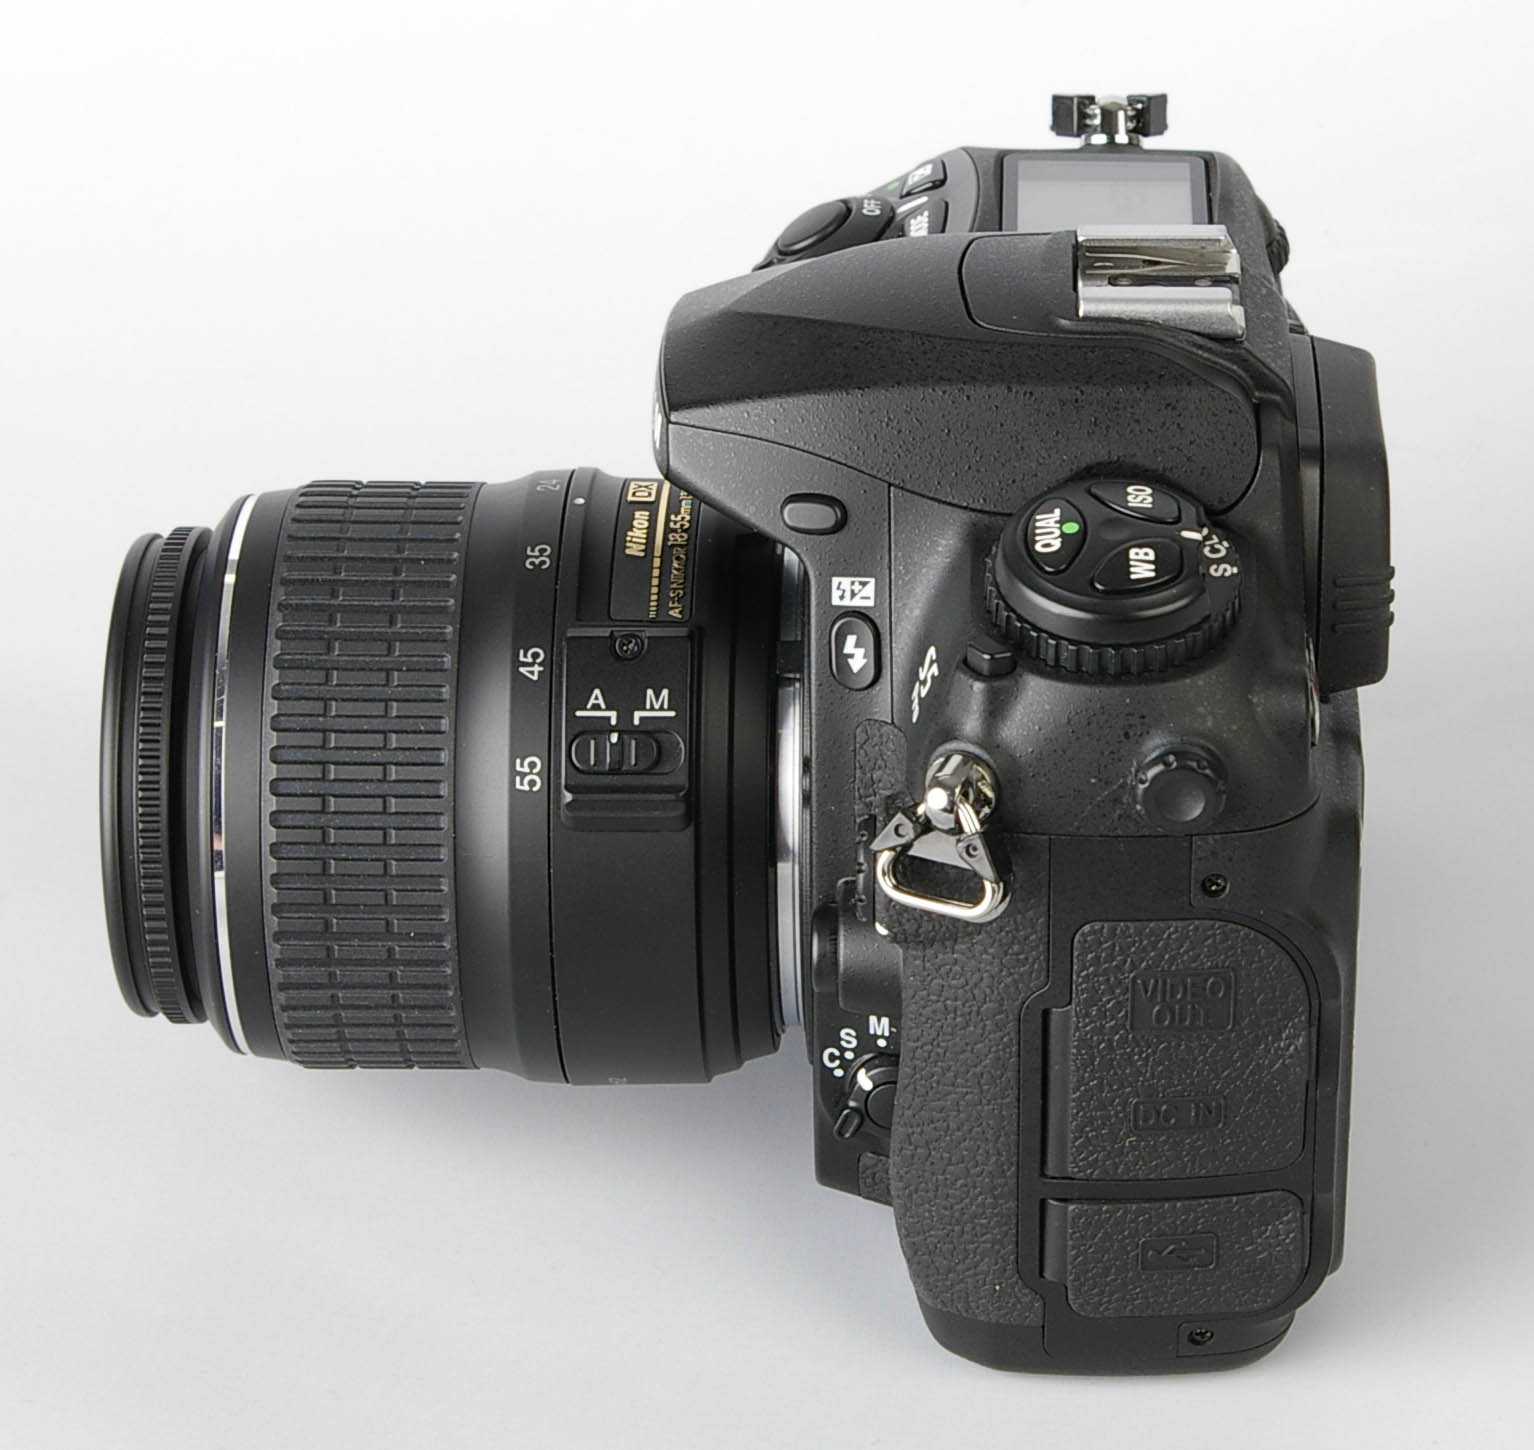
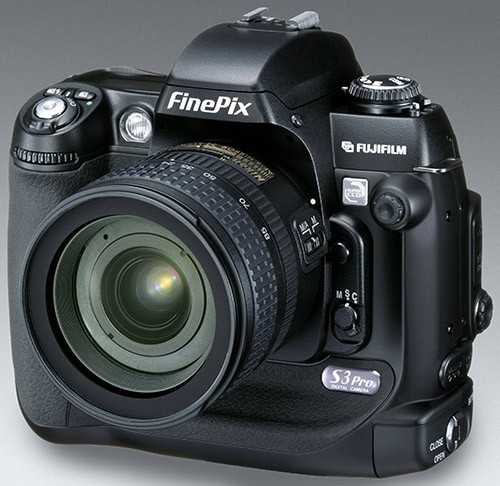
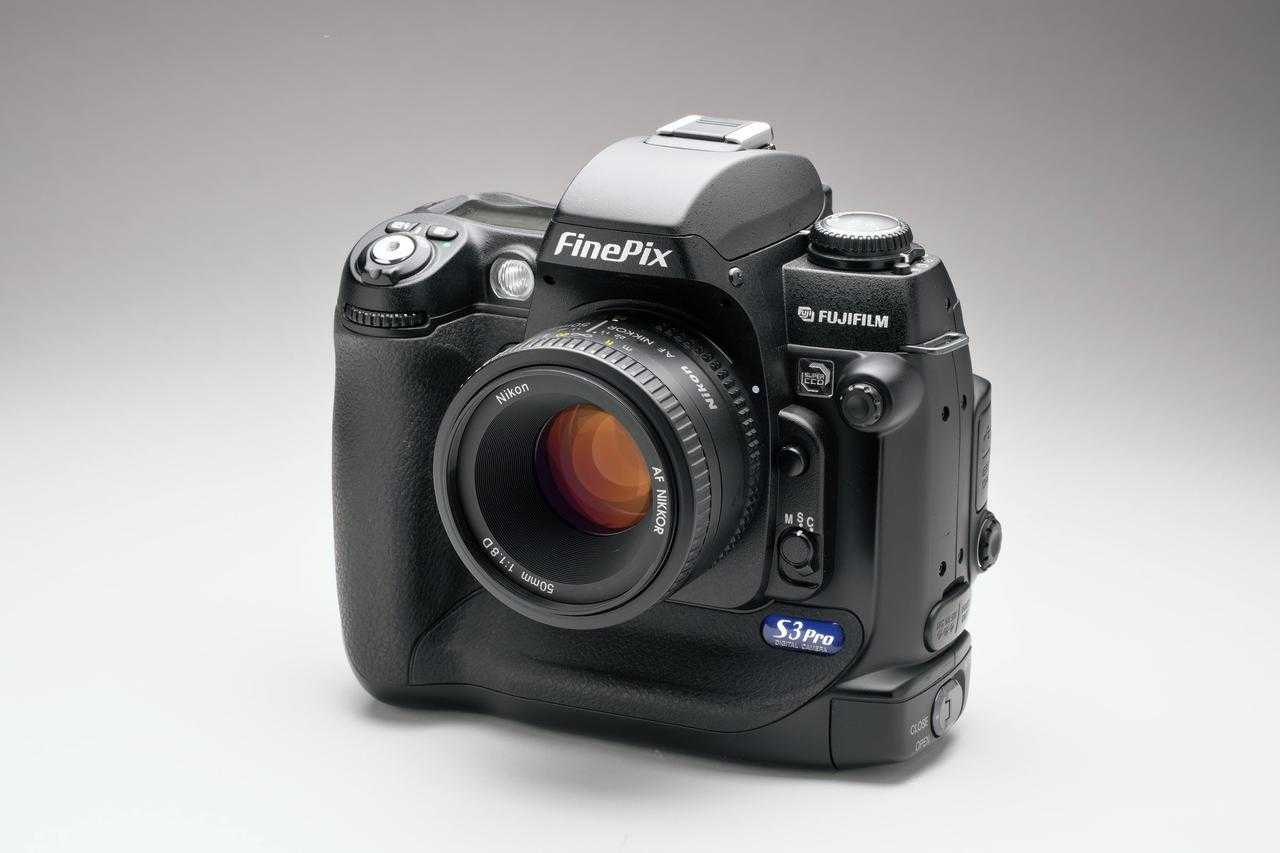
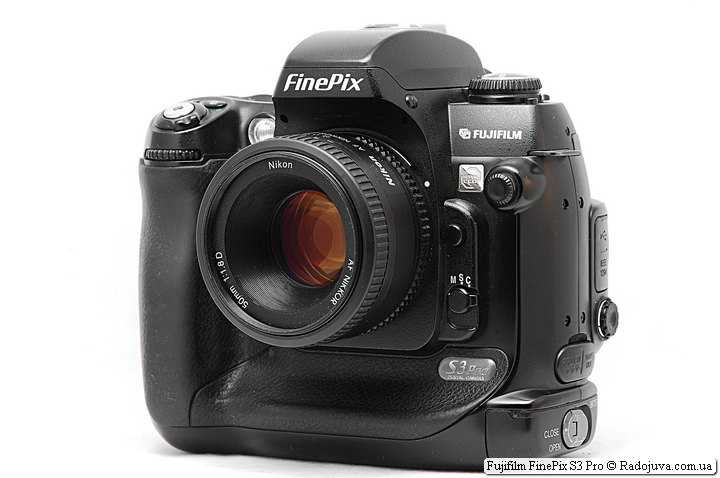
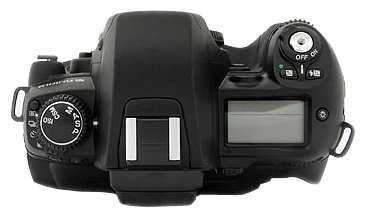
Design
The top of the S3 Pro (and the photographic parts of the camera; shutter box, AF, metering etc.) are based on the Nikon F80 (N80), however the bottom seven eighths of the camera (the main body area) is a custom build specifically made for the camera. The S3 Pro is only slightly taller than the S2 Pro but manages to fit in a vertical hand grip and shutter release button. A large percentage of the front and rear of the body has a new soft rubber coating which not only provides a better grip but also gives a more professional appearance. It’s fair to say that the S3 Pro feels considerably better built and more robust than the S2 Pro.
In your hand
As mentioned above the new rubber coating which wraps around the entire hand grip is soft and sticky, it provides a good hold and feels comfortable. Fujifilm has clearly taken some time on the shape of the entire camera but especially those areas which make up the grip areas. Also noteworthy is a more sculpted thumb grip on the rear of the camera. The new vertical hand grip also works well, size wise it’s quite similar to the main grip and there’s plenty of room for your fingers between the inside of the grip and the lens mount (unlike some other digital SLR’s with built-in vertical grips).
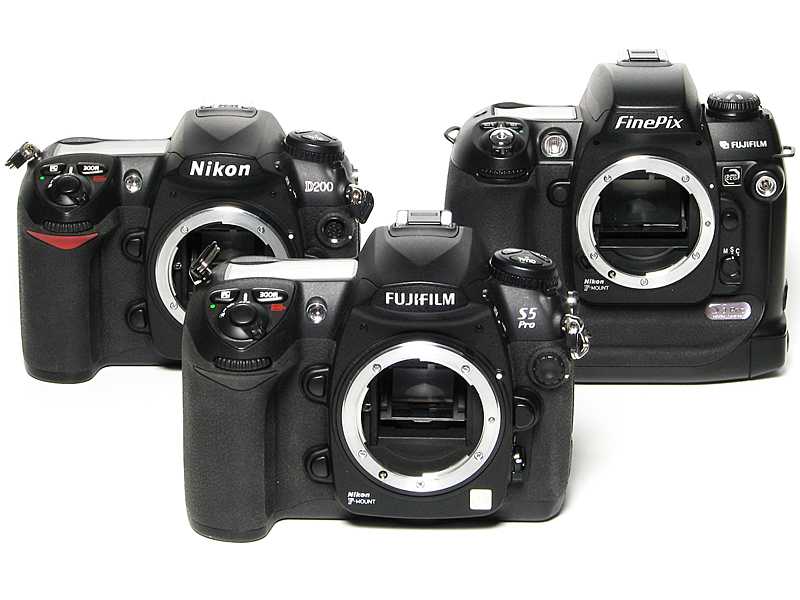
Side by side
You can see the S3 Pro with the Canon EOS 20D, Nikon D70 and the camera it replaces, the S2 Pro. The S3 Pro is visibly larger and is indeed one of the largest and heaviest of all current digital SLR’s. That said the S3 Pro does include a vertical hand grip, add the BG-E2 to the EOS 20D for example and it will weigh in at almost 1 KG.
| Left to right: Canon EOS 20D, Nikon D70, Fujifilm S3 Pro, Fujifilm S2 Pro |
|---|
| Camera | Dimensions (W x H x D) |
Body weight (inc. battery & card) |
|---|---|---|
| Canon EOS 300D | 142 x 99 x 72 mm (5.6 x 3.9 x 2.8 in) | 649 g (1.4 lb) |
| Konica Minolta 7D | 150 x 106 x 78 mm (5.9 x 4.2 x 3.1 in) | 649 g (1.4 lb) |
| Pentax *ist D | 129 x 95 x 60 mm (5.0 x 3.7 x 2.3 in) | 650 g (1.4 lb) |
| Nikon D70 | 140 x 111 x 78 mm (5.5 x 4.4 x 3.1 in) | 679 g (1.5 lb) |
| Canon EOS 20D | 144 x 106 x 72 mm (5.6 x 4.2 x 2.8 in) | 770 g (1.7 lb) |
| Fujifilm S2 Pro | 142 x 131 x 80 mm (5.6 x 5.2 x 3.1 in) | 870 g (1.9 lb) |
| Fujifilm S3 Pro | 148 x 135 x 80 mm (5.9 x 5.3 x 3.2 in) | 935 g (2.1 lb) |
The FujiFilm FinePix S3 Pro Takes Great Photos. Full Stop.
This subheading says it all. And, isn’t that what really matters in a camera? The Fujifilm Finepix S3 Pro captures photos with luscious color and dynamic range approaching that of negative film. I have not seen any modern camera that improves upon that basic formula to such a degree that it justifies upgrading. At the 6 or 12megapixels setting, at 100 ISO, when properly metered (shooting in raw mode), this camera will produce photos every bit as appealing as the best DSLR’s currently being produced. The photos are detailed, colorful and engaging. When paired with modern raw editing software such as Adobe Lightroom Classic or Exposure X5 you can extract dynamic range in the shadows and highlights that rivals the best cameras currently made by Canon or Nikon.
 Camera: Fujifilm FinePix S3 Pro, Nikon 70-300mm lens.
Because the FinePix S3 is so good at capturing the full range of light and color in a scene (thanks to the Super CCD sensor), there is a coherence and clarity in photos. Shoot photos of lush landscapes backlit by strong sunlight and you will be able to accurately preserve the highlights in post-processing. Skin tones are realistic. Clearly, Fuji’s heritage as a film manufacturer has a lot to do with the extraordinary color science programmed into this camera.
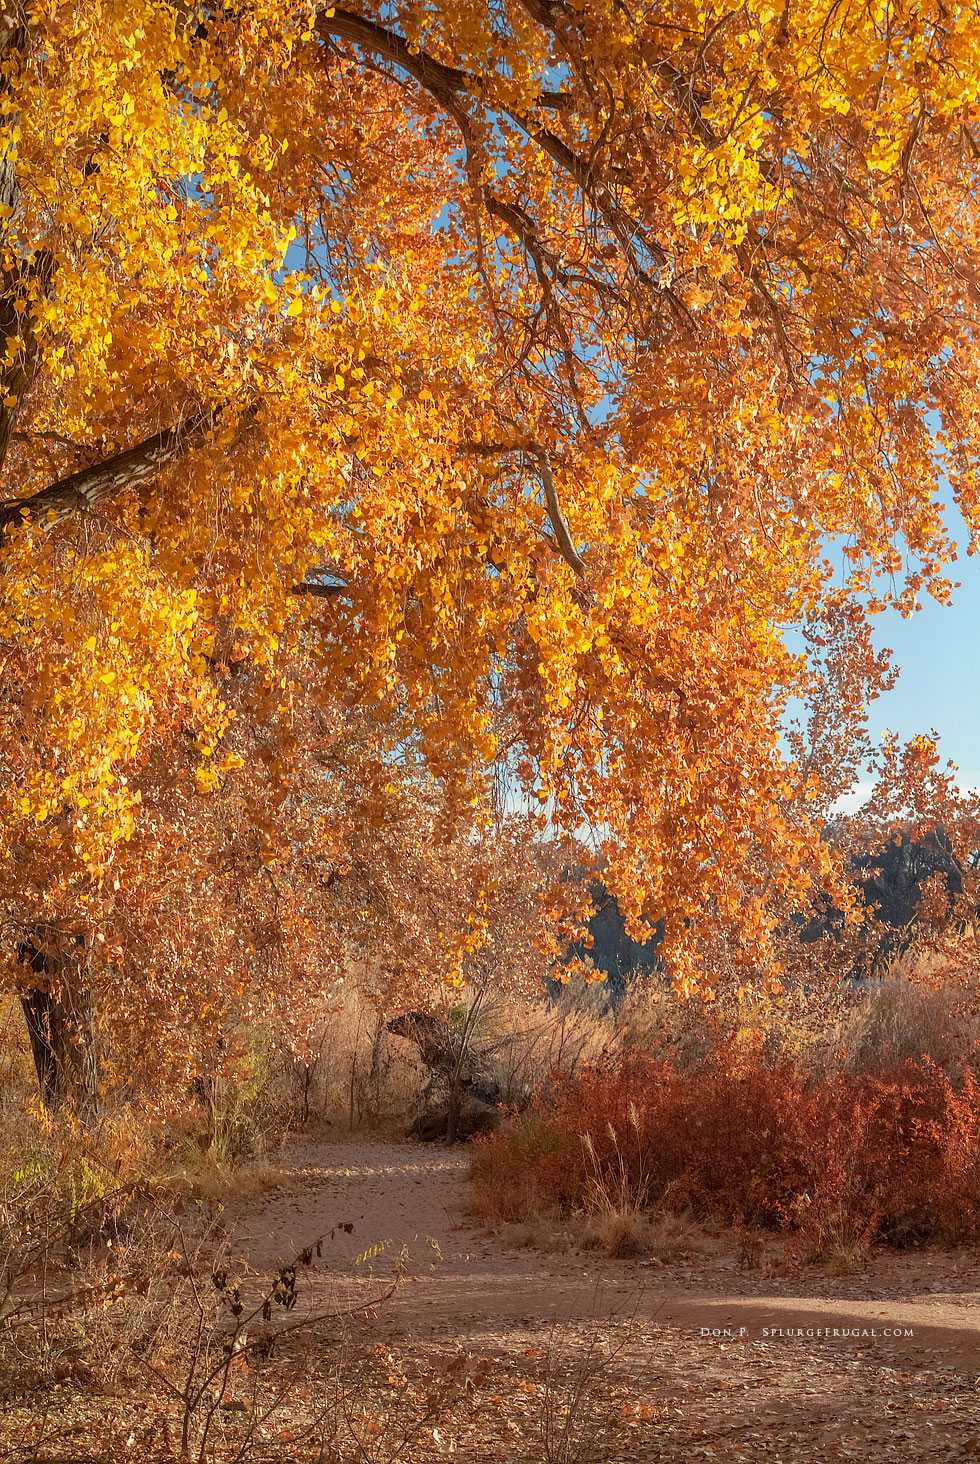 Landscape photographed with Fujifilm FinePix S3 Pro and Nikon 28-80mm lens.
I feel no need to upgrade. That is the best compliment I can give to any camera. Granted, the camera shows its age in a variety of ways: There is noise creeping into photos above 400 ISO, it takes forever to write raw files to the memory card, and the body feels rather clunky and ancient. Plus, if it breaks, no one, not even Fuji, has the parts to repair it. None of that matters. It’s all about that color! Pair it with your favorite Nikon lenses (it uses a Nikon body and lens mount as the foundation of the camera) and start shooting photos that will satisfy the artist in you.
The FinePix S3 (which I purchased used for $150.00) is now my main camera with its forerunner, the Fujifilm FinePix S2 Pro as a backup. I review that camera below. Everything I say about the FinePix S2 applies to the S3 with the exception of the fact that the S3 does not require 2 CR123a Lithium batteries.
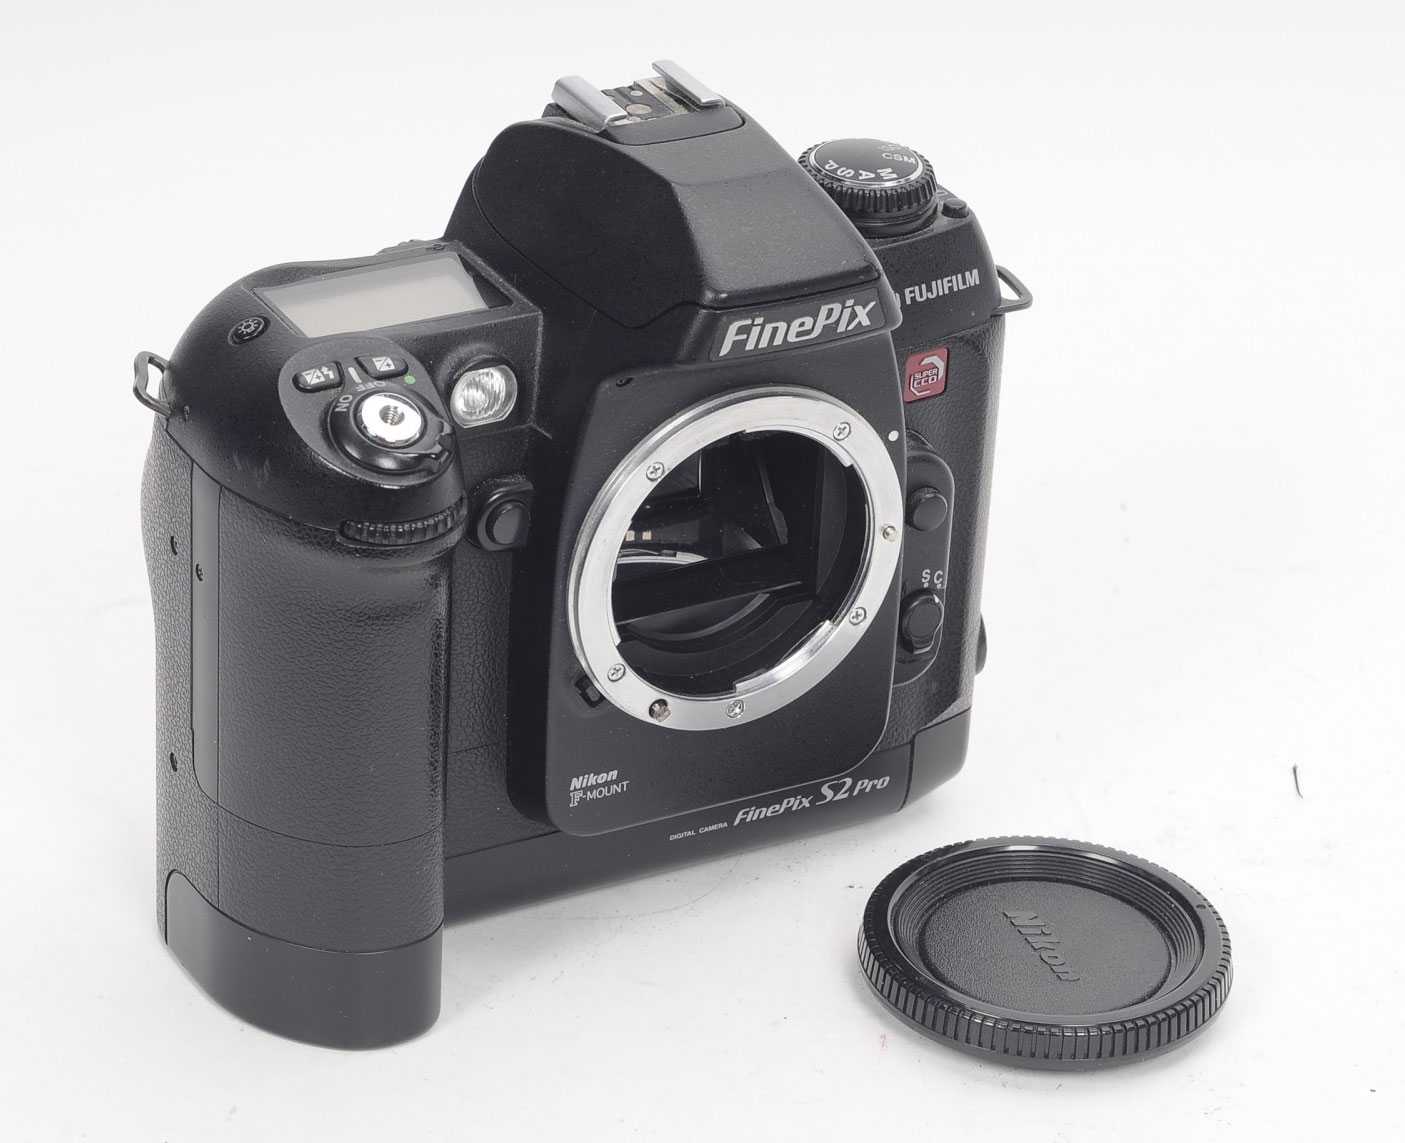
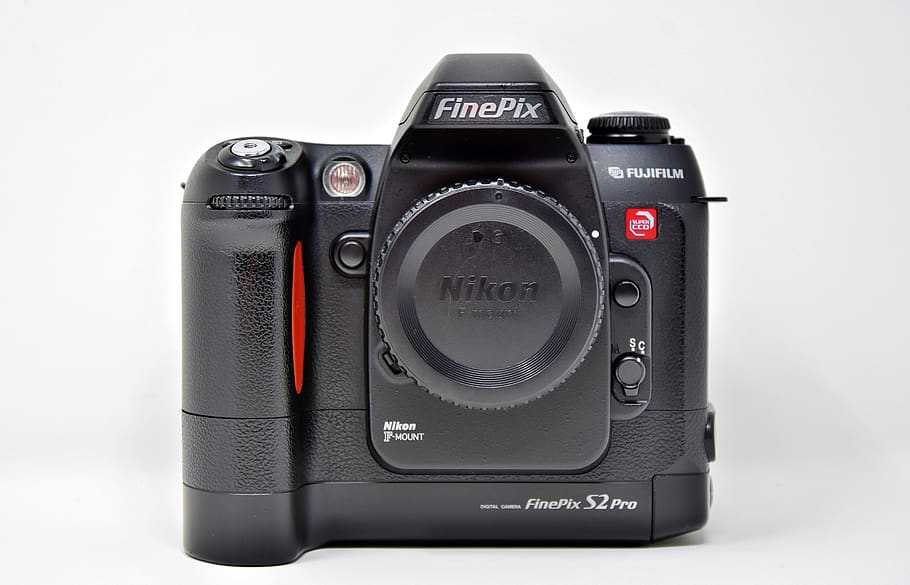
Fujifilm FinePix S2 Pro Camera Review
I owned the Fujifilm Finepix S2 Pro for about two years, purchasing it used in 2009 for $125.00. I sold it after purchasing my next used camera, a Canon Rebel XS. Recently, I’ve decided to again purchase three vintage S2 Pro DSLR bodies. Why? The Fujifilm FinePix S2 Pro has become my favorite camera of all time. For sheer image quality, it remains very competitive even by today’s standards.
The Fujifilm Finepix S2 Pro is a 6-megapixel DSLR (12-megapixel interpolated) introduced in 2002 by a company famous for its film products. Of these, Fuji Velvia color film was revered by professional landscape photographers. It has over-the-top saturation, sharpness, and contrast that turns landscape photos into sumptuous eye-candy. By comparison, most digital cameras of the time offered more accurate, and by comparison, more boring color rendition.
 Shot with Fujifilm FinePix S2 Pro
Dynamic Range (contd.) — RAW
Fujifilm’s (only really useful) RAW converter is Hyper-Utility2 (covered earlier in this review), when converting RAW files which were shot in Wide dynamic range mode it provides the option to adjust the dynamic range ‘mix’ from 100% to 400%. In addition it also provides some digital exposure compensation but rather surprisingly only to -1.0 EV. The other application which we use regularly and which supports the S3 Pro’s RAW format is Adobe Camera RAW (2.4) which is a free plug-in provided by Adobe for Photoshop CS.


Recovering dynamic range from RAW
The following image was just a typical ‘snapshot’ which when we examined later appeared to have been ruined by over-exposure. Time to see just what we could get back from this RAW image. The results were very, very interesting. As you can see Hyper-Utility2 did indeed manage to restore some image detail as well as some of the original color of the floor and walls, although there is a noticeable magenta color cast in ‘brighter’ areas of the image.
The biggest surprise however was the performance of Adobe Camera RAW, it almost miraculously recovered huge swathes of dynamic range which included accurate image detail, texture and color. It’s almost as though it’s a completely different exposure, but trust me the four images below came from the same RAW file.
| Thumbnail | 50% crop |
|---|---|
| Hyper-Utility2, 100% dynamic range | |
| Hyper-Utility2, 400% dynamic range, -1.0 EV digital exposure compen. | |
| Adobe Camera RAW, default | |
| Adobe Camera RAW, -4.0 EV digital exposure compen., brightness 90 |
Adobe Camera RAW, getting the most from the S3 Pro
This (for me) was a bit of a revelation, it appears as though Adobe Camera RAW is far more capable of using all the R-Pixel information and combining it with the S-Pixel information to deliver detail we would otherwise assume was lost. Just how much more it can recover is a little up in the air but we estimate it’s up to three stops. The results speak for themselves. Fujifilm need to speak to Adobe about getting their algorithms into Hyper-Utility2 and into the camera!
| Thumbnail | 50% crop |
|---|---|
| Adobe Camera RAW, default | |
| Hyper-Utility2, 400% dynamic range, -1.0 EV digital exposure compen. | |
| Adobe Camera RAW, -4.0 EV digital exposure compen. |
This is all very exciting of course, however the downside is that you have to shoot in Wide dynamic range RAW mode (25 MB per image, 13 sec write time, 40 images on a 1 GB card) and you will need Adobe Photoshop CS (at $2499 for the camera you can probably afford to buy CS).
No side-effects?
Well not quite, it appears as though Hyper-Utility2 (and the camera) are carrying out noise reduction on the R-Pixel ‘image’ before it is combined with the S-Pixel ‘image’, Adobe Camera RAW doesn’t do this which means that if you carry out ‘restoration’ negative exposure compensations as above you can get images with the slightly odd effect of noise in mid-to-high tones, this noise comes from the R-Pixels. The following image was converted from RAW by Adobe Camera RAW with a -2.3 EV digital exposure compensation.
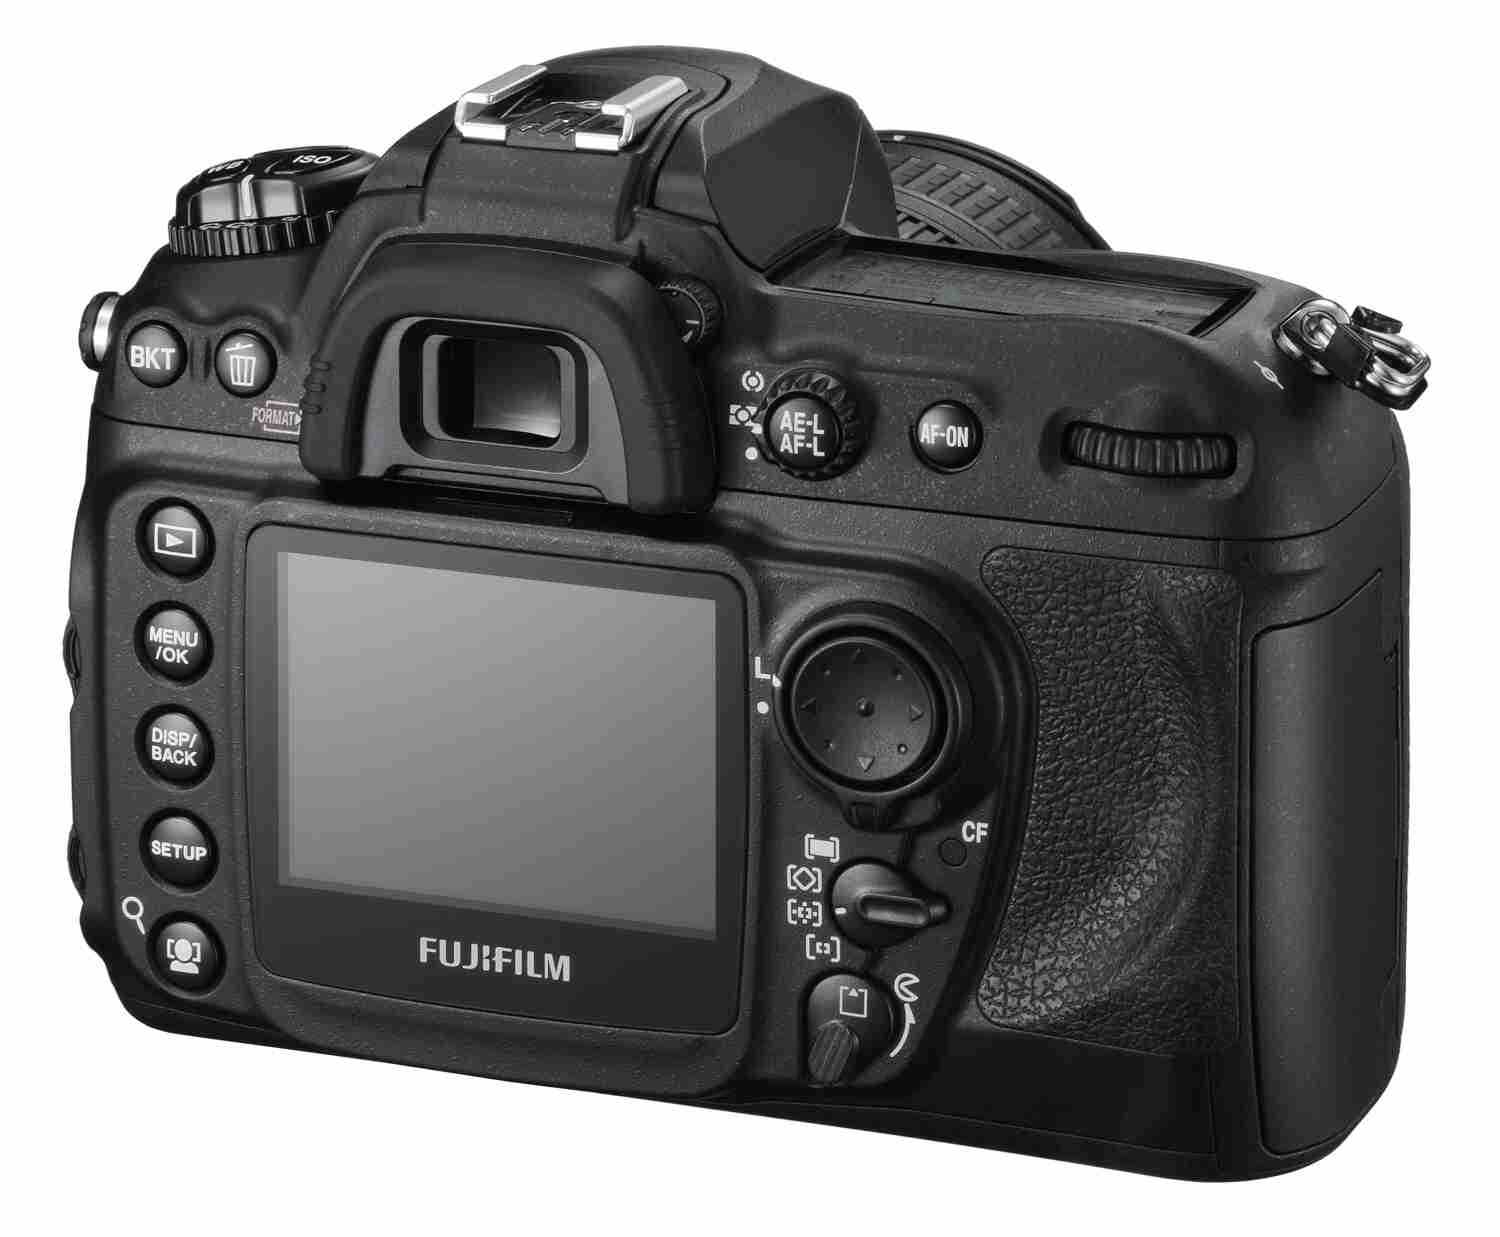
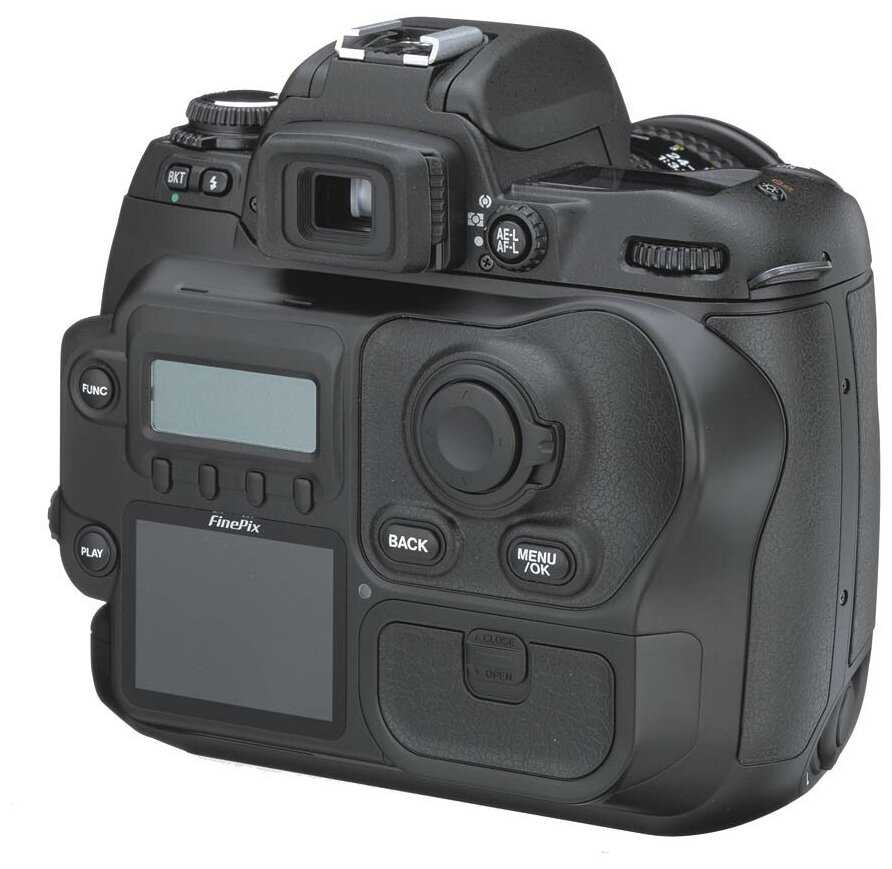
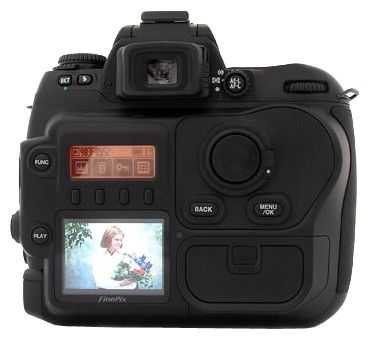
Control Panel
On the rear of the S3 Pro is the now familiar rear ‘Control Panel’ LCD. This provides both information and control over the majority of digital settings. The row of four function buttons below the panel refer to the different setting sections displayed in the panel (depending on the current mode). The FUNC button to the left of the panel scrolls through each page of information or settings. The panel is illuminated with an orange backlight at the same time as the top LCD panel by pressing the backlight button on top of the camera (or automatically after pressing the FUNC button). A breakdown of each setting and options is available later in this preview.
Record mode
| Record mode information display | Settings page 1 (WB, Qual, Size, Film sim. mode) |
|---|---|
| Settings page 2 (DR, Color, Tone, Sharpening) | Settings Page 3 (AF mode, Lock, Reset) |
Play mode
Long Exposure noise reduction / Night shots
The S3 Pro features an automatic ‘dark frame subtraction’ noise reduction system which comes into effect for shutter speeds of 1/8 sec or slower. This works by taking a second shot just after the main exposure (in darkness, with the shutter closed) and using the noise pattern from that to clean the main exposure.
We found that while the S3 Pro’s noise reduction system was fairly effective there will still a few ‘hot pixel’ speckles getting through to the final image and that their placement was consistent from shot to shot (within the same shooting session). We were however quite impressed with with the performance at higher sensitivities (up to ISO 400) for night exposures.
| ISO 100, 30 sec, F4.8, 6 MP | |
|---|---|
| ISO 200, 15 sec, F4.8, 6 MP | |
| ISO 400, 8 sec, F4.8, 6 MP | |
| ISO 800, 4 sec, F4.8, 6 MP |
Flash
The S3 Pro has a built-in pop-up flash for quick snapshots and a fully SB compatible hot-shoe which supports D-TTL with compatible Nikon SB flash units as well as D-3D Multi-Sensor Balanced Fill-Flash with type D or G lenses. The result using the internal flash was mixed, the best result was with the Nikon SB-600 direct, that said color rendition was very good with no obvious color casts. Clearly professional photographers will be connecting the S3 Pro to studio strobe units which is facilitated via the PC Sync terminal on the front of the camera.
| Built-in flash, Program (1/60 sec, F2.8) | Nikon SB-600, direct, Program (1/60 sec, F4) |
|---|---|
| Nikon SB-600, bounced, Program (1/60 sec, F4) | |
| Built-in flash, Program (1/60 sec, F2.8) | Nikon SB-600, direct, Program (1/60 sec, F4) |