How To Increase JPEG Quality Quickly –
1. Increasing JPEG Quality With The Help of Inbuilt Windows 10 Tools
-Paint Can Help You Increase JPEG Quality
There is a very slight chance that you haven’t heard of Paint. But not many know that this very Windows 10 tool can help increase JPEG quality and that too with just a few clicks and little patience. Here is how you can increase JPEG resolution with the help of Paint.
- Start paint
- Click on File > Open
- Open an image whose JPEG quality you want to increase
- From Home select Resize
- Click on the Resize and Skew dialog box, the image of which is shown below,
- Enter a lower image dimension
- Click on OK
- Save the file
-Use The Photos App
You needn’t install a bulky photo editing app, instead, you already have something right on your computer. Windows 10 has a decent Photos app with the help of which you can enhance the JPEG quality of an image. The process is simple and the steps for the same are mentioned below –
- Go to the folder where the image is placed
- Right-click on it and select Open with > Photos
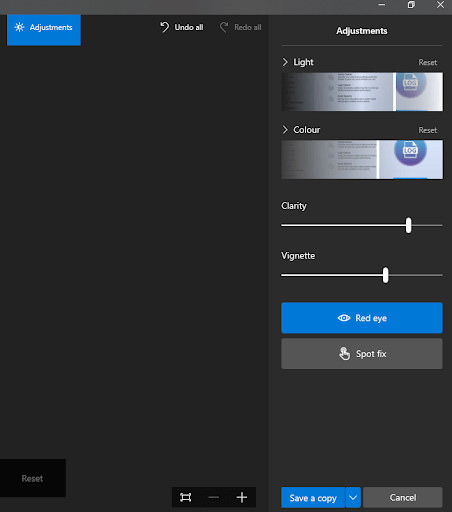
- Once the image is opened in the Photos app click on the Edit and create dropdown as shown below and select Edit
- Here you can choose from several Filters or auto-enhance the image by clicking on Enhance your photo
- If you go further and click on Adjustments you can fix blemishes such red-eye that might have occurred because of flash and you can even adjust its color, clarity, and few other things
2. Using Third-Party Tools To Improve JPEG Quality
It could be that until now you haven’t been able to achieve a quality that you desired. A third-party utility can help you increase JPEG quality. Here are two of the most popular utilities that can help you fix JPEG images –
– Use Stellar Repair for Photo To Increase JPEG
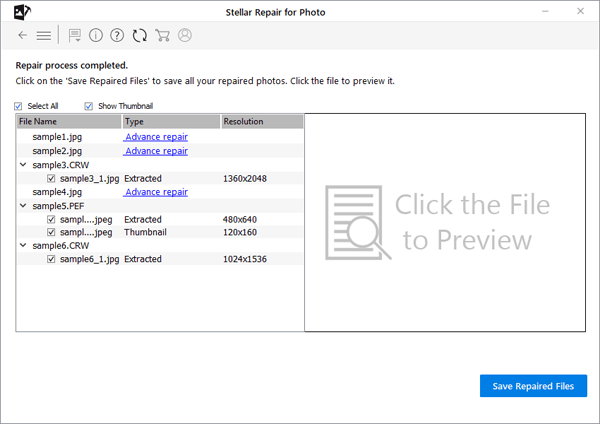
The first utility that can easily help you enhance the quality of a JPEG image is Stellar Repair for Photo. Here are the steps to enhance or fix the quality of a JPG or JPEG image using this tool –
1. Download and install Stellar Repair for Photo
Download Stellar Repair for Photo – Windows
Download and install Stellar Repair for Photo- Mac
2. Add the images whose quality you want to improve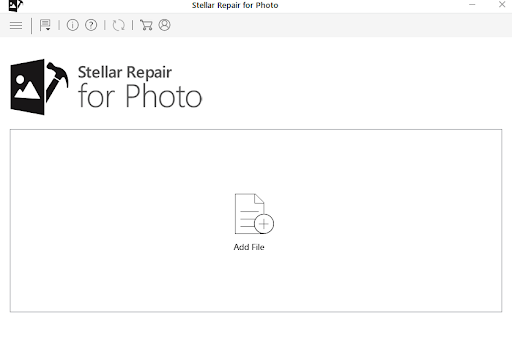
3. Click on the Repair option
4. You can even preview the image to check if the improvement is as per your desires
5. Not satisfied yet? Click on Advanced Repair and add all perfect JPEG files that you have taken
6. Click on Save Repaired Files
 Source: Stellar
Note: The free version lets you preview and evaluate images.
Also Read: How to Repair PDF Files using Stellar Repair for PDF?
3. Improving JPEG Quality With The Help of Adobe Photoshop
Undoubtedly, Photoshop is a go-to application for photo editing, so much so that you might find it on almost every graphic designer’s system. Wait! Here is a notion that might have knocked on your brains – isn’t using Photoshop something that’ll require some skill? Yes, it does. We don’t negate that completely, however, for the purpose of enhancing JPEG quality, you might not need extensive expertise. Here is how you can increase JPEG quality using Photoshop
- Click open the image that has a poor quality
- Click on Edit > Preferences > Technology Preferences
- Check the box that says Enable Preserve Details 2.0 Upscale (you may have to check if this option is available in your Photoshop)
- Now, click on the Image that you can see on the top menu bar
- Click on Image Size and make sure that you have checked the Resample checkbox
- Change the dimensions to 200% and click on Automatic next to Resample
- You can even preview the image
- If you are satisfied, click on OK and save the JPEG to your computer
Wrapping Up:
Sometimes we put our heart and soul into an image. But, when the output quality is not up to the mark, we get disheartened and end up deleting the image. We hope that now you will be able to increase the quality of your JPEG images with ease. At least this will give your hard work a second chance to stay with you. For more such content, keep reading Tweak Library.
Related Topics
- How To Get Your Photo Vault On Android >
- How To Get Back Recently Deleted Photos >
- Best Free Image Converter in 2023 | Online and Offline >
About the author
Sarang Bhargava
Sarang is avid blogger with over half a decade of experience in the field of writing and creating digital content. Through his content he intends to help users stay updated on latest tech-news and resolve their tech-related queries. He has published numerous blogs on technical how to’s, reviews, listicles and several other aspects across Windows, Android, Mac and iOS. He also likes researching, exploring and blogging about developments pertaining to cybersecurity.
One last note
There is no standard way to describe compression. Camera manufacturers use all sorts of terms. Here are a few I’ve come across, but there are several more.
- Normal – Fine – Superfine – Use Superfine
- Basic – Normal – Fine – Use Fine
- Good – Better – Best – Use Best
- Canon uses these symbols. Smooth curve is best, stepped is worst quality.
Lumix uses these symbols. The one on the right is the best quality.
Consult your camera manual to determine which is the best possible quality. My advice: Set your camera on the best possible quality and always leave it there. You can always change the file size, if you need to fit more photos on your memory card.
Problem No. 7: Many of my indoor photos have a nasty yellow cast. Am I doing something wrong?
The likely cause of this is an inaccurate white balance. The Auto White Balance setting of DSLRs typically does a good job of reacting to varying daylight conditions, such as bright sunshine, cloudy skies or shade, but the color temperature of indoor lighting generally falls outside of the range covered. The usual result is that interiors lit by general-purpose lights have a nasty yellow color cast.
The quickest remedy is to change your camera’s white balance setting from Auto to Tungsten (also called Incandescent on some cameras) if you’re shooting under standard interior lights, or the Fluorescent setting for strip lighting.
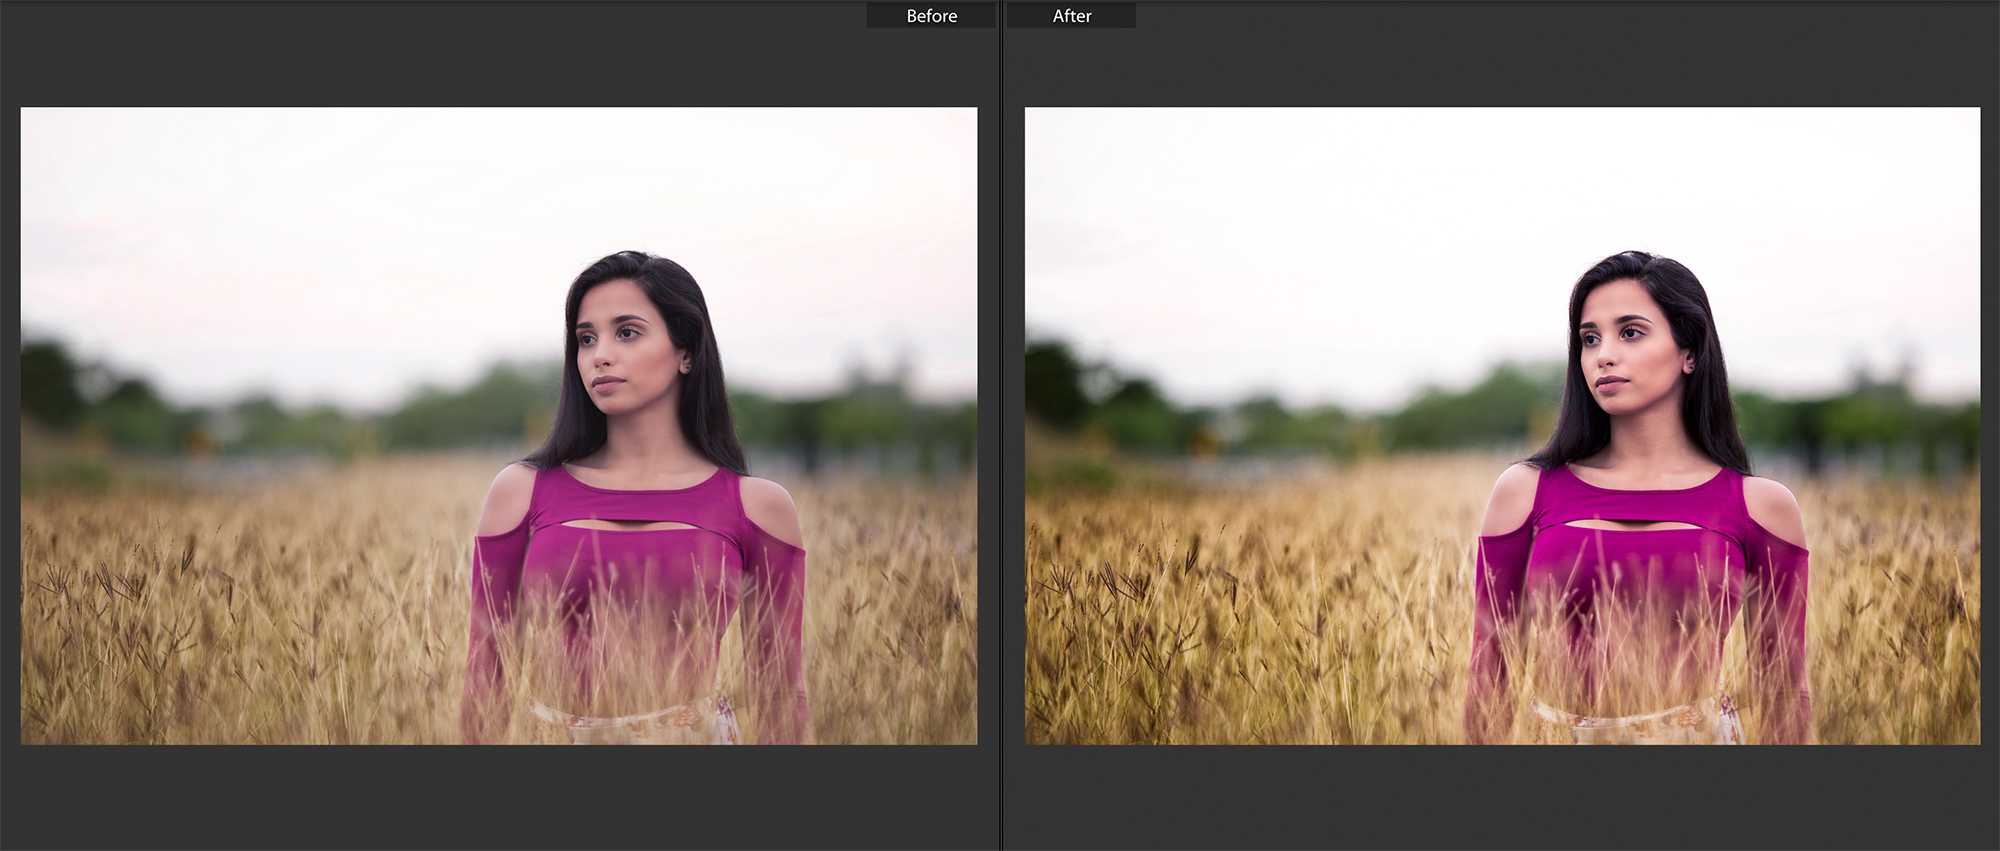
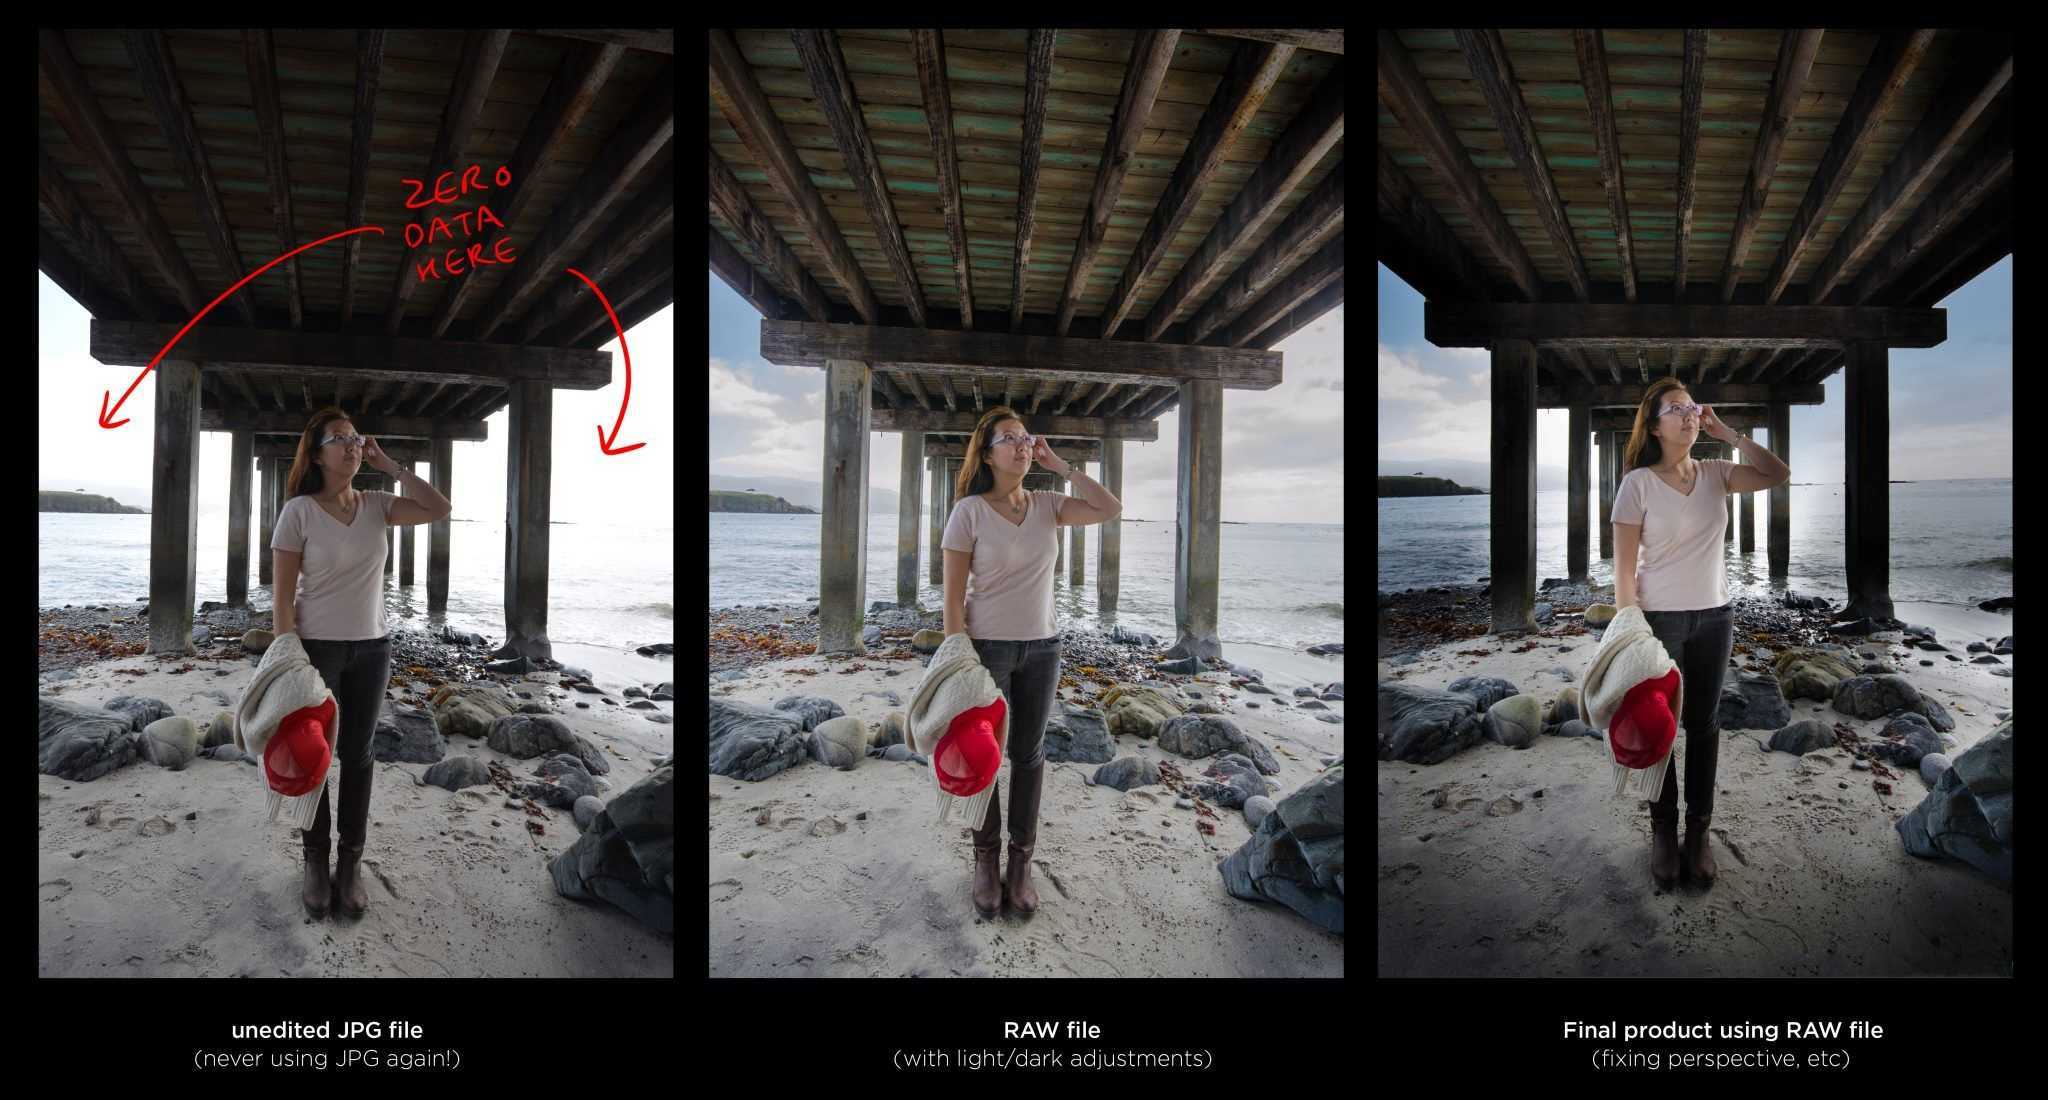
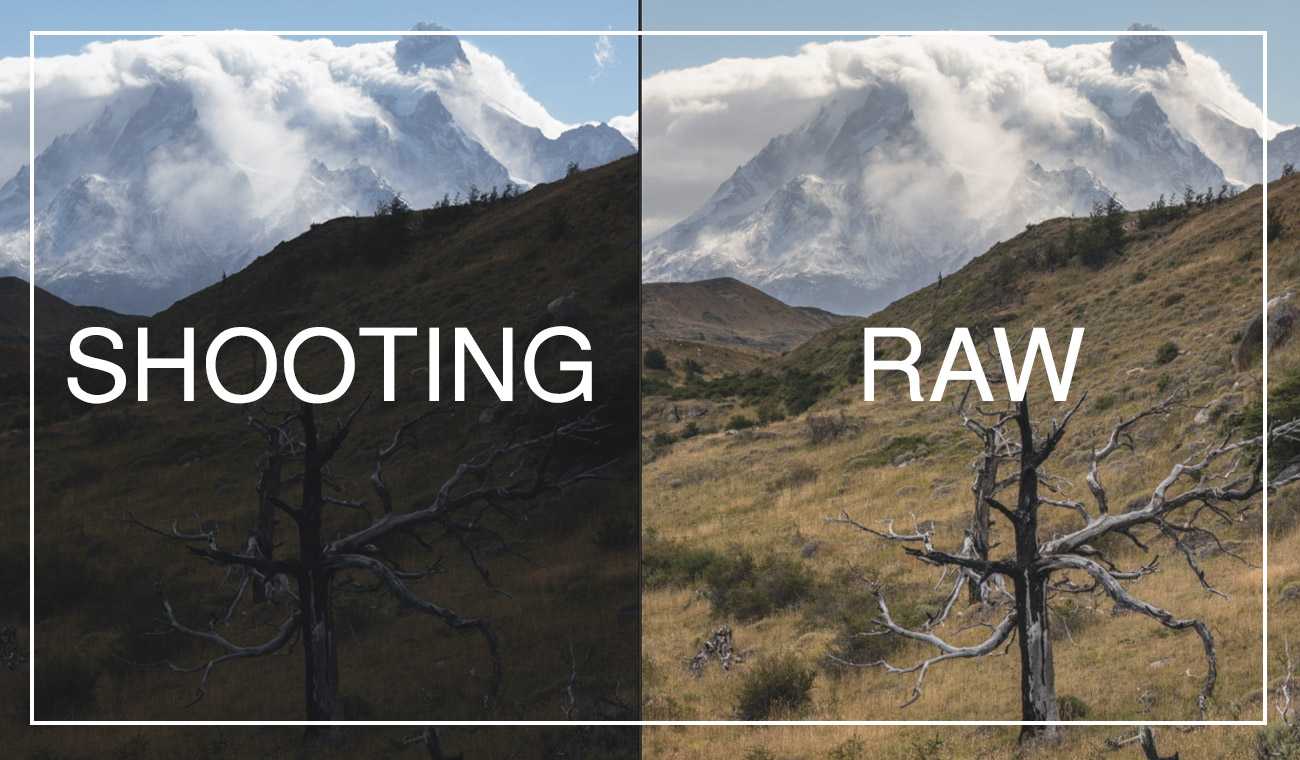
Things get trickier when you have a mix of lighting — when daylight is streaming in through a window and you’ve got interior room lights switched on as well, for example. If you have time, you might want to experiment with your white balance settings, but our recommendation would be to shoot in raw. As we’ve mentioned above, unlike JPEG files, it’s easy to change the color temperature of raw files at the editing stage.
Learn more: The A to Z of Photography: Kelvin
Part 1: What is JPEG Artifacts
Just as the name of JPEG Artifacts, JPEG artifacts are caused by compression saved in JPEG files. JPEG Artifacts are the blocky or blotchy areas of an image. JPEG Artifacts are the aggressive data compression result or conversion between different formats that cause the discard of some image data. The artifacts should ruin any great image. You should know the methods to repair JPEG Artifacts for a better photograph.
JPEG Compression Artifacts are mosquito noise (noise around edges), blurring, and a smeared appearance in the region. How can you find the JPEG artifacts within an image? Usually, when there are some flat blocks, you need some solutions to eliminate JPEG compression artifacts.
Problem No. 11: My zoom lens says it’s ‘macro’ but I can’t get anywhere near as close to subjects as I can with my compact camera. What’s going on?
True macro lenses have a reproduction ratio of 1:1, which means they can image a subject the same size as the camera’s sensor; on most DSLR and mirrorless cameras, this is about 24 x 16mm. Many ‘macro’ zooms boast ratios nearer 1:4, so the smallest possible subject is about credit-card size.
It’s true that many compact cameras do allow close focusing, but they only do so with the lens at its wide-angle setting. So the smallest subject they can capture isn’t as small as you might think. It can also be hard to get enough light on the subject, which ends up in the camera’s shadow. A slightly longer working distance is much more practical.
Learn more: Macro lenses: how to choose one, and how to use it
Настройка основной и фронтальной камеры
Рассмотрим, как настроить основную камеру на OPPO
Обратите внимание, что количество настроек зависит от конкретной модели телефона. Дорогие смартфоны имеют набор расширенных параметров, тогда как у более дешевых моделей есть только необходимые настройки
Иконки на верхней панели
Открываем системное приложение и просматриваем верхнюю панель с иконками. Здесь можно включить/выключить вспышку и подсветку, активировать режим HDR, включить автоматическую насыщенность цвета и подобрать фильтр для фото. Если кликнуть по троеточию в правом верхнем углу, появятся вкладки «Рамка», «Таймер» и «Настройки». Значок «Рамка» регулирует соотношение сторон для фото: на выбор 4:3, 1:1, 16:9 или Full (на весь экран). Таймер запускает затвор камеры через определенный промежуток времени – 3, 5 или 10 секунд.
Раздел «Настройки» и режимы фото
Перейдем к пункту «Настройки»:
- Выбираем, какую функцию будет выполнять кнопка громкости – непосредственно регулировку громкости, затвор камеры или масштабирование.
- По желанию включаем съемку по отпечатку пальца, звук затвора и автоматическое определение местоположения (должна быть включена служба геолокации). Если в смартфон вставлена SD-карта, активируем сохранение на карту.
- Также можно включить фото одним касанием, жесты для фотографирования, сетку (на снимке будет разметка) и водяной знак – модель телефона, имя автора или дату и время.
Из расширенных режимов присутствует ускоренная съемка, макро, панорама и экспертные фото. Режим «Эксперт» позволяет вручную выставить следующие показатели: ISO (добавление света в кадр), S (выдержка), WB (баланс белого), AF (автофокусировка) и EV (экспозиция). Самостоятельно регулируйте параметры и смотрите, как это влияет на качество картинки.
Еще многие интересуются, как настроить переднюю камеру на Oppo. Для фронтальной камеры доступны те же параметры, что и для основной. Есть только одна новая функция – «Зеркальное селфи». Чтобы включить ее, нужно переключиться на переднюю камеру и зайти в настройки, нажав по троеточию в правом верхнем углу.
Save Data Settings
Frame No.
CONT. You’ll probably be taking many photos and changing memory cards at some point during your travels. Setting this to Continuous will keep a sequential file numbering system even after you switch memory cards. This helps with organization, rather than resetting the file number to 0000 after changing a memory card.
Card Slot Setting
As desired. If you have a camera with multiple card slots, you have the option of duplicating everything to two cards (BACKUP), RAW on one card and JPEG on another (RAW/JPEG or SEPARATE), or just recording everything sequentially from one card to another when the first one is full (SEQUENTIAL). I’ll do SEQUENTIAL unless I’m doing commissioned work, in which case I’ll use BACKUP.
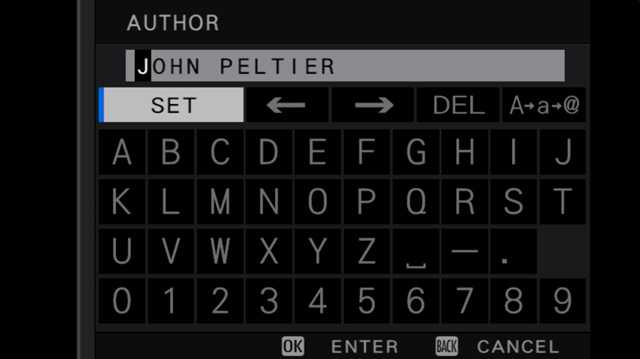
Copyright Info
Author/Copyright Set. Make sure your name is recorded in the file’s metadata! It’s helpful to be able to prove ownership when your photos are poached.
darktable
As the ufraw cannot be used on the recent versions, we have another and the best alternative, Darktable. To install darktable, Execute the following command:
sudo apt install darktable
Now, change the directory to where the raw images are located.
cd Downloads

To convert the raw images to jpeg, execute the following command:
find . -type f \( -iname "*.raw" -o -iname "*.cr2" \) -exec sh -c 'darktable-cli {} ${0%.*}.jpeg' {} \; -delete


If the raw images are in .NEF file format, change .cr2 to .NEF in the above command. The above command searches the current folder for any raw files and converts them to jpeg file format. It deletes the original file. To avoid deleting the raw image, remove -delete at the end of the above command.
Compress a JPEG with image editing tools
Several users prefer using image editing tools such as Photoshop or GIMP on their computers. However, while GIMP is freeware, Photoshop is a paid application. While you need some time and new skills to manipulate images on both the software, the steps to reduce file size are similar and easy.
1. Open the Image of your choice in Photoshop or GIMP
2. In Photoshop, select File > Save for Web & Devices, then choose the File type and Adjust the quality
3. In GIMP, select File > Save As > Save as JPEG > Adjust the Quality
4. Choose the location where the new file should be saved
5. Type the name of the new file and click Save
Using the best image quality matters
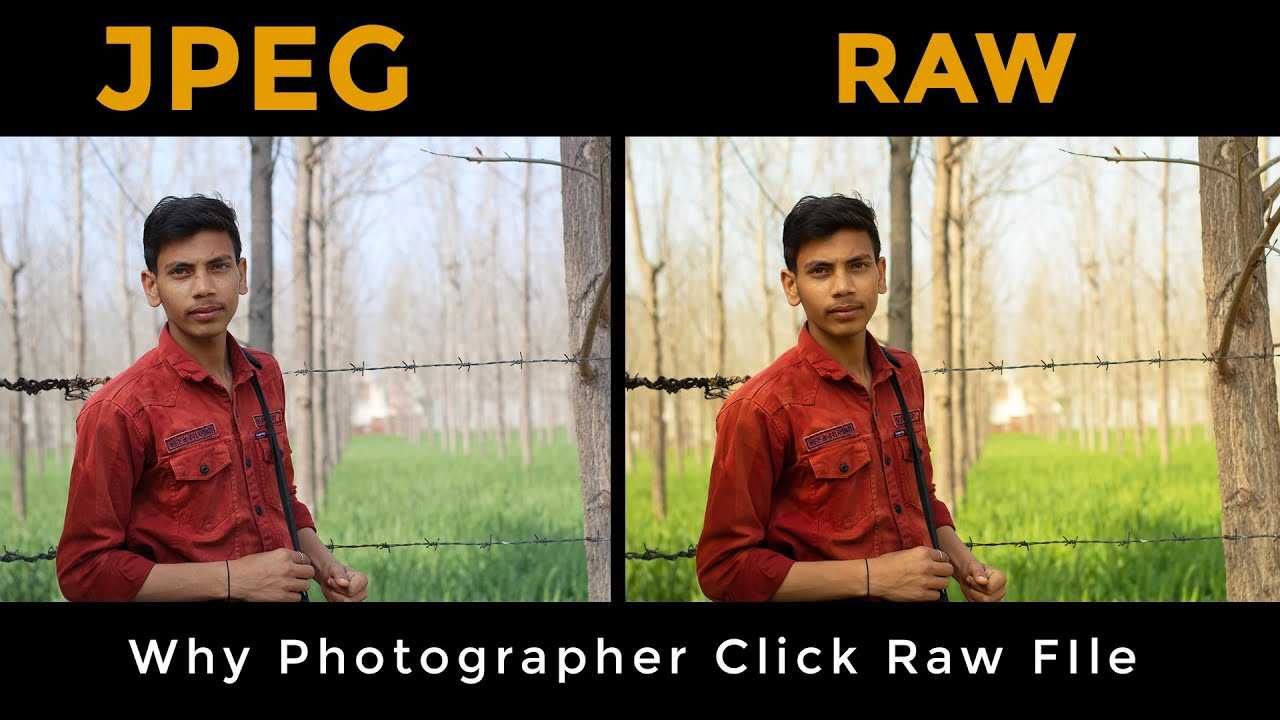
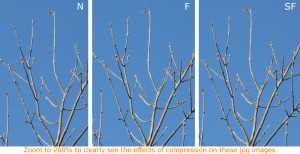 Have a look at the three images here. The first photo was taken with the camera on Normal, the second on Fine, and the last one on Superfine quality settings. What you notice is that on the Normal setting, artifacts (sometimes mistaken for pixelation) occur around the edges of the tree branches. This disappears somewhat on the Fine example, and is almost unnoticeable on the Superfine example. If you cannot see the differences at this size, click the photo and zoom in with your browser (Command/Ctrl +).
 Pixelation happens when you view an image at 200% or more. With pixelation you are looking at are enlarged pixels, or squares, and the image looks steppy. Each pixel is clearly defined as a square. Artifacts have an uneven pattern to them. You may notice both artifacts and pixels when viewing an image larger than 100% – i.e. zooming-in to the photo a lot.
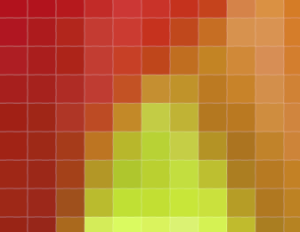
Artifacts show up most when you have a solid colour in your photo, such as a blue sky or red car. When compressing, the camera averages out the colours in an area and literally throws out some of the similar colours and decides some colours can stay. This causes bands of colour in smooth gradations. For example, a nice blue sky going from deep blue to a lighter blue, may show banding, especially if the photo has been put on a web site, where typically the quality is less than Superfine. You likely won’t notice artifacts if your image has lots of detail in it, like trees with leaves, unless you zoom in really deep.
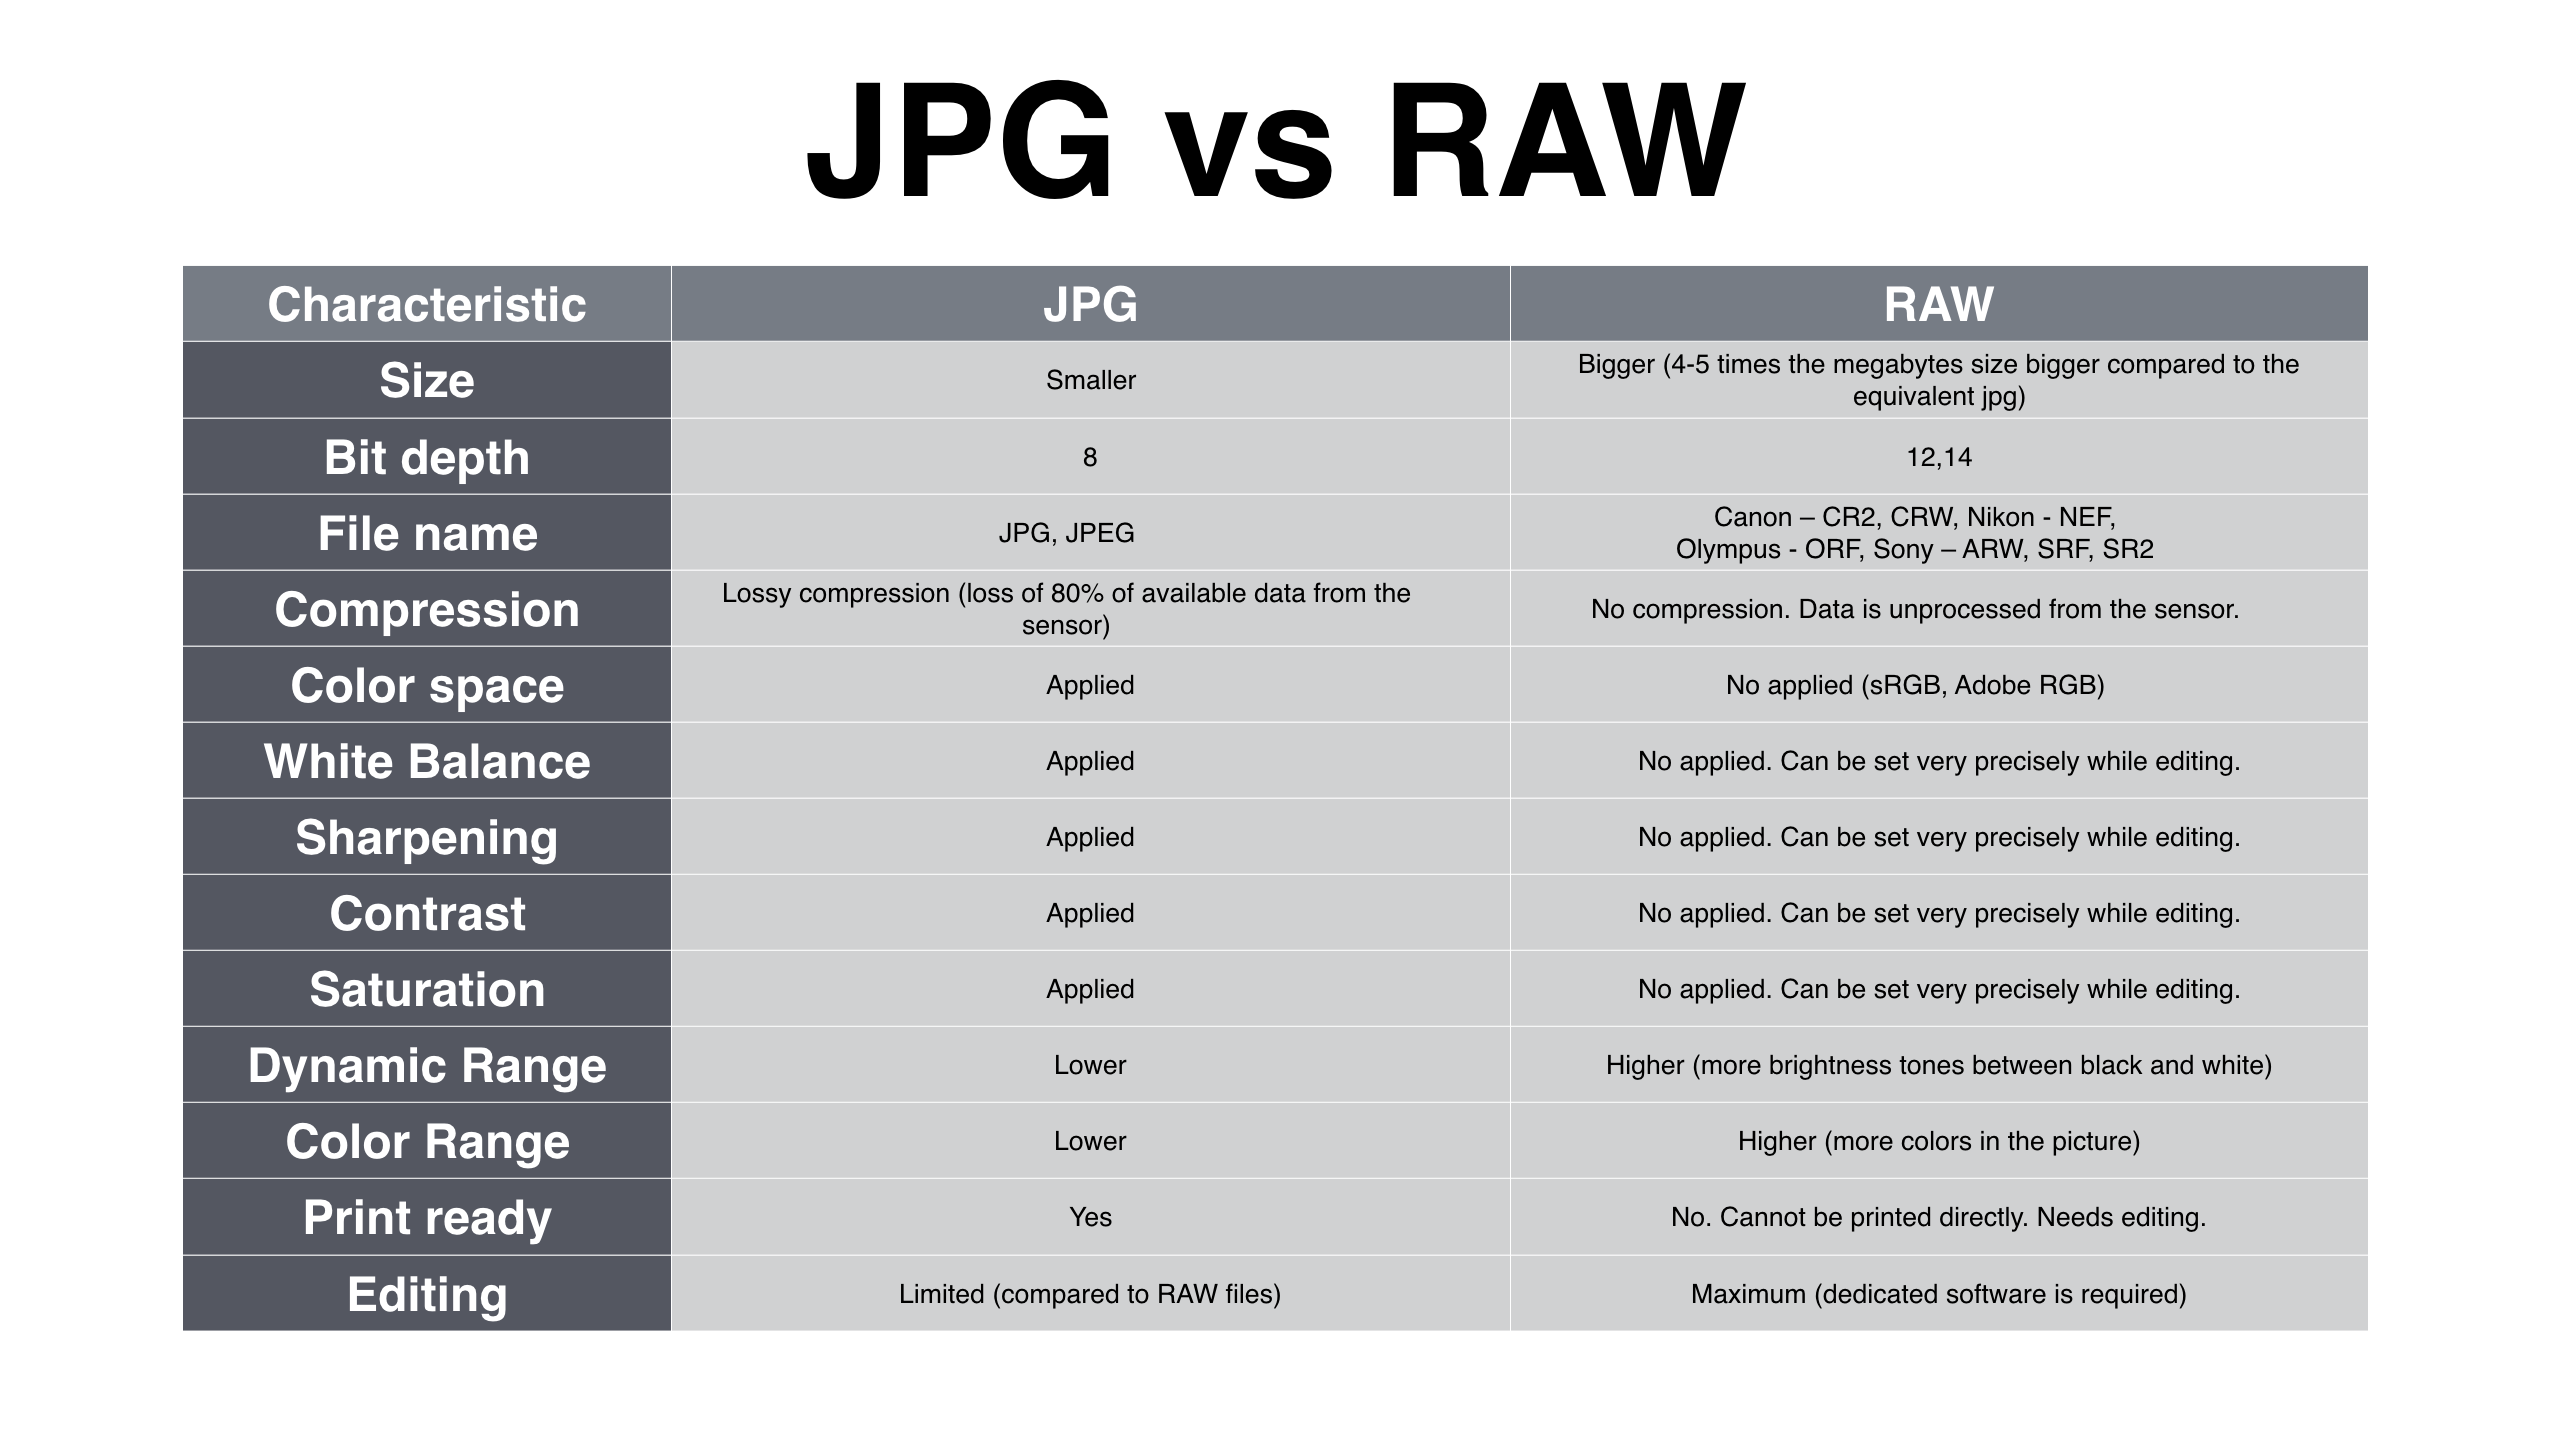
Why is RAW Capitalized?
Another quick question – you might be wondering why the word “RAW” is usually written in capital letters. Well, unlike JPG, RAW doesn’t actually stand for anything. It’s also not a specific file format, as different camera manufacturers use their own file extensions, like “CR2” or “NEF”.
As far as I am able to ascertain, RAW is usually capitalized for two reasons. First, to distinguish it from the word “raw”, which has its own definition. Second, as file extensions traditionally have always been capitalized (like .DOC for Word documents, or .XLS for excel spreadsheets), this indicates that RAW refers to a filetype.
To be honest though, there’s no rule that says you have to write RAW rather than raw. It’s up to you!
Step 1: Obtain Digital Images of Your Film Negatives
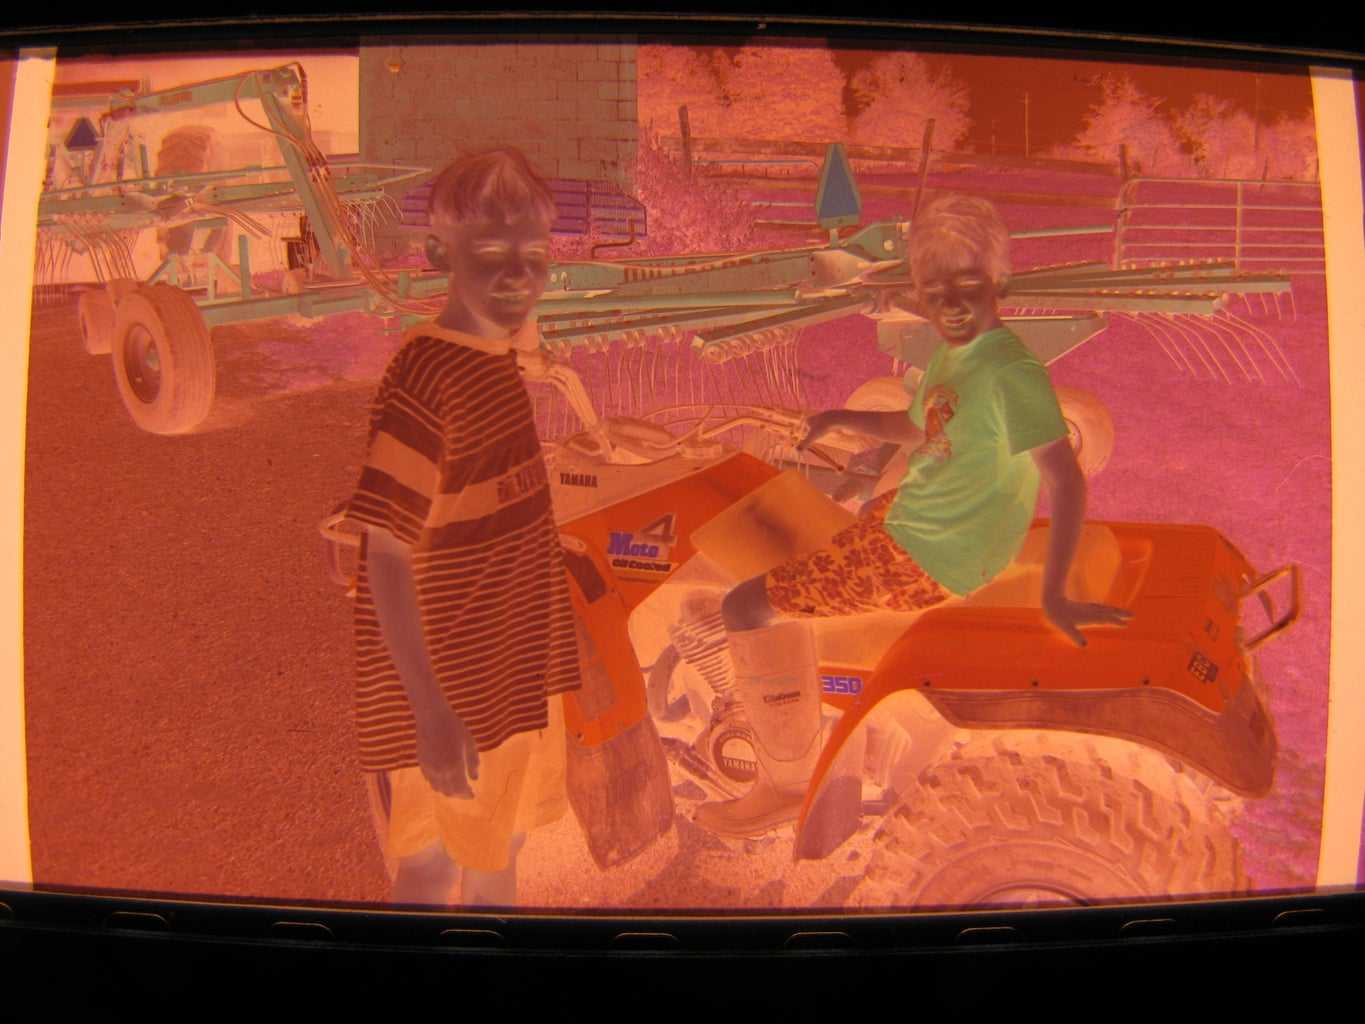
This Instructable assumes that you have a way to obtain jpeg images of your film negatives. For faster processing, it is best to have the negative positioned in approximately the same location in each image to allow for batch cropping and processing; otherwise, each image will need to be cropped individually.
Once you have your digitized negatives, put all of the ones that you want to convert into the same directory/folder on your computer (this will allow you to use VueScan’s batch conversion feature).
There are several ways to make digital images of your film negatives. I have found that the easiest way is to build a jig to hold a digital camera in front of a lightbox, and then use another jig to quickly position the negatives in front of the camera. I have documented this in a separate Instructable, located here:
GIMP Compression Levels Made Simple
Compression allows you to reduce the file size of your image. A high-resolution photo from a DSLR camera can be upwards of 75 megabytes in size, but the same file compressed into the JPEG format at 100% quality can shrink down to under 20 megabytes.
The same general idea applies to all types of image compression, but they’re not all created equal. Three of the most popular digital image formats are JPEG, PNG, and TIFF, and they each use compression in different ways.
Files saved in the JPEG format use a technique known as “lossy” compression, which means the algorithm discards some image data to reduce your file size. JPEGs are often the best compromise between file size and image quality, and they’re the most popular image format.
PNG uses a “lossless” compression method, so increasing the compression does NOT reduce your image quality. Instead, increasing the compression level simply means the computer will try harder and longer to get the file size as small as possible.
TIFF can also optionally use compression. LZW and Deflate both provide lossless compression, while JPEG provides lossy compression as usual. PackBits compression is only effective on black and white images, and can actually increase the file size of more complex color images.
Why reduce JPEG size?
Web connections take time to transmit data, this is known as latency. One of the reasons why JPEG images are popular online is because you can choose various compression settings. This lets you create websites that get your visual point across without making your users wait forever to load bloated sized images.
Bandwidth can be costly and since images account for the largest sized assets of an average website, reducing their size can be both beneficial for the visitor as well as the website owner. The more you reduce file sizes, the more you minimize load times and costly HTTP requests. Optimizing your images can also reduce operating costs by ensuring you pay for less server space. However, be aware that if you compress the image too much it will be noticeable to the average reader. Finding a happy medium between a small file size and image quality is important.
Photoshop to Enrich JPEG Photo
Photoshop is another powerful photo editing software that can help you improve JPEG quality. Use Photoshop CC 2018 or later, to increase photo resolution without losing quality.
The steps to upscale JPEG photos are as follows:
- Start your Photoshop CC application on your Windows PC.
- Open the JPEG image that you want to improve.
- Go to Edit > Preferences > Technology Preferences.
- On the dialog box, select the “Enable Preserve Details 2.0 Upscale” checkbox. Click OK.
- Go to Image > Image Size.
- Resize the Image Size dialog box, then ensure the Resample checkbox is selected.
- Change the dimensions of the photograph to, say 200%.
- Click Automatic next to the Resample checkbox and select “Preserve details 2.0”.
- Preview the increased resolution JPEG photo. Click OK to close the dialog box.
- Save the improved JPEG image to your computer.
Фотографии обложки
Для своей обложки я собираюсь использовать это фото:
Мое фото для обложки
Если я попытаюсь загрузить свое фото в полном размере (около 7000рх по ширине), вот что происходит:
Обложка Facebook с полным разрешением
Не очень хорошо. Facebook рекомендует сначала изменить размер фото до 851 х 315, поэтому так и сделаем:
Обложка Facebook с новым размером, но файл по-прежнему более 100kb.
Выглядит лучше, но все еще видны искажения, особенно вокруг птицы. Тем не менее, это фото по-прежнему «весит» почти 300kb, хотя Facebook рекомендует 100kb. Поэтому иду в Файл — Сохранить для Веб (Control-Shift-Alt-S) в Adobe Photoshop и подвигаю слайдер Качество (Quality) на отметку меньше 100kb.
Выбирайте опцию Сохранить для Веб, чтобы уменьшить размер фото до менее 100kbОбложка 851 х 134 сохранена в размере ниже 100kb
Как видите, этот способ дает самый лучший результат. Иногда у меня получается добиться немного лучших результатов с фото для обложек, когда я использую PNG вместо JPEG. Но, как я упоминала ранее, эти файлы сложнее сохранять в меньшем размере (менее 100 kb), поэтому попробуйте оба способа и посмотрите, что устроит вас больше.
Difference between JPG and JPEG and PNG
Here’s a detailed chart on the differences between JPEG, JPG, and PNG image formats:-
| Attribute | JPG/JPEG | PNG |
|---|---|---|
| File extension | .jpg, .jpeg | .png |
| Compression | Lossy | Lossless |
| Quality | Moderate to high | High |
| Transparency | Does not support transparency | Supports transparency |
| Color space | Limited to RGB | Supports RGB and RGBA |
| File size | Smaller than PNG at similar quality | Larger than JPG at similar quality |
| Suitable for | Photographs and complex images | Graphics, logos, and simple images |
| Compatibility | Widely supported by most platforms | Supported but less compatible |
| Use cases | Web images, social media, photography | Transparent graphics, icons |
Which is better, JPG or JPEG?
JPEG and JPG are the same format, with JPG being a shortened version of JPEG. Therefore, there is no difference in quality between the two formats.
Can I convert a JPEG to a JPG?
Yes, it is possible to convert a JPEG to a JPG. There are various online tools and software that can help you convert the format.
What is JPEG best used for?
JPEG is best used for images that have many colors or gradients, such as photographs. It is a lossy format that can compress images to a smaller size without compromising too much on image quality.
Is JPEG better for photos?
JPEG is not necessarily better for photos than other formats, as it depends on the intended use and specific requirements.
Can you change JPEG to JPG on iPhone?
There is no option to change the file extension on an iPhone, but you can convert the format using a third-party app or software.
How do I make a JPEG better quality?
You can improve the quality of a JPEG by increasing the resolution or reducing the compression, but this will result in a larger file size.
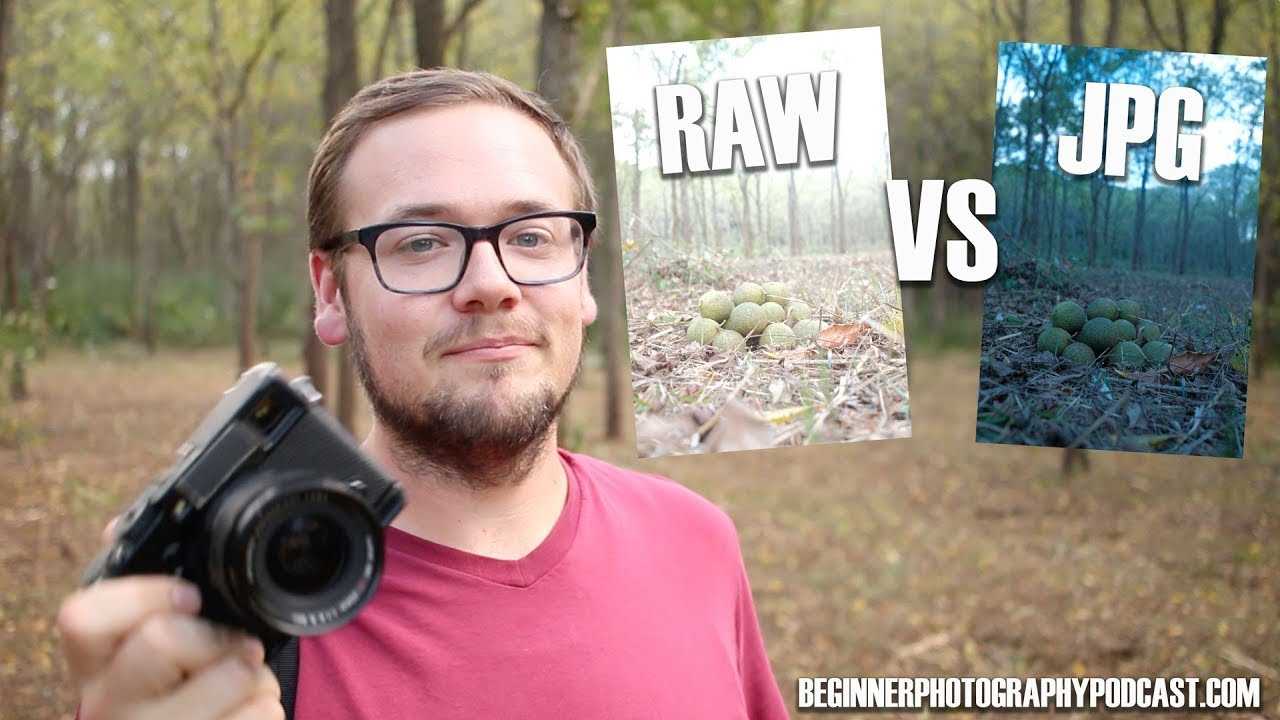
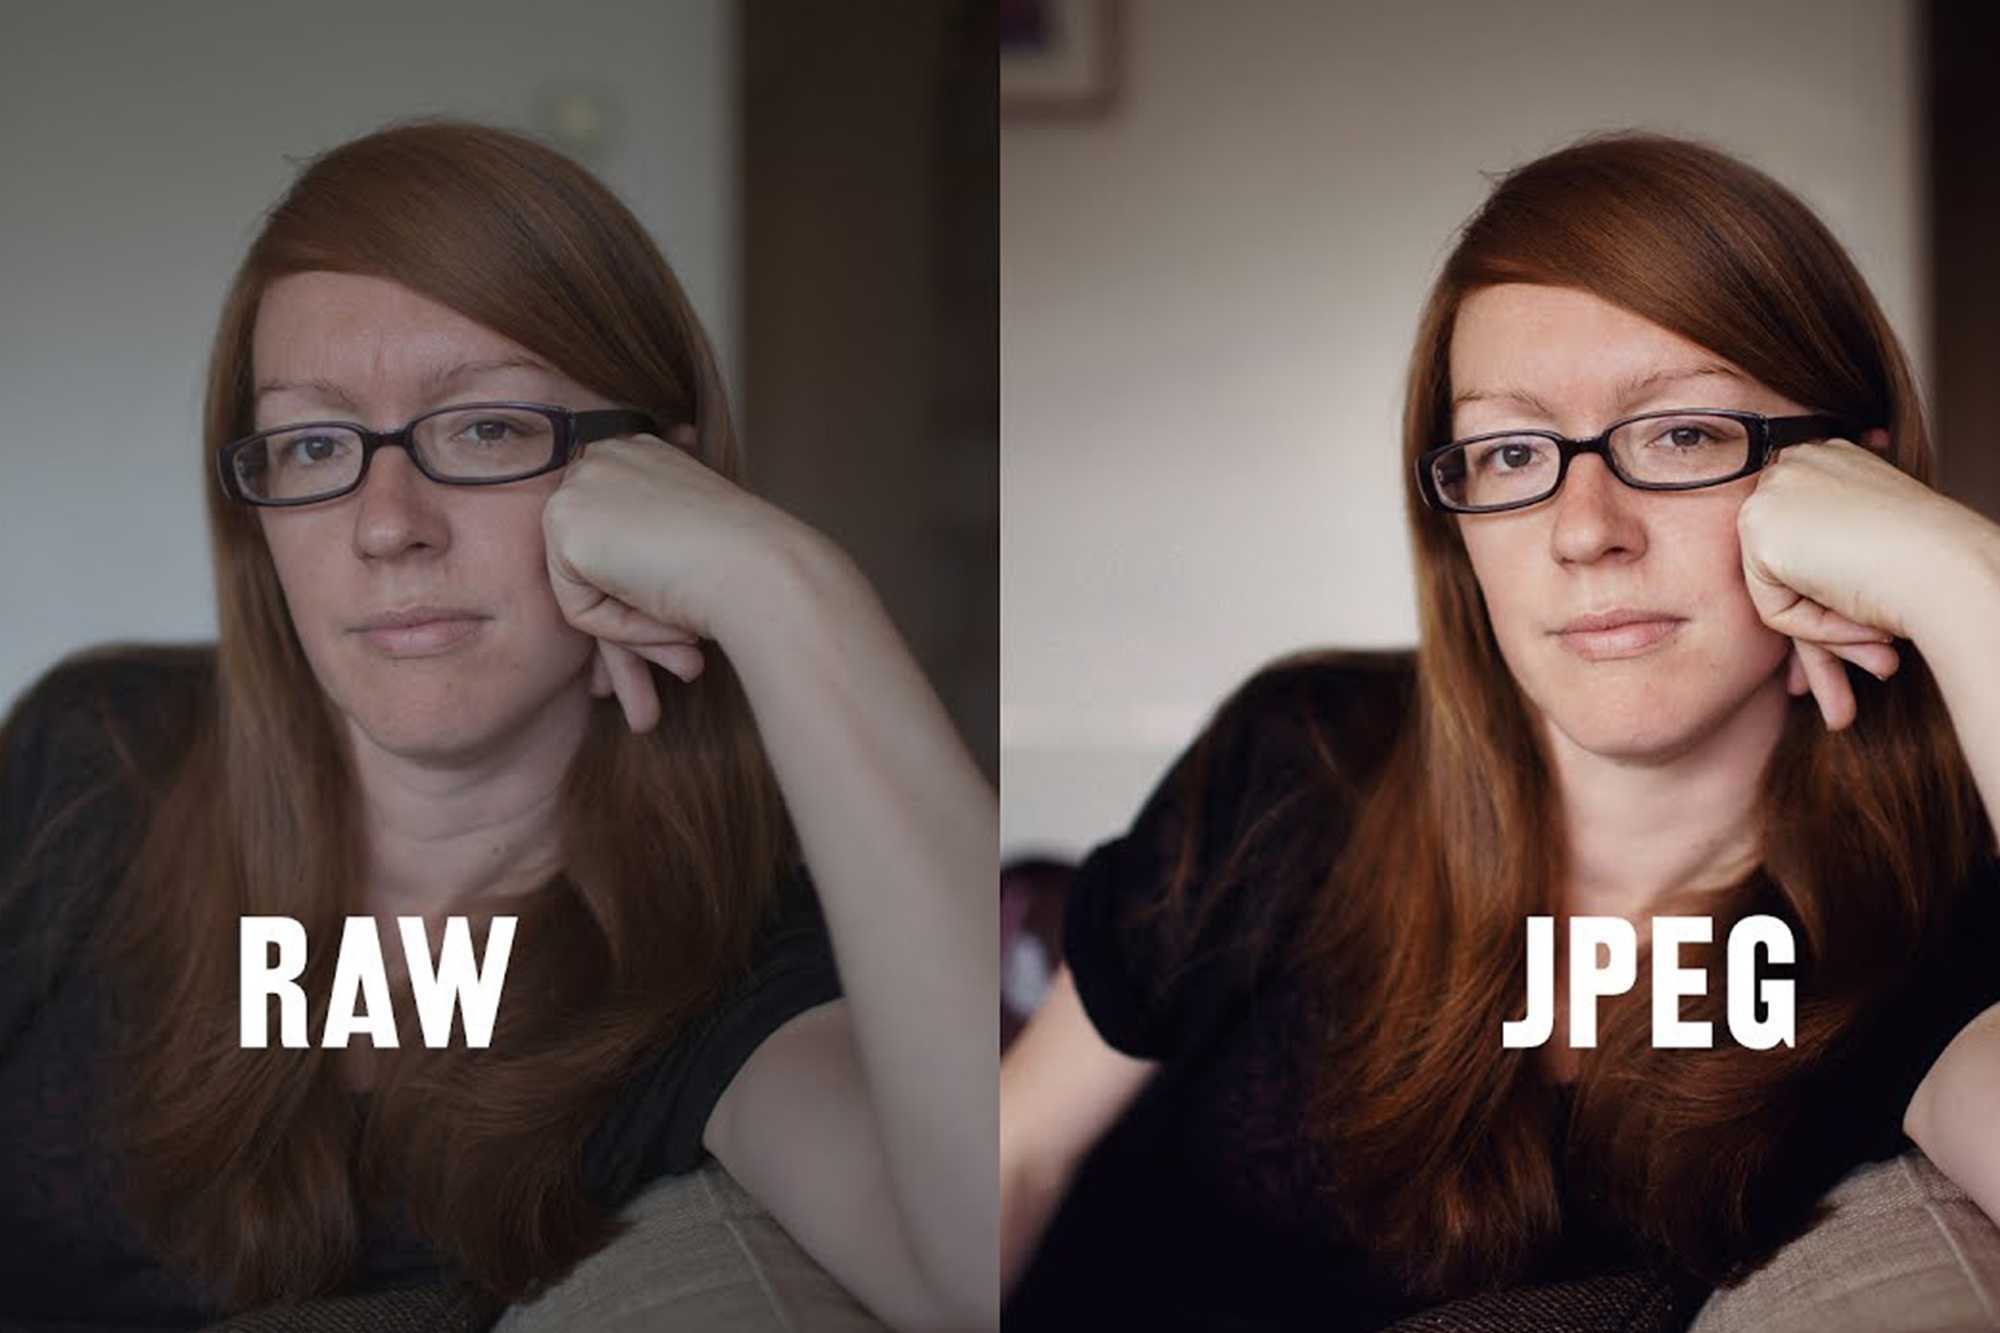
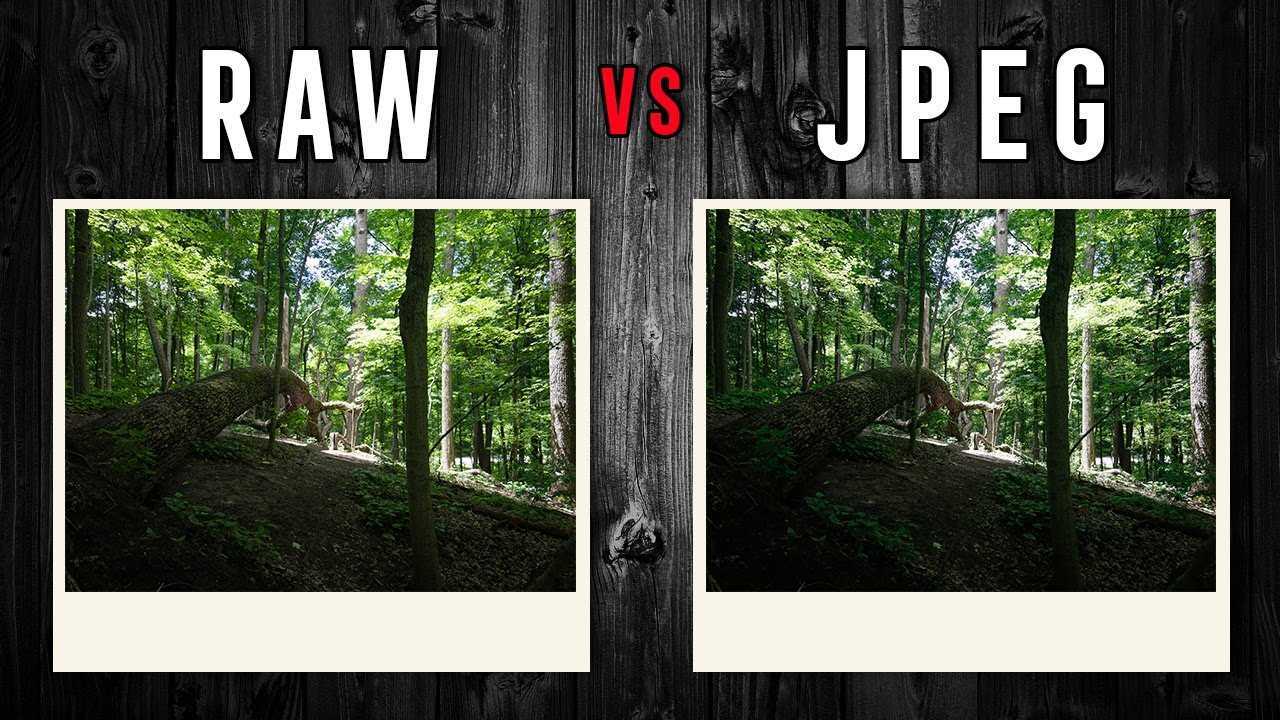
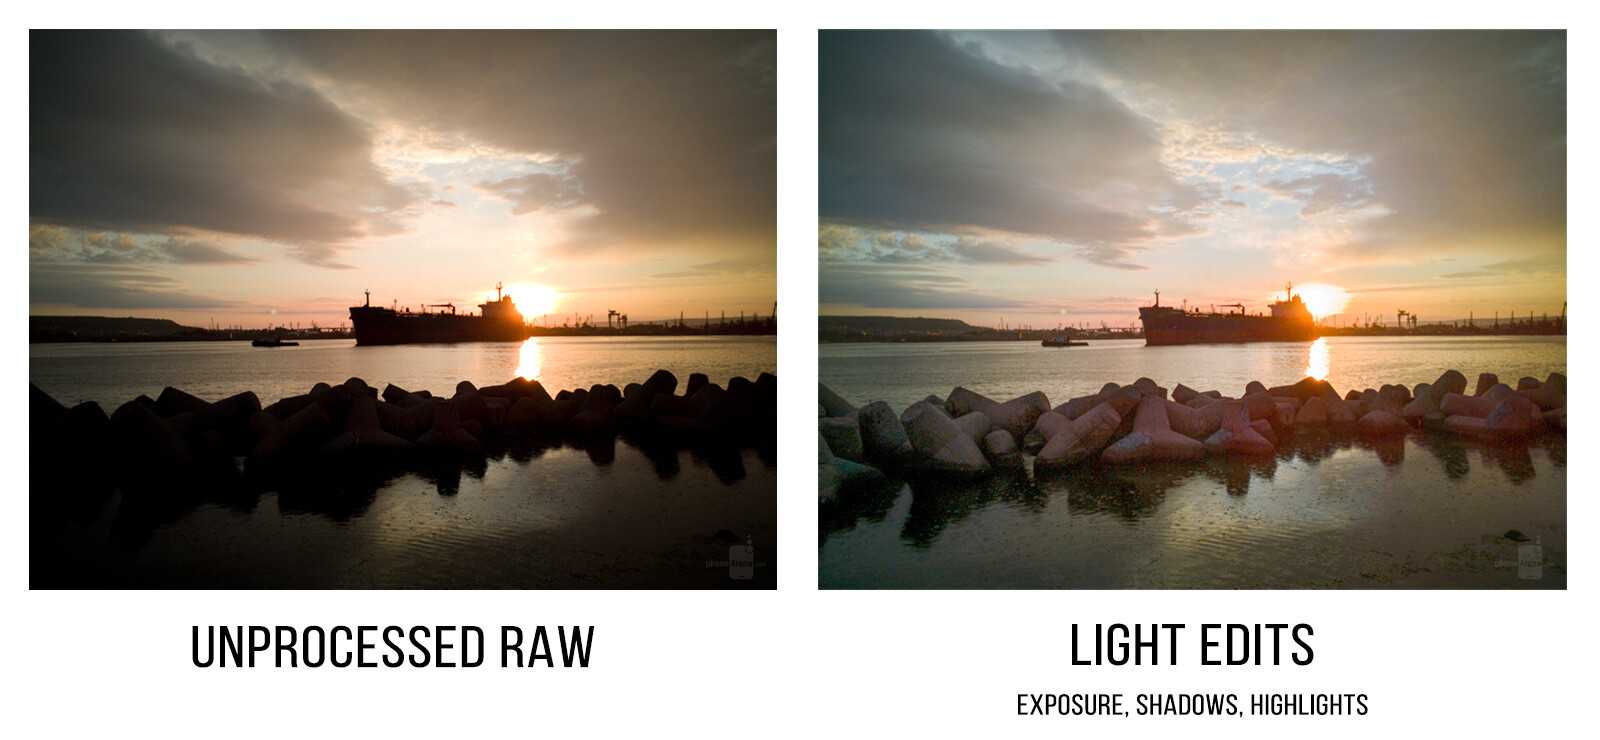
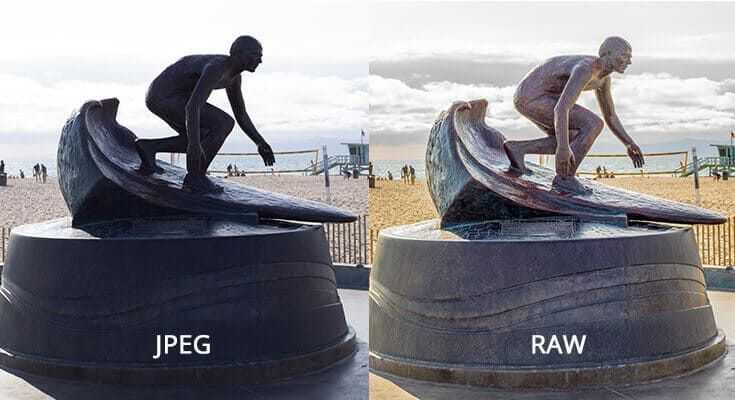
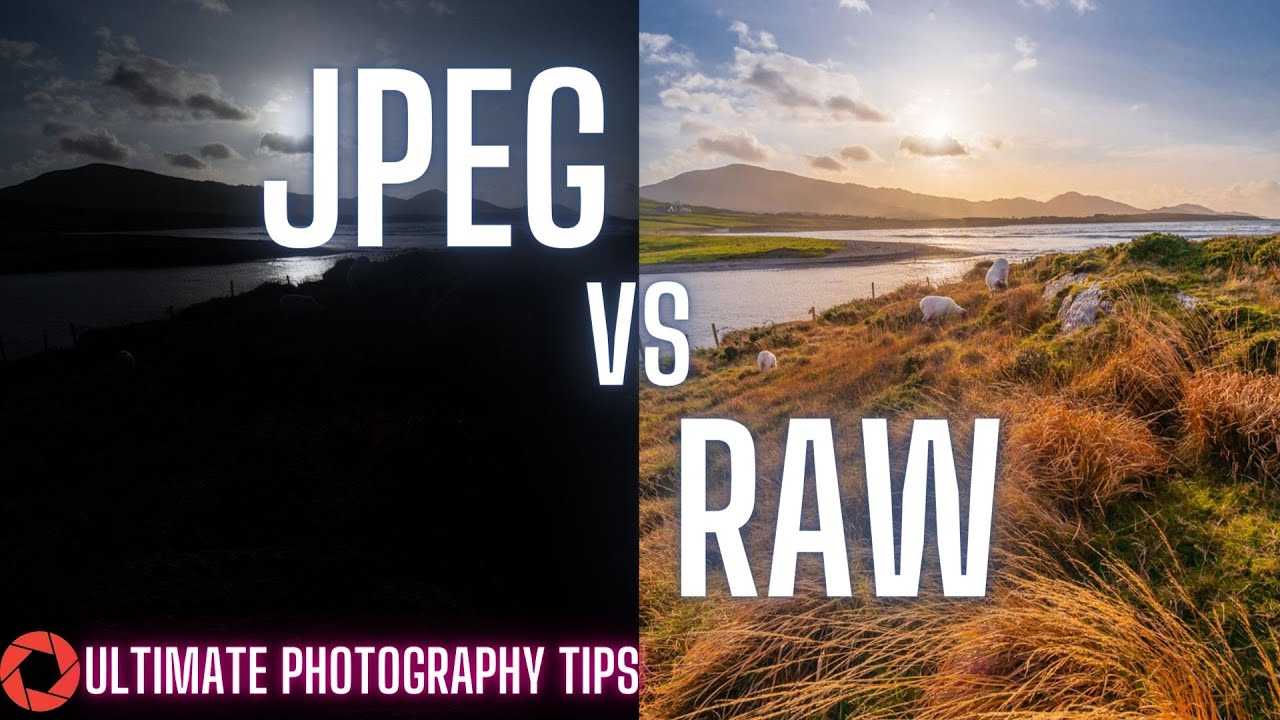
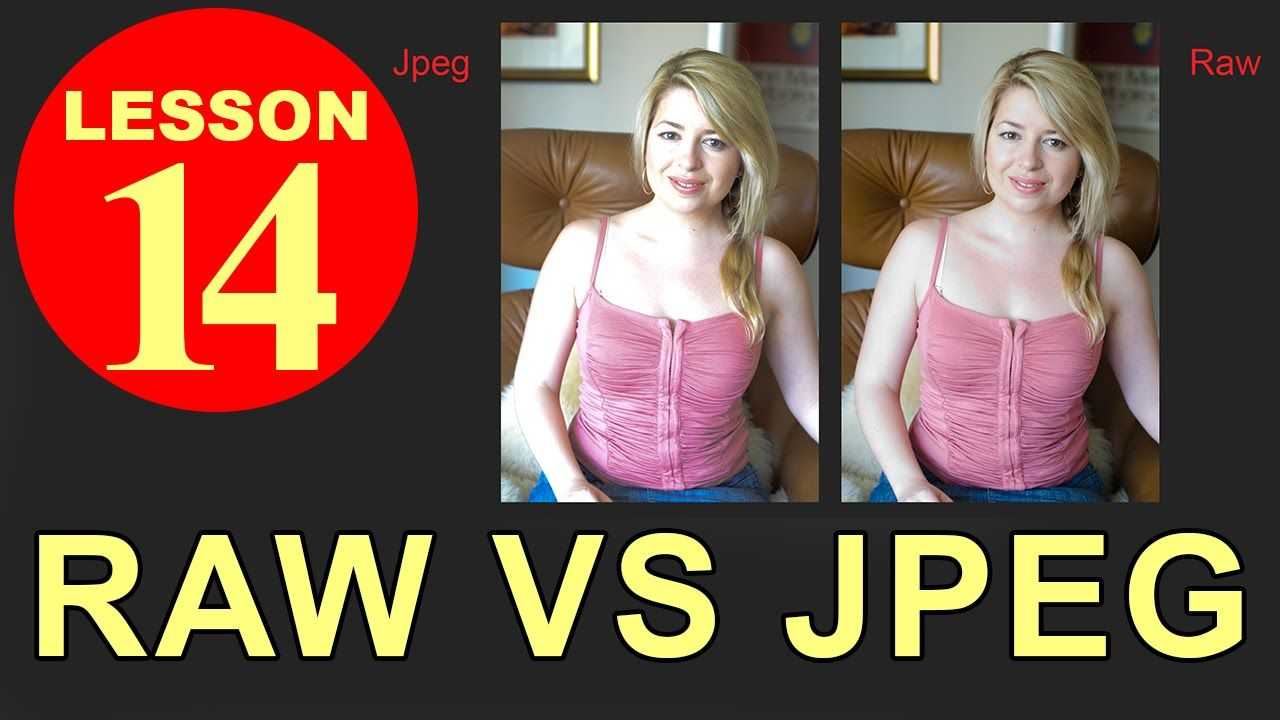
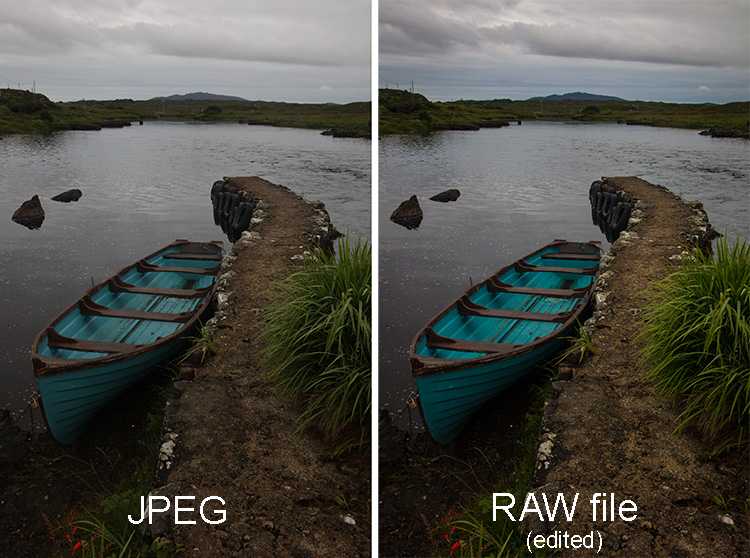
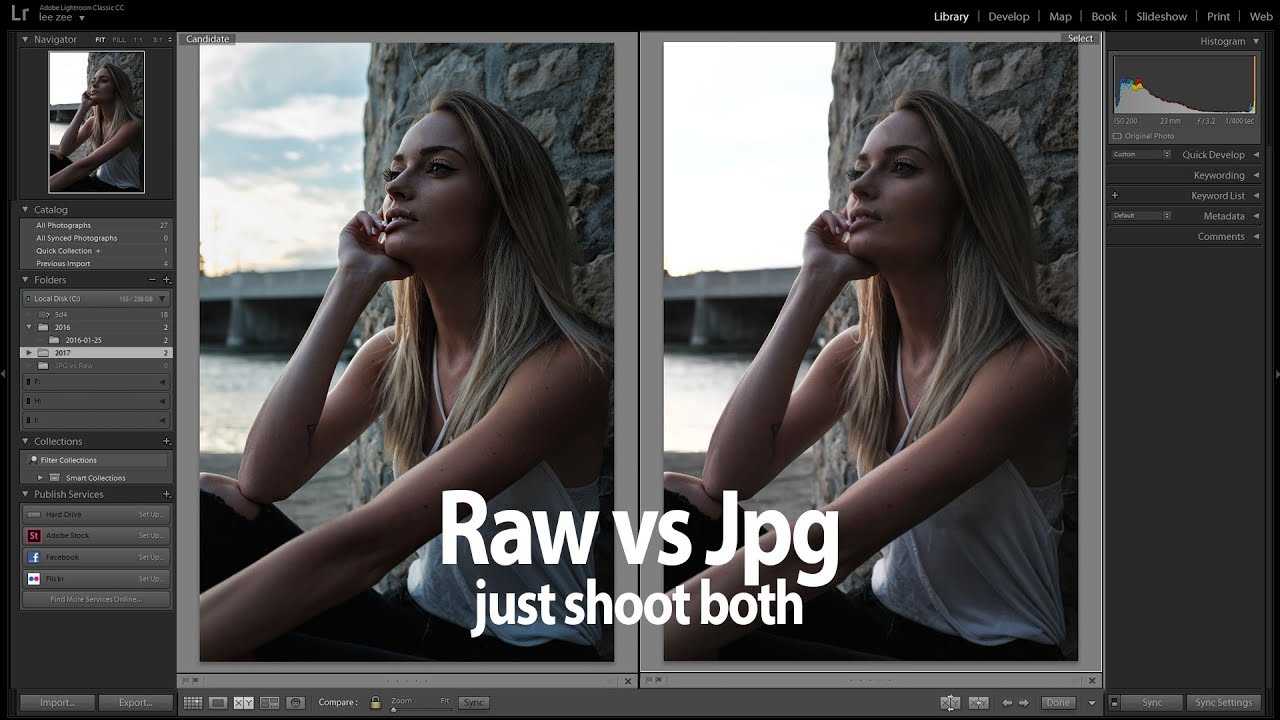
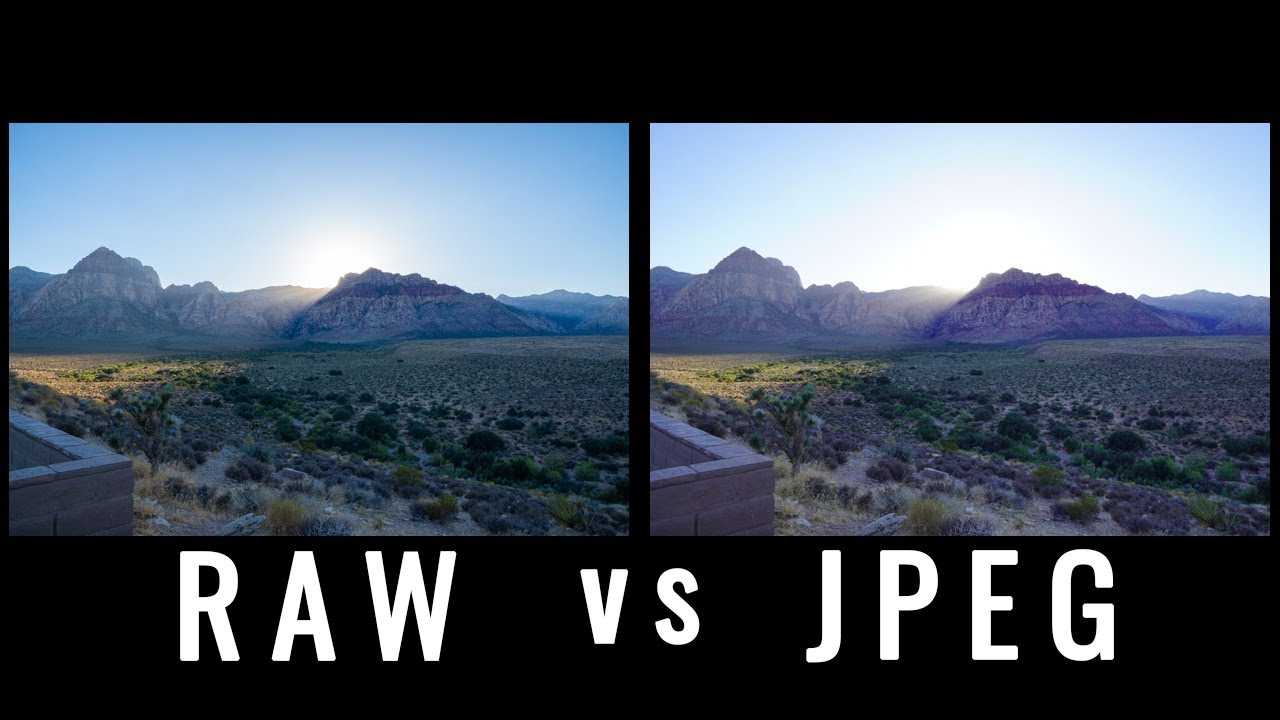
Should I edit photos in raw or JPEG?
Editing photos in RAW format allows for more flexibility and less image quality loss, but it requires specialized software and is not always necessary.
Can I change a photo on my phone to JPEG?
If the photo was originally saved as a JPEG, then there is no need to change it. However, if the photo is saved in a different format, you can convert it to JPEG using an image editing app or software.
Why is JPEG so popular?
JPEG is popular because it is a widely supported format that can compress images to a smaller size without sacrificing too much image quality.
Do JPEGs lose quality copied?
JPEGs can lose quality when copied or compressed, but the amount of loss depends on the compression ratio and other factors.
Is it better to scan or photograph old photos?
It depends on the quality of the original photo and the purpose of the scan or photograph. Scanning can provide higher quality results, but photographing may be quicker and more convenient.
Is it better to save an image as a JPEG or PDF?
JPEG is better for storing and sharing images, while PDF is better for documents and files that need to be printed or shared in a consistent format.
How does Progressive JPEG Encoding work?
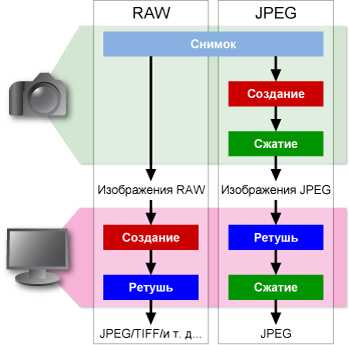
We’ve already gone through the various steps involved in JPEG compression in our guide to JPEG compression.
To refresh your memory, these are shown in the following diagram:
If you have not already done so, I highly recommend reading our article on /tmdhosting-deals/. It will give you a detailed understanding of all the stages shown in this diagram.
However, let’s quickly refresh ourselves on a few pertinent details:
- All images are divided into 8×8 pixel blocks, each processed separately.
- In each 8×8 block, there is a DC coefficient (top left pixel in the matrix), with the remaining being AC coefficients.
- In the entropy encoding stage, the Quantized Coefficients are processed in zigzag order, which helps group similar frequency pixels.
With baseline sequential JPEGs, the entire block 8×8 pixel block is processed in a zigzag order as follows:
With progressive JPEGs, this is not the case.
Progressive encoding encodes a few similar-positioned batches of coefficients of all the 8×8 blocks contained in the image in one go. This is called a scan.
This involves encoding the DC coefficient for all blocks, followed by a few AC coefficients (typically around 4), and then all the remaining AC coefficients.
This typically involves around three scans, depending on the software and settings.
This is how it looks on the diagram:
So, are Progressive JPEGs better?
If the choice is just a simple question between regular baseline or progressive JPEG, then yes, using a progressive JPEG is better.
If the choice is between progressive JPEG and another format such as Webp, AVIF, or SVG, then that depends.
Fortunately, we answer this question in detail later in the article.
Using JPEG #
You might feel a little overwhelmed by all this information. There’s good news for your day-to-day work, though: the more technical specifics of JPEG compression are abstracted away, instead exposed as a single «quality» setting: an integer from 0 to 100. 0 provides the smallest possible file size, and as you might expect, the worst possible visual quality. As you progress from 0 to 100 both the quality and the file size increase. This setting is subjective, of course—not every tool will interpret a value of «75» the same way, and perceptual quality always varies according to the content of the image.
To understand how this compression setting works, let’s use a common web-based tool for optimizing image files: Squoosh.
Squoosh—maintained by the Chrome team—provides a side-by-side comparison between different methods of encoding and configuring image outputs, with configuration options ranging from a 0-100 global «quality» slider, to the ability to fine-tune details of chrominance vs. luminance resampling. The lower the «quality» number, the higher the compression, and the smaller the resulting file will be.
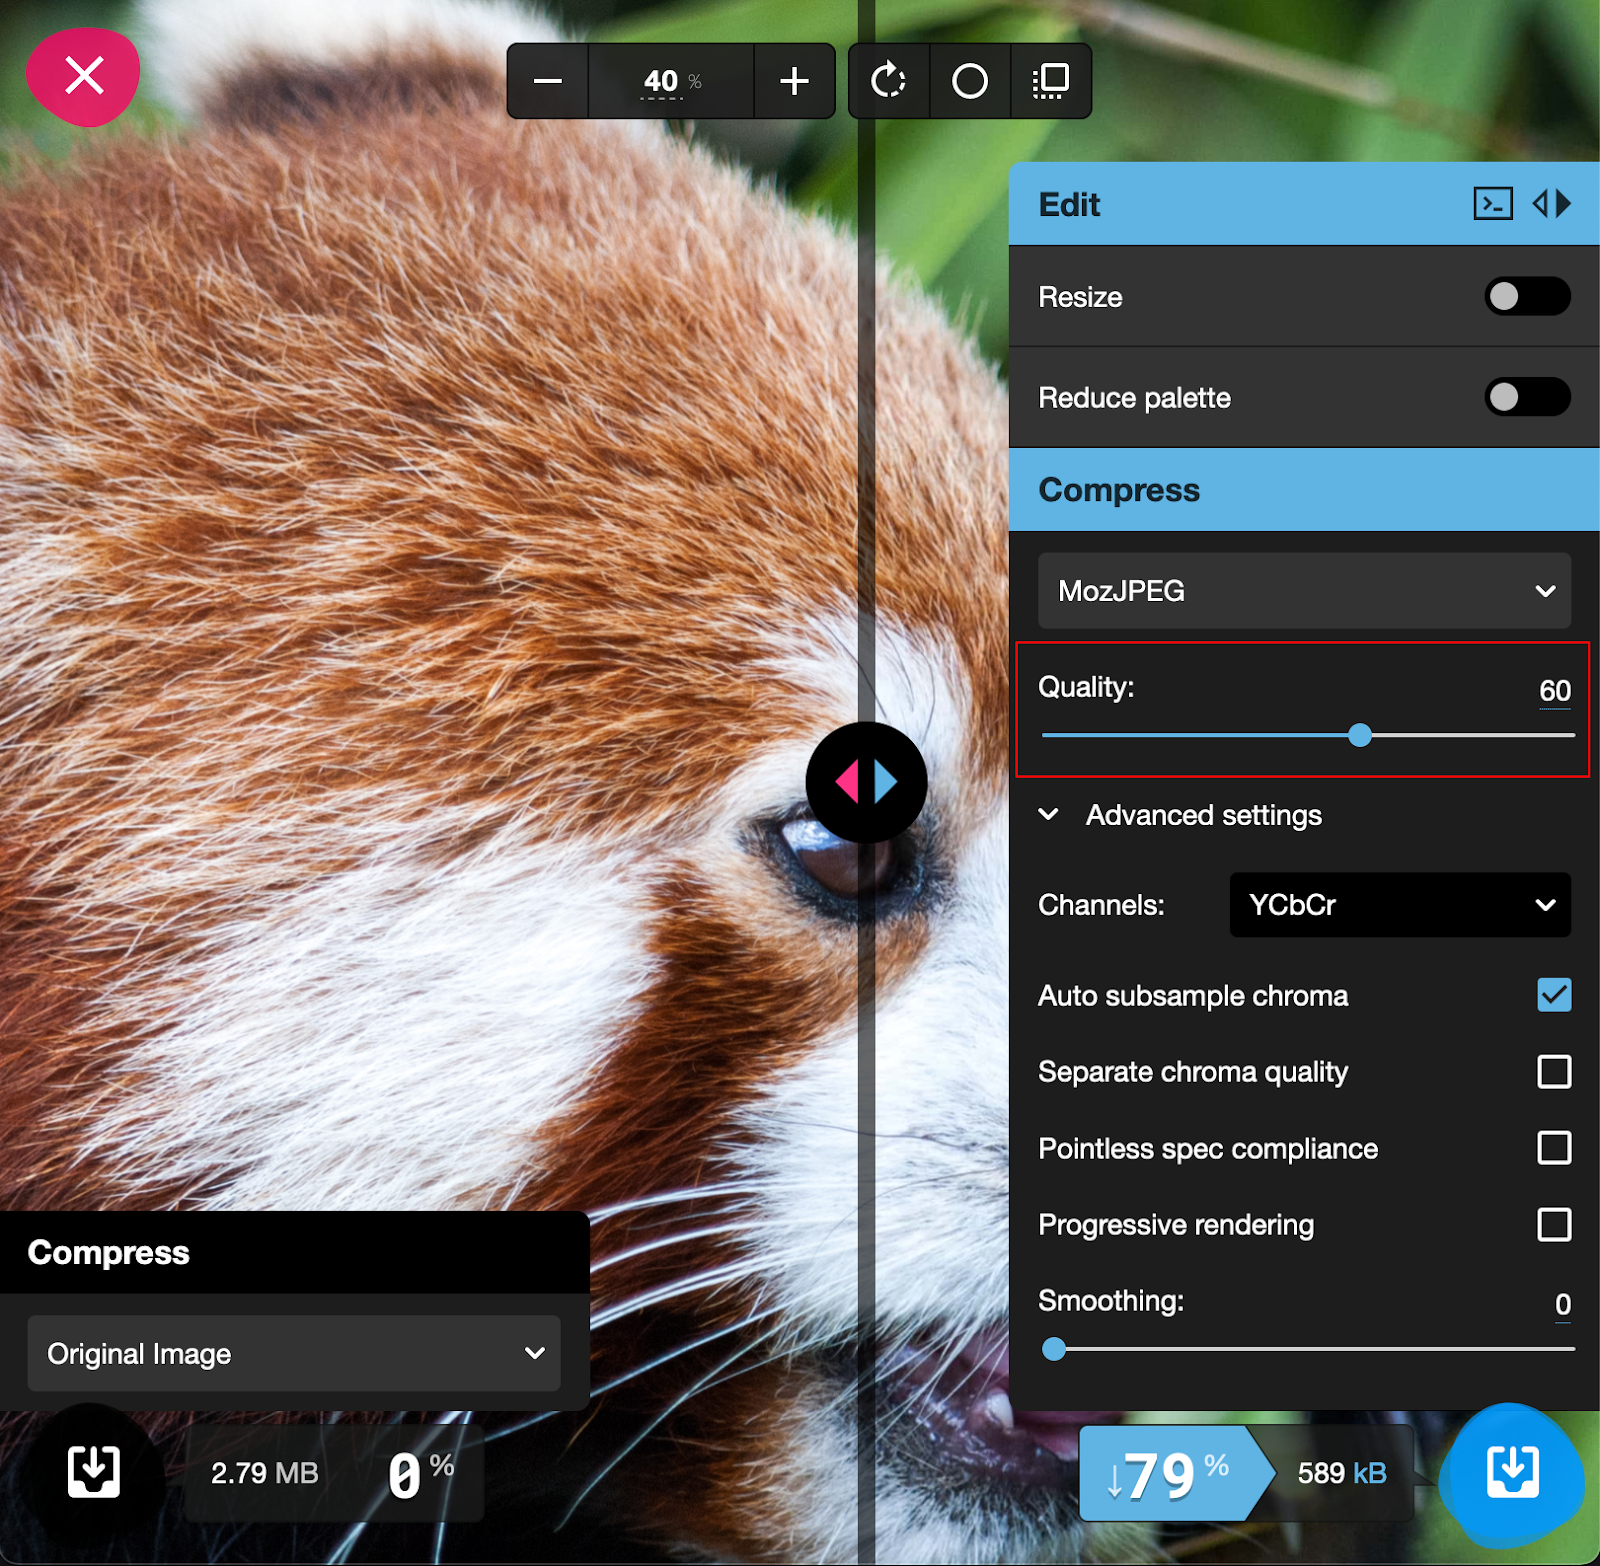
Here, with the «quality» set to 60, the file size is reduced by 79%. Don’t be fooled by the implications of this label: differences in quality across most of the scale will be imperceptible to the human eye, even when performing a side-by-side comparison.
To convert your source image to a progressive JPEG, tick the box labeled «progressive rendering» under «advanced options.» Some of these configuration options are almost certainly a deeper dive than the average web project will require, but they can provide you with a closer look at how the things you’ve learned about JPEG encoding impact file size and quality in real world use cases.

There is not much to it in practical terms, despite how complicated we now know JPEG to be internally. Squoosh is just one of countless methods of saving optimized JPEGs, all of which use a similar method of determining the compression level: a single integer between 0 and 100.
Determining the ideal level of compression for your images is a finesse game, given that all the complexity of JPEG encoding is being distilled down to a single integer, especially when so much hinges on the content of an image. Like thinking about blinking or breathing, considering JPEG compression settings changes how we perceive them.
Looking back outside now, after writing all this, my psycho-visual processing has become more manual—now I’m looking at the individual leaves, even though the picture itself—so to speak—hasn’t changed. That makes configuring JPEG compression a little fraught: you know exactly what kinds of visual defects to look for. By thinking about image compression in the first place, you’re focusing on individual leaves—we’re primed to spot slight blurring and the occasional compression artifact. The harder you look for artifacts while fine-tuning your JPEG compression settings the more likely you are to find them, when a user likely wouldn’t. Even if that user knew exactly what to look for, they’re not likely to visit a page with JPEG compression on their mind.


Problem No. 13: Which autofocus mode should I use?
Most cameras featurre two basic autofocus (AF) modes: Single and Continuous (though Canon helpfully calls them One-shot and AI-Servo).
For general shooting, single mode works best because autofocus locks onto its target when you apply a light press to the shutter release button and remains fixed while you maintain the light press, until fully pressing the button to take your shot.
Continuous autofocus mode is better for moving targets, because focus continually tracks subjects, though how successful that will be is dependent on the sophistication of your camera’s AF system.
Learn more: 10 surefire ways to get your sharpest-ever shots
Upscale.media’s Image Resolution Boosting Features:
1. Quickly improve image quality
Using a technique that utilizes artificial intelligence, the Upscale.media software can, with a simple button, upscale an image from lower quality to a version with a better resolution.
The technology eliminates the need for manual involvement from a person or the need to use confusing buttons while increasing the image resolution.
2. Remove JPEG artifacts
JPEG artifacts are something that is commonly seen in digital images. Do they appear as random, colorful patches or streaks across the image? People frequently mistake them for noise. This is because of the way they seem. JPEGs are prone to artifacts because the image file is compressed.
During the process of image compression, a computer can reduce the file size of an image by removing what it determines to be extraneous details. There could be blurring, streaking, and a reduction in the integrity of the colors.
Users of Upscale.media can remove JPEG artifacts from their images by pressing the «Enhance Quality» button, all while maintaining the subtlety, clarity, and other natural elements present in the original image.
3. Boost image resolution by 4X
Imagine for a moment that you could easily and rapidly quadruple the resolution of a photograph of the widely used Upscale. The media app, powered by artificial intelligence, makes it easy to instantly boost image resolution by selecting a personalized choice button (2X or 4X).
4. Professionals can use it in all fields
Suppose you are an artist, the owner of an online business, an independent photographer, or a real estate specialist. In that case, you can make a fantastic first impression by converting your low-quality photographs into high-quality images with only the click of a button.