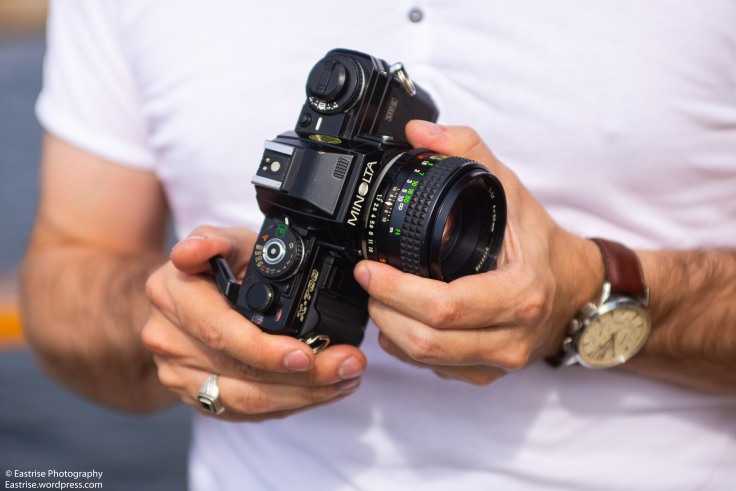
What Lens Mount Does the Minolta SR-T 101 Use?
The Minolta SR-T 101 uses the Minolta MD lens mount.
Technically it is the Minolta SR mount, but no one calls it that. It is called the MD mount because that was the name of the last revision to the Minolta mount. That’s why the camera model includes SR-T or SRT, depending on how you want to write it.
Lenses are backward compatible with older camera models, so there isn’t a downside to referring to it as the MD mount instead of SR.
Minolta SR vs MC vs MD
The Minolta SR mount is a bayonet style mount. The MC and MD revisions were made so that camera features could be added.
- SR — Features an automatic aperture diaphragm. When the camera shutter release is pressed, the camera will automatically stop down to the set aperture. This allows for focusing with the aperture wide open, so the focus screen is as bright as possible.
- MC — Adds meter coupling. This allows the camera to do full aperture metering. Previously you would have had to use stop-down metering, which required the lens to be stopped down to get a correct light meter reading.
- MD — Allows the camera to read the smallest aperture available and lets the camera set the aperture. The benefit of this is that combined with accurate metering it enables the use of shutter priority mode.
Standard Lens Cap Size
The standard lens cap and filter ring thread diameter used on most vintage manual focus Minolta lenses is 55mm.
There are lenses with smaller filter threads that were designed to be small and portable. Those models use 49mm filter threads.
Image quality
Olympus Zuiko MC Auto-S 50/1.8 with Focal Reducer
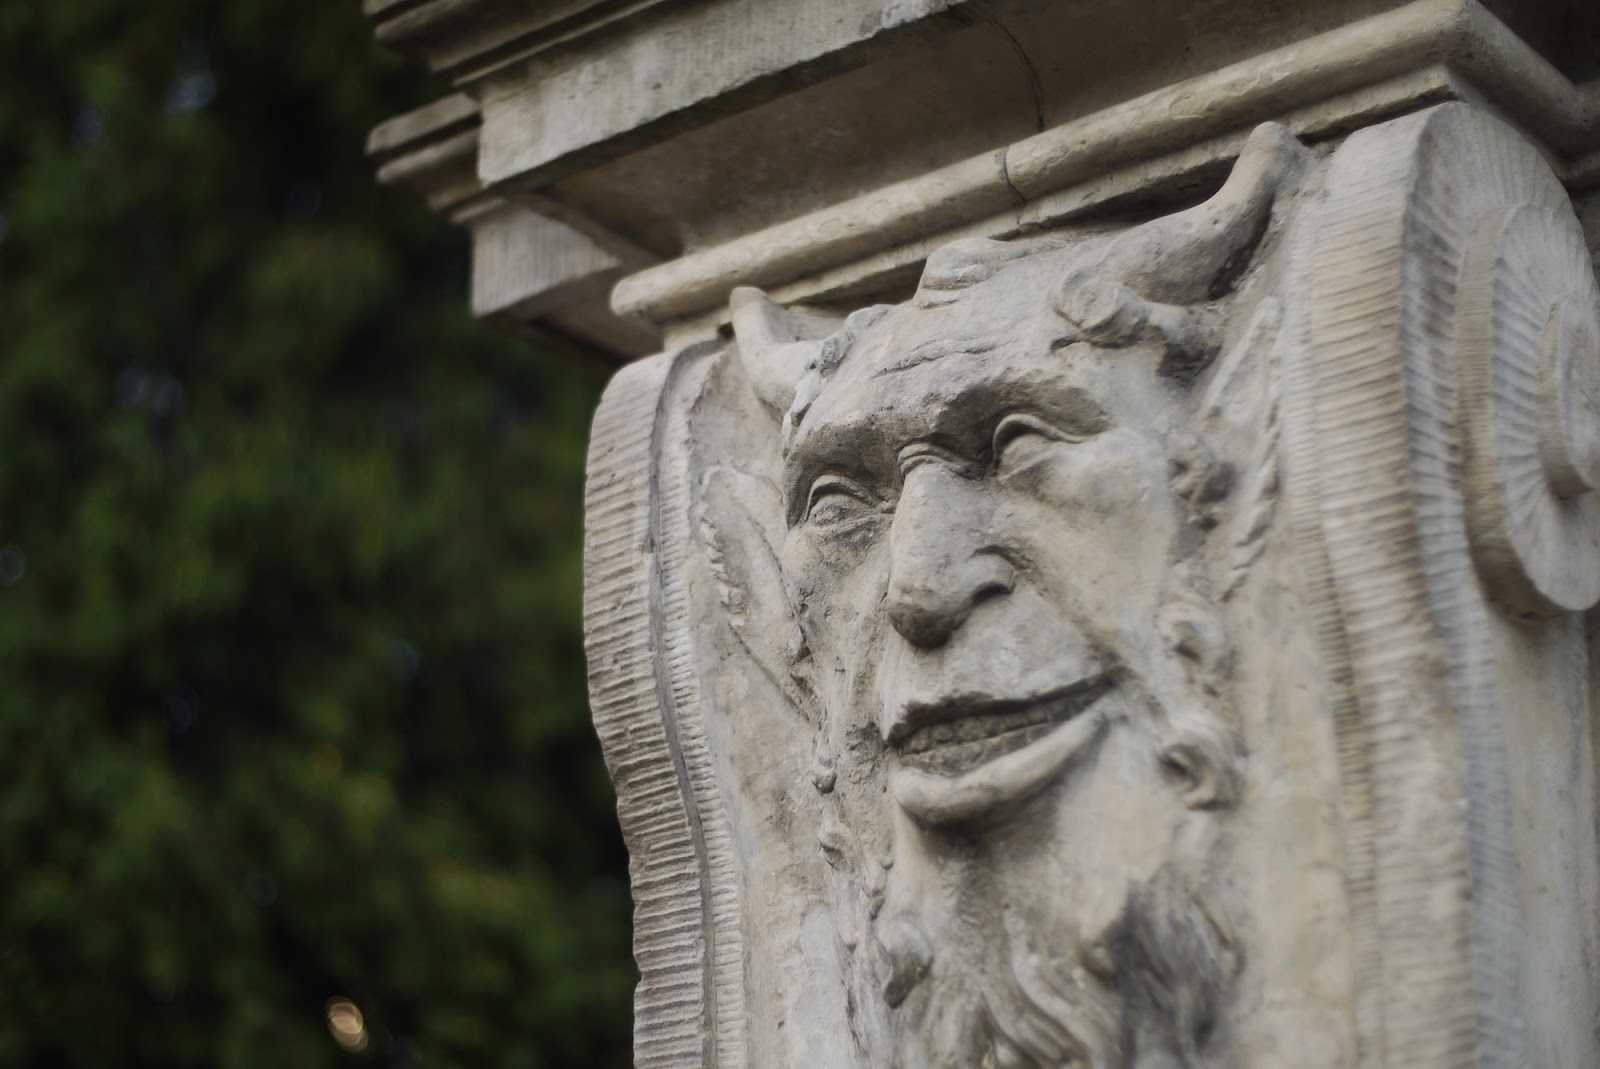 |
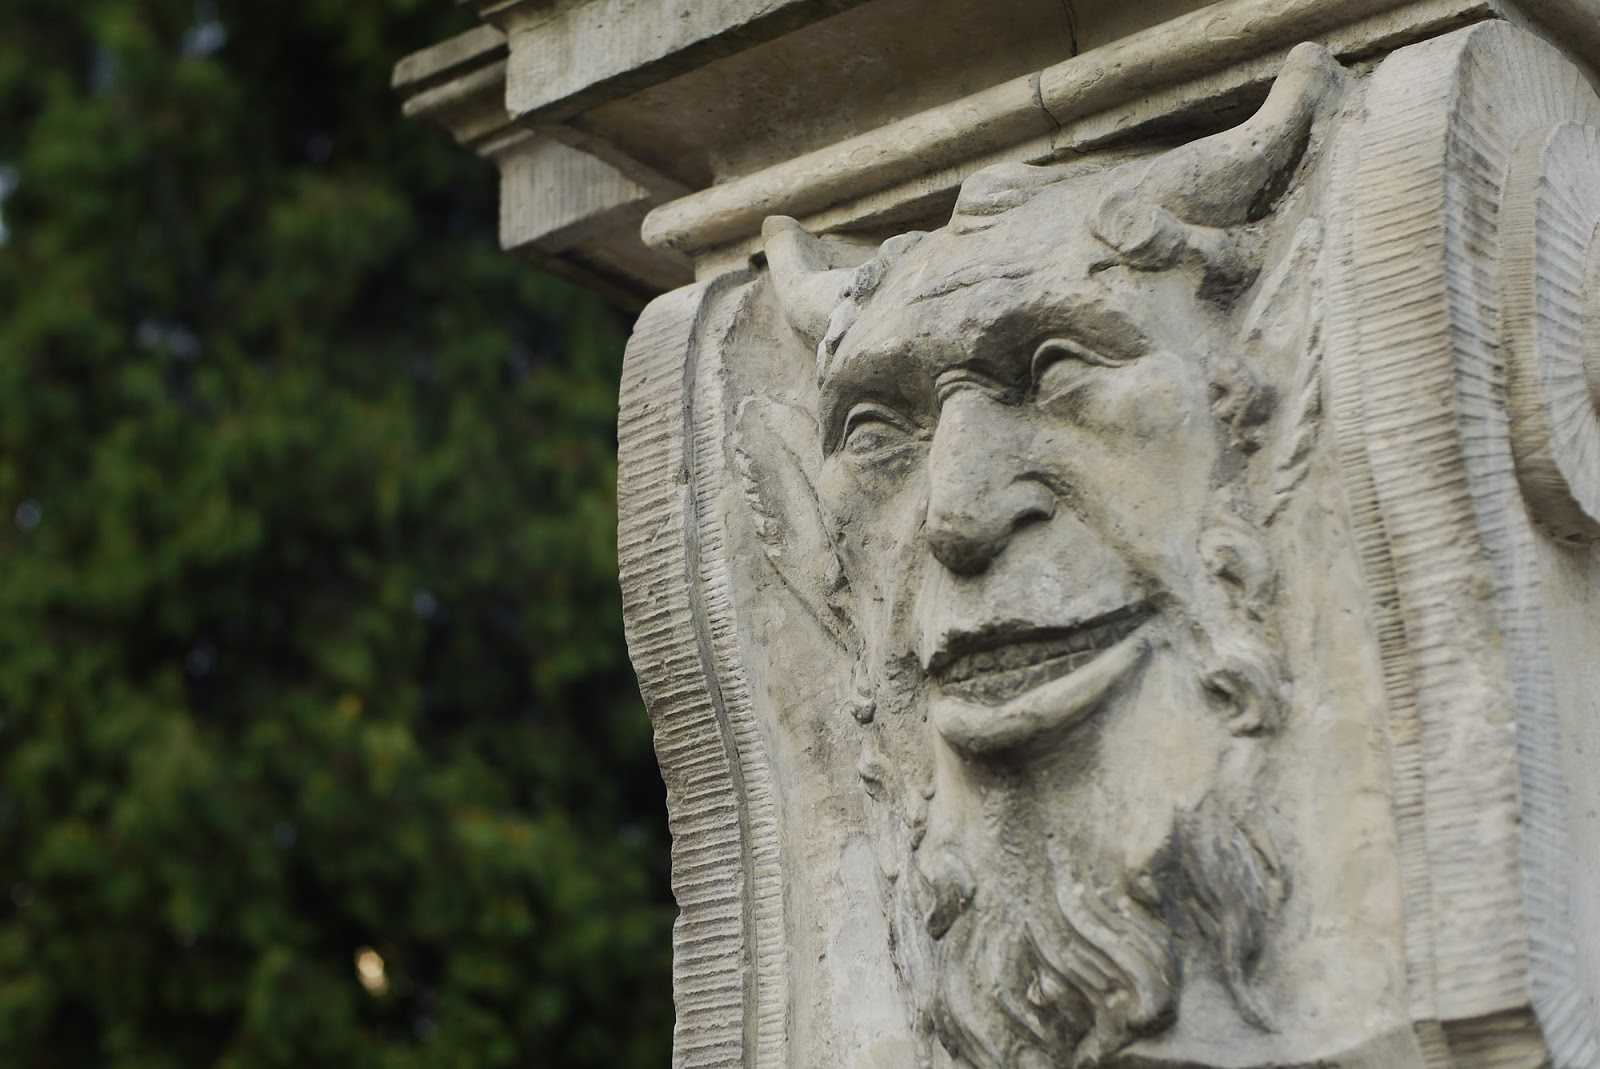
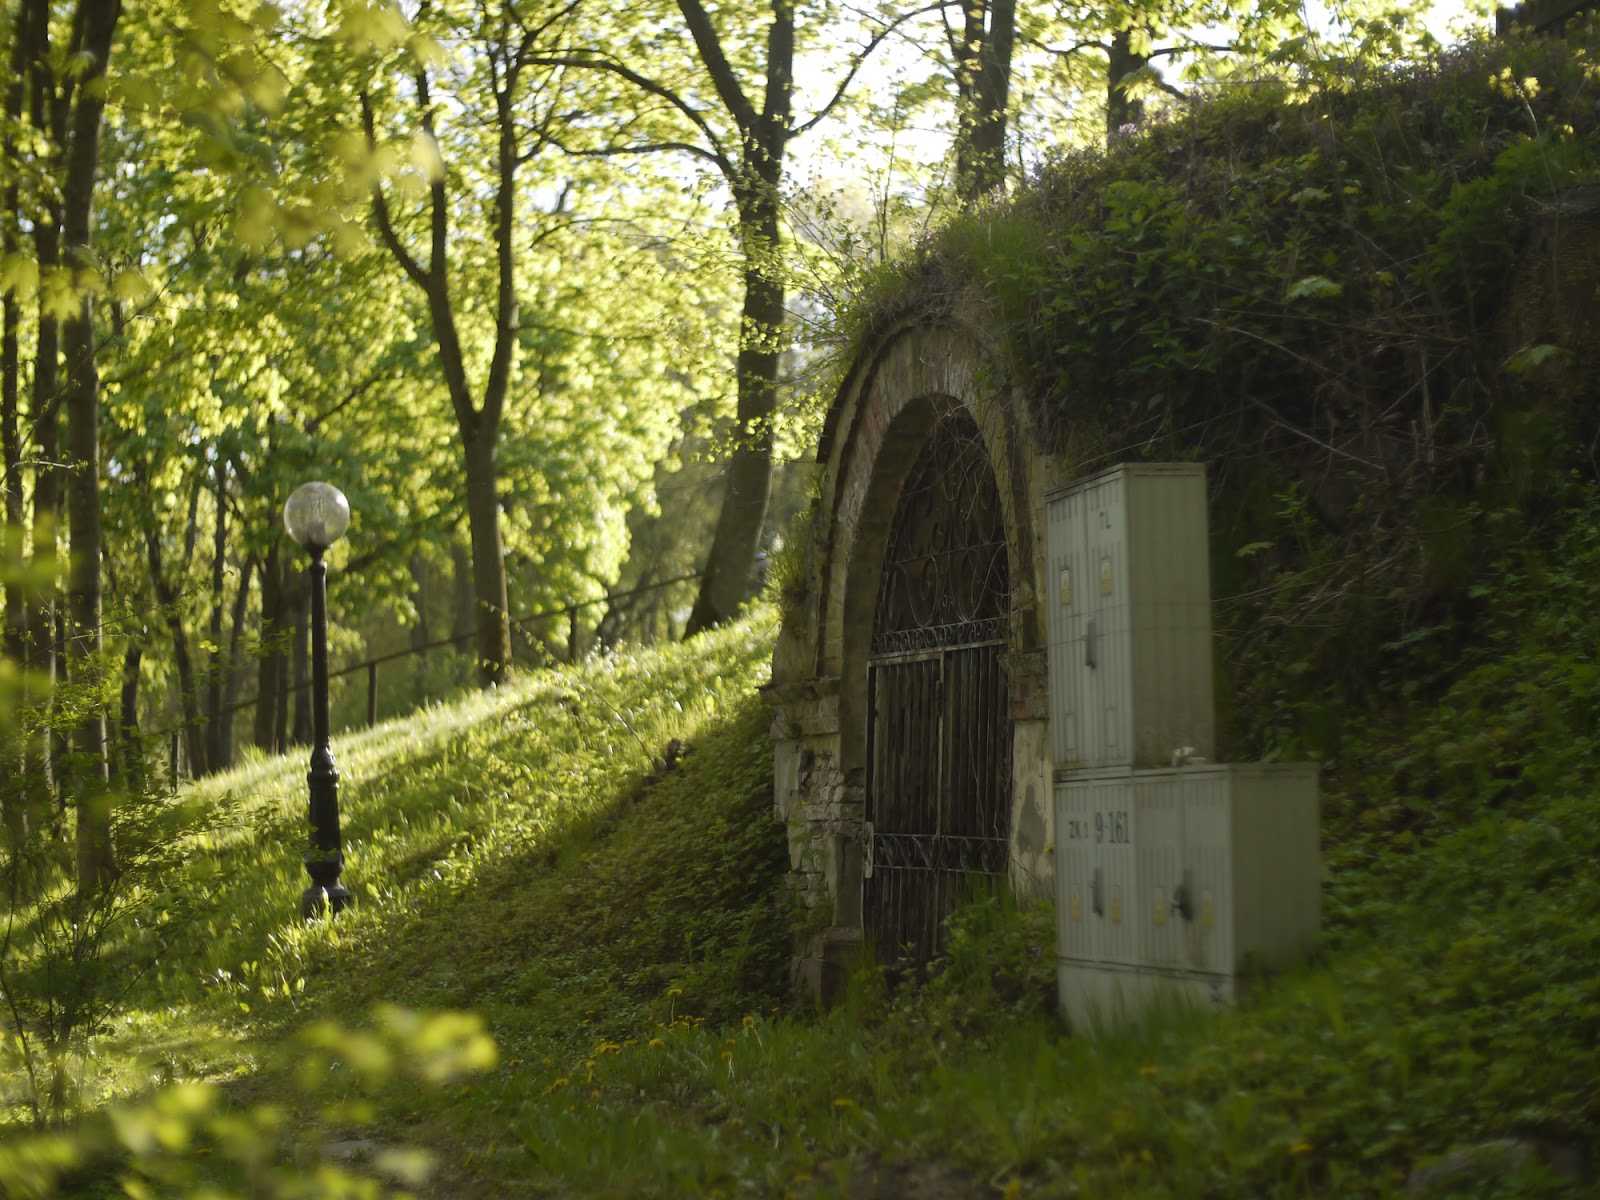
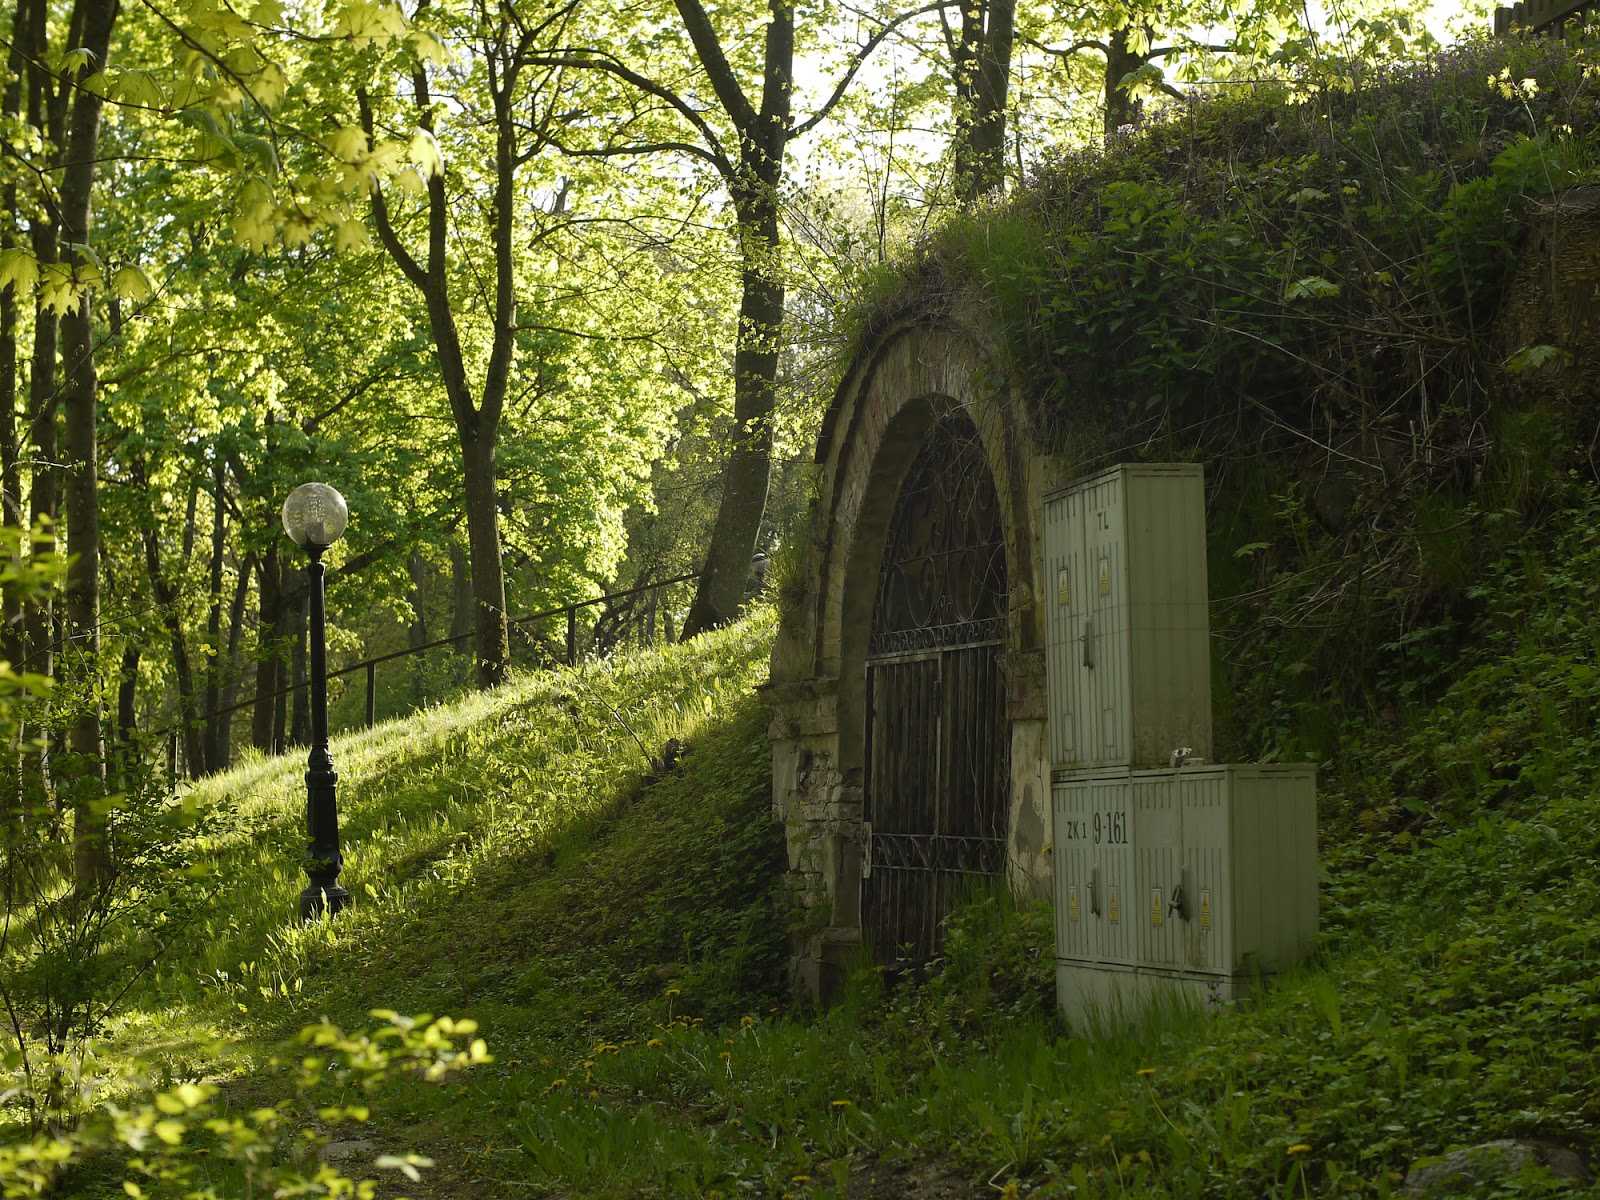
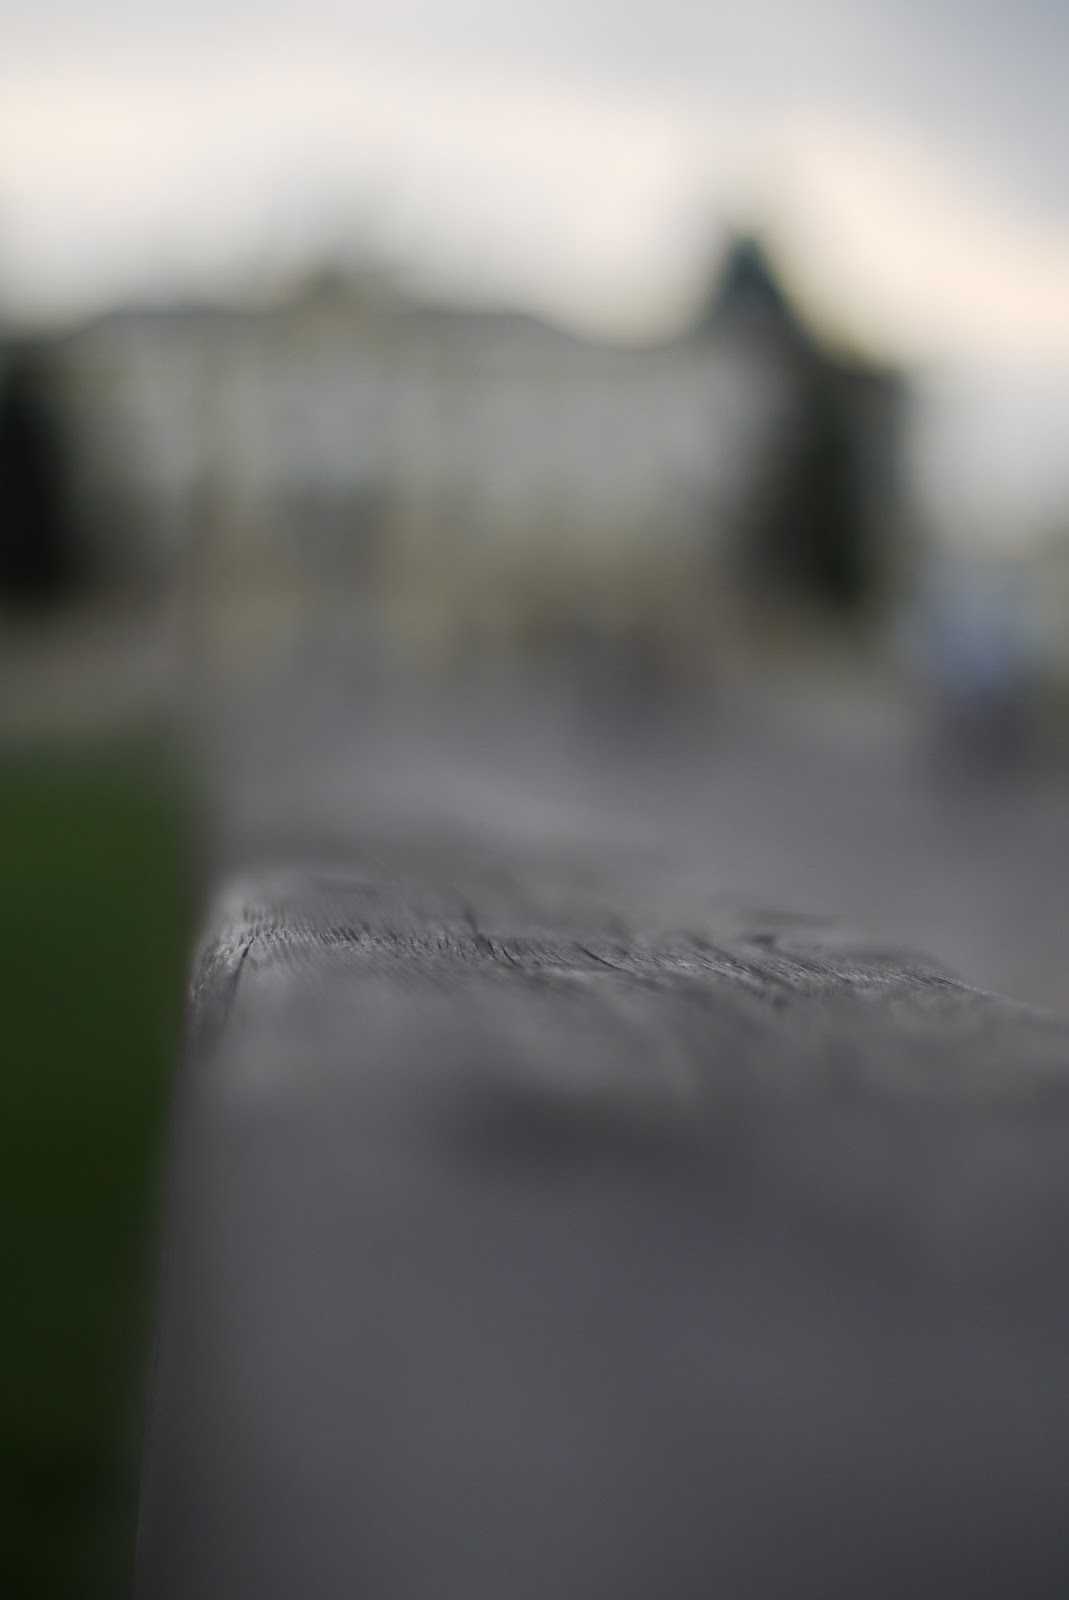
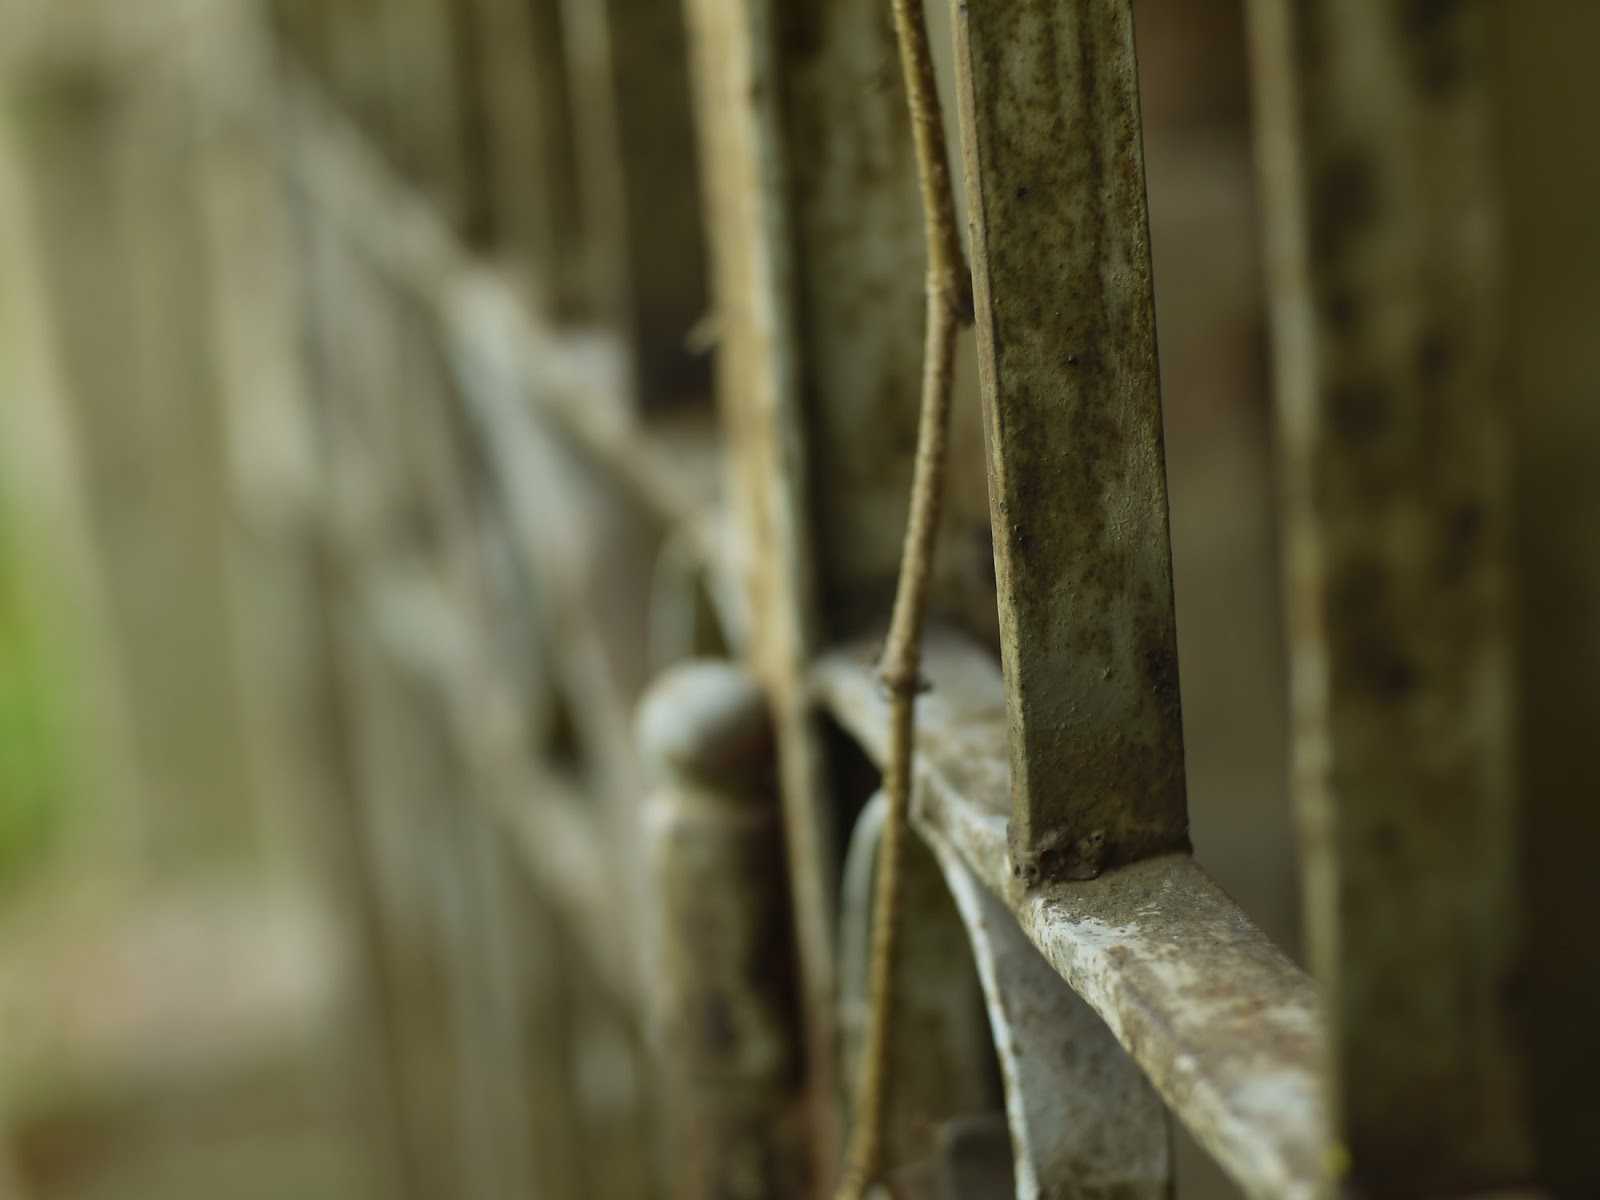
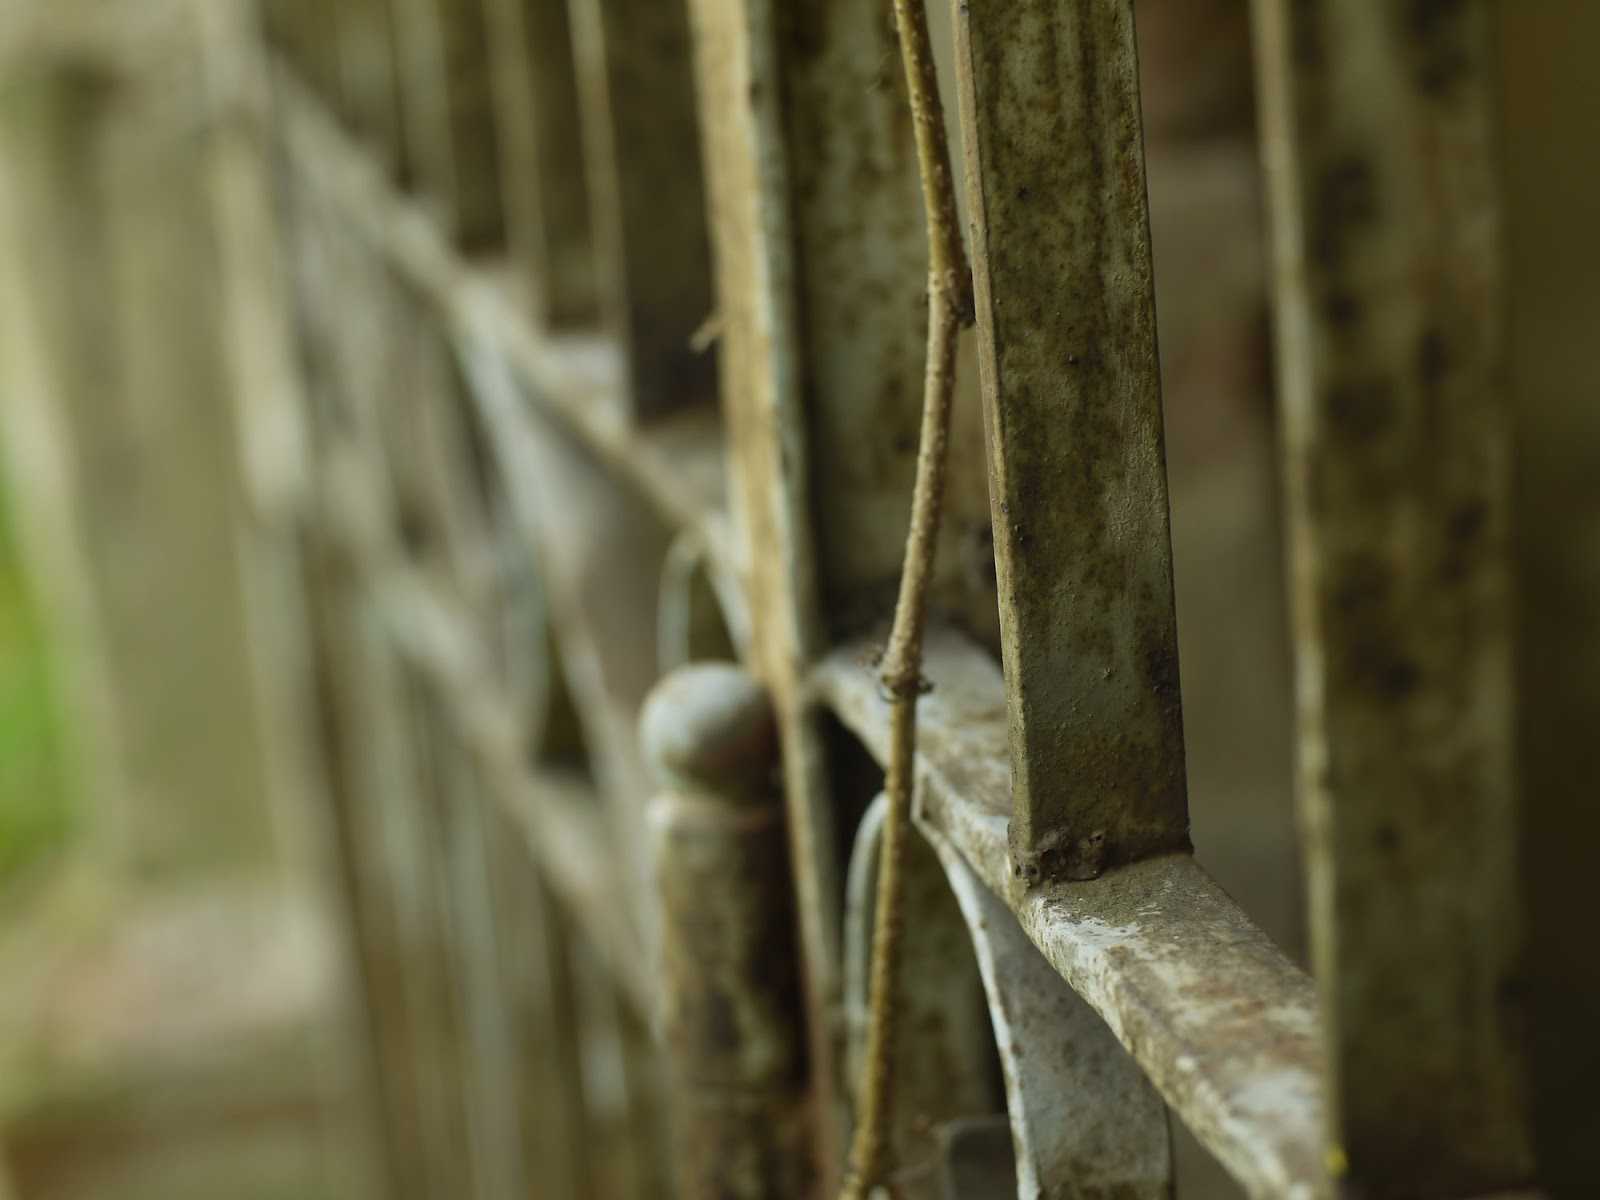
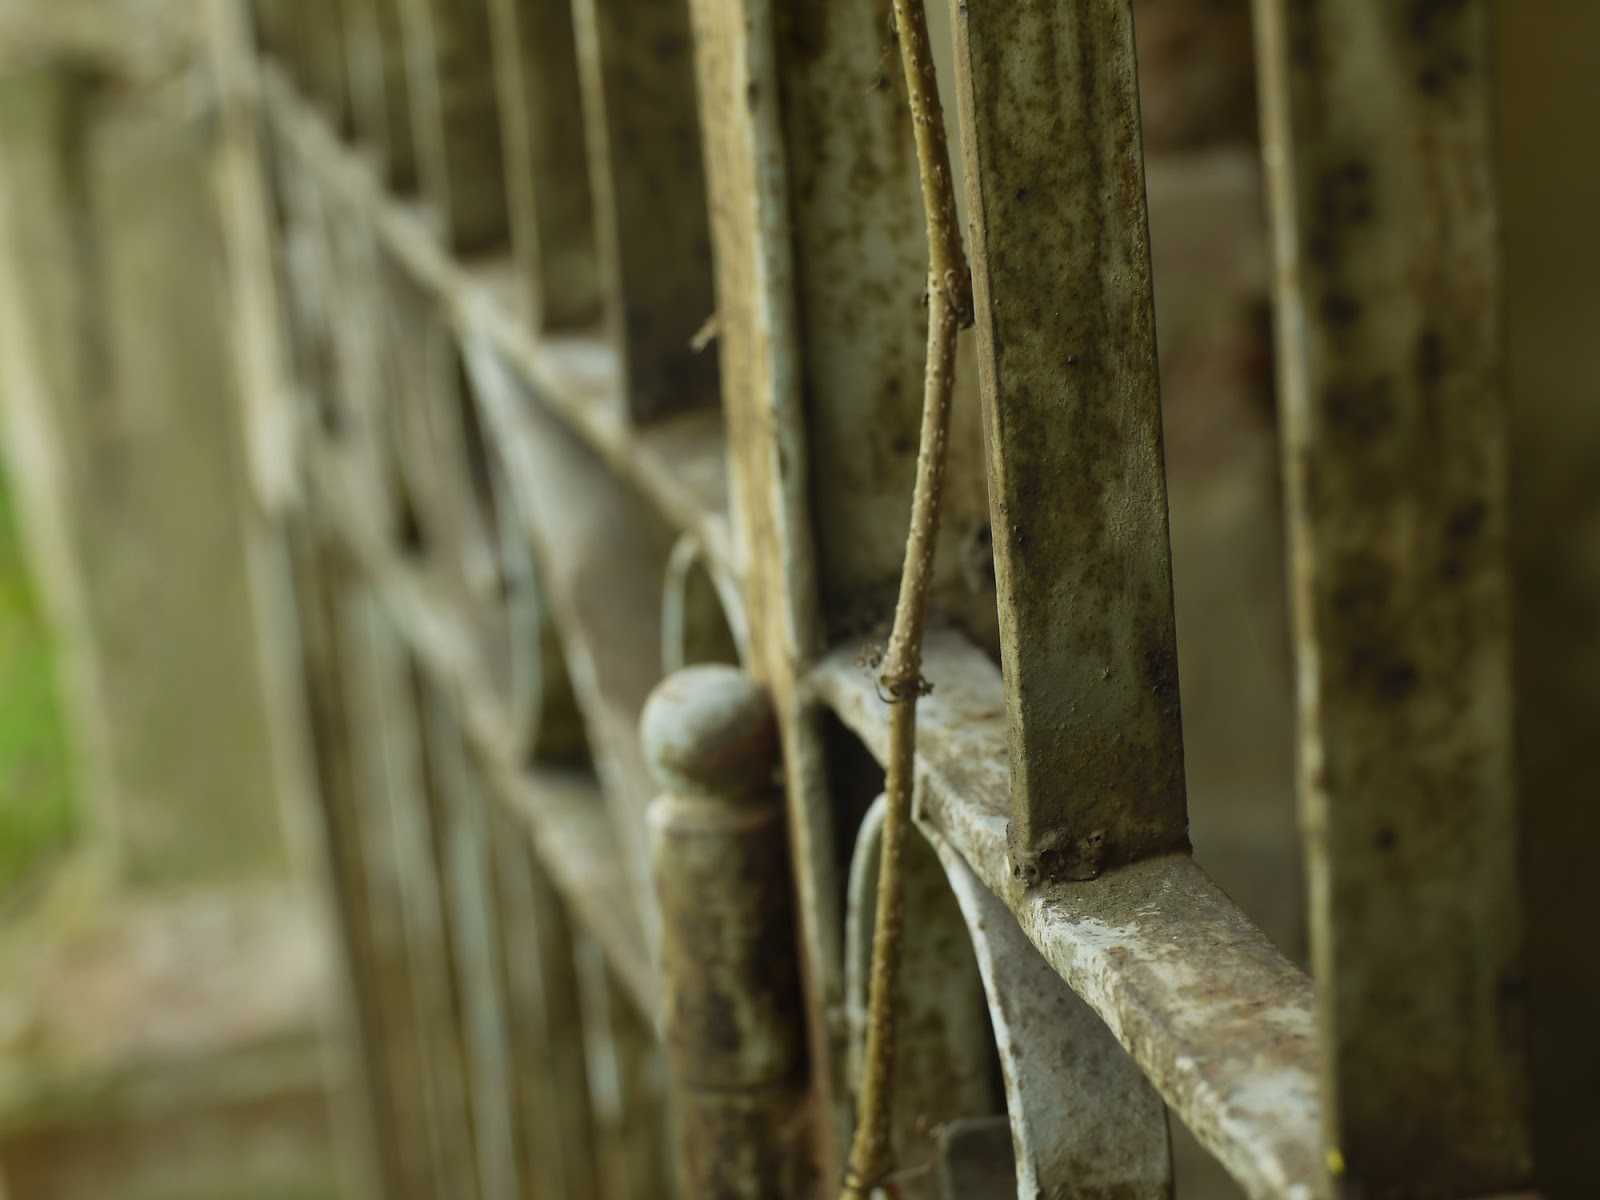
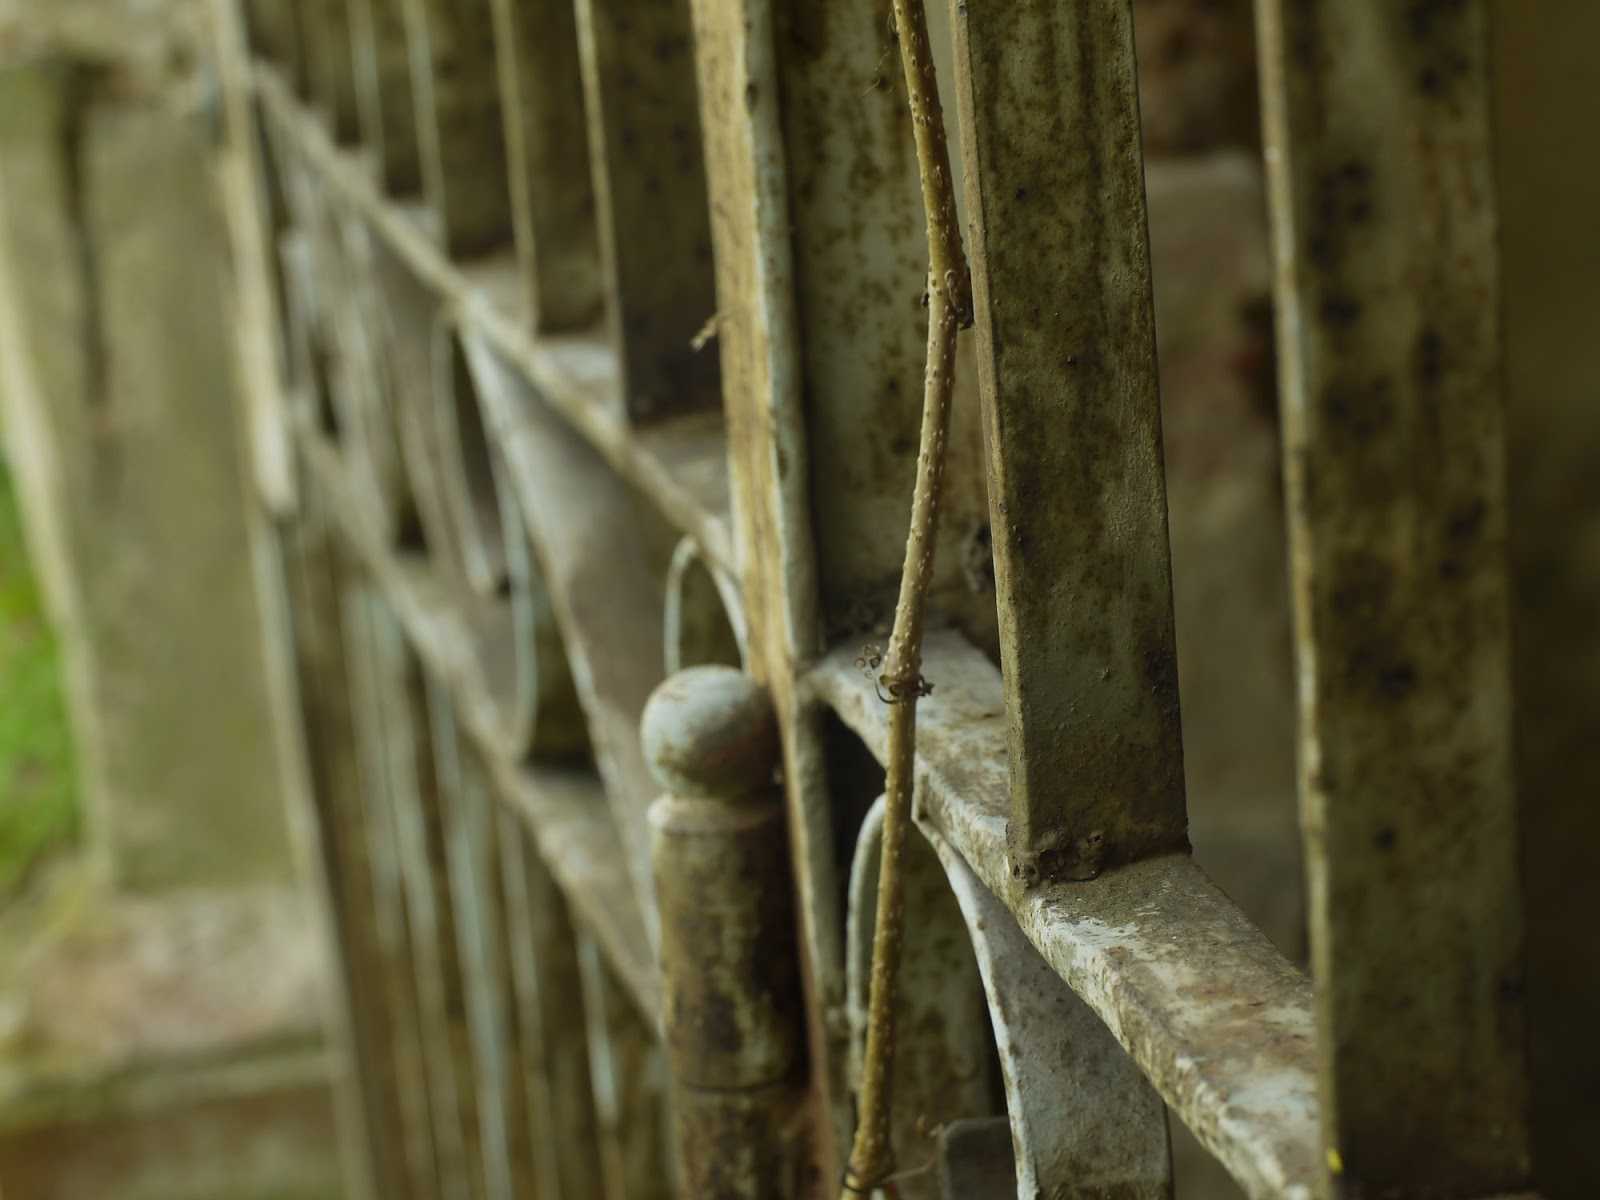
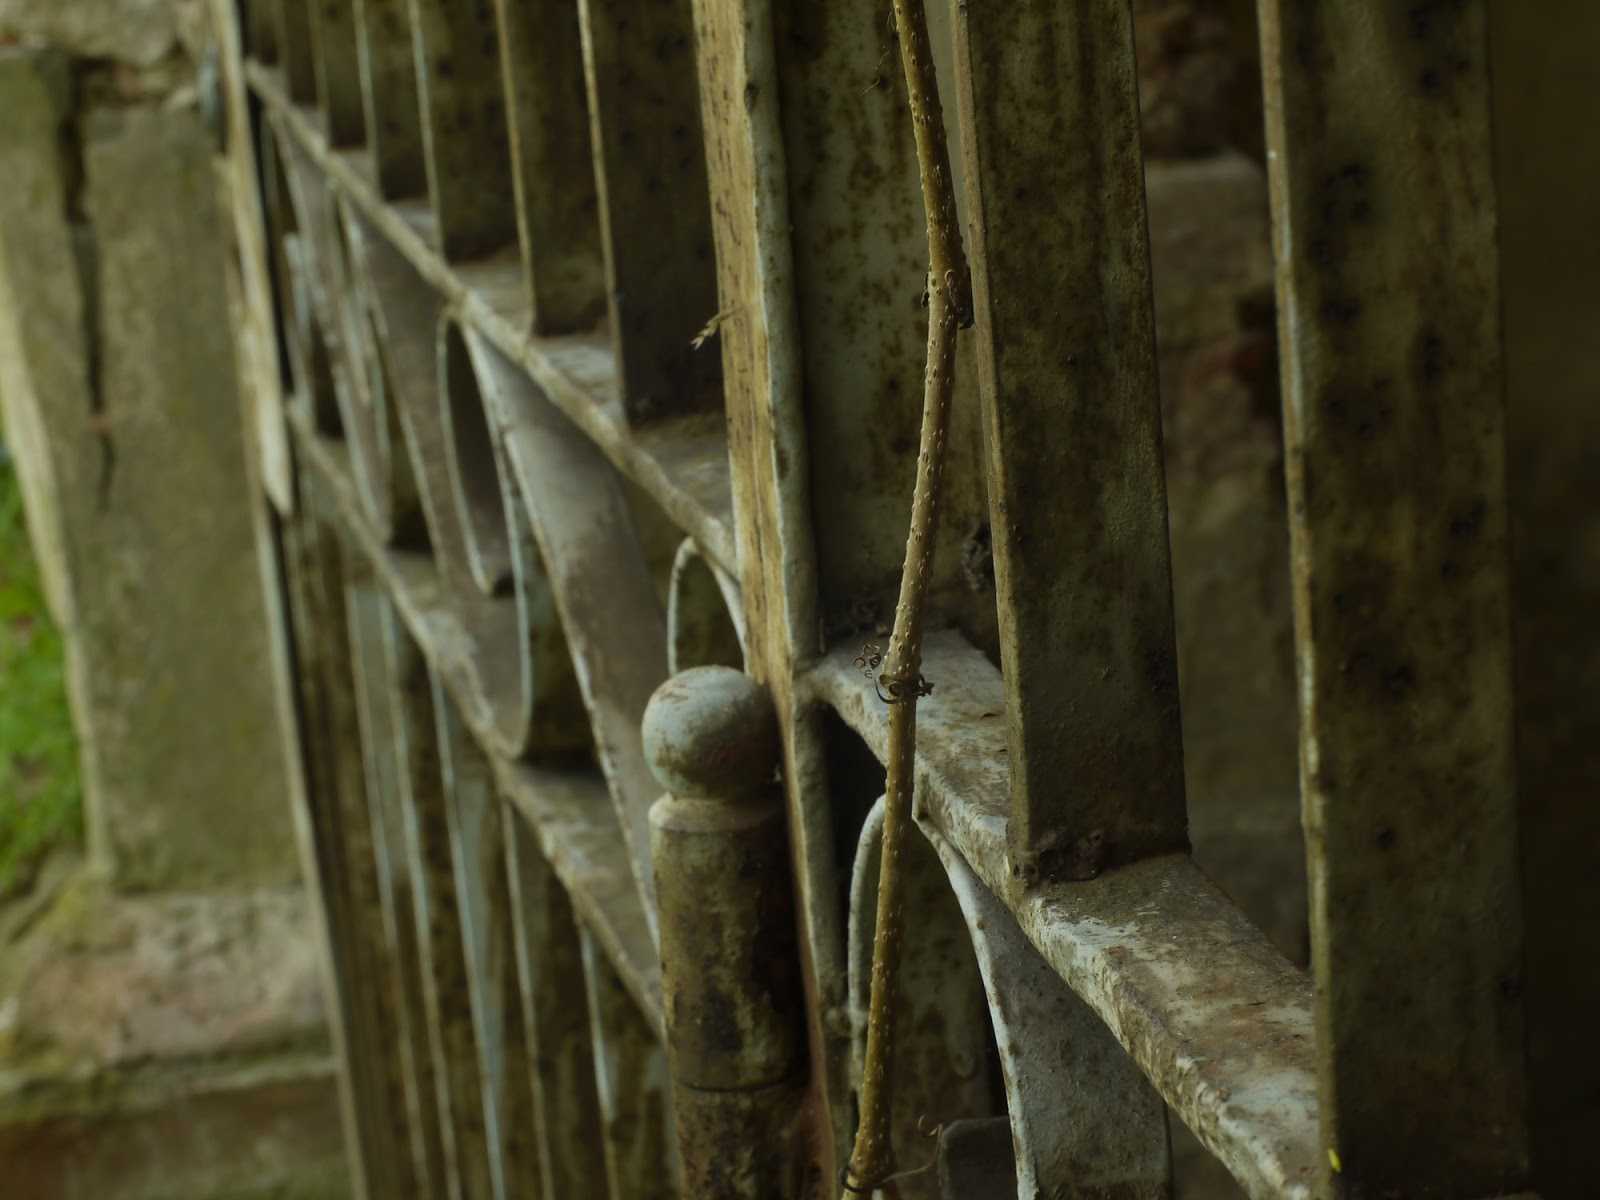
| Minolta MD Rokkor 50/1.4 with EF Focal Reducer — @1.4 — architectural detail |
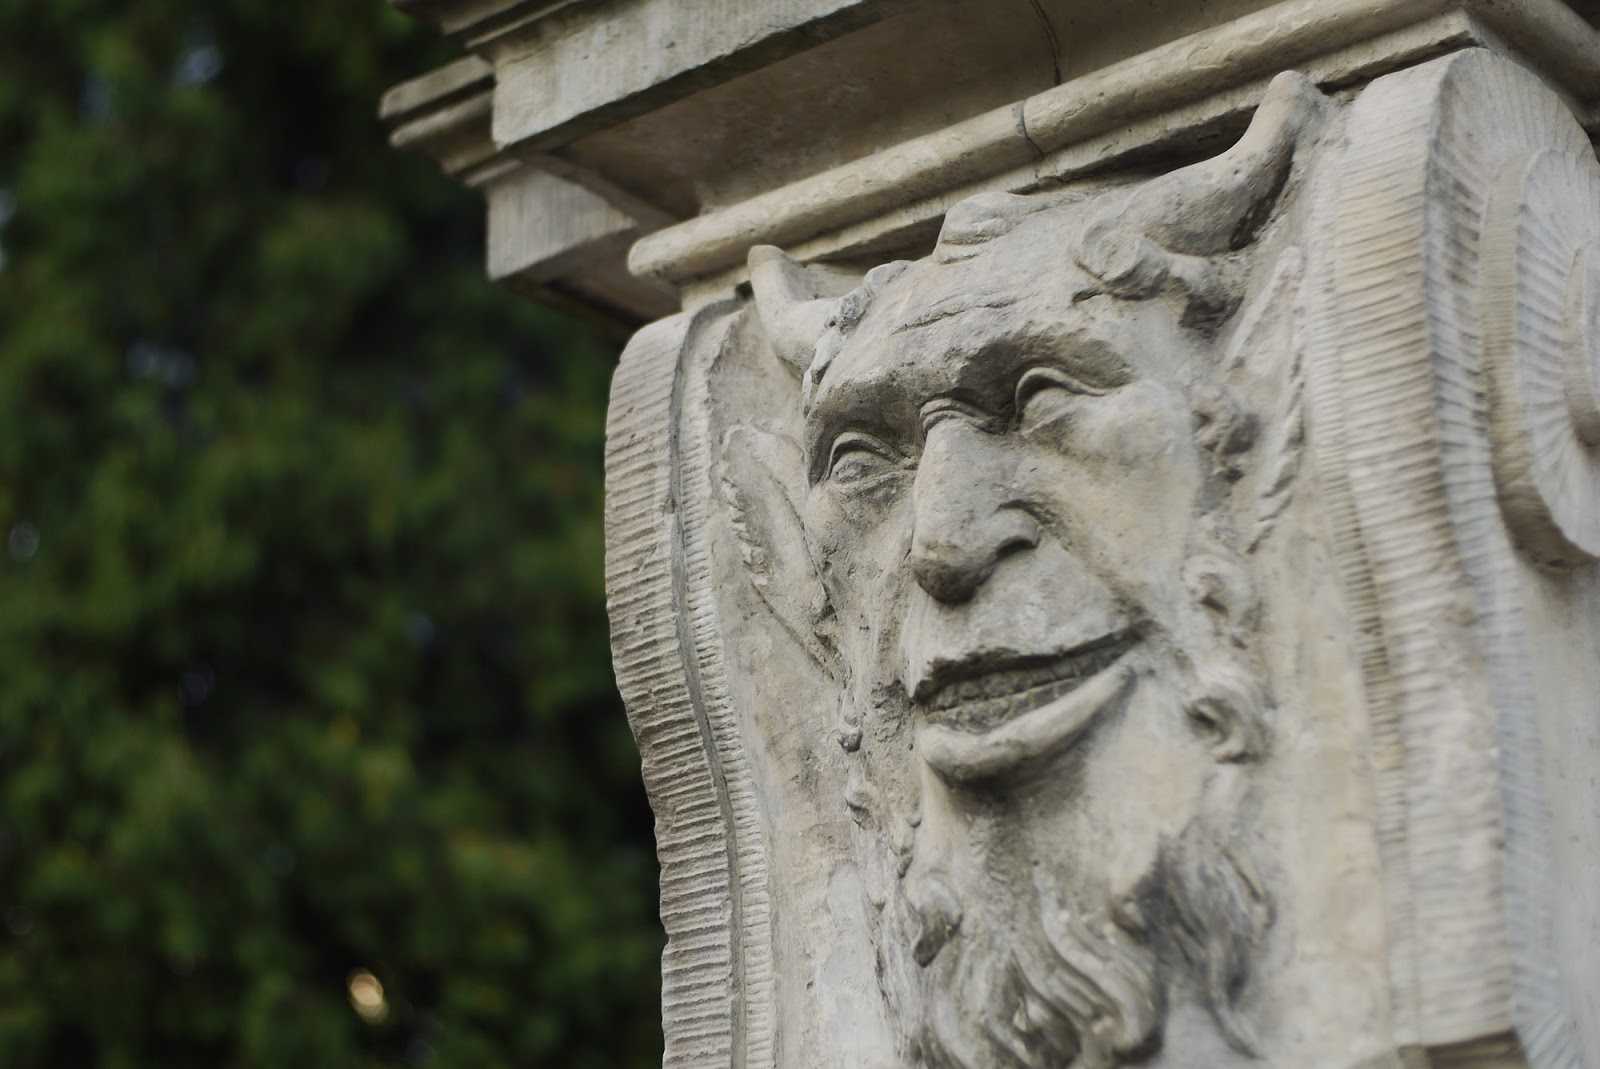 |
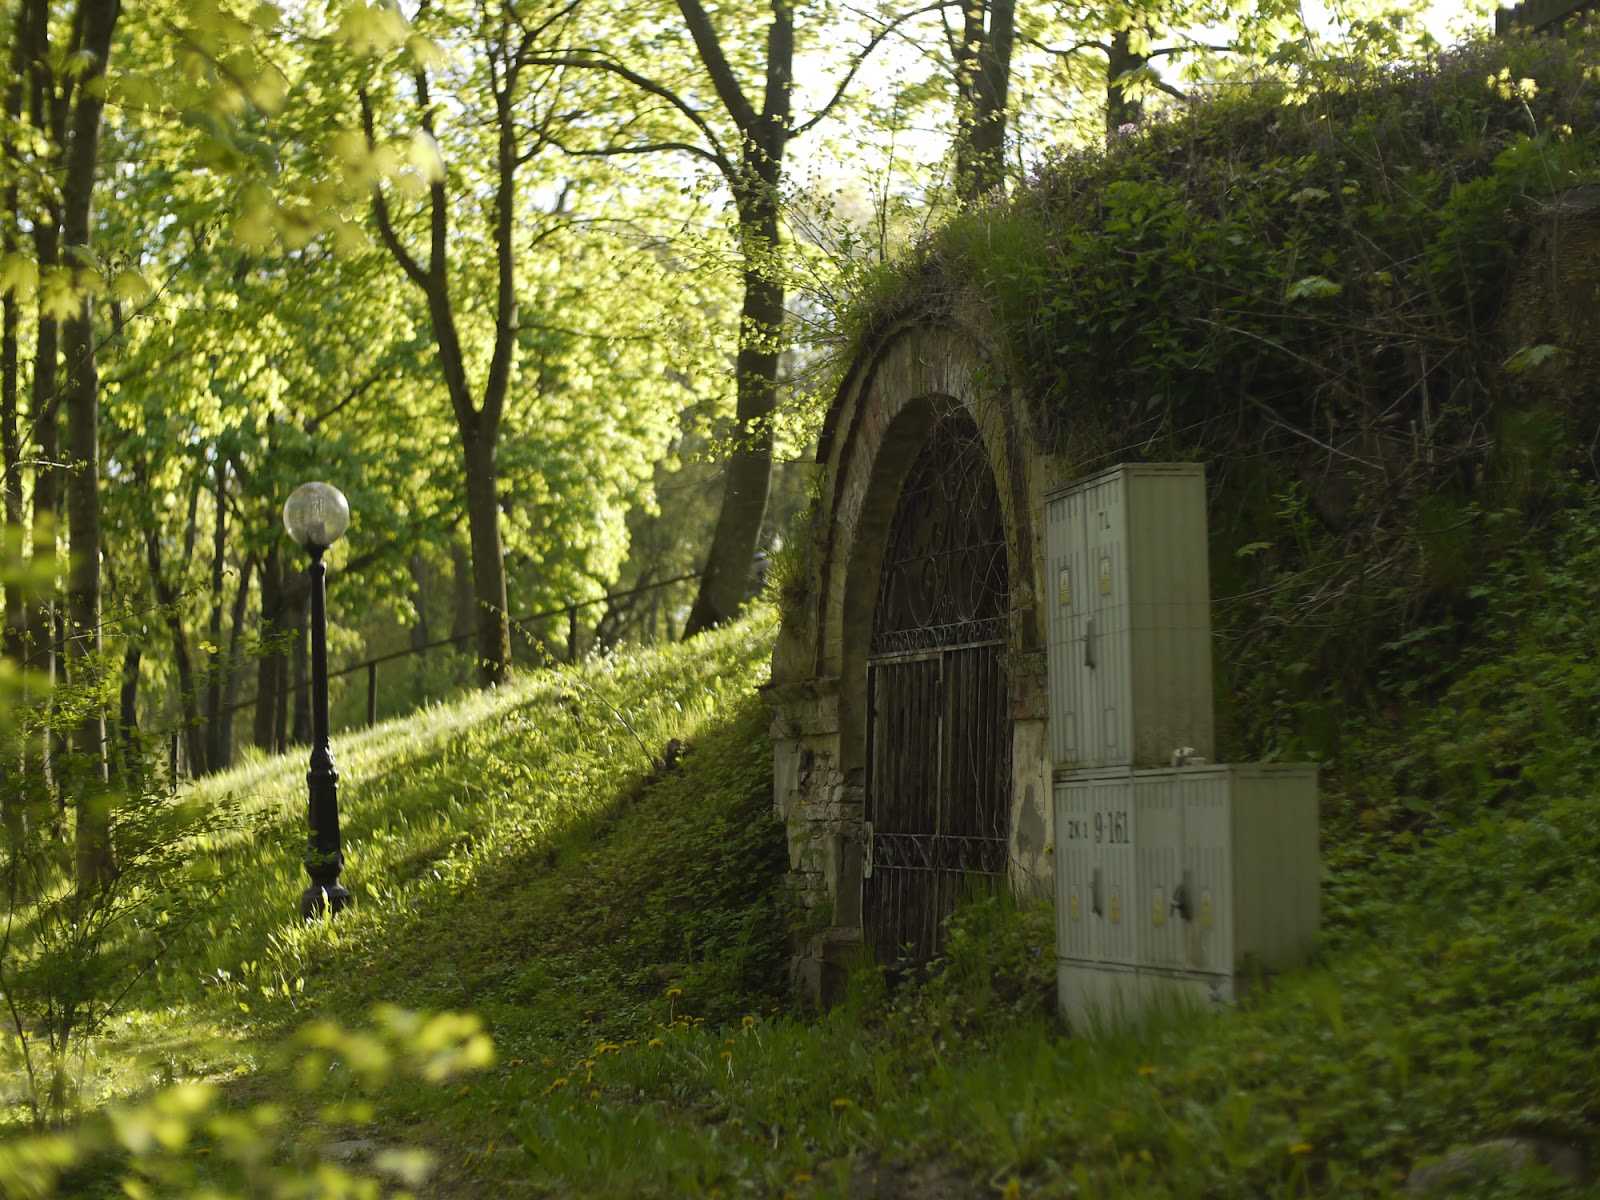
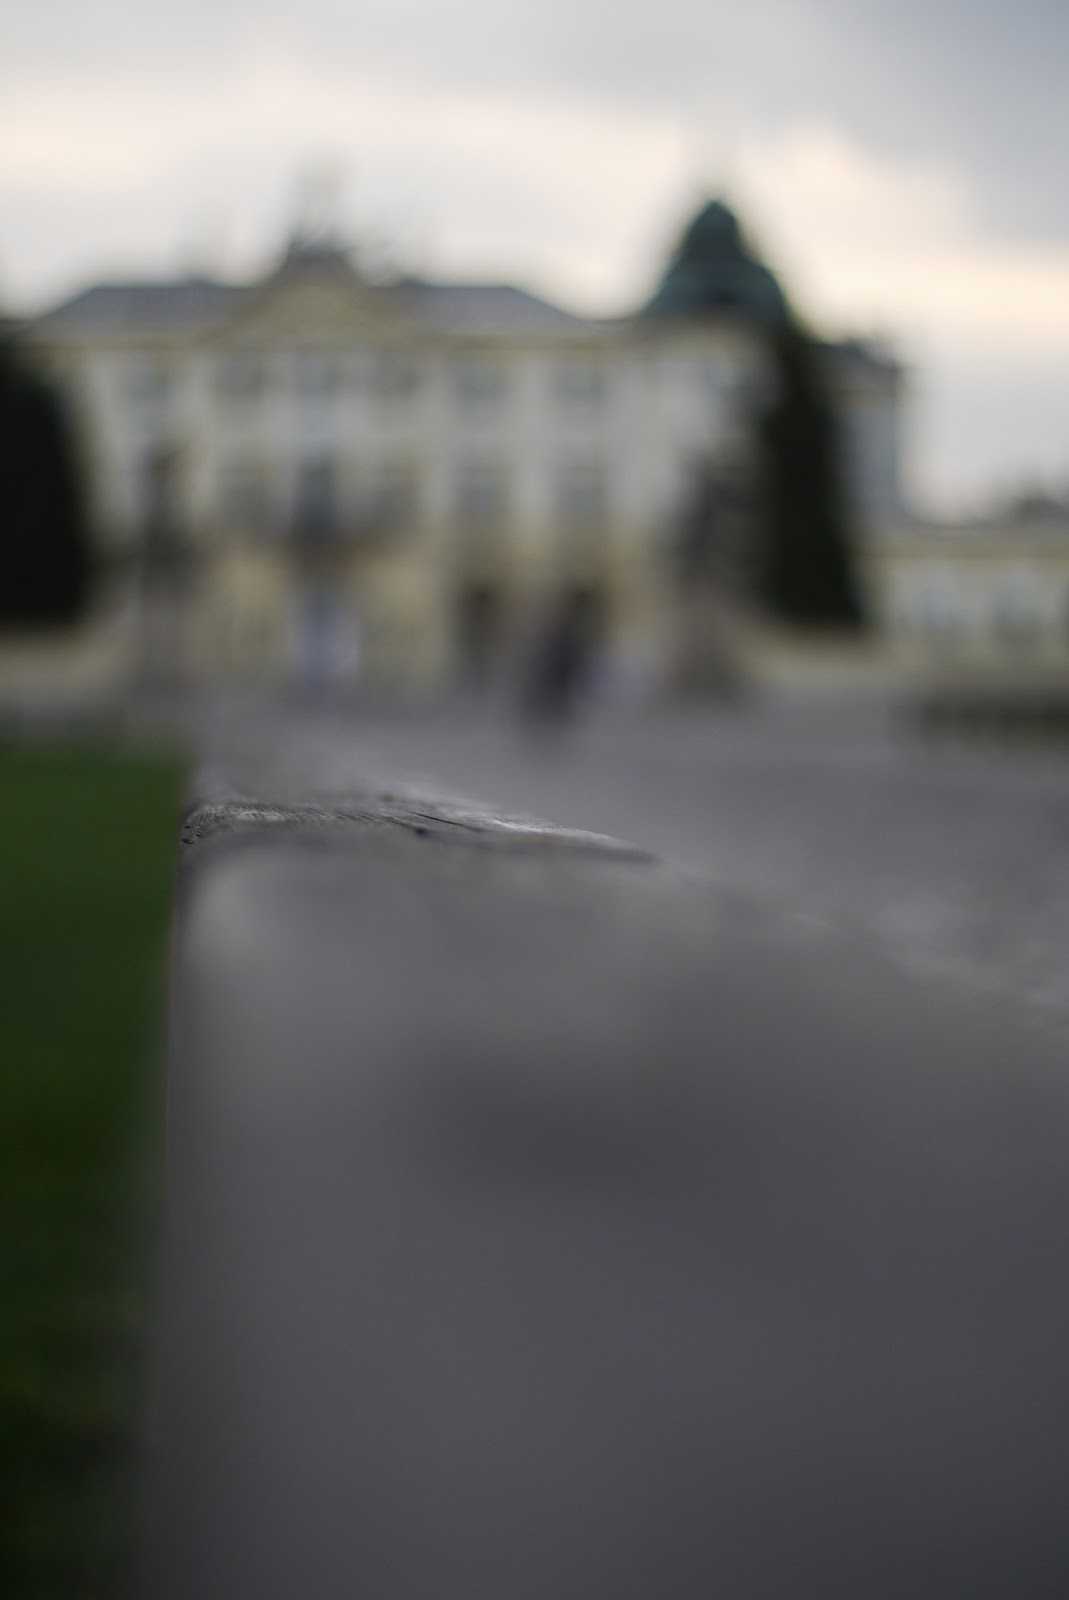
| Minolta MD Rokkor 50/1.4 with EF Focal Reducer — @2.0 — architectural detail |
 |
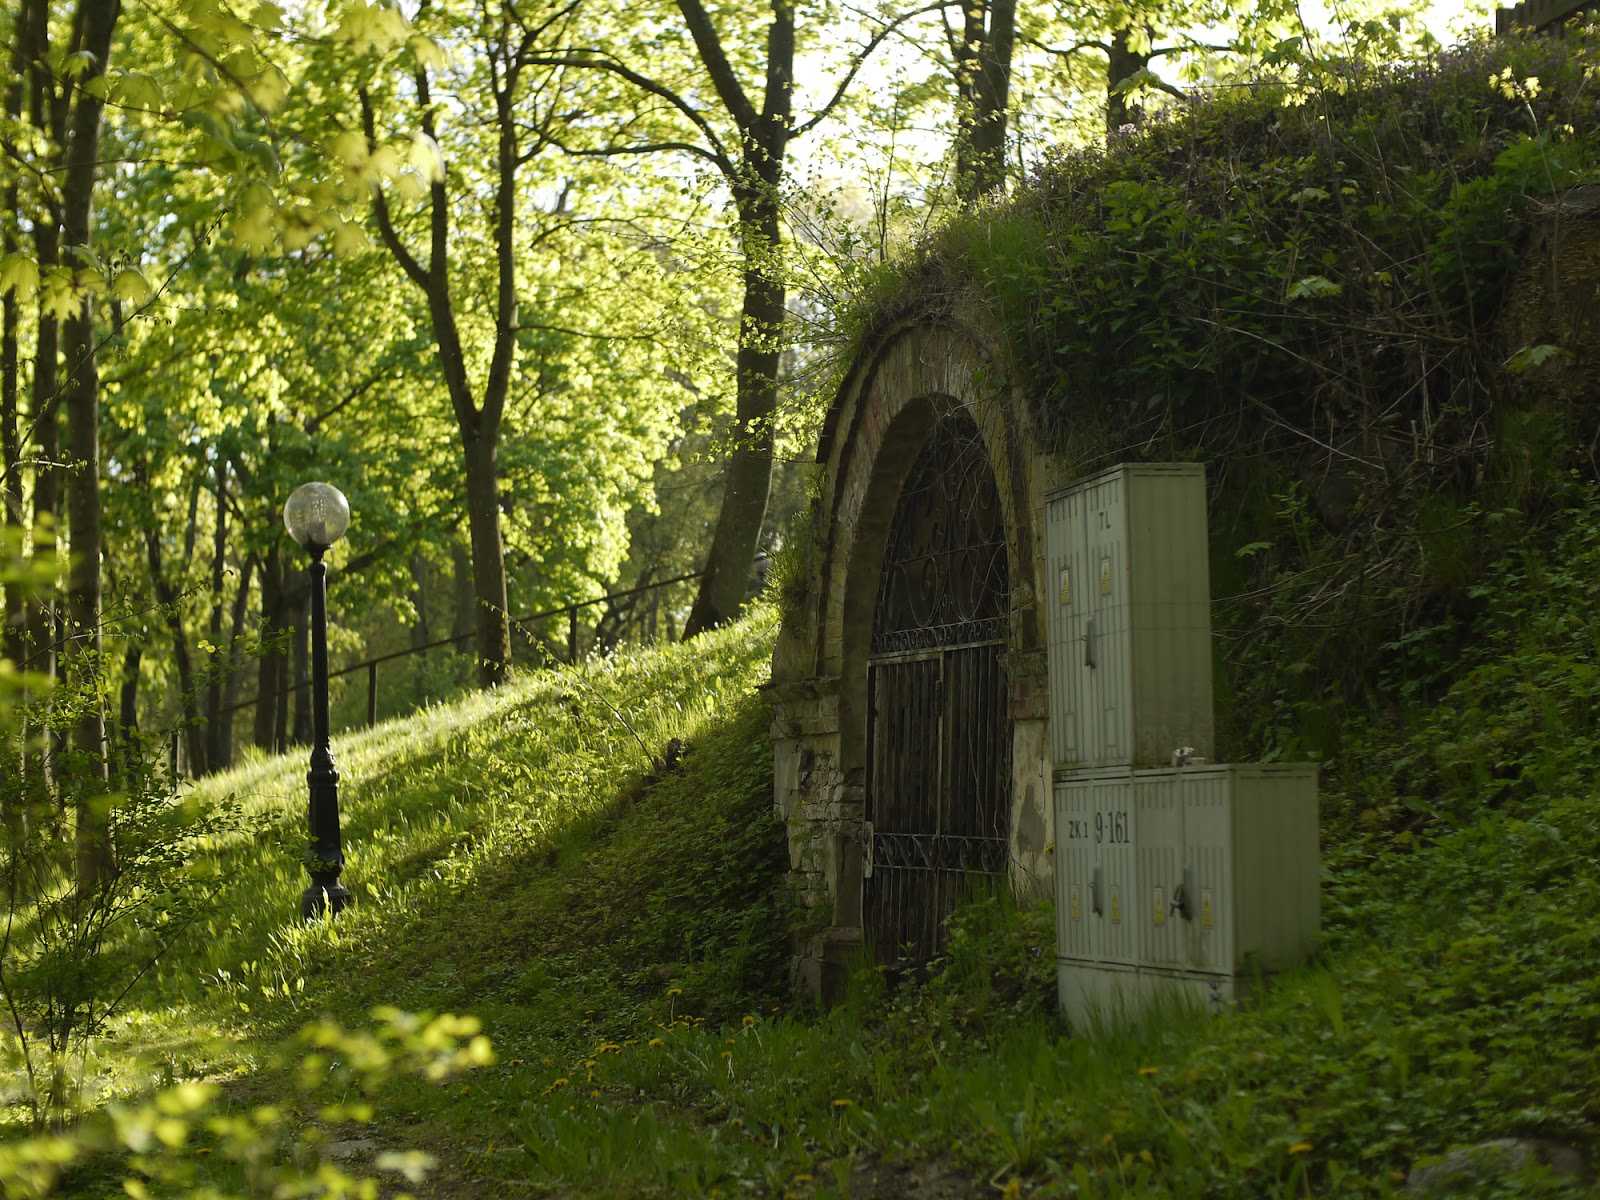
| Minolta MD Rokkor 50/1.4 with EF Focal Reducer — @2.8 — architectural detail |
 |
| Minolta MD Rokkor 50/1.4 with EF Focal Reducer — @1.4 |
 |
| Minolta MD Rokkor 50/1.4 with EF Focal Reducer — @2.0 |
 |
| Minolta MD Rokkor 50/1.4 with EF Focal Reducer — @2.8 |
 |
| Minolta MD Rokkor 50/1.4 with EF Focal Reducer — @4.0 |
 |
| Minolta MD Rokkor 50/1.4 with EF Focal Reducer — @5.6 |
 |
| Minolta MD Rokkor 50/1.4 with EF Focal Reducer — @8.0 |
 |
| Minolta MD Rokkor 50/1.4 with EF Focal Reducer — @11 |
 |
| Minolta MD Rokkor 50/1.4 with EF Focal Reducer — @16 |
Disassembly
Disclaimer
All information in this blog is meant for sharing of experience and not as instruction, and is no substitute for diligent learning and assessment of competence. I have messed up my fair share of lenses, and will not be held responsible for any damage caused in the reader’s venture into this fascinating world of mechanical and optical marvel.
You should be conversant with lens repair techniques; beginners should read my earlier blog posts – the Lens Repair series (Lens Repair (1): Some Thoughts, Lens Repair (2): Major Parts of a Lens (Manual Focus), Lens Repair (3): Working from the rear…, Lens Repair (4): Coming from the front, Lens Repair (5): Helicoids) and Richard Haw’s excellent write-ups (Camera and Lens Repair Essentials, Best Practices (part 1), Best Practices (part 2), Best Practices (part 3) and Working with Helicoids).
Since the lens did not come with a name plate, I can’t tell you how to remove it. But it could either be by rubber tool to unscrew the name plate, or simply prying it off. The former is likely. See the screws, remove the 3 that are holding the filter ring and take off the filter ring.
3 more screws and the front optical unit (FOU) can be lifted out. I usually use a marker to mark the location relative to the index line.
Well, a plastic case entombed the glass lenses. It was fortunate for me that the inner surfaces did not require any work. So I did external surface cleaning – the front of E1 was filthy with oil and finger prints. The oily smudges were likely to be from the helicoid grease.
3 more screws hold the FR. Ensuring the lens was at infinity, I removed the screws then the FR. Immediately mark the positions of OUH and FRH at infinity with respect to the lens index line.
Coming from the rear, remove the 3 screws holding the bayonet mount. Remove it slowly, and watch for linkages.
The post marked in this photo couples with the aperture curve (marked in the next photo) to constraint the movement of the stop-down lever, and thus control the size of the aperture opening according to the position of the AR. The slot at 6 o’clock is the stop-down lever coupling.
The aperture curve moves with the AR setting – this curve thus communicates the aperture setting to the stop-down lever. At 6 o’clock is the stop-down lever coupling post. Some oil was evident. So simple – and witness the clumsy Canon FD mount! At this point it is time to locate the AR detent ball bearing, before attempting to remove the AR. Knowing where it is helps prevent the ball bearing from flying off to oblivion.
The little ball bearing. I have learned a fair bit about handling them and am no longer fearful of them tiny ball bearings; this one measured 1.28mm.
Next I remove the 3 screws holding a shim, lift off the shim and then the ROU.
The ROU is encased. Impossible to separate further without resorting to cutting the OU open with a pen knife, after which is it impossible to put back in the alignment intended.
(Don’t mind the ROU still in this photo) The FRH and OUH position at infinity should have been marked against index line (when the FR was removed). The grooves at the bottom part of the lens barrel are for the AR ball bearing detents. Now measure the length of the OUH against the rear barrel, and the FRH against the rear panel. Guess what? I did not measure (but should have).
While holding the FRH in place rotate the OUH closewise (to left) slowly and noting when the OUH separates (4/5 turn). Mark this point – this is where you begin the installation of the OUH back to the FRH when you assemble the lens. Look at the yucky helicoid grease!
FRH was separated at 4 4/5 turns CCW. Mark the separation point!
FRH before cleaning.
Cleaning of grease first by wiping then by lighter fluid, and soap water wash with tooth brush. Thoroughly dried the parts before re-assembly. After reassembly the lens was stored in dry cabinet to ensure all moisture is removed from the lens.
After cleaning of external surfaces of OU, lens body, helicoids and re-greasing, the lens operates smoothly and gave good results, better than 50mm f/1.4 MD Rokkor (MD I), in my opinion.
MD-III
If you are working on a MD-III lens, do be aware that it too has encased OU. Photos below courtesy of Vu Banh, a friend and a member of the FB group Film Camera Repair Directory And Resources.
50mm f/1.7 MD, or commonly referred to as MD-III (without Rokkor designation). Plastic encased optical units as well.
Mechanical parts of the MD-III 50mm f/1.7.
More photographs can be seen MD-III tear down by Vu Banh.
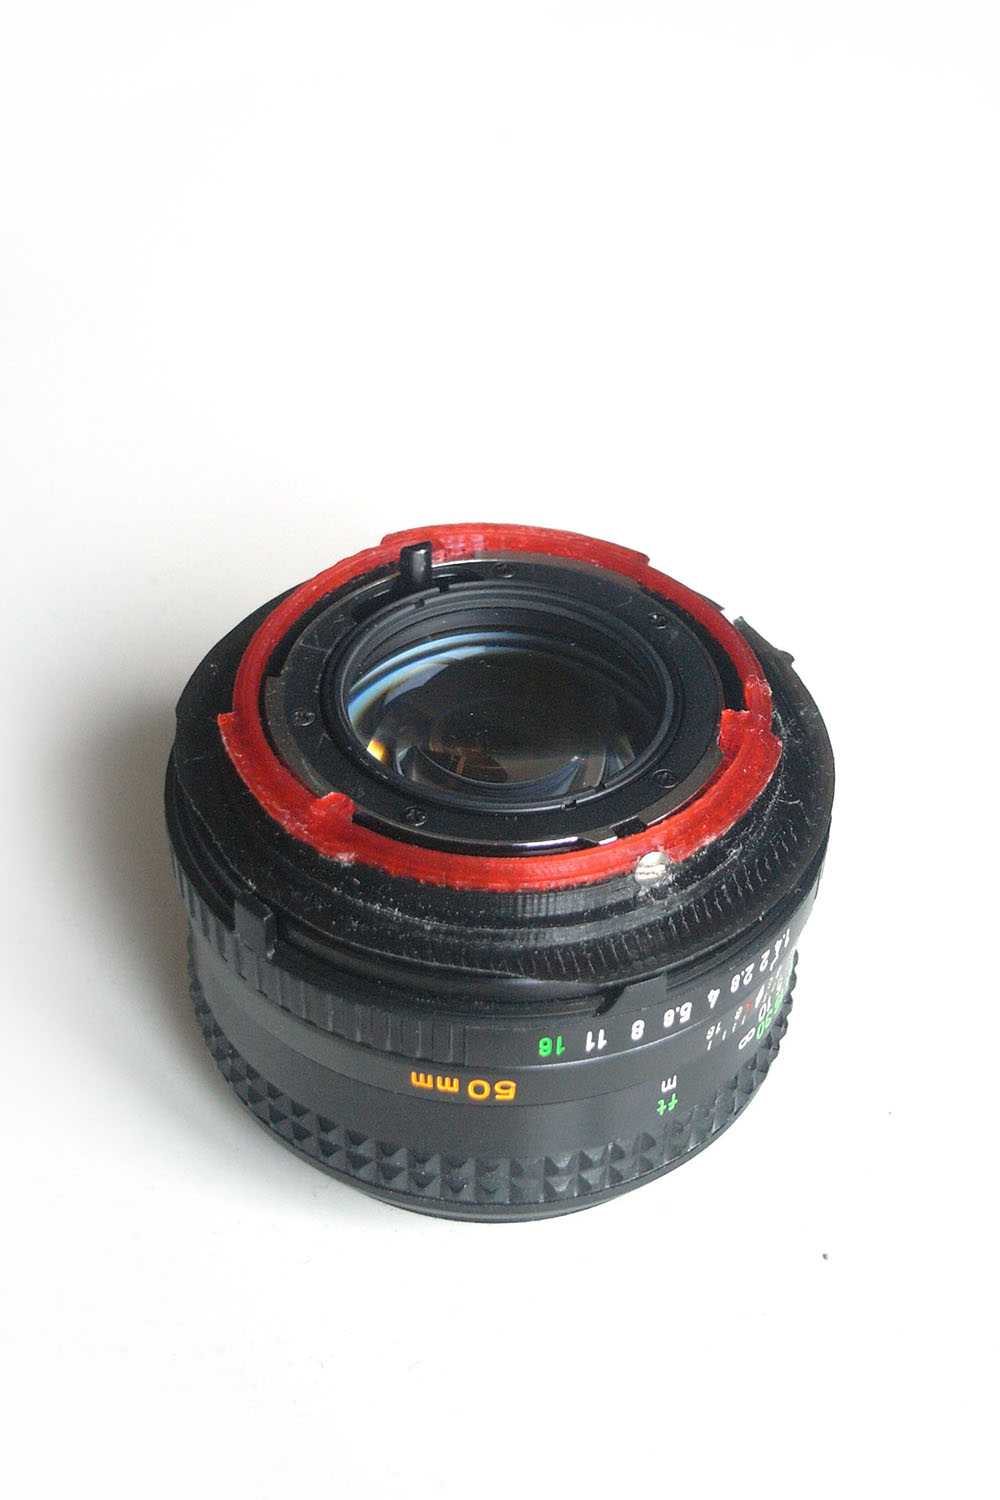
Minolta MD>Canon EOS EF adapter
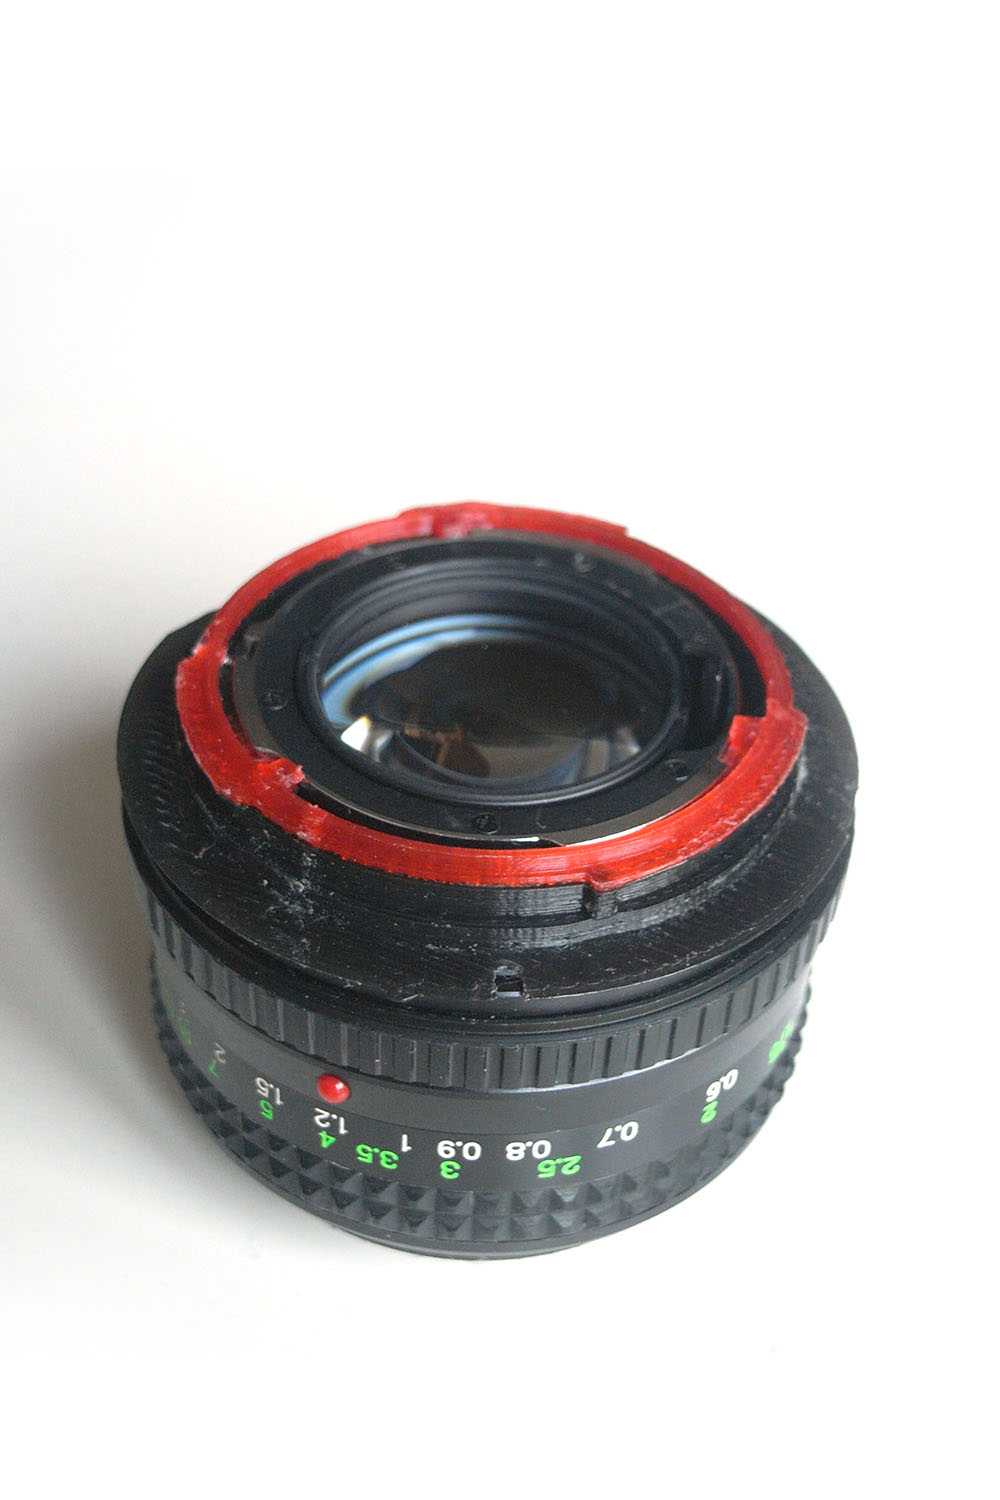
When I bought the lens I wasn’t aware that there are MD>EF thin adapters, so I decided to pint one myself. I downloaded Minolta lens cap by profhankd from Thingiverse and EF Mount Module by AlexEnglish also from Thingiverse. Then I created MD>EF adapter with 0.2 mm thick flange (became thicker in printing process). It would be perfect to remove that flange at all, but it’s a place to cut a hole to lock the lens on Canon camera or Focal Reducer. Otherwise, one must drill a hole in the lens, which I wanted to avoid (collector value).
 |
| 3D-print-ready Minolta MD>Canon EF thin adapter model — perfect for Focal Reducer. |
 |
|
|
All you have to do is to print it. I printed 0.1 mm layer thickness and no support — worked perfectly. Photos show adapter printed in black and red, because black filament jammed in the printer and I had to change it. It doesn’t affect the quality at all.
Then I cut hole in adapter for EF mount lock — simply with scissors. I didn’t modelled the hole, because I wanted it to fit tight with Focal Reducer.
 |
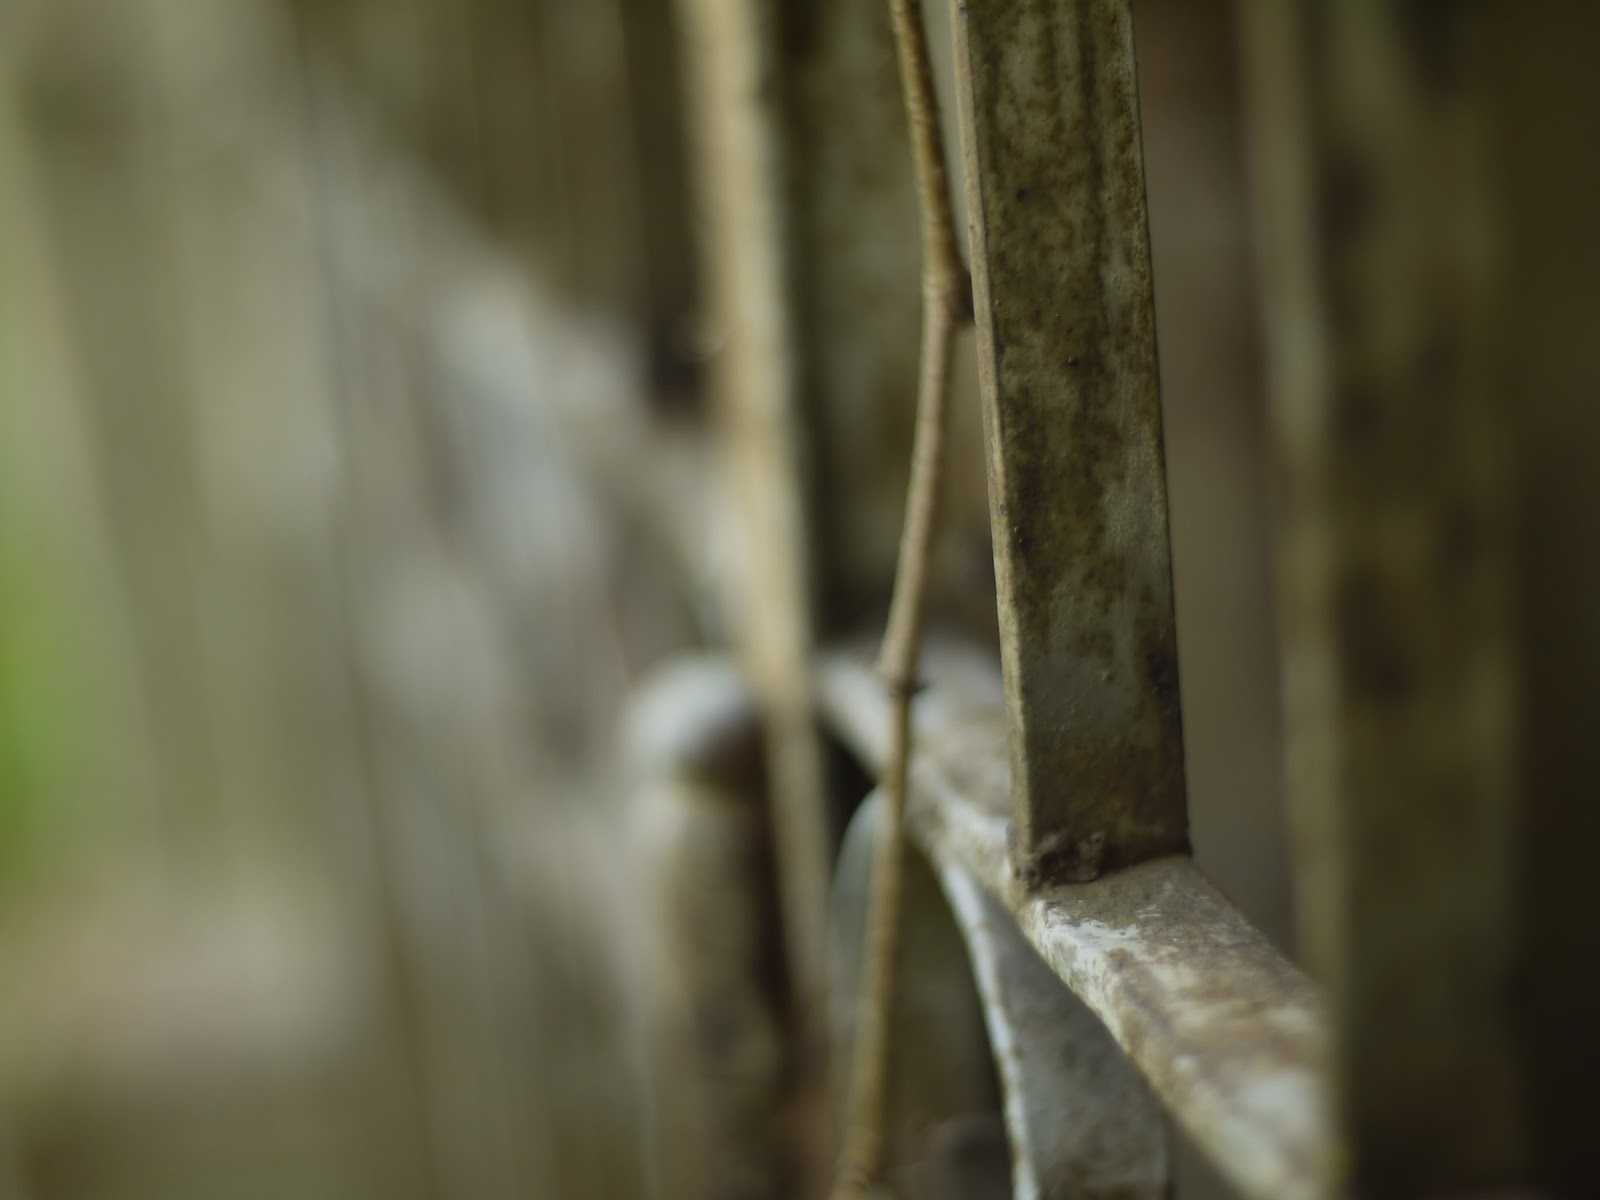
| Minolta MD Rokkor 50/1.4 with thin MD>EF adapter — EF mount lock cut out visible. |
Then I drilled a hole to place the screw locking MD lens (visible on the photo below). The screw and the nut came from my spare parts box and I don’t know any dimensions of it.
 |
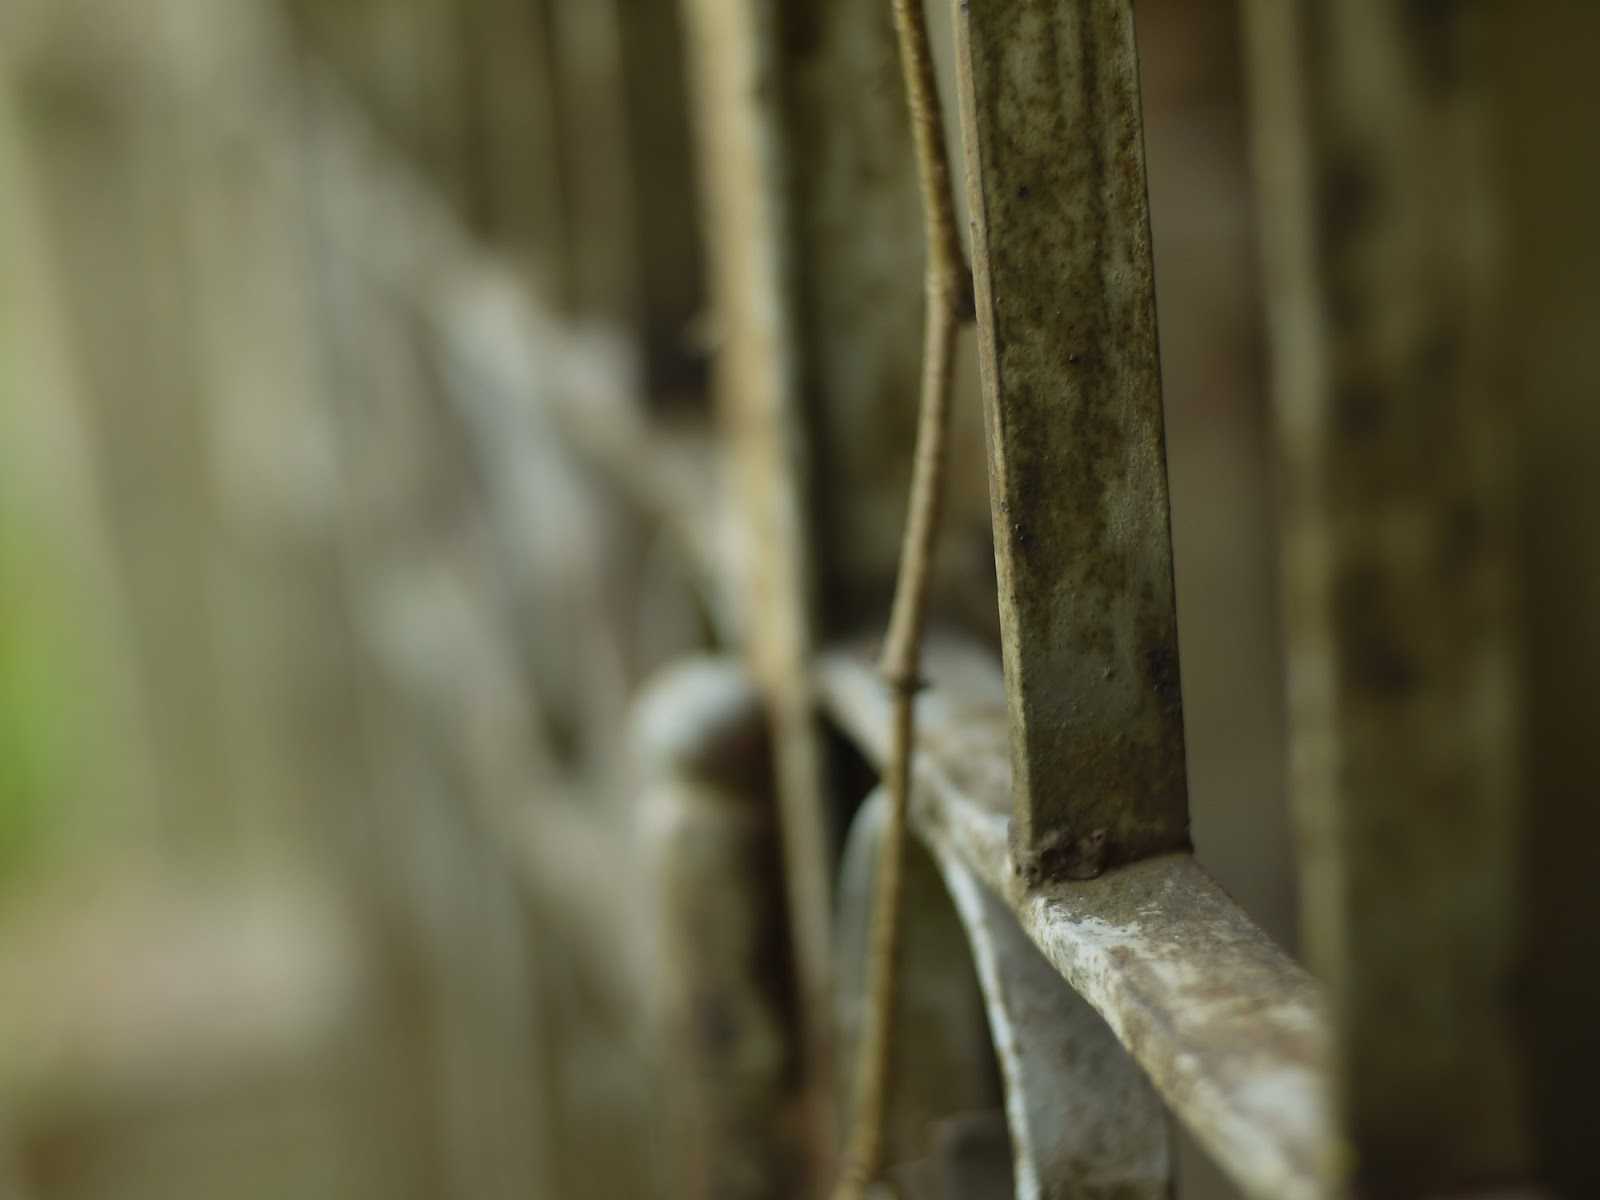
| Minolta MD Rokkor 50/1.4 with thin MD>EF adapter — lens locking screw visible on the photo. |
All in all, the adapter works great. It doesn’t work with bare EF mount, due to the fact that flange distance is a bit too long (about 0.5 mm). However, Focal Reducer gives you the opportunity to correct it with internal optical element. Now the lens focuses infinity and that’s awesome!
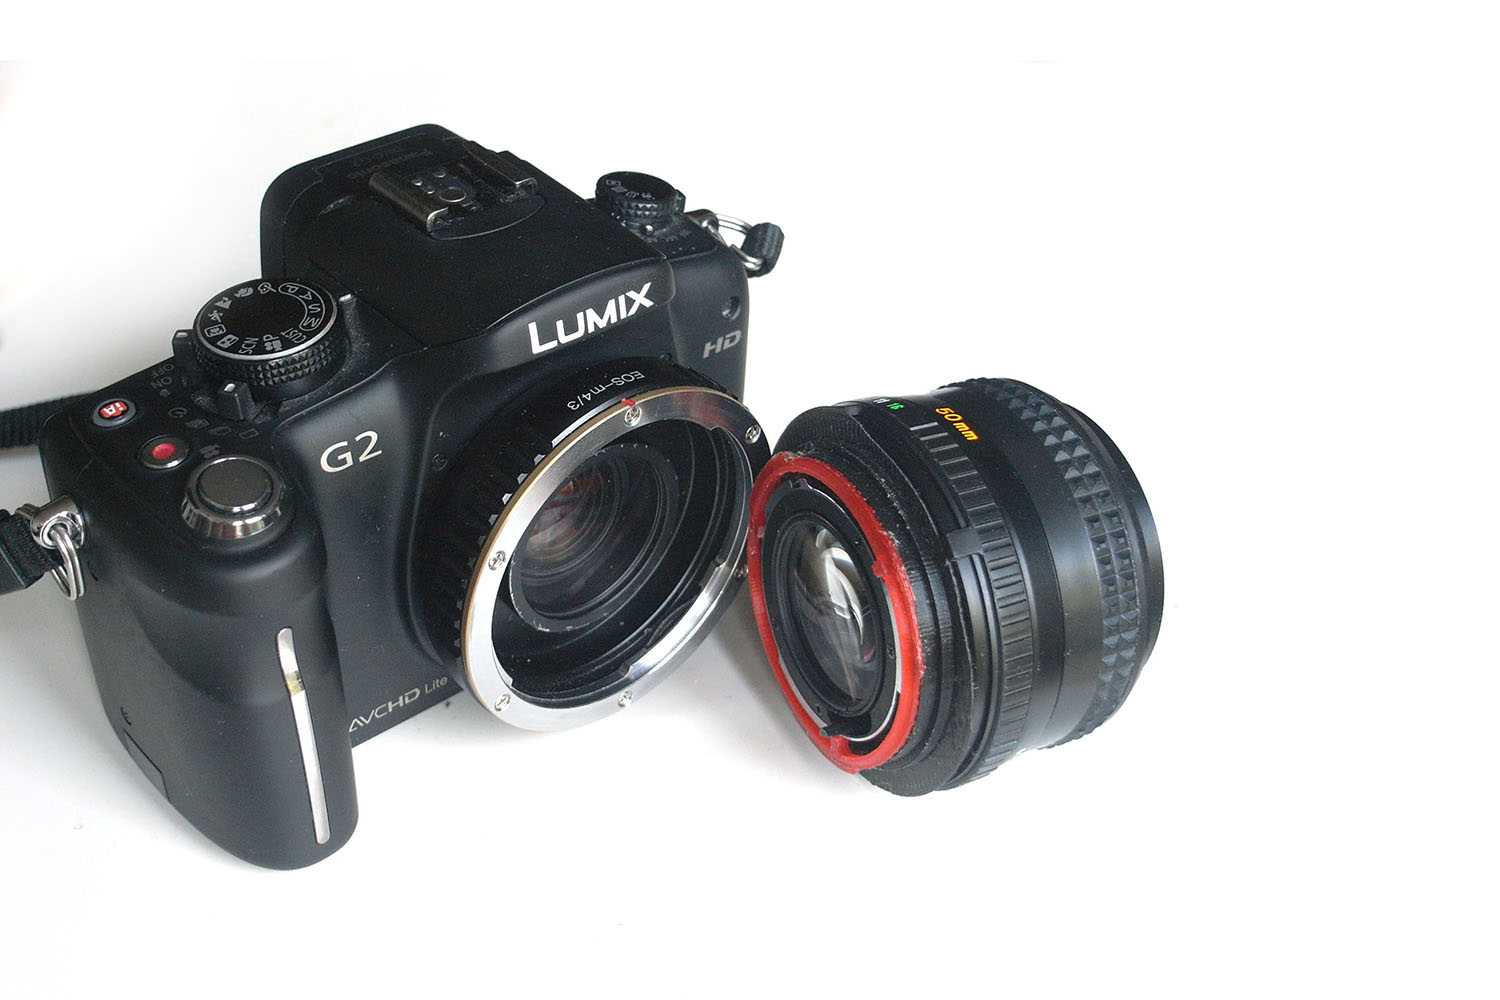 |
| Minolta MD Rokkor 50/1.4 with thin MD>EF adapter and Lumix G2 with Focal Reducer. FR internal optical element visible on the photo — that’s the one to be adjusted. |
Finally proof of infinity focus. There were no clouds that day, but lens focused even a bit beyond those trees.
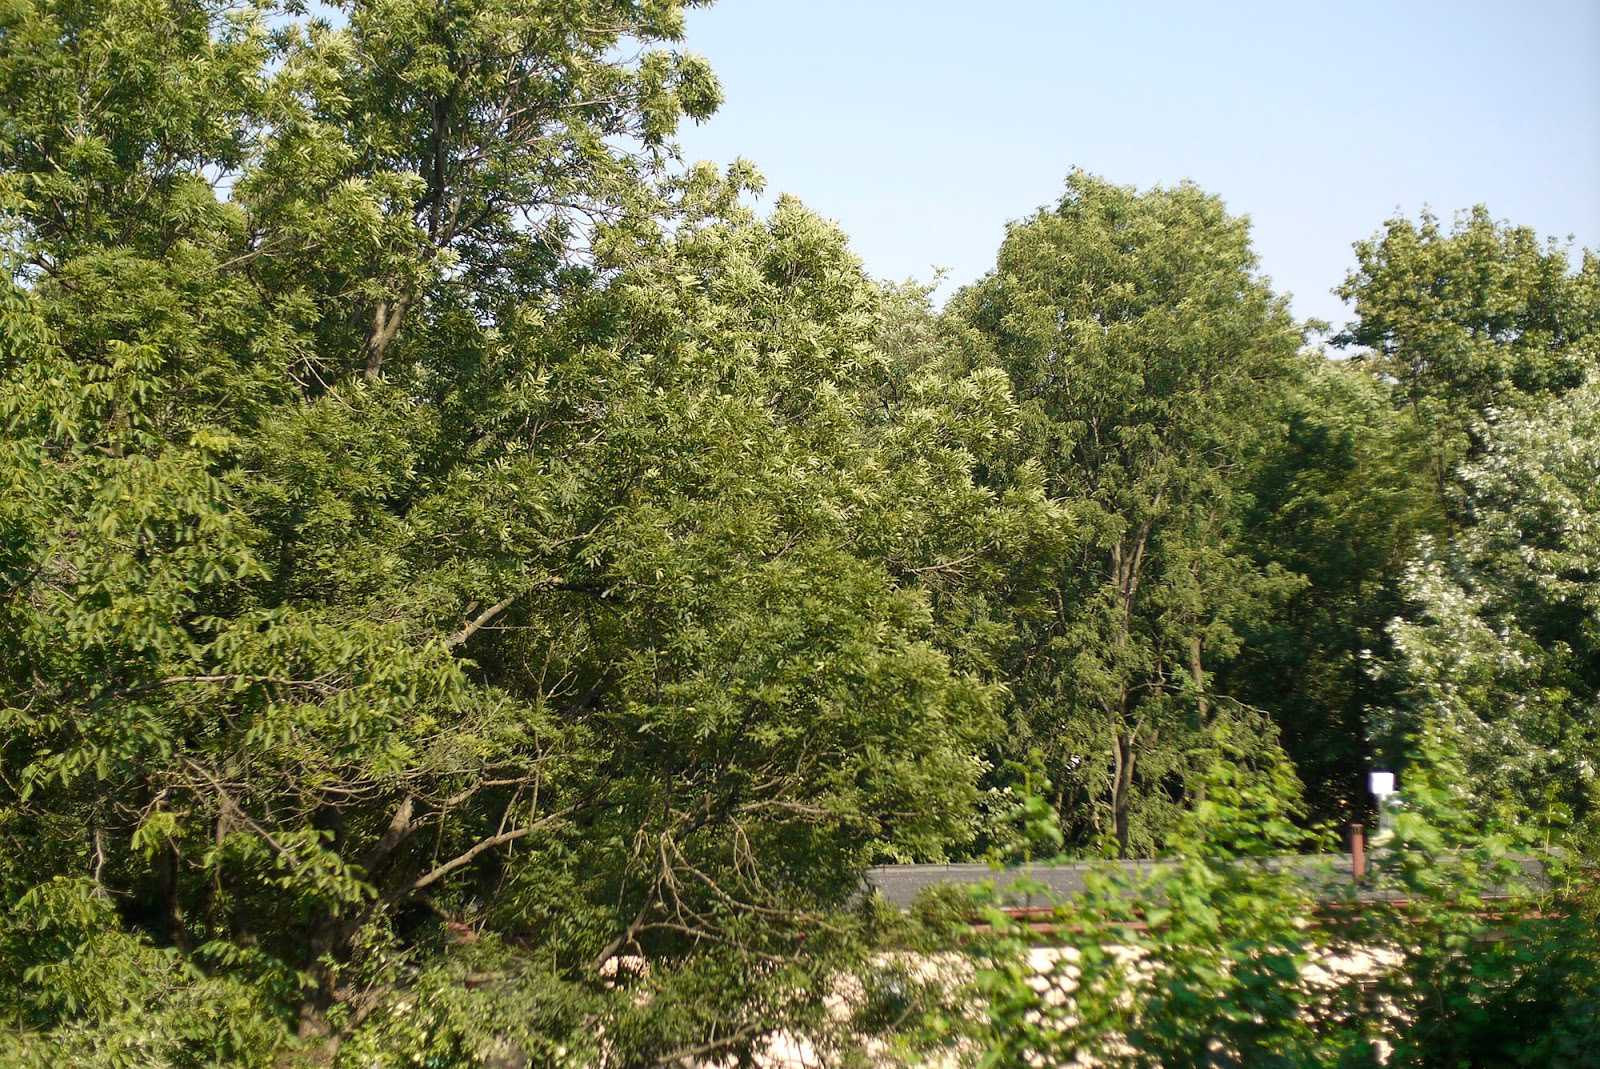 |
| Minolta MD Rokkor 50/1.4 with EFFocal Reducer — infinity focus @2.0 |
Bokeh and depth of field
focal reducer
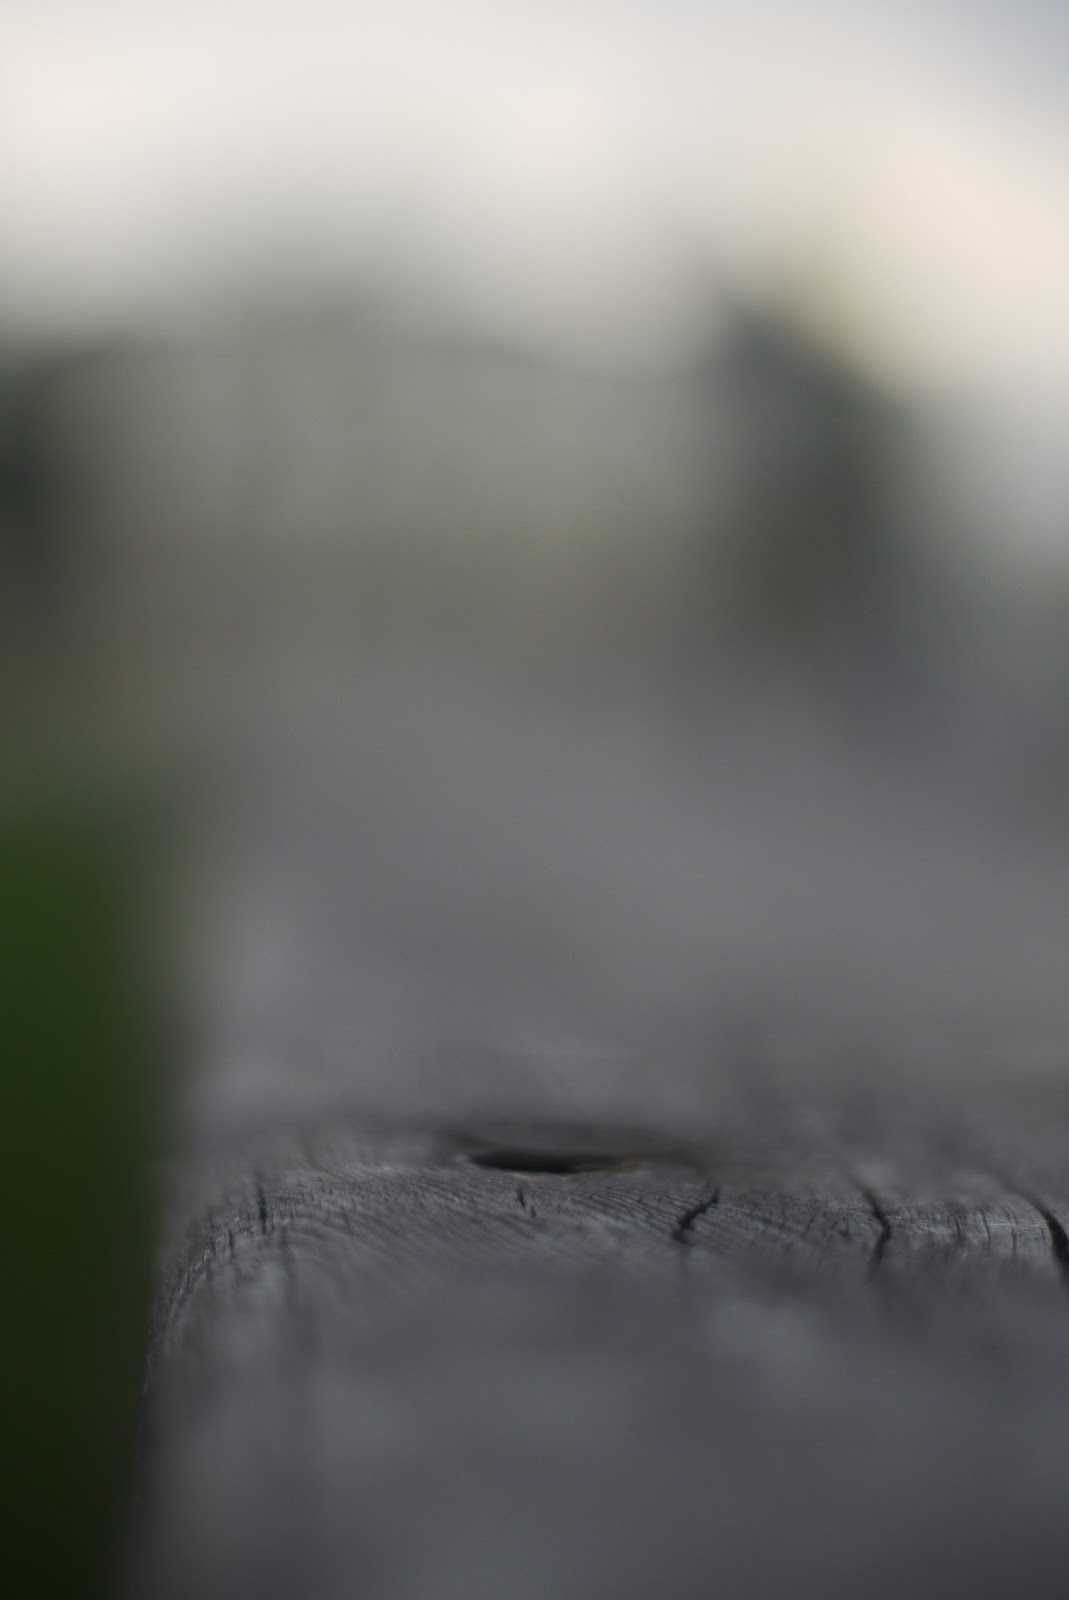 |
| Minolta MD Rokkor 50/1.4 with EF Focal Reducer — @1.4 — focused as close as possible. |
 |
| Minolta MD Rokkor 50/1.4 with EF Focal Reducer — @1.4. |
 |
| Minolta MD Rokkor 50/1.4 with EF Focal Reducer — @1.4. |
 |
| Minolta MD Rokkor 50/1.4 with EF Focal Reducer — @1.4. |
 |
| Minolta MD Rokkor 50/1.4 with EF Focal Reducer — @1.4 |
 |
| Minolta MD Rokkor 50/1.4 with EF Focal Reducer — @2.0 |
 |
| Minolta MD Rokkor 50/1.4 with EF Focal Reducer — @2.8 |
 |
| Minolta MD Rokkor 50/1.4 with EF Focal Reducer — @4 |
 |
| Minolta MD Rokkor 50/1.4 with EF Focal Reducer — @5.6 |
 |
| Minolta MD Rokkor 50/1.4 with EF Focal Reducer — @8 |
 |
| Minolta MD Rokkor 50/1.4 with EF Focal Reducer — @11 |
 |
| Minolta MD Rokkor 50/1.4 with EF Focal Reducer — @16 |
 |
| Minolta MD Rokkor 50/1.4 with EF Focal Reducer — f1.4-16 animation |
Conclusions
This lens is a very simple lens to service, but unfortunately due to the entombed OU the lens can’t be serviced if there is haze or fungus on any internal lens surface. Performance wise I cannot fault the lens, and it is really a splendid, if somewhat fortunate find for me. If you get a copy, please make sure there is nothing internal to the OU that needs cleaning, and make sure you store in a humidity controlled environment – I live in a high humidity environment so I cannot say if you are in a low humidity environment might it be ok – to make sure fungus doesn’t get a chance to grow on it.
Recommended on the above conditions. Stay away if there is fungus.
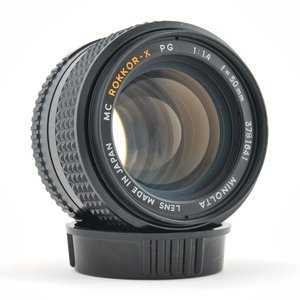
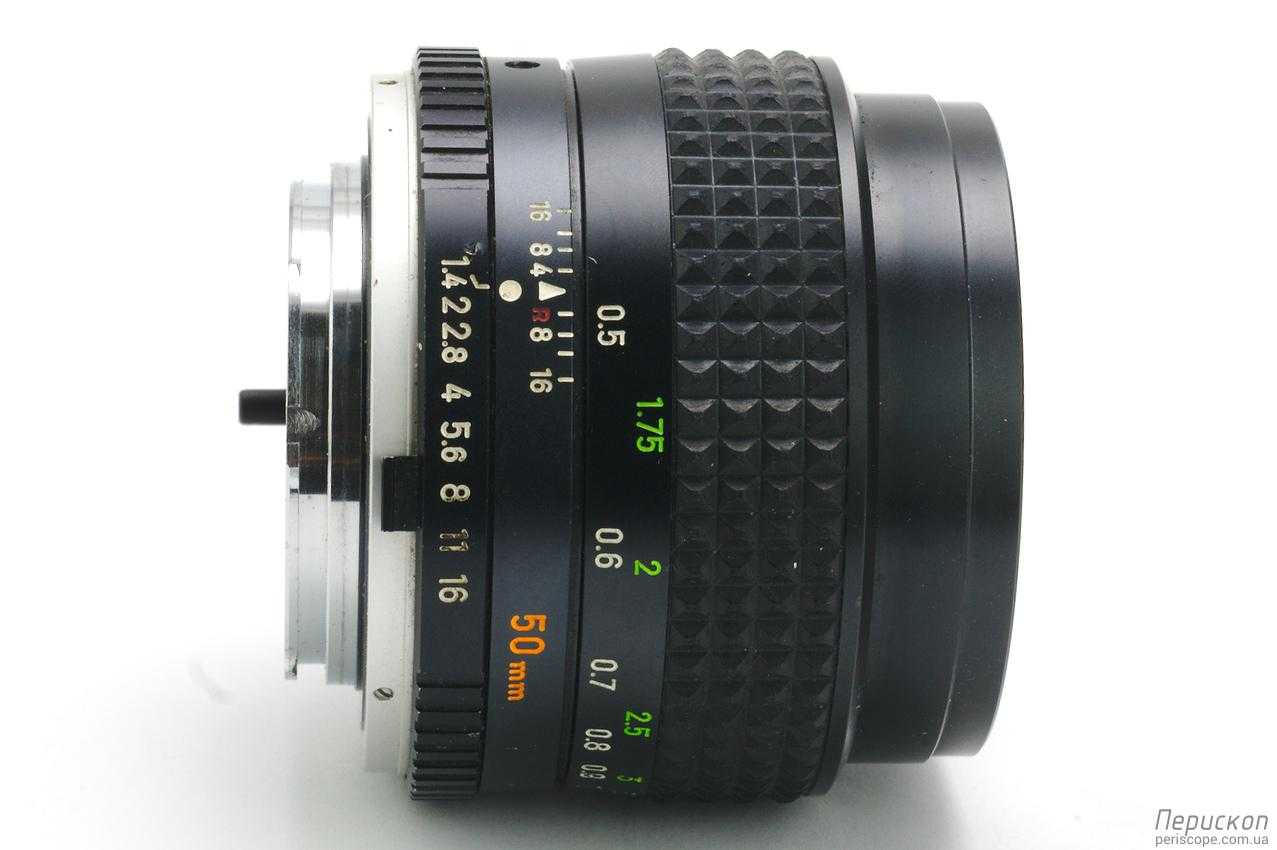
Характеристики Minolta MC Rokkor-X PG 1:1.4 f=50mm
Фокусное расстояние: 50 мм
Пределы диафрагмирования: f/ 1.4—16
Длина: 48 мм
Вес: 312 г
Резьба под светофильтр: 55 мм
Количество лепестков диафрагмы: 6
МДФ: 0,5 м
Конструктив Minolta MC Rokkor-X PG 1:1.4 f=50mm
Объектив имеет добротную металлическую конструкцию и дизайн, характерные своим годам. Лично мне эстетика и дизайн объективов 70-х годов прошлого века нравится больше чем современных.
Посредине оправы широкое прорезиненное фокусировочное кольцо, которое вращается на 180 градусов. При фокусировке на минимальную дистанцию передняя часть удлиняется примерно на 0,5 см. МДФ составляет 0,5 м.
Передняя линза имеет диаметр, характерный объективам со светосилой 1,4 и имеет зеленовато-янтарное просветление. Задняя линза имеет фиолетово-янтарное.
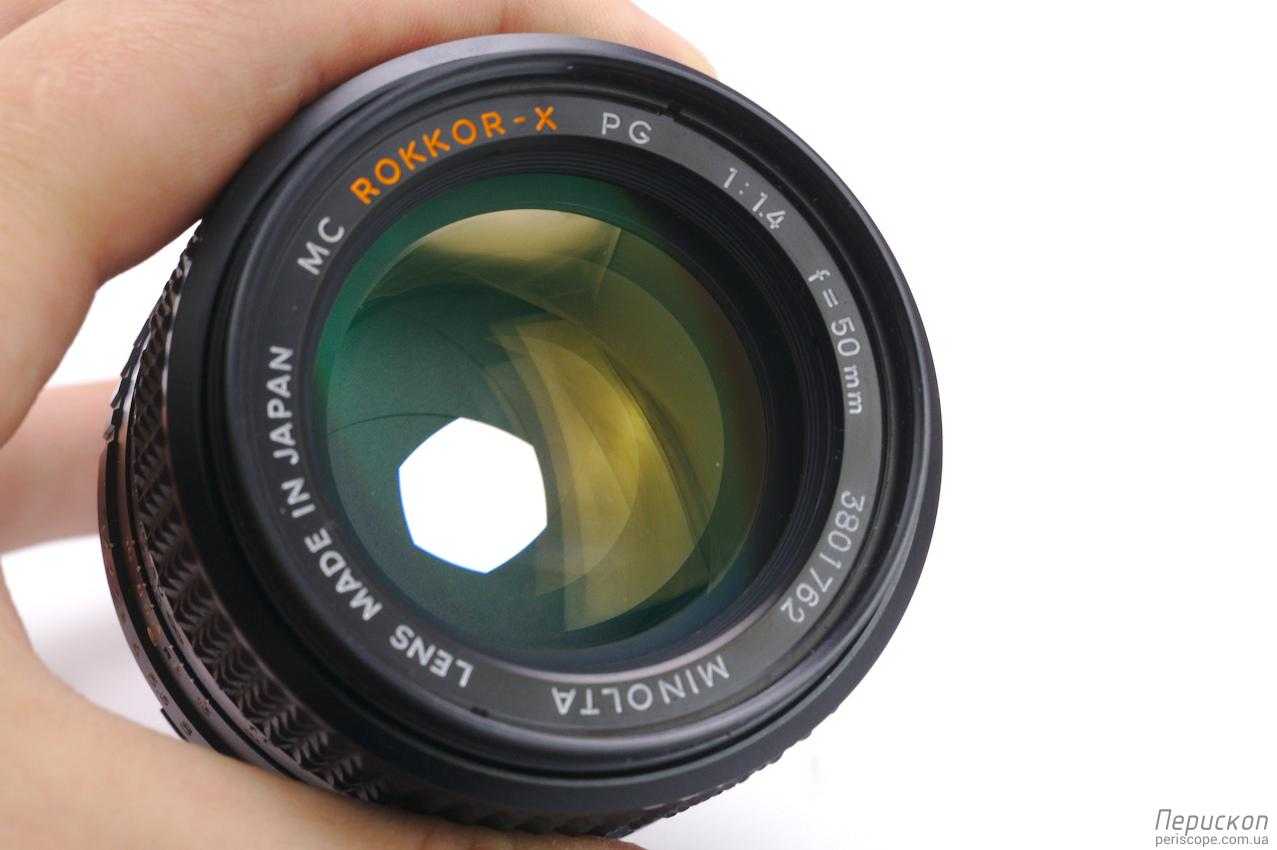
Диафрагма закрывается дискретно, полу-стопами, имеет 6 лепестков.
В целом ничего особенного в конструктиве нет, стандартный светосильный полтинник 70-80-х годов. Приятно держать в руках и пользоваться.
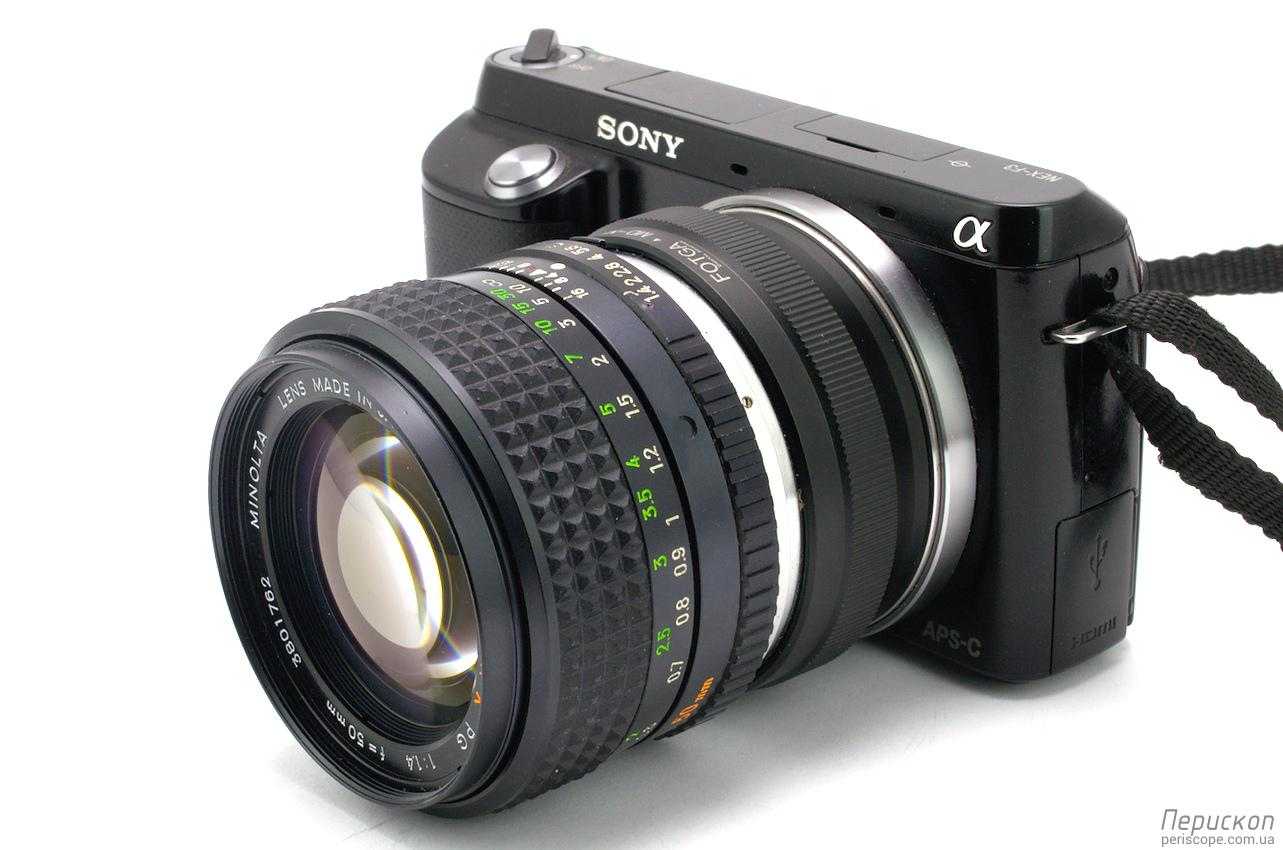
Я установил объектив на беззеркальную камеру Sony NEX F-3 с помощью переходника Minolta MD — NEX.
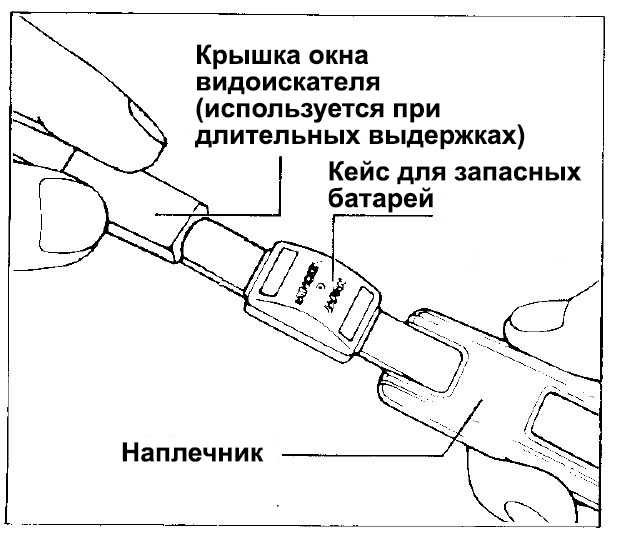
Эргономика
Тут всё выстроено по классической схеме. Для простоты восприятия я просто переведу схемы из инструкции.
И ещё у этой камеры интересный многофункциональный ремешок…
Как можно заметить, камера выполнена согласно классической схеме и не отличается какими-либо неожиданными техническими решениями, благодаря чему вам скорее всего не придется долго изучать/привыкать и, тем более, переучиваться на новую систему.
От себя могу отметить следующие эргономические плюсы камеры Х-700 (исключительно субъективные):
- Экспонометр активируется прикосновением к поверхности кнопки спуска, то есть без «легкого нажатия», как на множестве других камер. Во-первых, благодаря такому решению можно не бояться случайно отснять кадр. Во-вторых, это действительно новые тактильные ощущения, которые в какой-то степени выделяют эту камеру из общего ряда. В-третьих, с помощью такого нажатия можно проверить работоспособность батарей без каких-либо дополнительных кнопок «check», воздействия на затвор или чего бы то ни было ещё.
- Видоискатель. В этой камере прекрасно реализованы как клинья Додена, так и микрорастр. У меня очень плохое зрение и всё равно мне с ней очень легко фокусироваться. Другие аппараты, такие как Exacta Varex IIa или Fujica ST801 (которая славится своим светлым и большим видоискателем) ощущаются значительно хуже, хотя снабжены и клиньями, и микрорастром.
- Вкусовщина. Мне нравится, что электронный автоспуск в этой камере сопряжён с кнопкой блокировки автоэкспозиции. Фотоаппарат выглядел бы перегруженным, если бы автоспуск с таймером были вынесены в отдельную кнопку.
- Размер и вес.
Но есть и пара минусов…
- Кнопка автоспуска/блокировки автоэкспозиции имеет неудачную форму. При частом или длительном нажатии палец откровенно болит как из-за неудачной формы самой кнопки, так и из-за острых рамок её окантовки. Неприятно…
- Оба кольца имеют блокираторы, и для изменения их положения требуется приложить больше усилий, нежели хотелось бы. Думаю, что отсутствие блокираторов сказалось на эргономике лишь положительно… Всё-таки не нужна защита от дурака на камере, которая позиционировалась как наиболее продвинутая в линейке (хотя именно 500/570 считалась лучшим выбором для профессионалов благодаря отсутствию режима «Р» и наличию двух индикаторов выдержки в видоискателе).
Zooms
Before the introduction of autofocus, in the early 1980s, there were a small number of lenses made by third-party manufacturers that performed better than what Minolta was offering.
A large number of these top-performing lenses were released with Vivitar branding. Any zoom lens that has the Vivitar Series 1 branding on it is going to have the best optics you’ll see from a vintage zoom lens.


![Lenscraze: minolta md rokkor 50 mm 1:1.4 with focal reducer [md]](https://realshop5.ru/wp-content/uploads/d/e/2/de2c4172fe8044ab5c6612cf8f4e6ef0.jpeg)

Unfortunately, finding copies of these lenses in good condition can be extremely difficult. Beyond that, no vintage zooms offer outstanding performance. If you see one for sale that is cheap enough, it may be worth picking up, but I don’t think they are worth hunting for.
Vivitar Series 1 70-210mm f/3.5
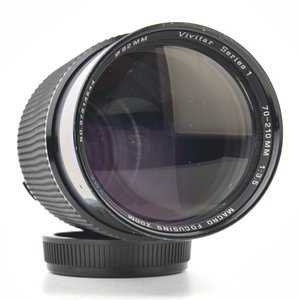 Vivitar 70-210mm f/3.5 Zoom Lens
- Covers a popular zoom range.
- Great for portrait or wildlife photography.
- A rare time when a third-party lens is the better choice.
- 62mm filter threads.
See current price and more information on:
Amazon eBay KEH
Optically, the performance from this lens on the Minolta SRT 101 is going to be better than any Minolta counterpart. The fit and finish are a little lackluster and age makes that worse.
For sharp photos, just like every vintage zoom lens, you will have to stop the lens down to f/5.6 or f/8. There are no intermediate stops between f/3.5 and f/5.6.
Shooting at an f/5.6 aperture will cause many lighting situations to be difficult without the use of an external flash. You’ll be fine shooting outdoors during the day.
The lens is sold with mounts for other camera systems. If you decide to buy one, make sure that it is for the Minolta MD mount.
Vivitar Series 1 28-90mm f/2.8-3.5
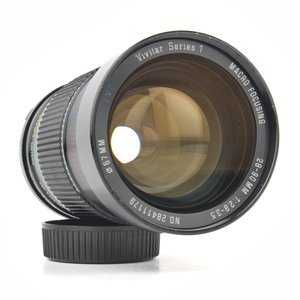 Vivitar Series 1 28-90mm f/2.8-3.5 Zoom Lens
- Covers a useful zoom range.
- Great for everyday general photography.
- A rare time when a third-party lens is the better choice.
- 67mm filter threads.
See current price and more information on:
eBay KEH
Depending on the type of photography you intend to do, this could be a more useful zoom range.
However, owning 58mm and 28mm primes will make a majority of the zoom range redundant. The primes also have better image quality, are smaller, and weigh less.
Минусы
У X-700 есть и один недостаток, наличие которого, однако, я обнаружил лишь с помощью англоязычной Википедии. Суть в том, что в ручном режиме Х-700 в видоискателе показывает лишь рекомендуемую выдержку, в то время как индикатора выбранной выдержки вы там не найдёте. Забавно, ведь в младшей модели X-500 (X-570 в США) было два индикатора и, следовательно, такого недостатка не наблюдалось (а ещё у него была возможность использовать более медленную выдержку синхронизации со вспышкой).
Англоязычные источники также говорят о том, что в конкурентной борьбе с камерами типа Canon AE-1, Minolta сделала ставку на дополнительное оборудование, что привело к снижению бюджета на внутренний механизм камеры и в результате Х-700 лишилась дорогих затворов, которыми были снабжены ее предшественники — ХЕ и XD. Minolta также снизила цену камеры, изготавливая некоторые детали механизма перемотки пленки из менее дорогих материалов, а также за счет использования более простых электронных компонентов. Даже рычаг перемотки камеры сделан из пластика.
Подчёркиваю — менее дорогих не значит дешёвых или плохих. К качеству и прочности механизма у меня не возникло никаких претензий!В подавляющем числе рабочих ситуаций это ни на что не влияет, тем не менее, выдержка синхронизации 1/60 секунды, полностью электронный затвор, а также невозможность измерять уровень освещённости ниже EV-1 негативно сказались на возможностях использования Х-700 в условиях экстремально-низкой освещённости и на особо длительных выдержках. Это нужно учитывать…
Так же стоит помнить, что в 1990 году Minolta перенесла производство камер Х-700 в Китай. Примерно в это же время был заменён конденсатор электронного затвора, что негативно сказалось на его надёжности. Серьезных проблем это не вызвало, но при желании сама деталь легко заменяется в любой фотомастерской. В общем, не стоит из-за таких мелочей отказываться от удовольствия работы с этой камерой.
Стоит учитывать, что в ваших руках всё-таки сложная электронная фотокамера, её работоспособность зависит от множества факторов и, как следствие, вероятность столкнуться с поломкой на Х-700 несколько выше, чем в случае с полностью механической камерой. Зато есть режим приоритета диафрагмы и прочие плюсы… Так или иначе, это дело исключительно в расстановке ваших приоритетов. У меня в коллекции, к слову, есть как полностью механические камеры, так и полностью электронные, и используются все они в соответствии с задачами и настроением. Автоматическая камера обеспечивает высокую скорость работы и стабильные результаты даже в ситуации с быстроизменяющимся освещением, в то время как механические аппараты не зависят от источников питания, более надёжны (в большинстве случаев), а также предоставляют полный контроль над процессом. Похоже на сравнение автоматических и механических КПП на автомобилях, не находите? В общем да… эти размышления вовлекут в пучину холивара, точно!
Ancient Optics MINOLTA ROKKOR Cine Primes
Кинофиксы MINOLTA ROKKOR рекламируются как вариант очень дорогих объективов Canon K35, которые были представлены еще в 1970-х годах.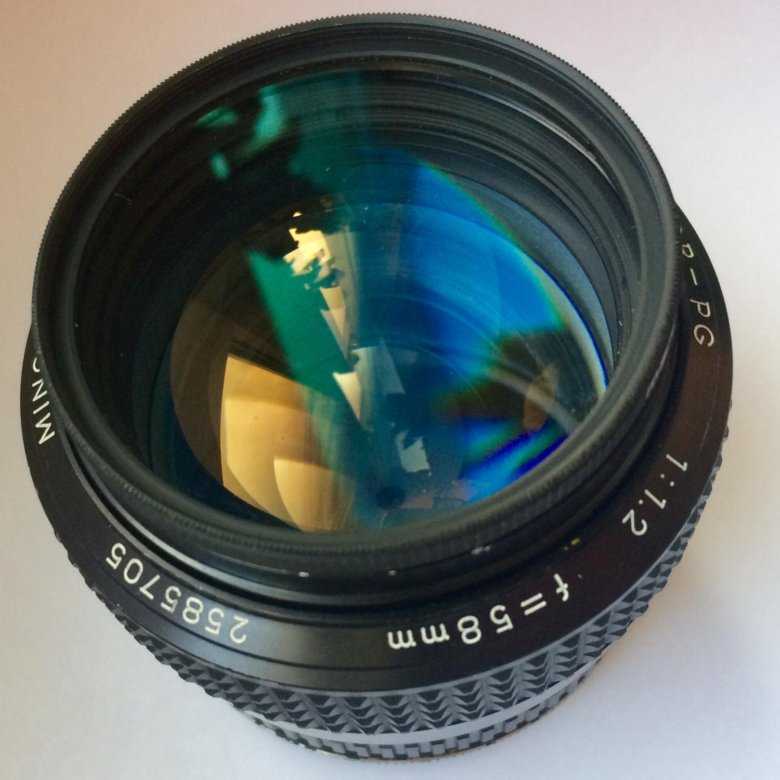 В то время как многим кинематографистам нравится внешний вид K35, поскольку объективы сейчас продаются по смехотворным ценам и их нет в наличии, безусловно, существует потребность в альтернативах.
По данным Ancient Optics, фикс-объективы MINOLTA ROKKOR способны показывать очень похожий внешний вид при использовании на современных цифровых кинокамерах.
Еще в 60-х и 70-х годах линейка ROKKOR была одним из самых полных наборов объективов на рынке с широким диапазоном доступных фокусных расстояний. Компания GL Optics провела поиск лучших экземпляров, которые все еще доступны, и повторно разместила их.
Первая партия кинофиксов MINOLTA ROKKOR будет предлагаться в наборе из 11 объективов с фокусным расстоянием от 21 до 200 мм. В будущем к набору добавятся сверхширокоугольный и макрообъектив.
Как и многие другие производители, Minolta использовала отдельное название для своих объективов, в данном случае название «Роккор» было выбрано основателем Minolta Кадзуо Тасимой в качестве отсылки к горе Рокко в Японии. , который находится рядом с фабрикой Minolta. Minolta, которую в конечном итоге купила Sony, еще в 60-х и 70-х годах производила выдающееся стекло. Minolta производила собственные стеклянные элементы и покрытия, что в то время было не так распространено.
Объективы 21 мм f2.8, 58 мм f1.2 и 85 мм f1.7 по-прежнему очень популярны среди фотографов даже сегодня. Самым лучшим из всех объективов является 135 мм f2.
Качество покрытий на этих ранних линзах Rokkor было не таким хорошим, как на более поздних MC и MD линзах, а в некоторых случаях в смесь стекла добавляли радиоактивные соединения тория и лантана для увеличения показателя преломления. Это проявляется в некоторых более светосильных объективах, таких как 58 мм f/1,2 и 85 мм f/1,7, где в некоторых ранних версиях, содержащих это стекло, радиоактивные компоненты постепенно распадались, обесцвечивая стекло и делая изображения, сделанные с пораженными линзы очень теплого оттенка.
Материалы покрытия первых линз MC включали фторид магния, а также другие ингредиенты, а фактические покрытия были покрыты двойным покрытием в процессе Minolta, называемом ахроматическим покрытием, обеспечивающим превосходную цветопередачу и светопропускание по сравнению с конкурирующими производителями.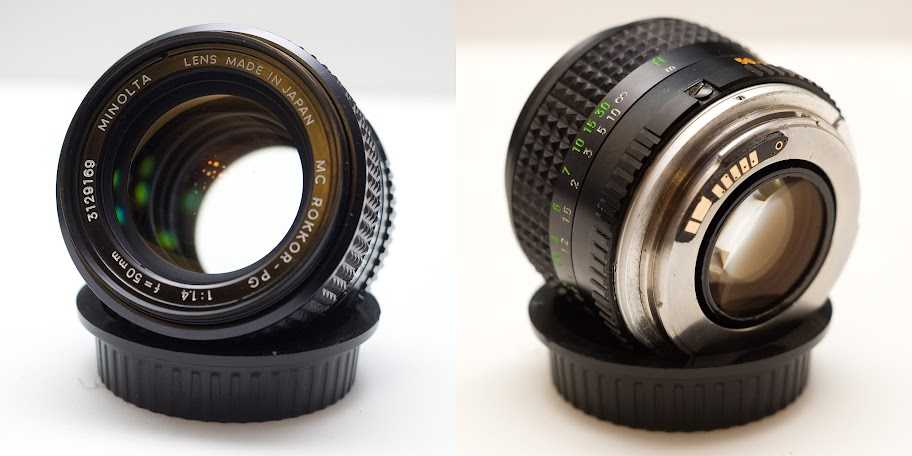 Хотя и не так эффективно, как новые покрытия, постепенно вводимые в более поздние линзы. Покрытия на объективах MC 2-го и 3-го поколения, как правило, лучше, чем на более ранних объективах 1-го поколения.
Эта легендарная оптика продается в очень ограниченном количестве. Если вы арендуете дом за пределами Лос-Анджелеса, вы можете связаться с Ancient Optics, чтобы узнать цены и график доставки.
Мэтью Аллард ACS
Мэтью Аллард — обладатель множества наград, аккредитованный ACS внештатный оператор-постановщик с 30-летним опытом работы в более чем 50 странах мира.
Он является редактором Newsshooter.com и пишет на сайте с 2010 года.
Мэтью получил 43 награды ACS Awards, в том числе четыре престижных Золотых штатива. В 2016 году он получил награду за лучшую операторскую работу на 21-й церемонии вручения наград Asian Television Awards.
Мэтью можно нанять в качестве DP в Японии или в любой другой стране мира.
Wide Angles
Minolta 24mm f/2.8 MD
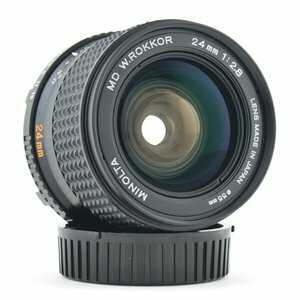 Minolta MD W.Rokkor 24mm f/2.8 Lens
- Great combination with a 50mm lens.
- Optical coatings help improve sharpness and reduce glare.
- Excellent wide angle lens.
- 55mm filter threads.
See current price and more information on:
Amazon eBay KEH
Other versions of this lens are marked as W.Rokkor or Rokkor-X. All three are excellent choices for a wide-angle lens.
While Minolta made wider lenses, they are either expensive and/or suffer from significantly more distortion than a modern wide-angle lens.
If you want something special, the Minolta MD VFC Rokkor 24mm f/2.8 has a completely different design than other 24mm lenses. VFC stands for ‘variable field curvature’.
Using the VFC control ring enables the plane of focus to be adjusted from flat to convex or concave. It is a very rare feature to find on a lens, which makes them expensive.
Minolta 28mm f/2.8 MD W.Rokkor-X
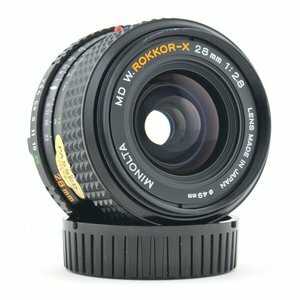 Minolta 28mm f/2.8 Lens
- Works well with a standard lens.
- Small and compact.
- Very easy to find.
- Inexpensive.
- 49mm filter threads.
See current price and more information on:
Amazon eBay KEH
Avoid the ‘Celtic’ model of this lens as it was introduced to be a budget line of lenses. All of the other versions that feature Rokkor in the name have a better build quality.
It is the widest angle lens available that remains easily affordable. Anything wider will cost multiple times what this lens should be available for.
Another possible alternative is the W Rokkor HG 35mm f/2.8.
Minolta Macro Lenses
For capturing photos at macro magnification (1x), focal lengths in the 90mm-105mm range will be the best choice.
You’ll have a large enough working distance to be able to use flash, while avoiding excessive weight and high costs that come with longer focal lengths.
All of the Minolta MD macro lenses require the use of extension tubes to reach 1x magnification. These tubes were branded as ’life-size’ adapters, which can be difficult and expensive to purchase if they are not included with a lens.
Vivitar 90mm f/2.8 Macro
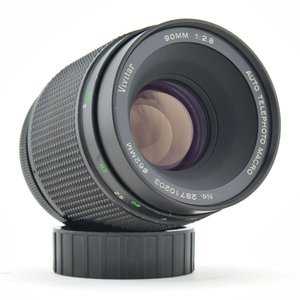 Vivitar 90mm f/2.8 Macro Lens
- Ideal focal length for 1x magnification.
- Widely available.
- Incredible value.
- 62mm filter threads.
See current price and more information on:
eBay KEH
My favorite vintage macro, the 90mm Vivitar, was made with a variety of camera mounts. Fortunately, it is not difficult to find one for the Minolta SR-T 101 with a Minolta MD mount.


The lens is ideal for shooting macro at 1:1 magnification because you’ll get around 3 inches of working distance. Emulsions with a slow film speed will produce the sharpest image possible.
Shutter speeds will need to be slow without the use of a flash. Even with a flash, it can make sense to use the mirror lockup feature on the SR T101.
Both of the Vivitar macro models were made by Komine and were released under several different brand names such as Panagor, Elicar, Quantaray, Spiratone, and Rokunar.
There is a Vivitar 90mm Macro Review and a Vivitar 55mm Macro Review.
Vivitar 55mm f/2.8 Macro
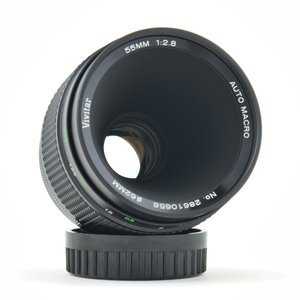 Vivitar 55mm f/2.8 Macro Lens
- The second best vintage macro lens I’ve used.
- An outstanding lens for close-up photography.
- Can achieve life-size magnification without needing an extension tube.
- 55mm filter threads.
See current price and more information on:
Amazon eBay KEH
The Vivitar 55mm is an excellent choice for close-up photography with the Minolta SR-T 101. That includes copy work, nature, and tabletop photography.
At 1X magnification, there is a small amount of working distance. An upside to that is that at 0.5x magnification you won’t have to be several feet away from the subject.
To get the best results use a tripod and mirror lock up to prevent camera shake.
An earlier f/3 version of the lens exists and should be avoided. The f/2.8 version is significantly sharper.
Minolta 50mm f/3.5 MD Macro
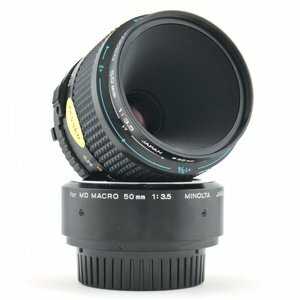 Minolta 50mm f/3.5 Macro Lens with Extension Tube
- The second best vintage macro lens I’ve used.
- An outstanding lens for close-up photography.
- Can achieve life-size magnification without needing an extension tube.
- 55mm filter threads.
See current price and more information on:
Amazon eBay KEH
I own the worst two models of the lens, the MD non Rokkor and Celtic. Both were designed with lower costs than a Rokkor model.
In order to reach 1:1 magnification, a 25mm extension tube is needed called a ’life-size adapter’ by Minolta. Make sure one is included as they can be difficult to find.
It is well suited to studio use, where the camera can be on a sturdy tripod. To get the best sharpness from the lens lock the mirror up to prevent vibrations from the mirror slap.
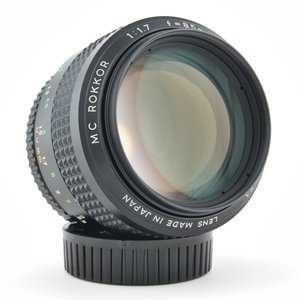
Minolta 50mm f/1.7
I have 3 of these – a 50mm f/1.7 MC Rokkor-PF, a 50mm f/1.7 MD Rokkor (this lens) and a 50mm f1/.7 MD, along with a 55mm f/1.8 Auto Rokkor-PF. This would be what I would call the middle class normal lens; the top class being the 50/55mm f/1.2, the upper middle class 50/58mm f/1.4, and the budget class the 45/50mm f/2. I have used the f/1.7 range and am very fond of this group of lenses; with the MC Rokkor-PF a solid performer, while the MD Rokkor and MD have better colours in the photographs they produce. In comparison, I found the f/1.4 Rokkors to be not as consistent in performance and contrary to what some of my FB friends in Minolta Collectors say, I would pick up the f/1.7 anytime over a f/1.4. I must say this opinion is based on a 58mm f/1.4 MC Rokkor-PF and a 50mm f/1.4 MD Rokkor. I should add that for portraiture the 58mm f/1.4 MC Rokkor-PF is a very nice lens, with beautiful bokeh.
Hindhede Nature Park, Singapore.
Bidadari Park, Singapore
Portrait & Telephoto
Minolta 135mm f/2.8 MD
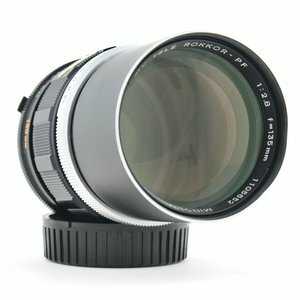 Minolta 135mm f/2.8 Lens
- 85mm substitute.
- Excellent value.
- Relatively inexpensive.
- Widely available.
- 55mm filter threads.
See current price and more information on:
Amazon eBay KEH
Minolta made several versions of this telephoto lens, most likely due to its popularity. When the Minolta SR-T 101 was released, 135mm lenses were more popular for portrait photography than other telephoto lenses.
A big part of that was that a 135mm was close to half the price of an 85mm. Today on the used market, 135mm lenses can be had for a fraction of what 85mm lenses sell for.
Minolta 85mm f/1.7 MC Rokkor
 Minolta MC Rokkor 85mm f/1.7 Portrait Lens
- Sharp stopped down.
- Fairly expensive.
- Can be difficult to find in good condition.
- 55mm filter threads.
See current price and more information on:
eBay KEH
There is also a second MD version of the Minolta Rokkor 85mm lens. The difficulty with either version of this telephoto lens will be finding one in good condition.
Make sure to carefully read product descriptions. Many will be listed as in “excellent” condition while having fungus and/or haze.
If you want a copy of this lens, you’re likely going to have to buy one off of eBay from Japan. KEH, Adorama, or Amazon rarely have copies of the lens for sale.
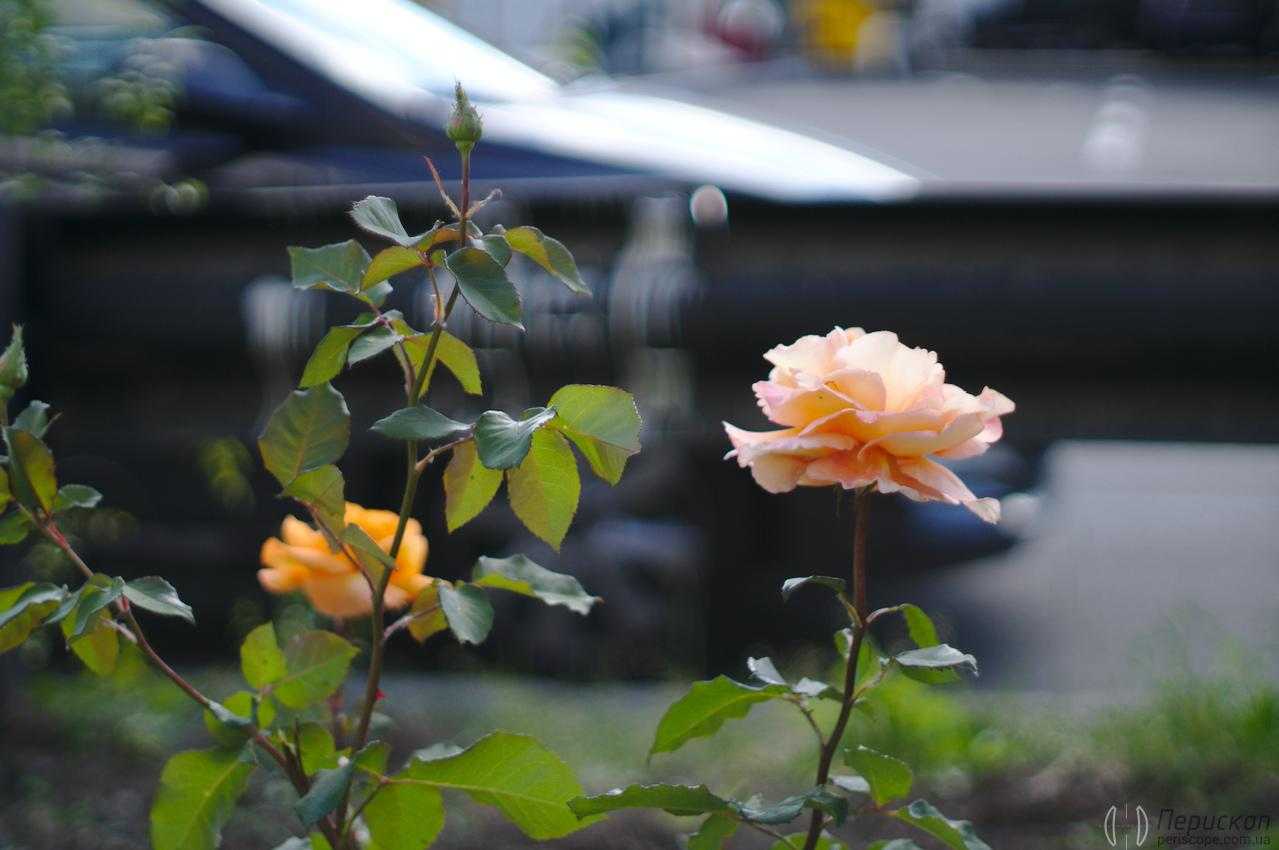
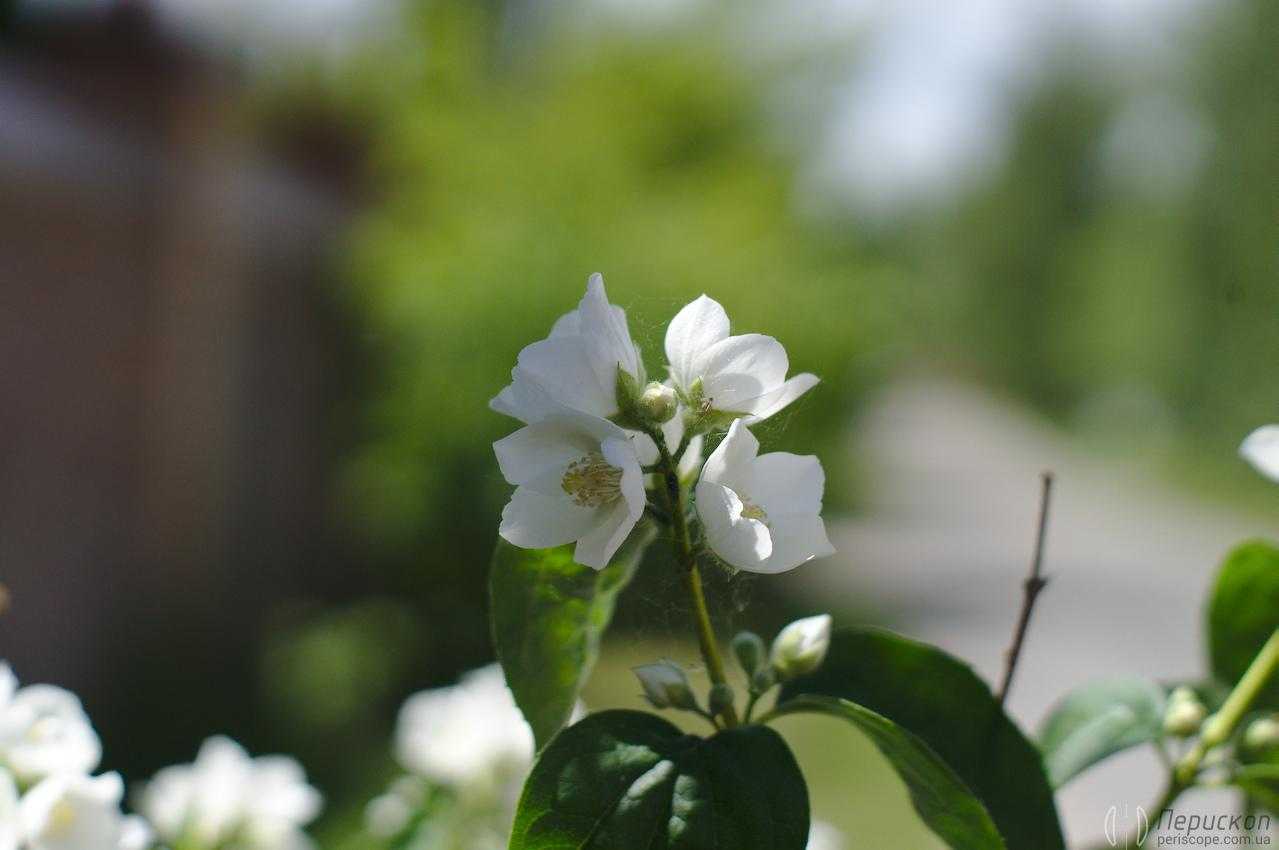
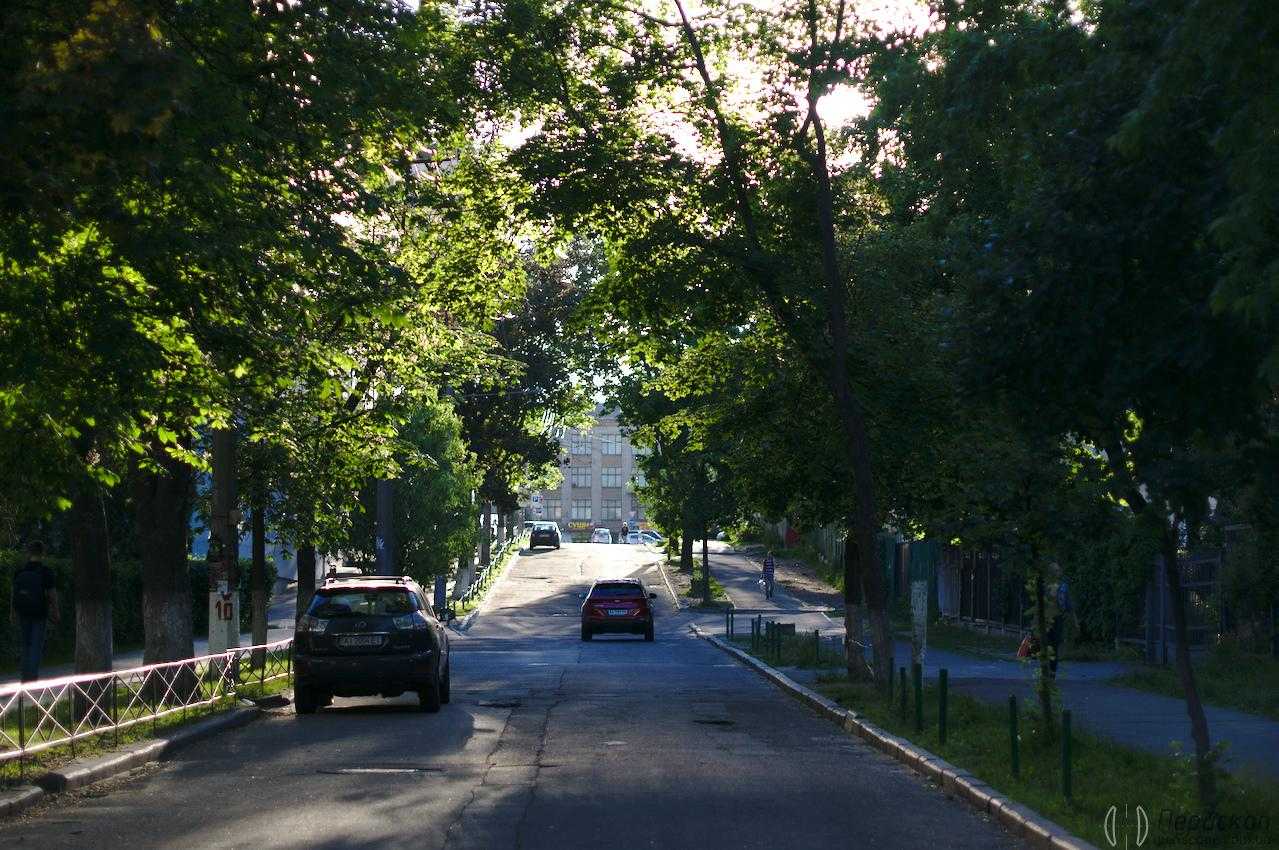
Примеры фотографий, снятых объективом Minolta MC Rokkor-X PG 1:1.4 f=50mm
Все примеры сняты камерой Sony NEX F-3, экспорт из RAW с незначительной коррекцией экспозиции.
Резкость Minolta MC Rokkor-X PG 1:1.4 f=50mm
Объектив имеет хорошую резкость начиная с открытой. она вполне годится для портретов.

f/ 1.4

f/ 1.4

f/ 1.4 (снято через сетку-рабицу)
f/ 2.8
f/ 5.6
С прикрытием диафрагмы до f/ 2 резкость возрастает, а при f/ 2.8 объектив уже супер резкий, далее прироста резкости я не заметил, только расширяется ГРИП.

f/ 2.8
Если объективом снимать на открытой, нужно немного времени приловчится, т.к. ГРИП очень узкая и можно легко промахнуться.

f/ 1.4
Рисунок и боке Minolta MC Rokkor-X PG 1:1.4 f=50mm
На открытой диафрагме рисунок получается пластичный и мягкий, в боке можно наблюдать интересные кружочки, которые остаются вплоть до f/ 2.8.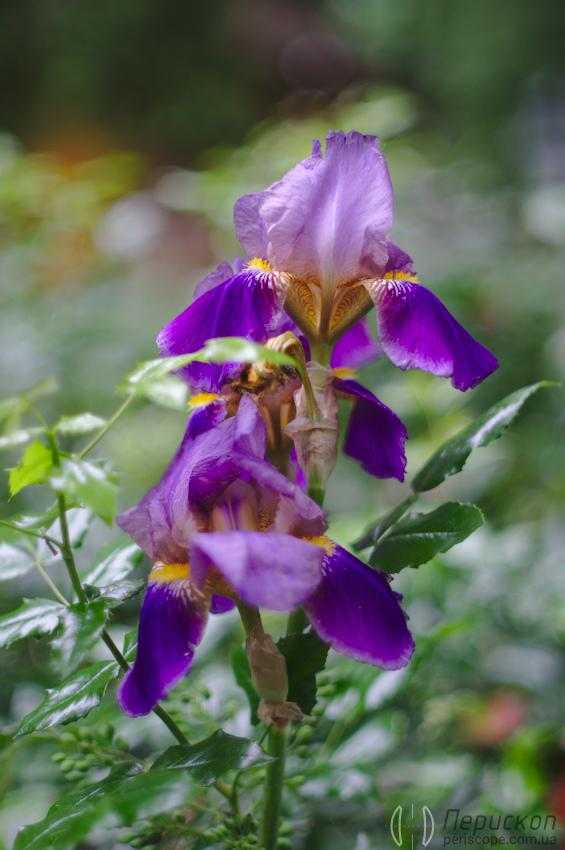
f/ 1.4
f/ 1.4

f/ 2

f/ 2.8
Рисунок характерен минольтовским полтинникам, в целом рисунок мне понравился, нескучный, но в тоже время чего-то экстравагантного я не заметил.

f/ 2

f/ 2
f/ 2.8
Контраст и цветопередача Minolta MC Rokkor-X PG 1:1.4 f=50mm
Объектив имеет хороший контраст, при контровом свете на открытой диафрагме можно заметить падение контраста, но в норме.

f/ 2

f/ 4
Другими словами он держит контраст неплохо, хотя и уступает более новым объективам.

f/ 1.4
f/ 2

f/ 2
Цвета насыщенные, я не заметил какого-то сдвига в цветах, нормальные типичные цвета, при определенных сценах есть небольшой уход в зеленоватый отенок.
f/ 4

f/ 4
f/ 4
Вывод
Minolta MC Rokkor-X PG 1:1.4 f=50mm хороший добротный светосильный полтинник от Minolta. Цена на рынке сейчас 80-150 баксов.


Вердикт
По соотношению цена/качество/функционал — Minolta X-700 и её младшая модель X-500 (X-570) — хороший выбор. Аппарат из Японии без объектива обойдётся вам примерно в 70-100 долларов в зависимости от состояния, в России же всё будет зависеть от совести продавца. Так или иначе, за эти деньги вы получите камеру с приятным и светлым видоискателем, точной экспонометрией, вполне жизнеспособным режимом приоритета диафрагмы и, в случае с моделью Х-700, ещё и автоматическим режимом. Объективы серии MC и MD, благодаря своей относительной новизне и большим партиям, не отличаются высокой стоимостью, в то время как их оптические свойства достаточно высоко ценятся. Цена базовых объективов редко превышает 50 долларов.
В продаже можно найти множество аксессуаров Minolta Program System, в частности, относительно недорогие вспышки серии «РХ», вайндеры и моторные/батарейные ручки.
Minolta X-700 использует стандартные батарейки LR44, благодаря чему её можно оживить практически в любом населённом пункте, где есть хотя бы простейший магазин электрики/электроники или часовщик. Камера очень экономична и проработает на одном комплекте батареек долго.
Это действительно очень компактная зеркальная камера!
Standard Camera Lenses
Here is a selection of 58mm, 50mm, and 45mm focal lengths that made up the selection of standard lenses for the SRT 101. Back when the camera was sold as new, there would have been a discount to buy a 58mm or 50mm lens with the camera as a kit.
Minolta 58mm f/1.4 MC Rokkor
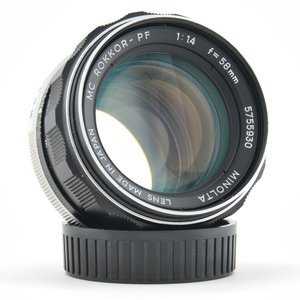 Minolta MC Rokkor-PF 58mm f/1.4 Prime Lens
- “Kit” lens for the SRT 101.
- Excellent value.
- A novel focal length.
- 55mm filter threads.
See current price and more information on:
Amazon eBay KEH
If you don’t already own it, a good first lens to get for the Minolta SRT-101 is the Minolta 58mm f/1.4 MC Rokkor. The 58mm focal length is uncommon, which provides a unique experience.
Be careful when selecting your film speed if you intend to shoot wide open outdoors during the day. The maximum shutter speed of 1/1000 of a second on the camera might not be fast enough if you use ISO 400 film.
Like many lenses for the SR T series of cameras, there can be problems such as fungus, haze, or tight focus ring.
Minolta 50mm f/1.4 MD Rokkor-X
 Minolta MC Rokkor-X 50mm f/1.4 Camera Lens
- Exceptional optics.
- Optical multi-coatings to improve performance.
- Easy to meter with at night.
- Comparatively inexpensive.
- 55mm filter threads.
See current price and more information on:
Amazon eBay KEH
This is an excellent fast and sharp 50mm lens for the Minolta SRT 101. There is also an earlier MC version of the lens, but the MD version is easier to find.
The lens is one of the cheapest manual focus 50mm f/1.4 lenses available from any of the manufacturers that made film cameras. If you want an even cheaper option, look for the Minolta 50mm f/1.7.
Minolta 45mm f/2 MD Rokkor-X
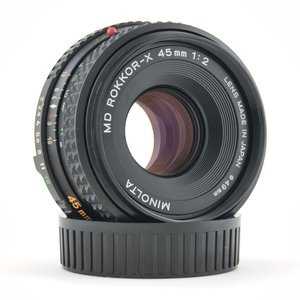 Minolta MD Rokkor-X 45mm f/2 SLR Lens
- Great image quality.
- Small, compact, and light.
- Easy to find.
- Inexpensive.
- 49mm filter threads.
See current price and more information on:
Amazon eBay KEH
This is another model with uncommon focal length lens from Minolta. It’s a great choice if you are looking for a small and light pancake lens for your SR-T 101.
They are very cheap and can easily be found in good condition. There is an earlier MC version that is also a good option.