

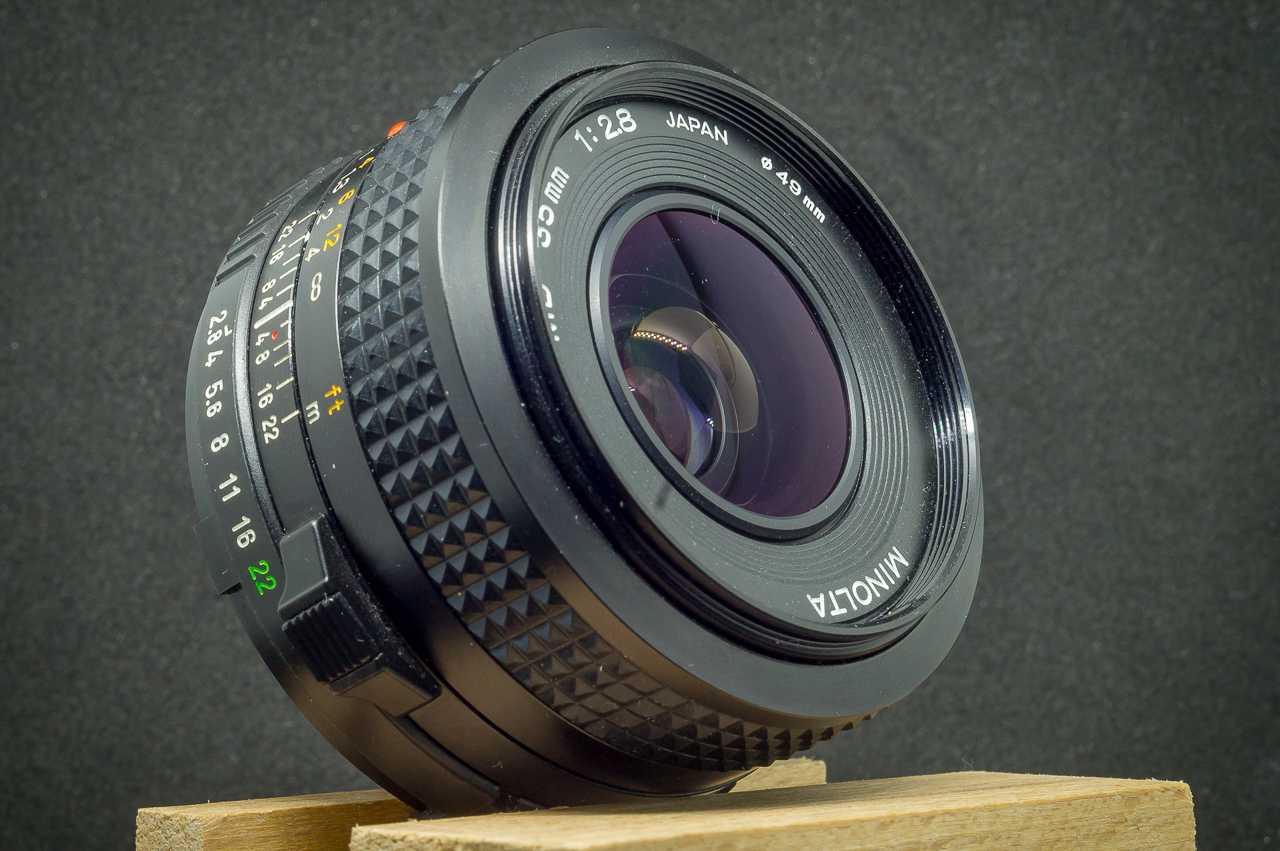
Minolta MD FISH-EYE Rokkor 16mm 1:2.8 (3-3.5/5)
- f/2.8: The center is excellent, and most of the image sharp enough, midframe sharpness is actually lower than near corner sharpness wile the far corners are unsharp. Vignetting is surprisingly low.
- f/5.6: noticeably better than f/4, most of the image is very sharp, only the far corners are unsharp
- f/11: very good sharpness across the frame. Flare resistance is average and CA pronounced.
- A rather heavy lens with integrated filters and lens hood. Built quality is excellent
Fisheye lenses are very hard to master, I wasn’t really succesfull at it. But this is a good lens, so good in fact that it also came in Leica R-mount and the same optical design is still used by the current Sony 2.8/16 Fisheye.
There is a younger MD version which is supposedly not as good.
full resolution samples | test
Get the lens at ebay.de | ebay.com | ebay.co.uk (affiliate links)
Minolta MD 50mm 1:1.2 (or Minolta MD 50mm F/1.2, New-MD, MD III design) – overall conclusion

This lens represents balance. Yes, it isn’t sharpest among other lenses, but very sharp, it doesn’t have the best bokeh, but this bokeh is lovely enough, it isn’t most lightweight but not heavy. The 50mm is the most universal and can be used for landscapes, street, portraits, etc. Additionally, it can provide thin DOF, and F1.2 can be used in low light. So, you got the idea – this is the most universal lens among others. If I were allowed to have only one lens, then I would choose this. It is ready for landscapes even from F2.8, for all other tasks from F2.0, and it really can be used on F1.2 without tons of softness like it often happens with other ultra-fast lenses. I recommend auto-focus adapters that can help a lot to make photos on F1.2.


Minolta Rokkor MD 45mm 1:2.0 specifications:
| # in minolta.eazypix.de index | 88 |
| Name engraved on lens | MD ROKKOR (-X) |
| f | 45 |
| A max [1/f] | 2.0 |
| A min[1/f] | 16 |
| Lens design | 6 |
| Lens design | 5 |
| Filter thread Ø front(rear) | 49 |
| Lens Shade | – |
| close-focus [m/ft] | 0.6/2.0 |
| Dimension Ø x length | 64×30.5 |
| Weight | 125 |
| Year | 1978 |
| Style | MD II |
| Code No. (ROKKOR-X) or Order No. | 588-100 (-300) |
More data
| Floating elements | NO |
| Aperture blades number | 5 |
| Confidence in the test results of reviewed copies | High |
| Reviewed lens SN: | 1665021 |
Note: the tested lens has ‘ROKKOR-X’ labeling, it means that the lens was produced for the North American market, but there are no other differences with the same lenses without this label.
Chiyoko 50mm 1:2.8 Super Rokkor (Minolta) parameters:
| Name engraved on lens | CHIYOKO SUPER ROKKOR |
| f | 50 |
| A max [1/f] | 2.8 |
| A min[1/f] | 22 |
| Lens design | 5 |
| Lens design | 3 |
| Filter thread Ø front(rear) | 40.5 |
| Mount | LTM (aka LSM, m39, etc.) |
| closefocus[m/ft] | 1/3.3 |
| Dimension Ø x length | 47×37 |
| Weight | 175 |
| Year | 1954 |
| Aperture blades | 9 |
More data
| Floating elements | NO |
| Serial | 1511817 |
| Confidence in the test results of reviewed copies | Average |
Additional information:
- This lens was introduced in 1954 (with s/n ‘1 500 001’ ) with new Minolta 35 Model II camera and has two editions
- Some of these Chiyoko were marked with red-“C”, it means “multi-layer lens coating”. Yes, this is one of the first lenses in our history with a multi-layer coating (other two: Chiyoko Super Rokkor 50mm 1:1.8 and Chiyoko Rokkor 35mm 1:3.5) (source – canonrangefinder.org)
- Biggest known s/n is about ‘1 603 xxx’ but there was a gap between ‘1 511 xxx’ and ‘1 600 001’. So the total number of produced lenses is about 16 000 copies (not over 100k as it can be imagined). This lens is rare. (source – collection-appareils.fr)
- It is the cheapest 50mm lens in Chiyoda Kogaku/Chiyoko LTM line
- On the right side of the field depth scale, there will be a red dot, indicating the focus mark with the infrared film. (source – collection-appareils.fr)
- The reviewed copy has defects, which can slightly affect the performance in corners, but I hope it doesn’t happen. But I can’t check it… But I must say it.
- Reviewed Copy has a number of air bubbles in the center of the front lens – don’t worry about it, it’s OK for old optics and allowed by old standards of production. This trait makes this particular copy more interesting from the collector’s point of view.
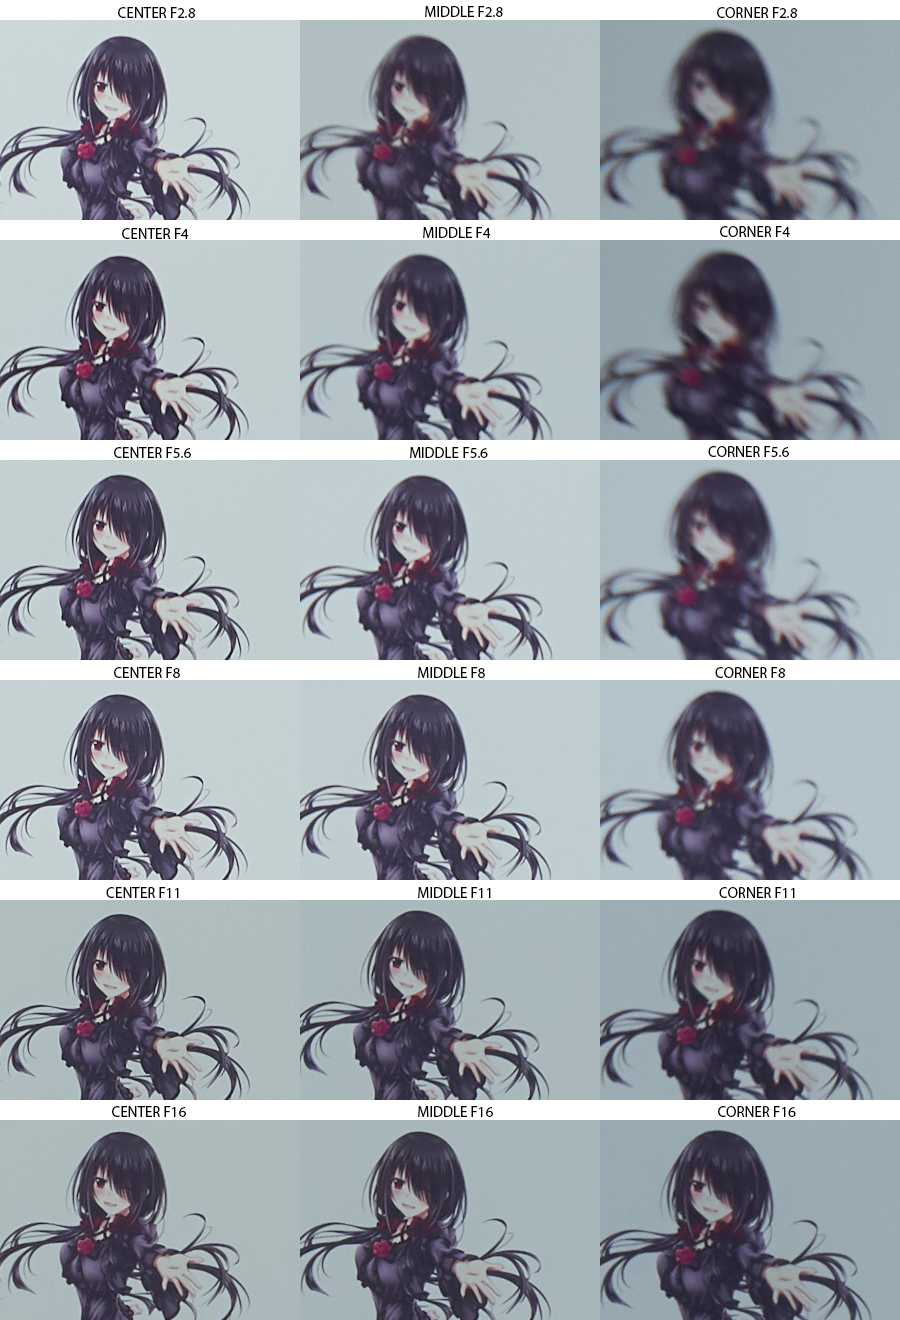
Minolta MD Rokkor 45mm 1:2.0 sharpness
Сlose-distance resolution test, minimal distance
Testing methods description
- Target: 10-15 cm picture, printed on glossy photo paper
- Distance: 0.4m
- Camera: Sony A7II (24mpx, full-frame, tripod, remote control). M-mode, ISO fixed, WB fixed, SteadyShot – OFF.
- The test was repeated for every F-stop on every focus position with manual focus adjustment for each shot. That is to avoid the effect of field curvature.
- RAW processing: Capture One, default settings. All quality settings – 100%. Crops – 300×200 px
Original target image (printed in horizontal orientation on 10cm X 15cm glossy photo paper)


Testing methods description
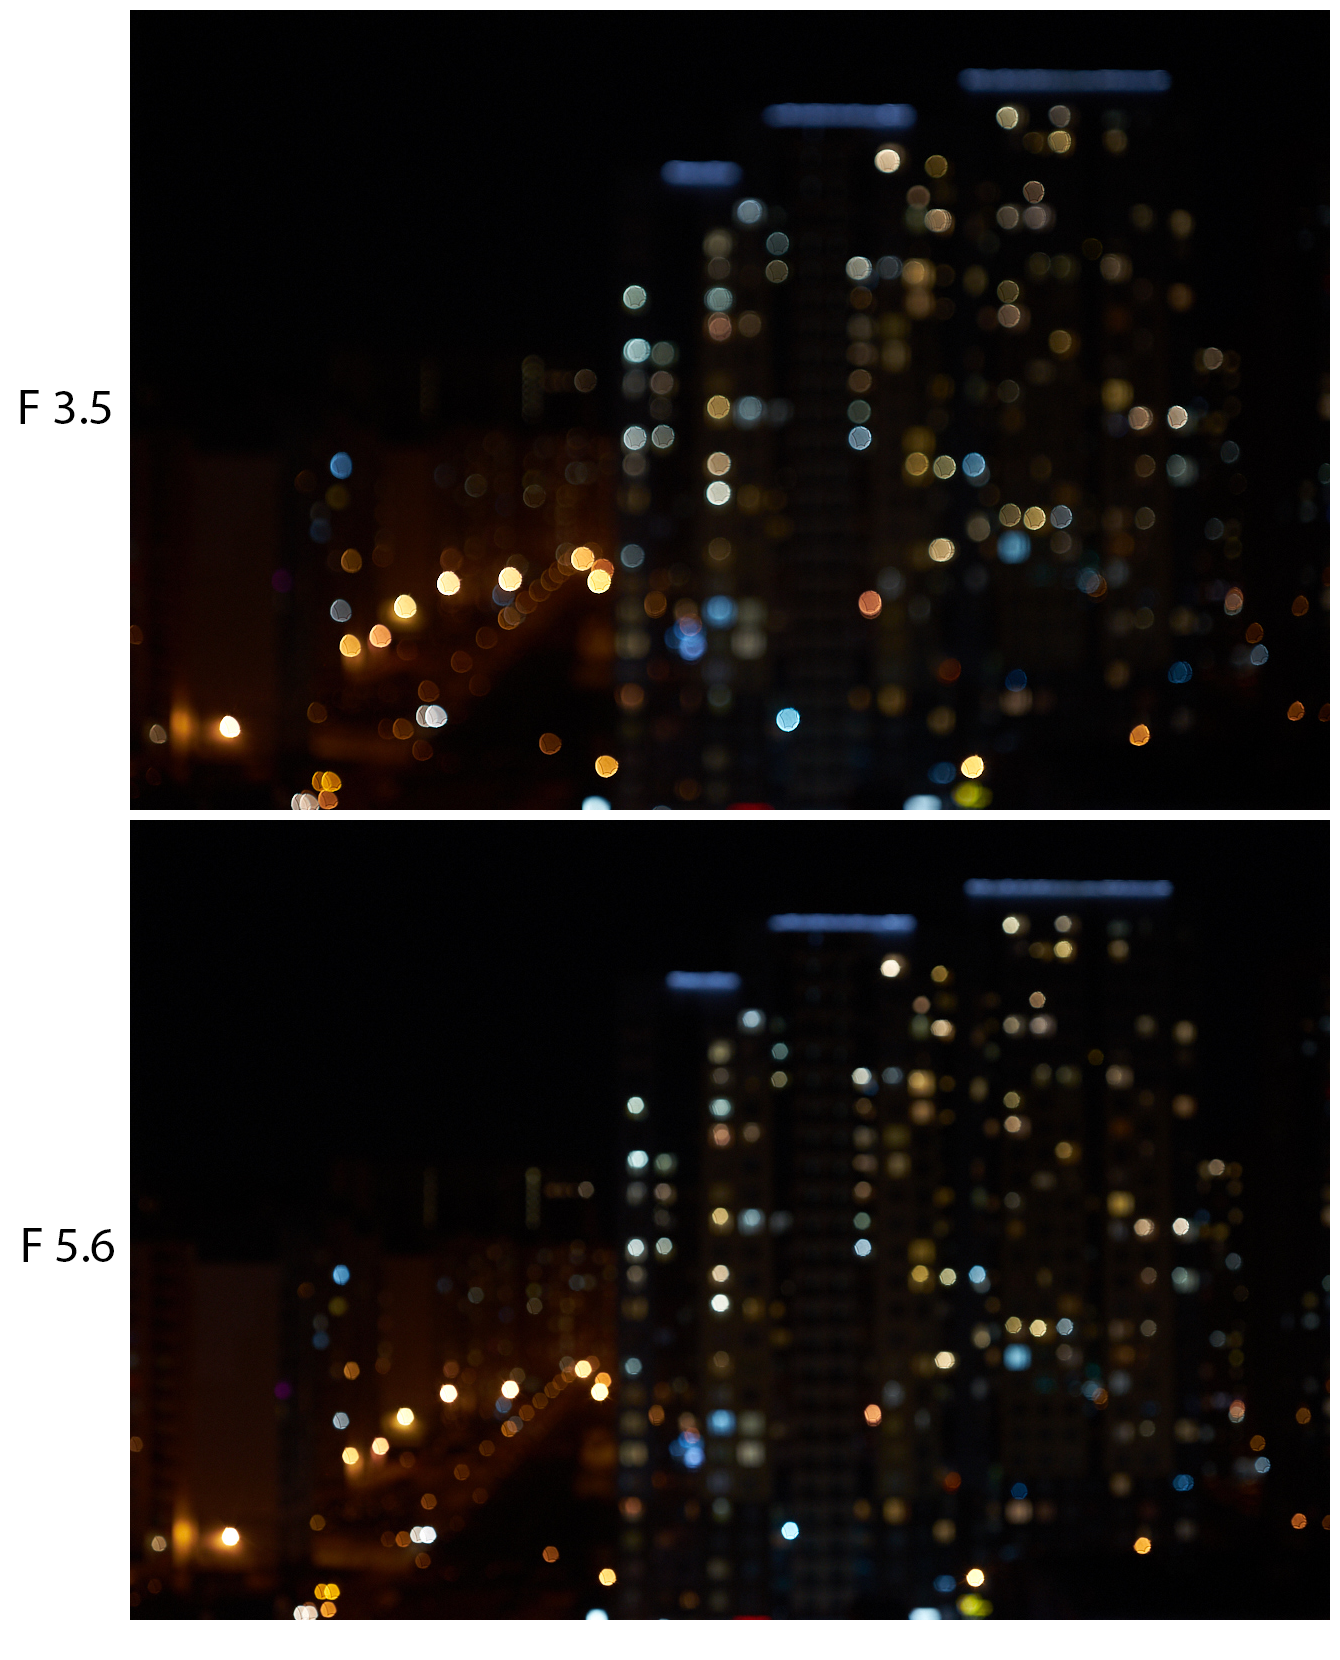
- Target: cityscape
- Distance: > 200 meters to center focus point
- Camera: Sony A7II (24mpx, full-frame, tripod, remote control). M-mode, ISO fixed, WB fixed, SteadyShot – OFF. The focus point is on the center only.
- RAW processing: Capture One, default settings. All quality settings – 100%. Crops – 300×200 px
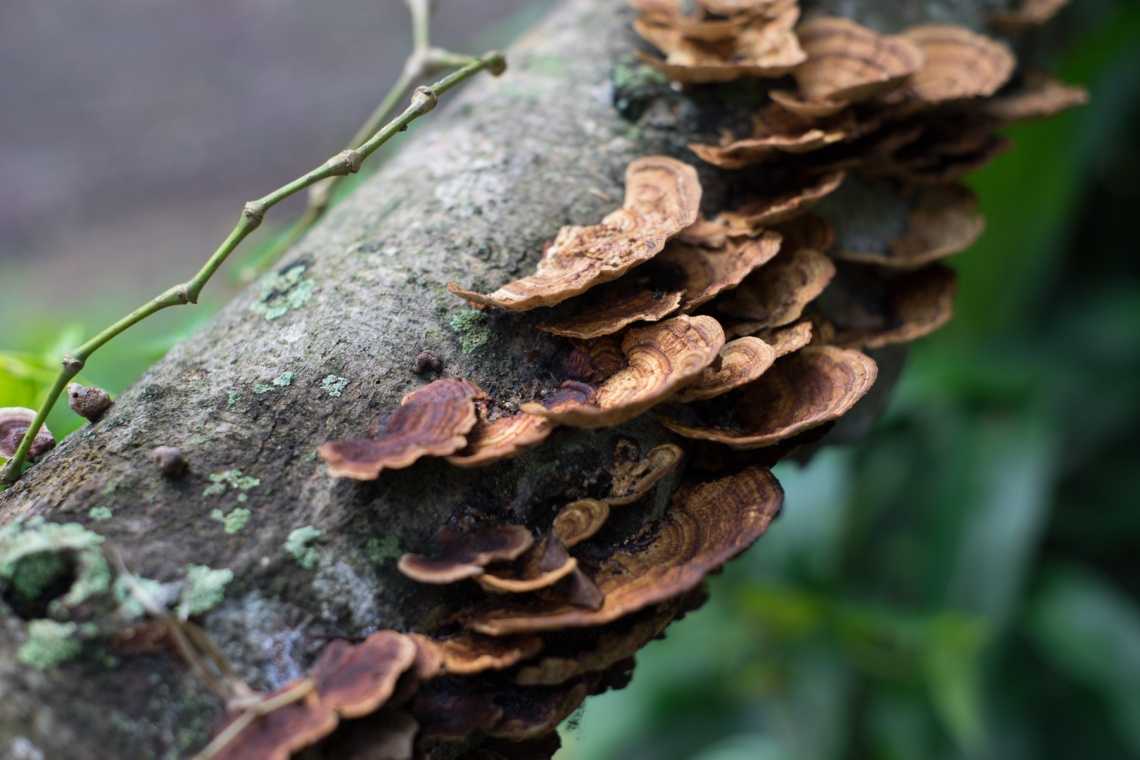
Minolta MC Rokkor QF 50mm 1:3.5 Macro aberrations
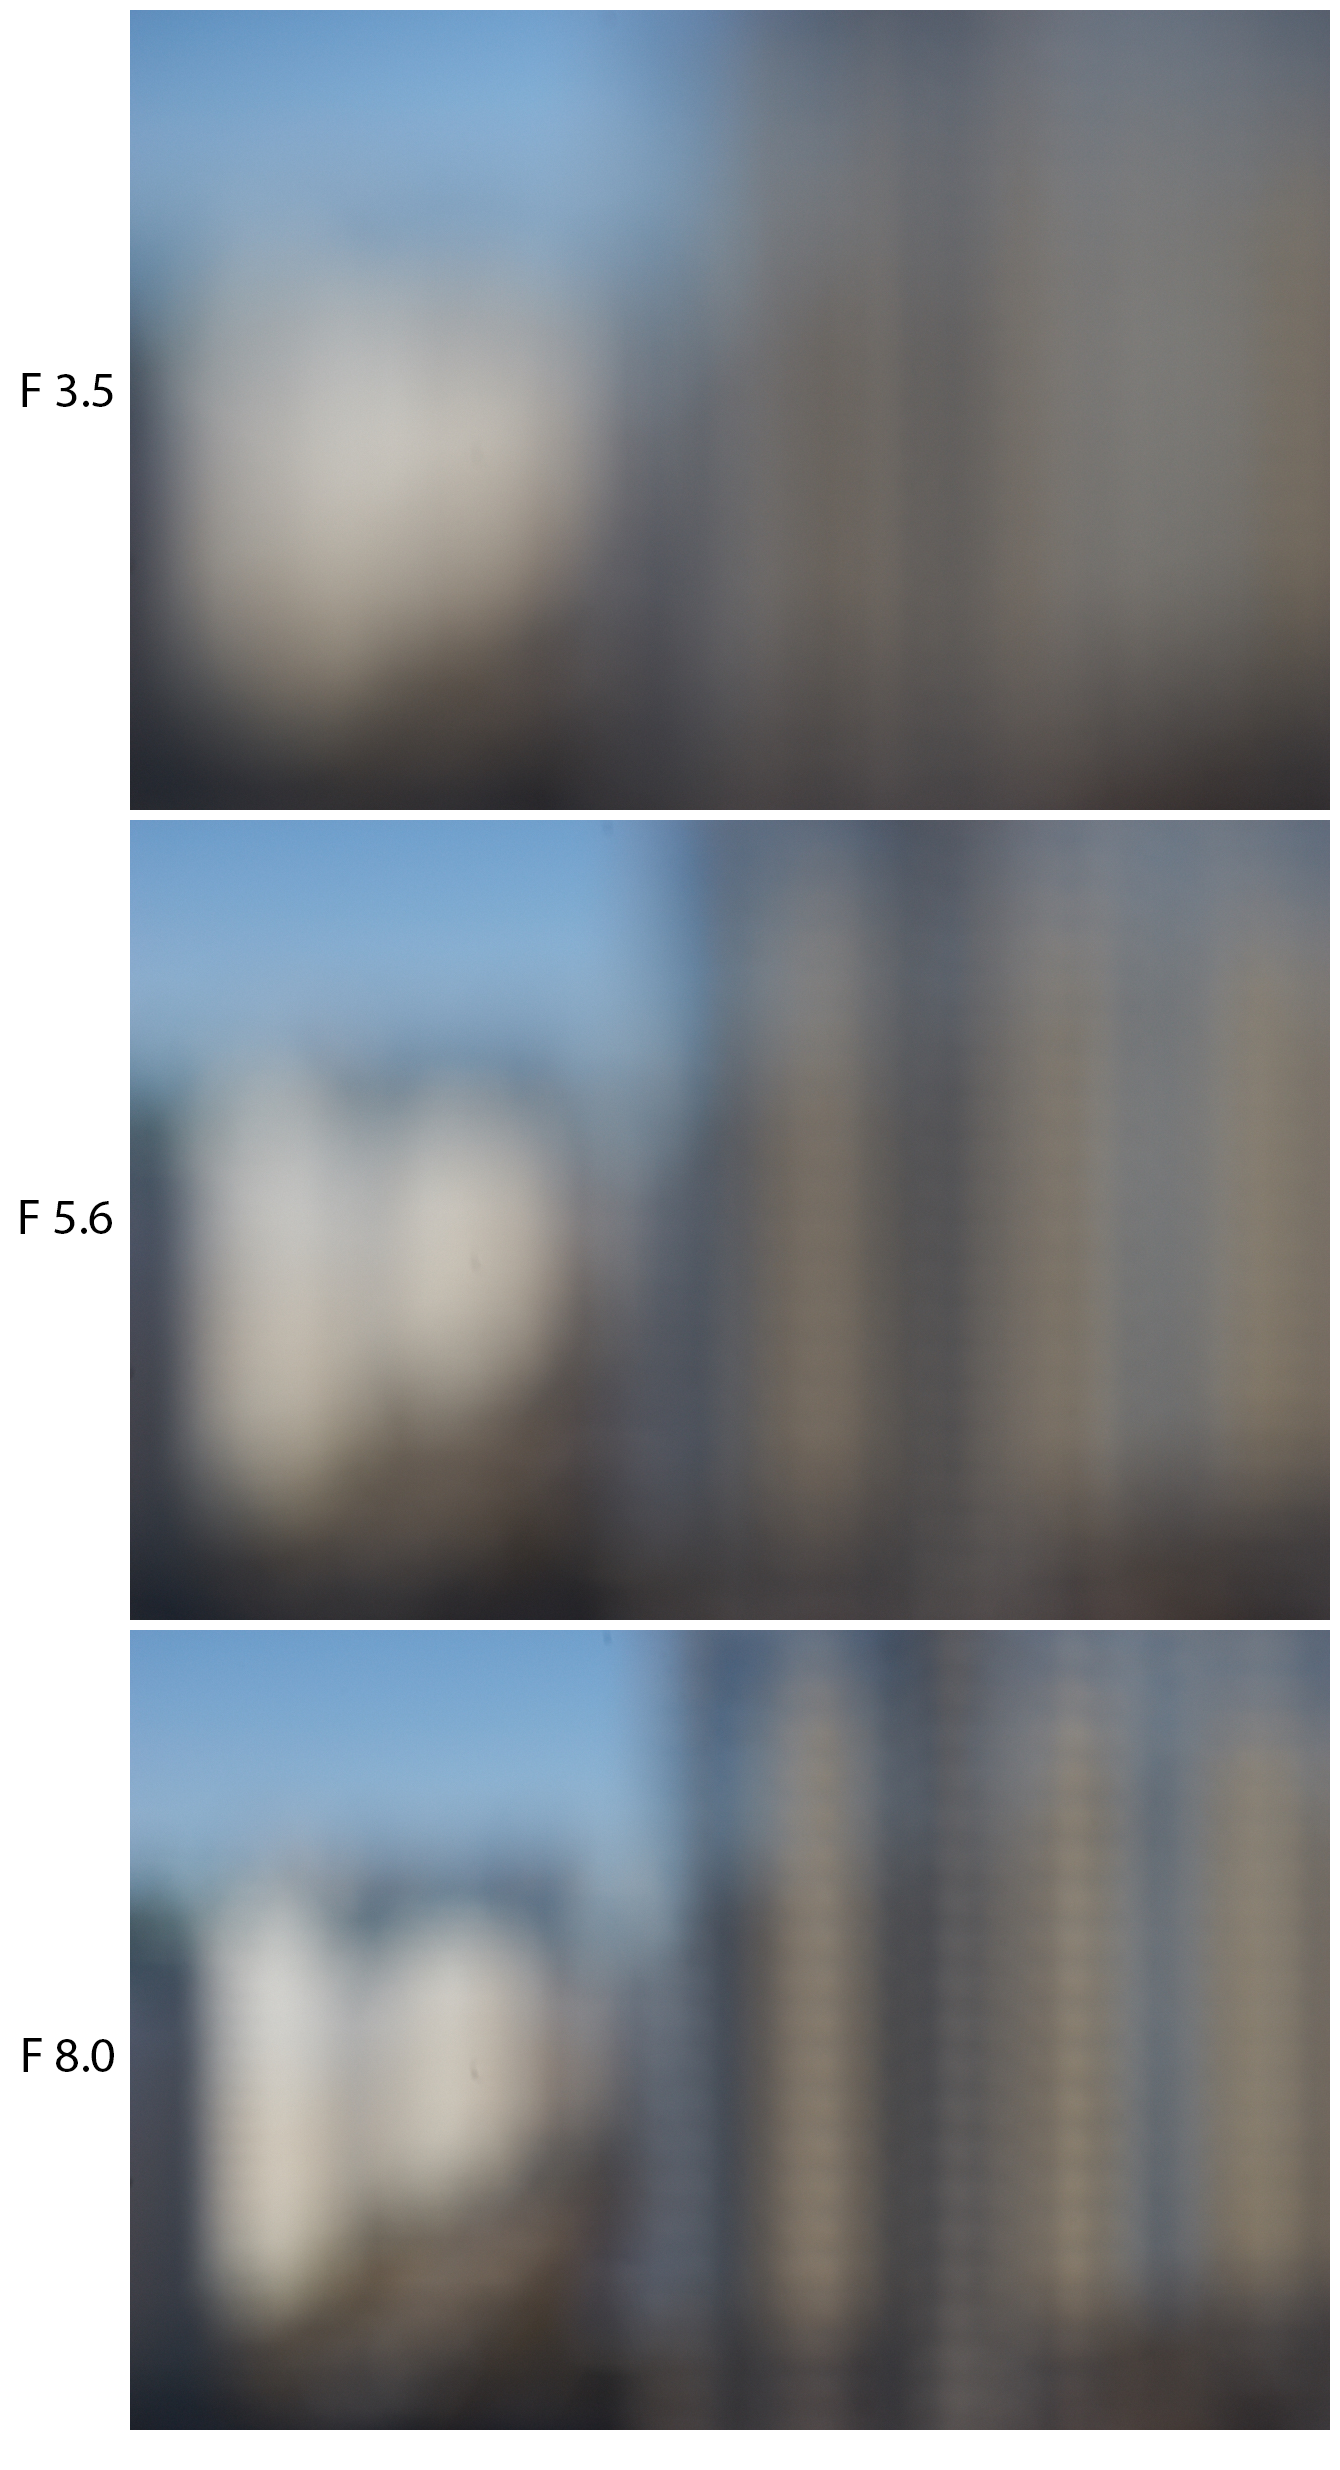
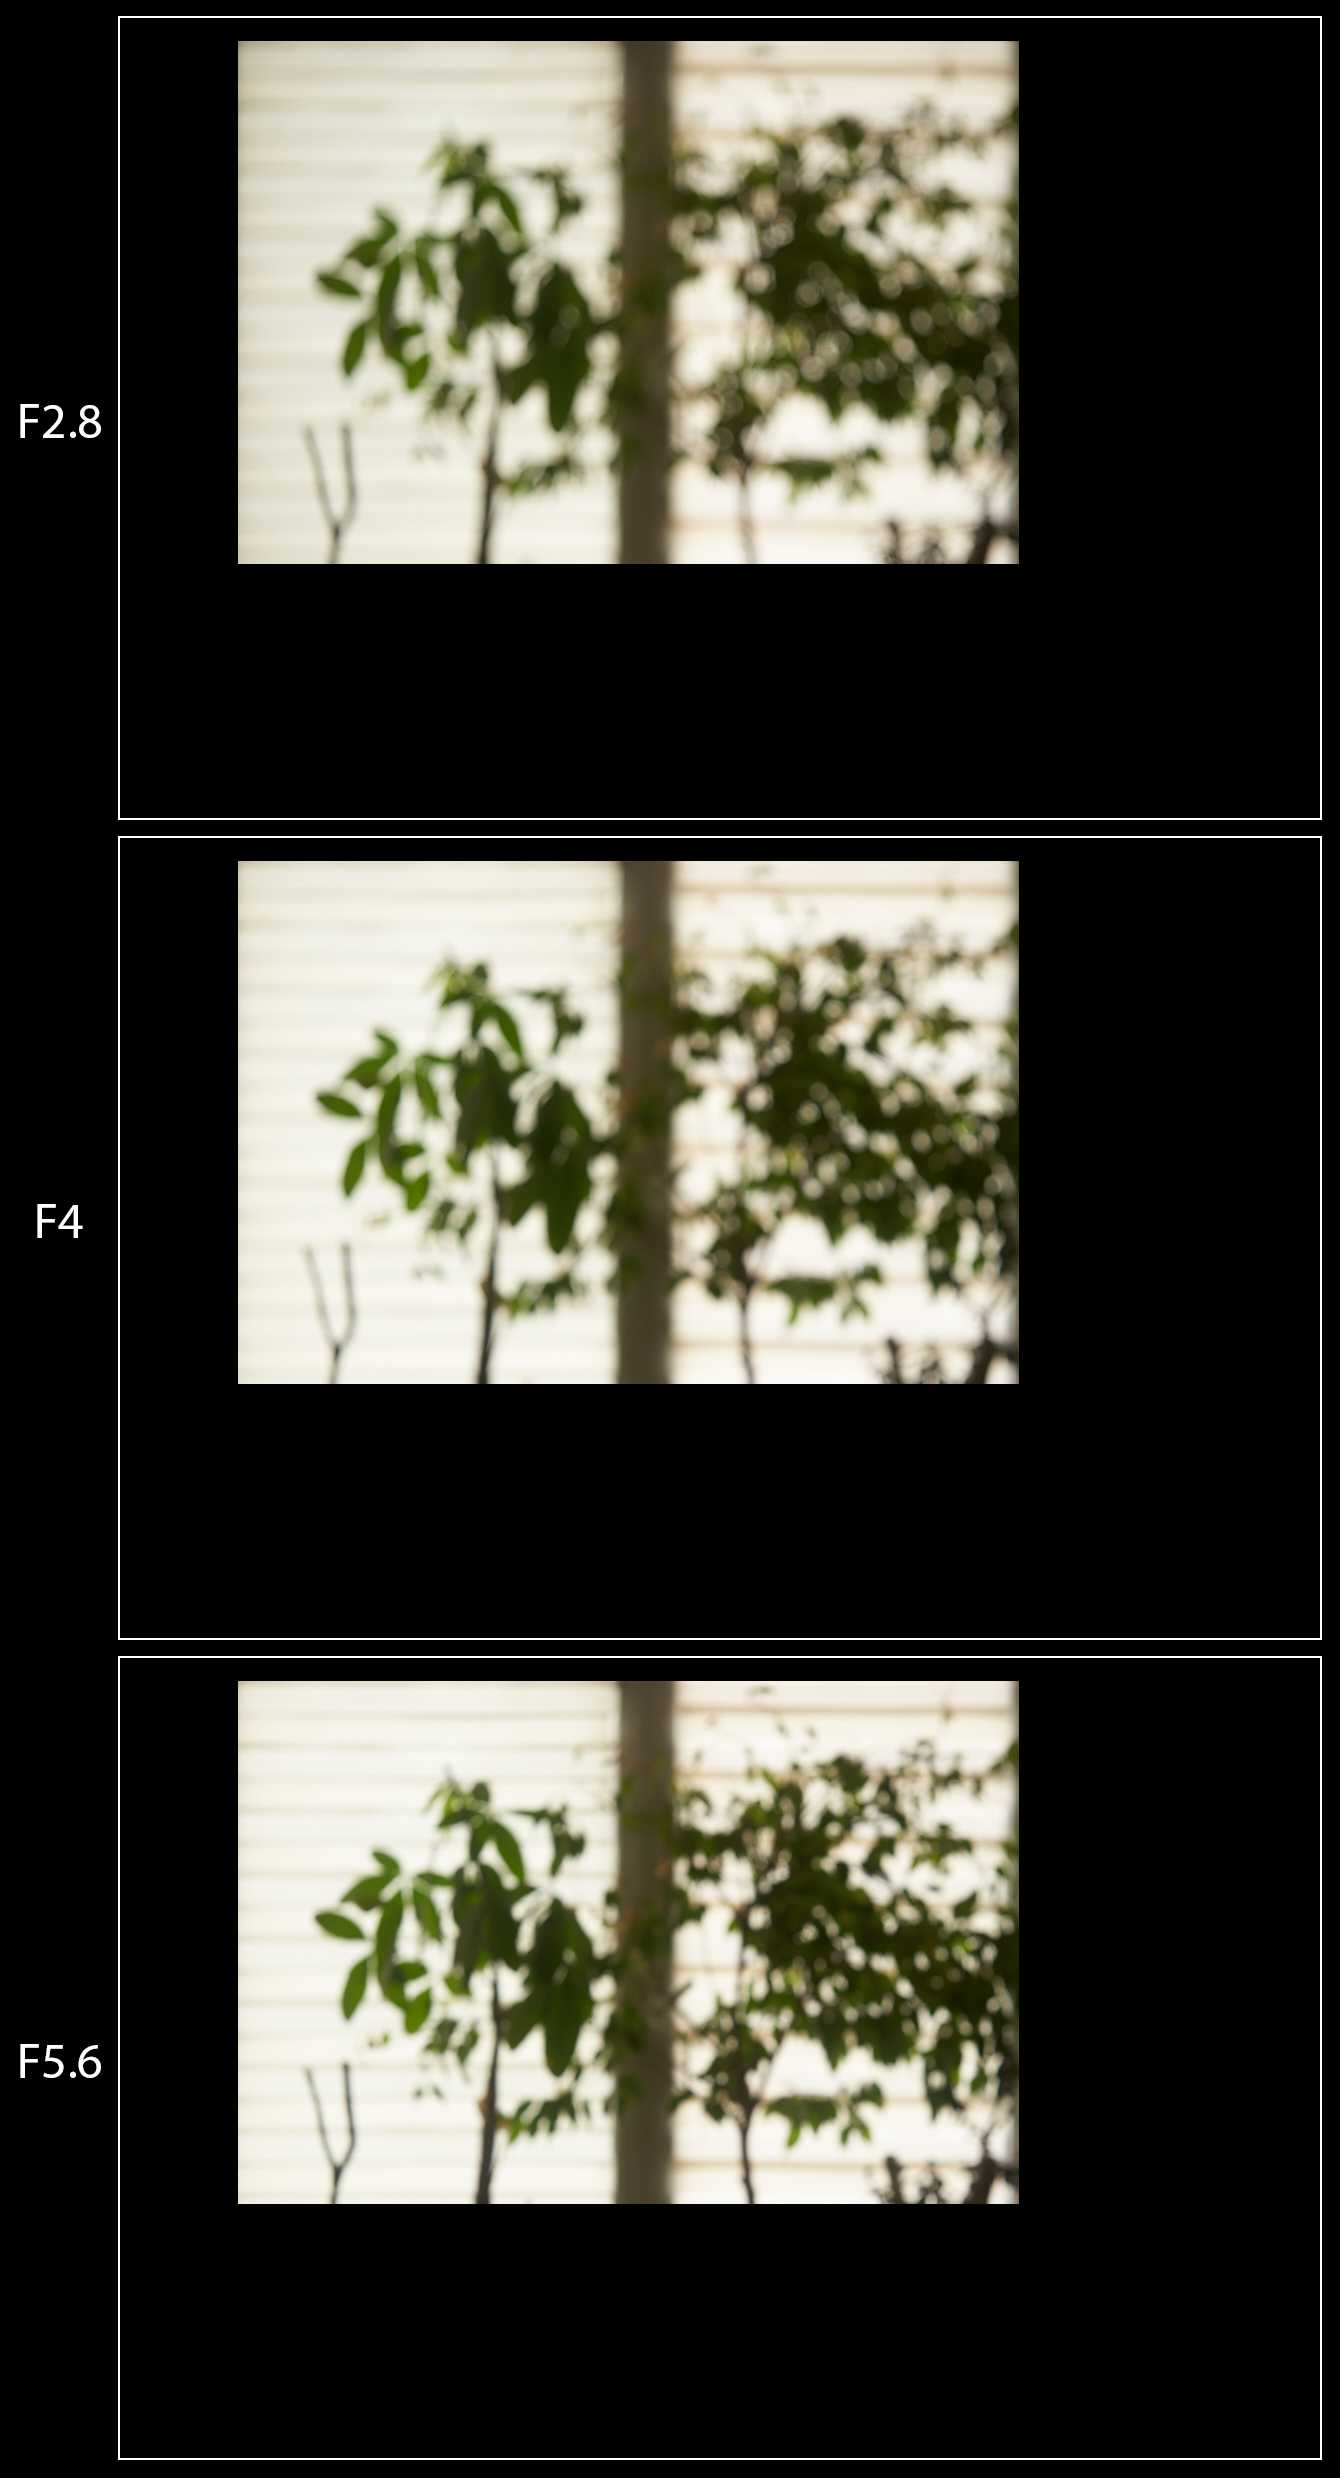
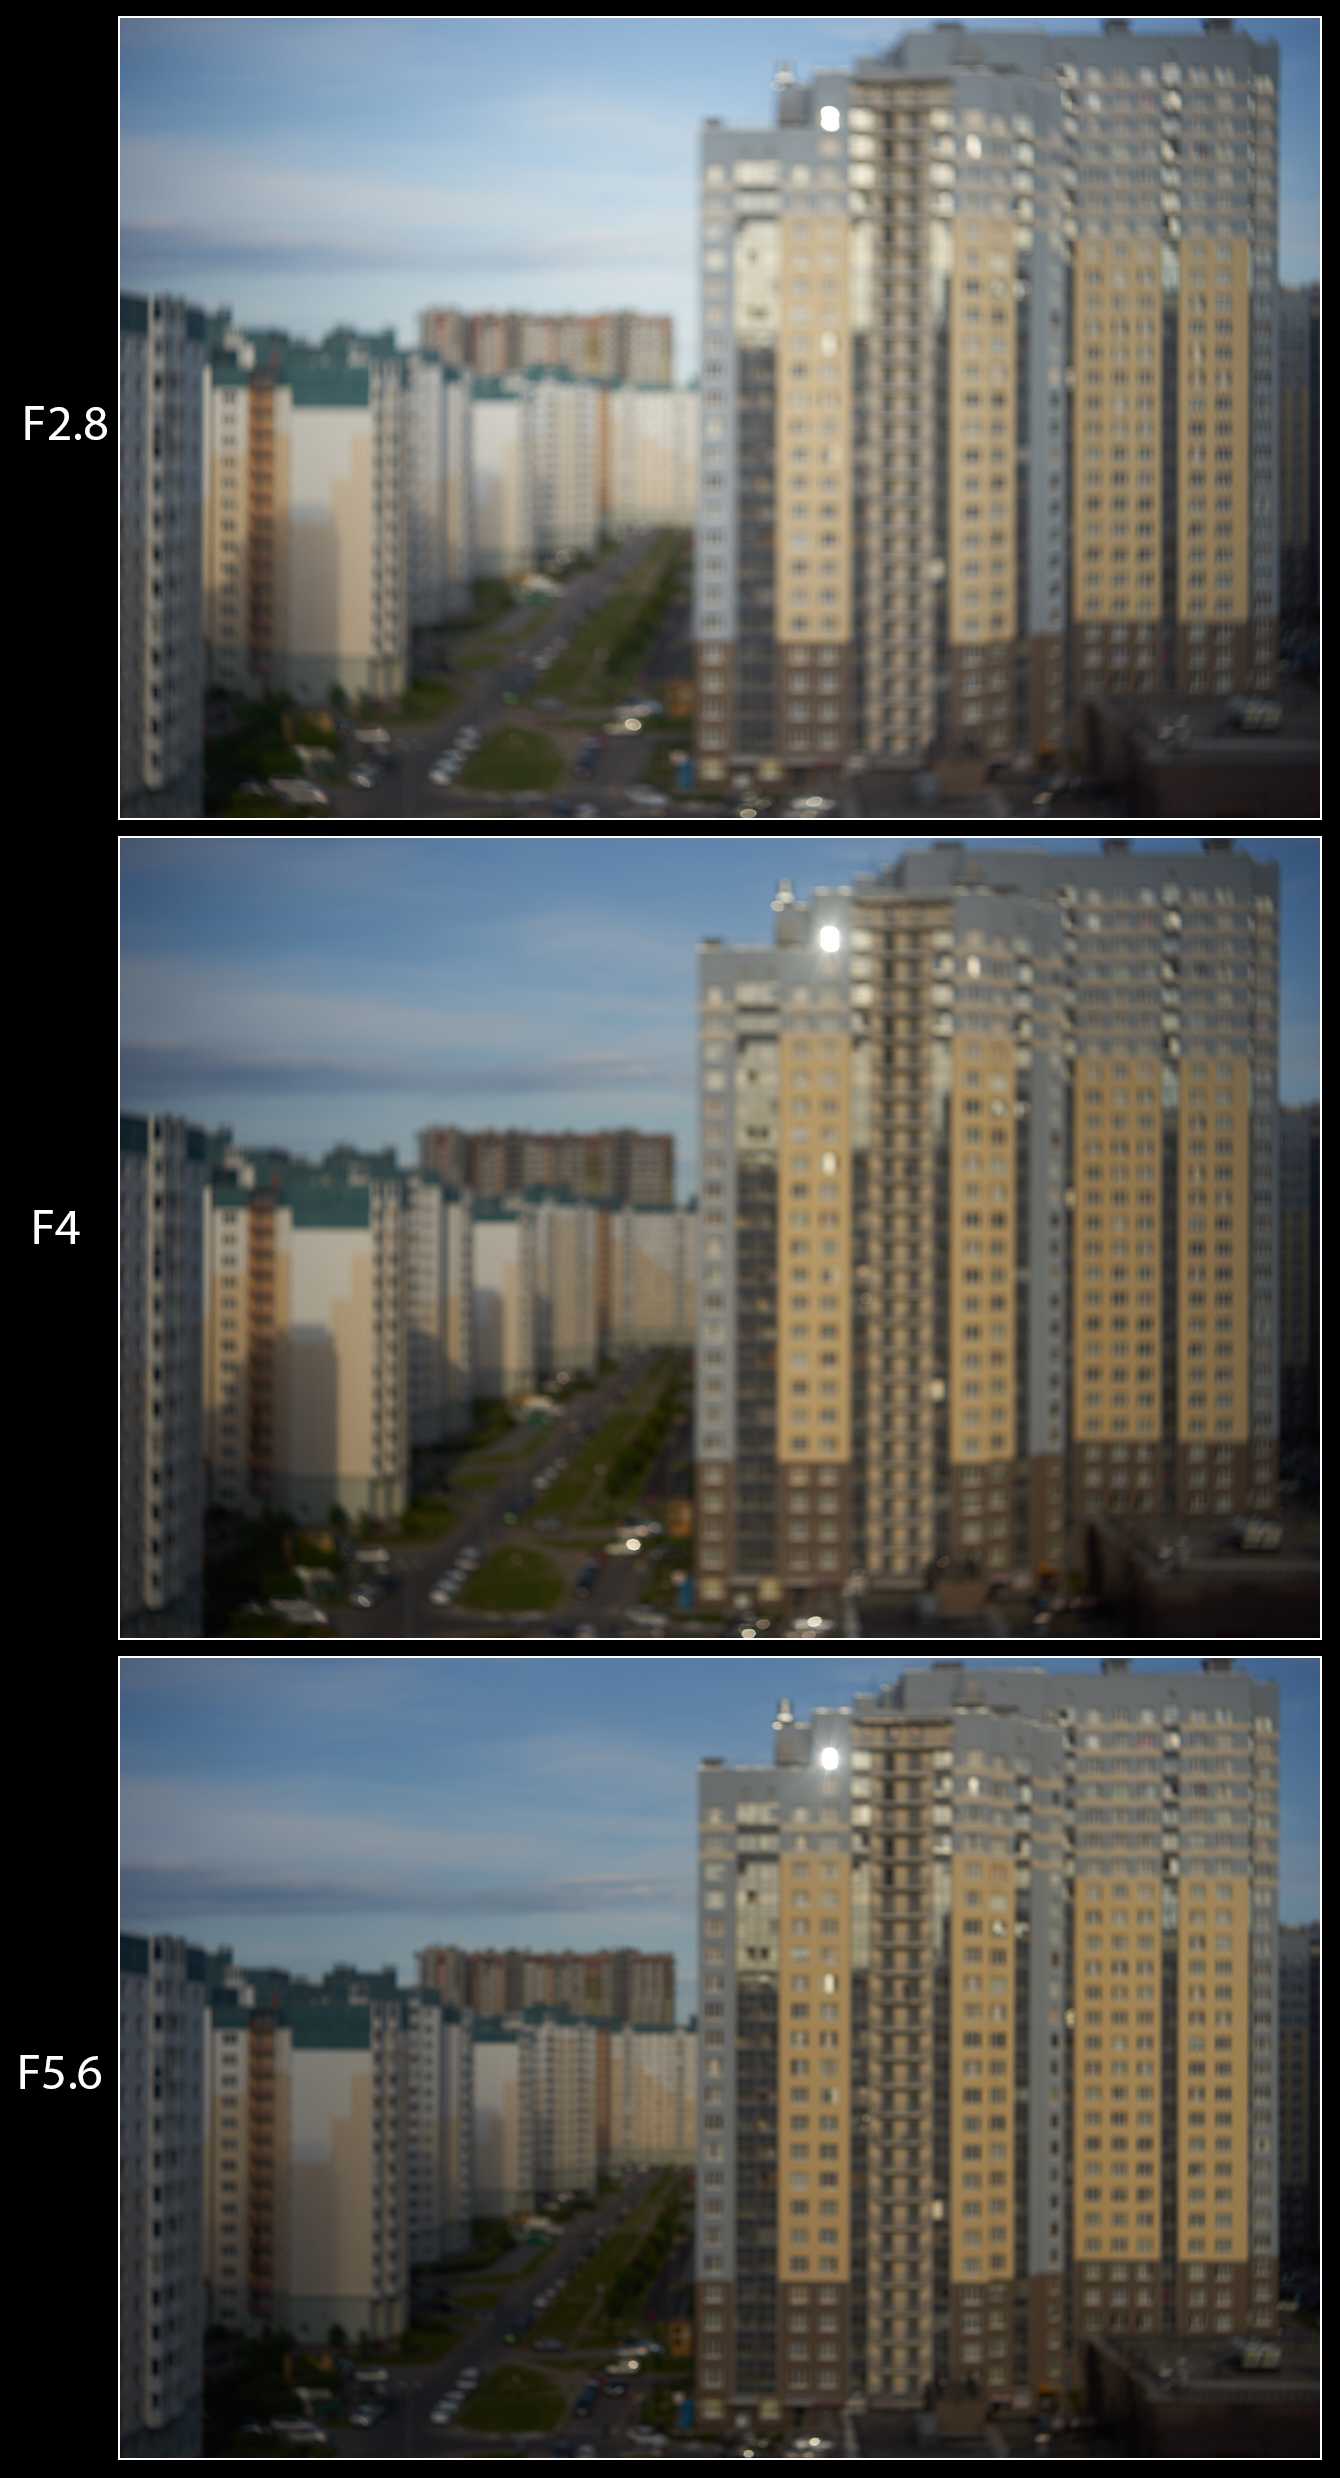
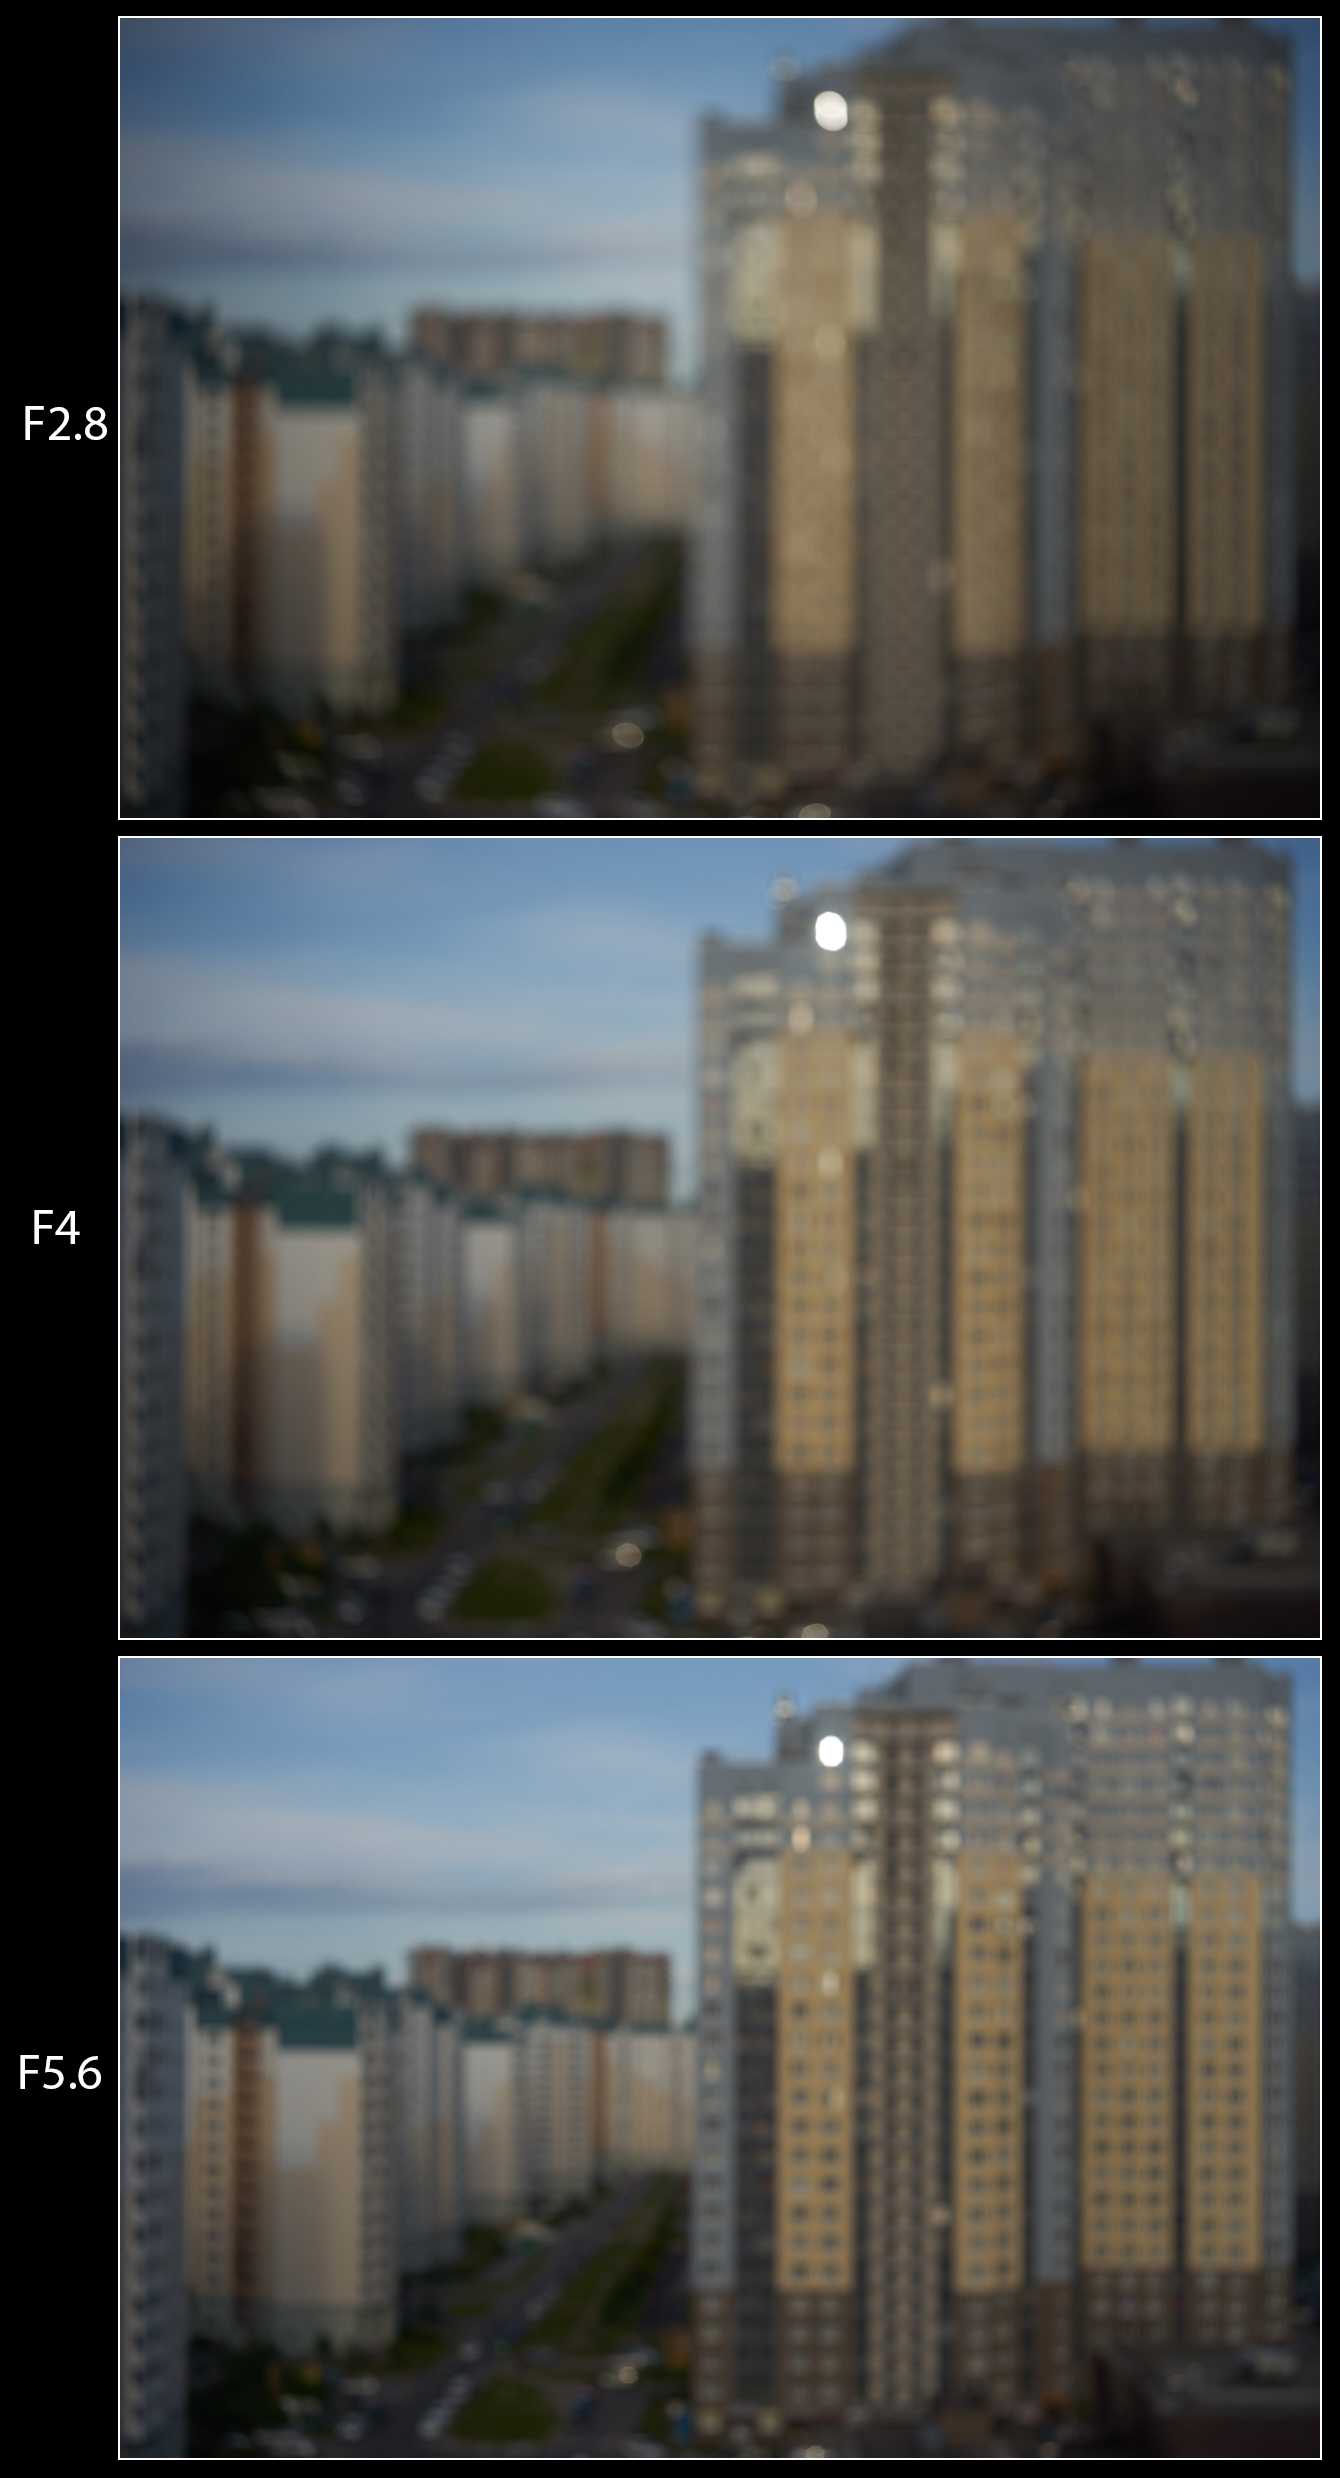
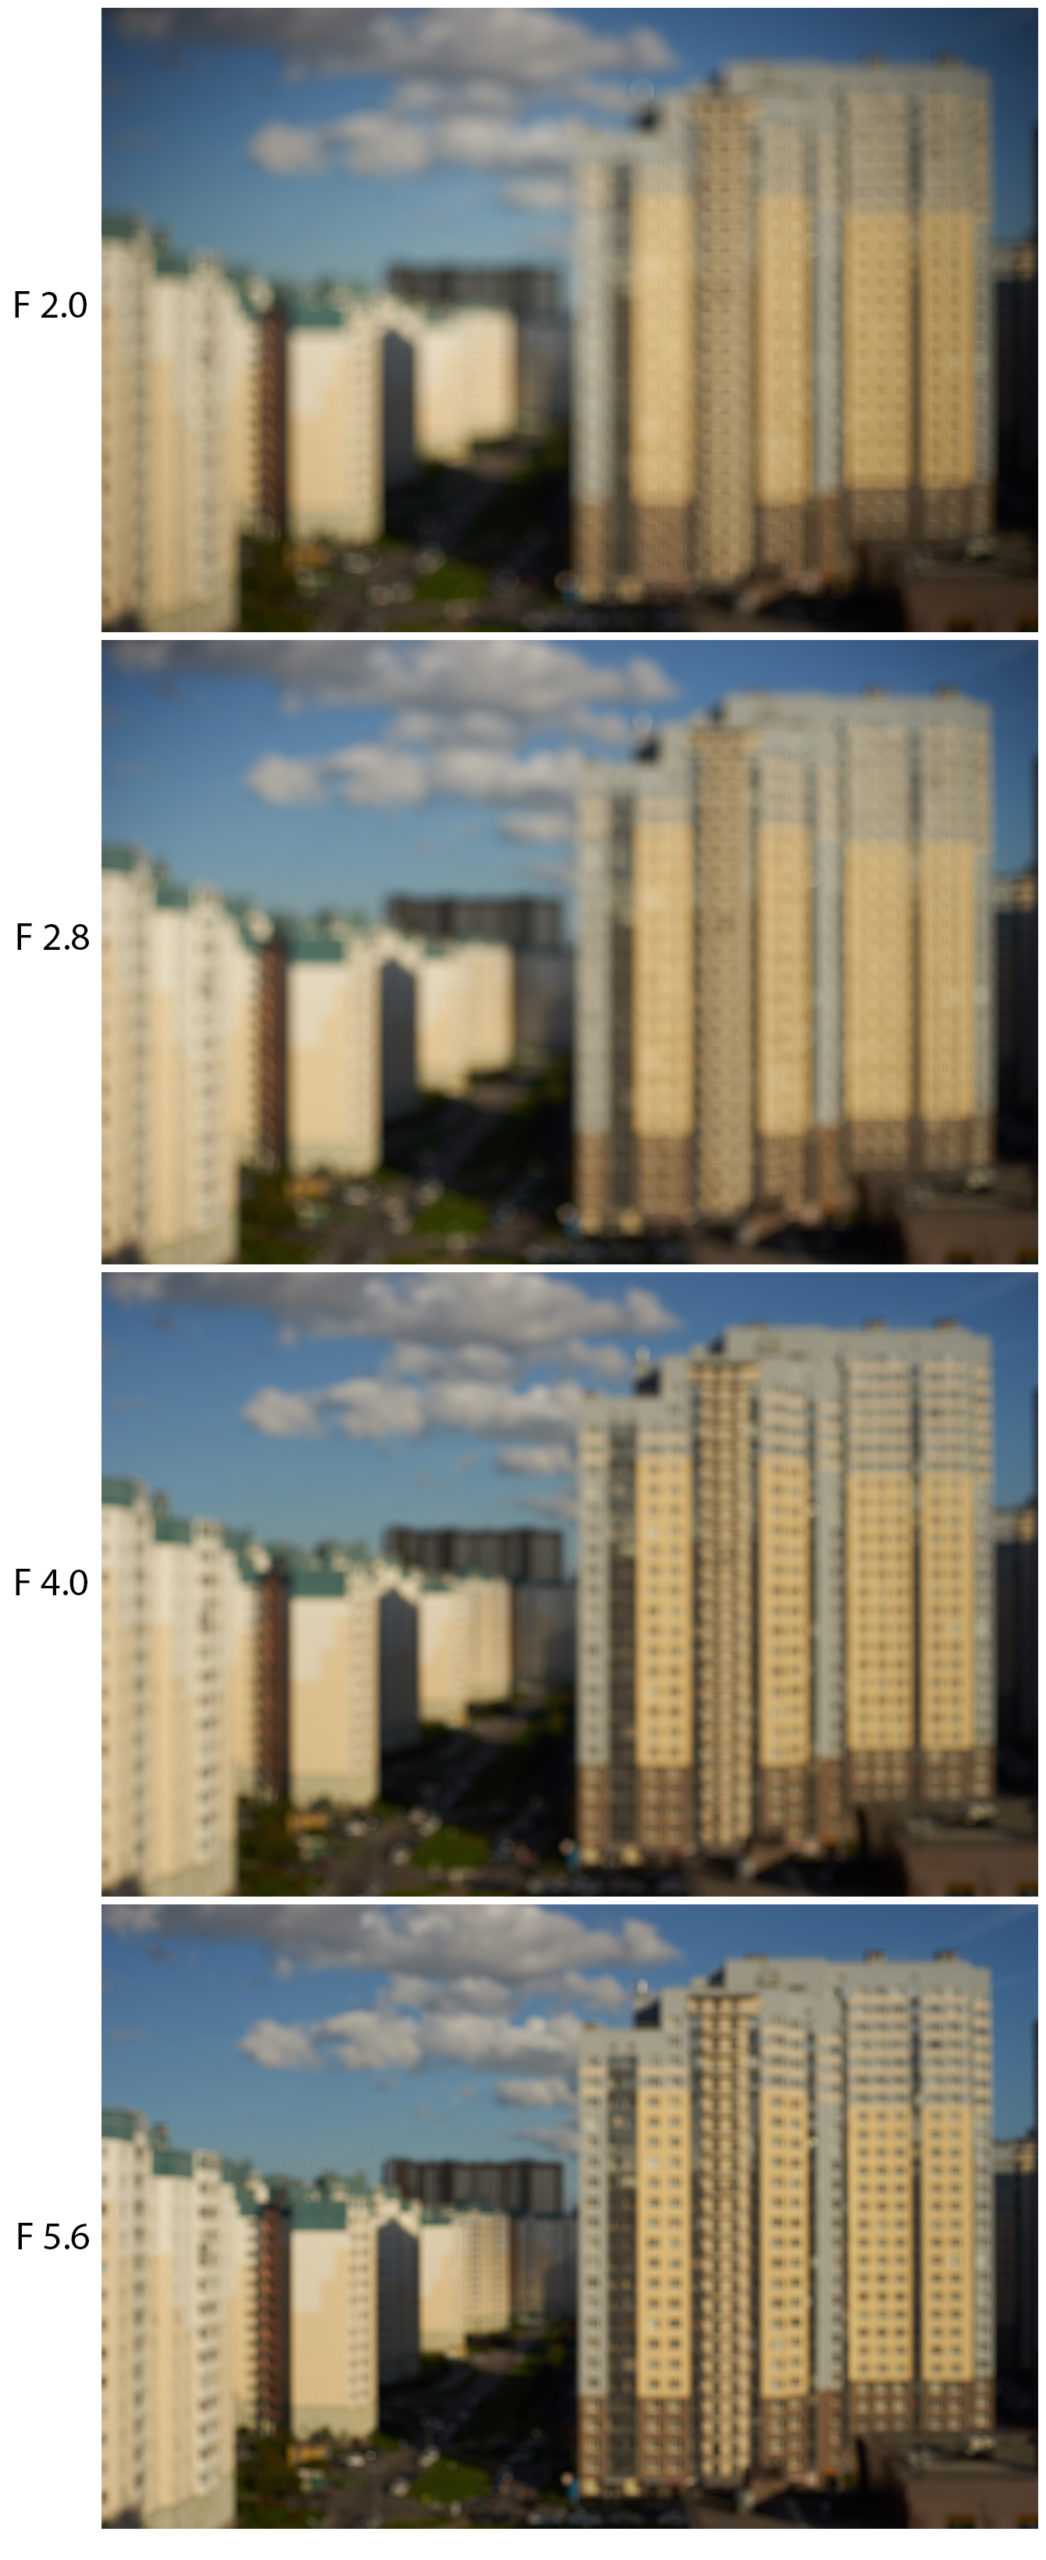
Long-distance bokeh
Test conditions: the lens was focused on 0.23m, buildings are on “infinity”-distance
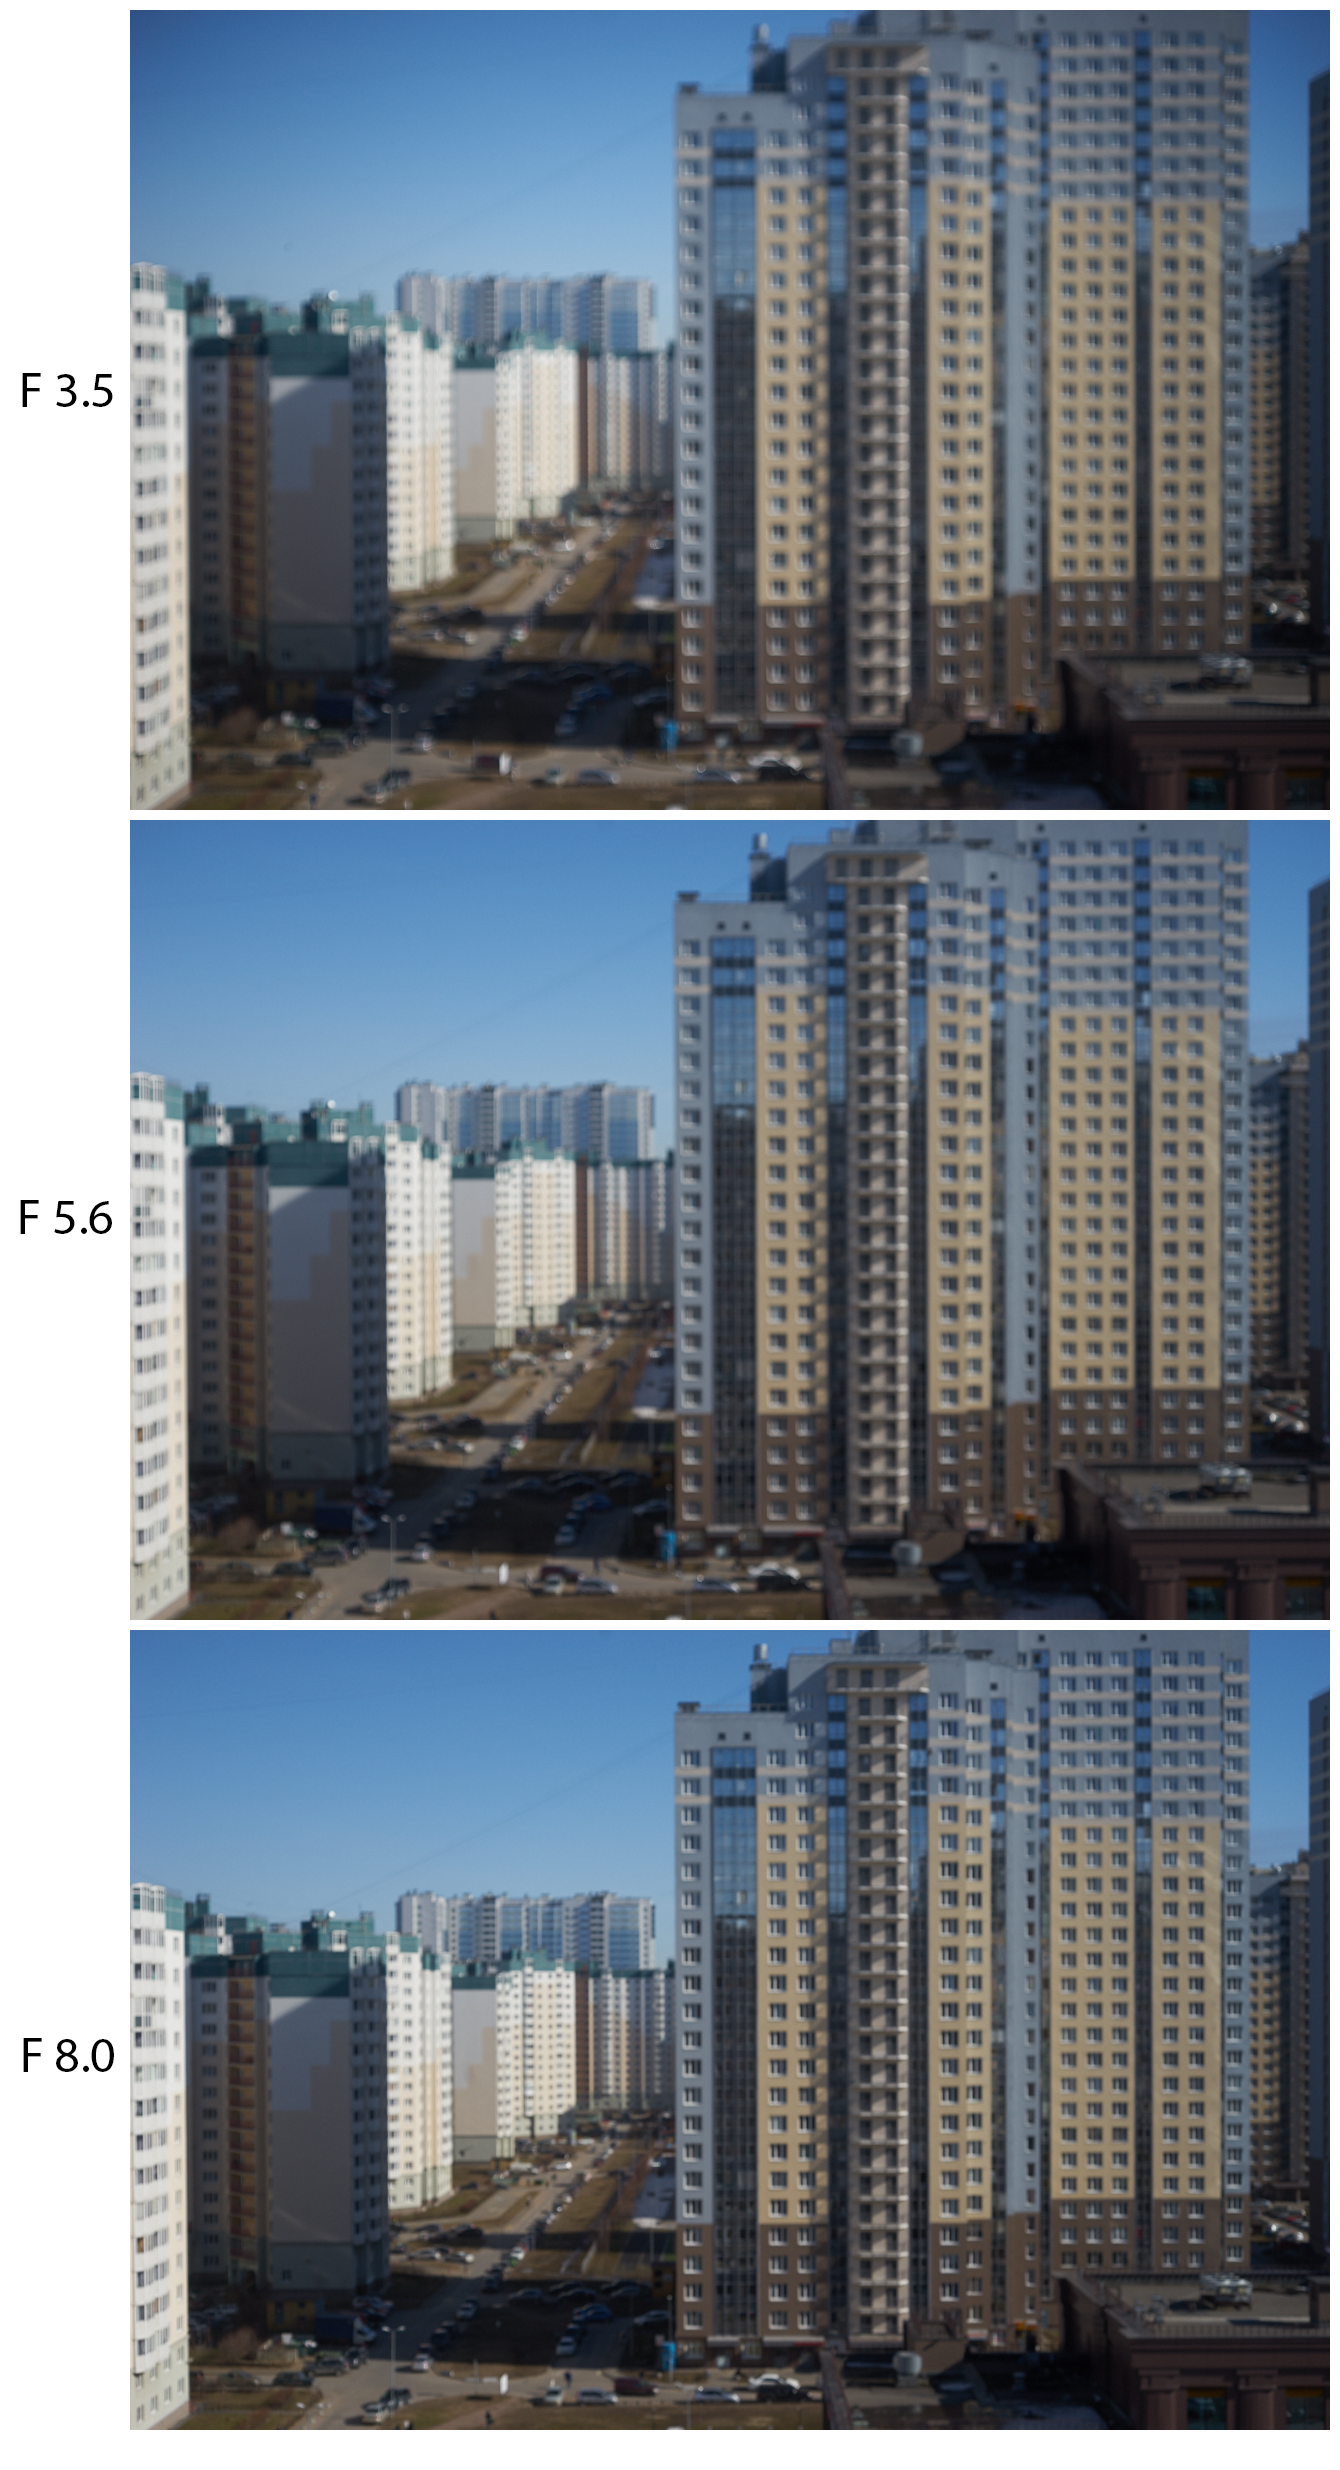
Test conditions: lens was focused on 2m
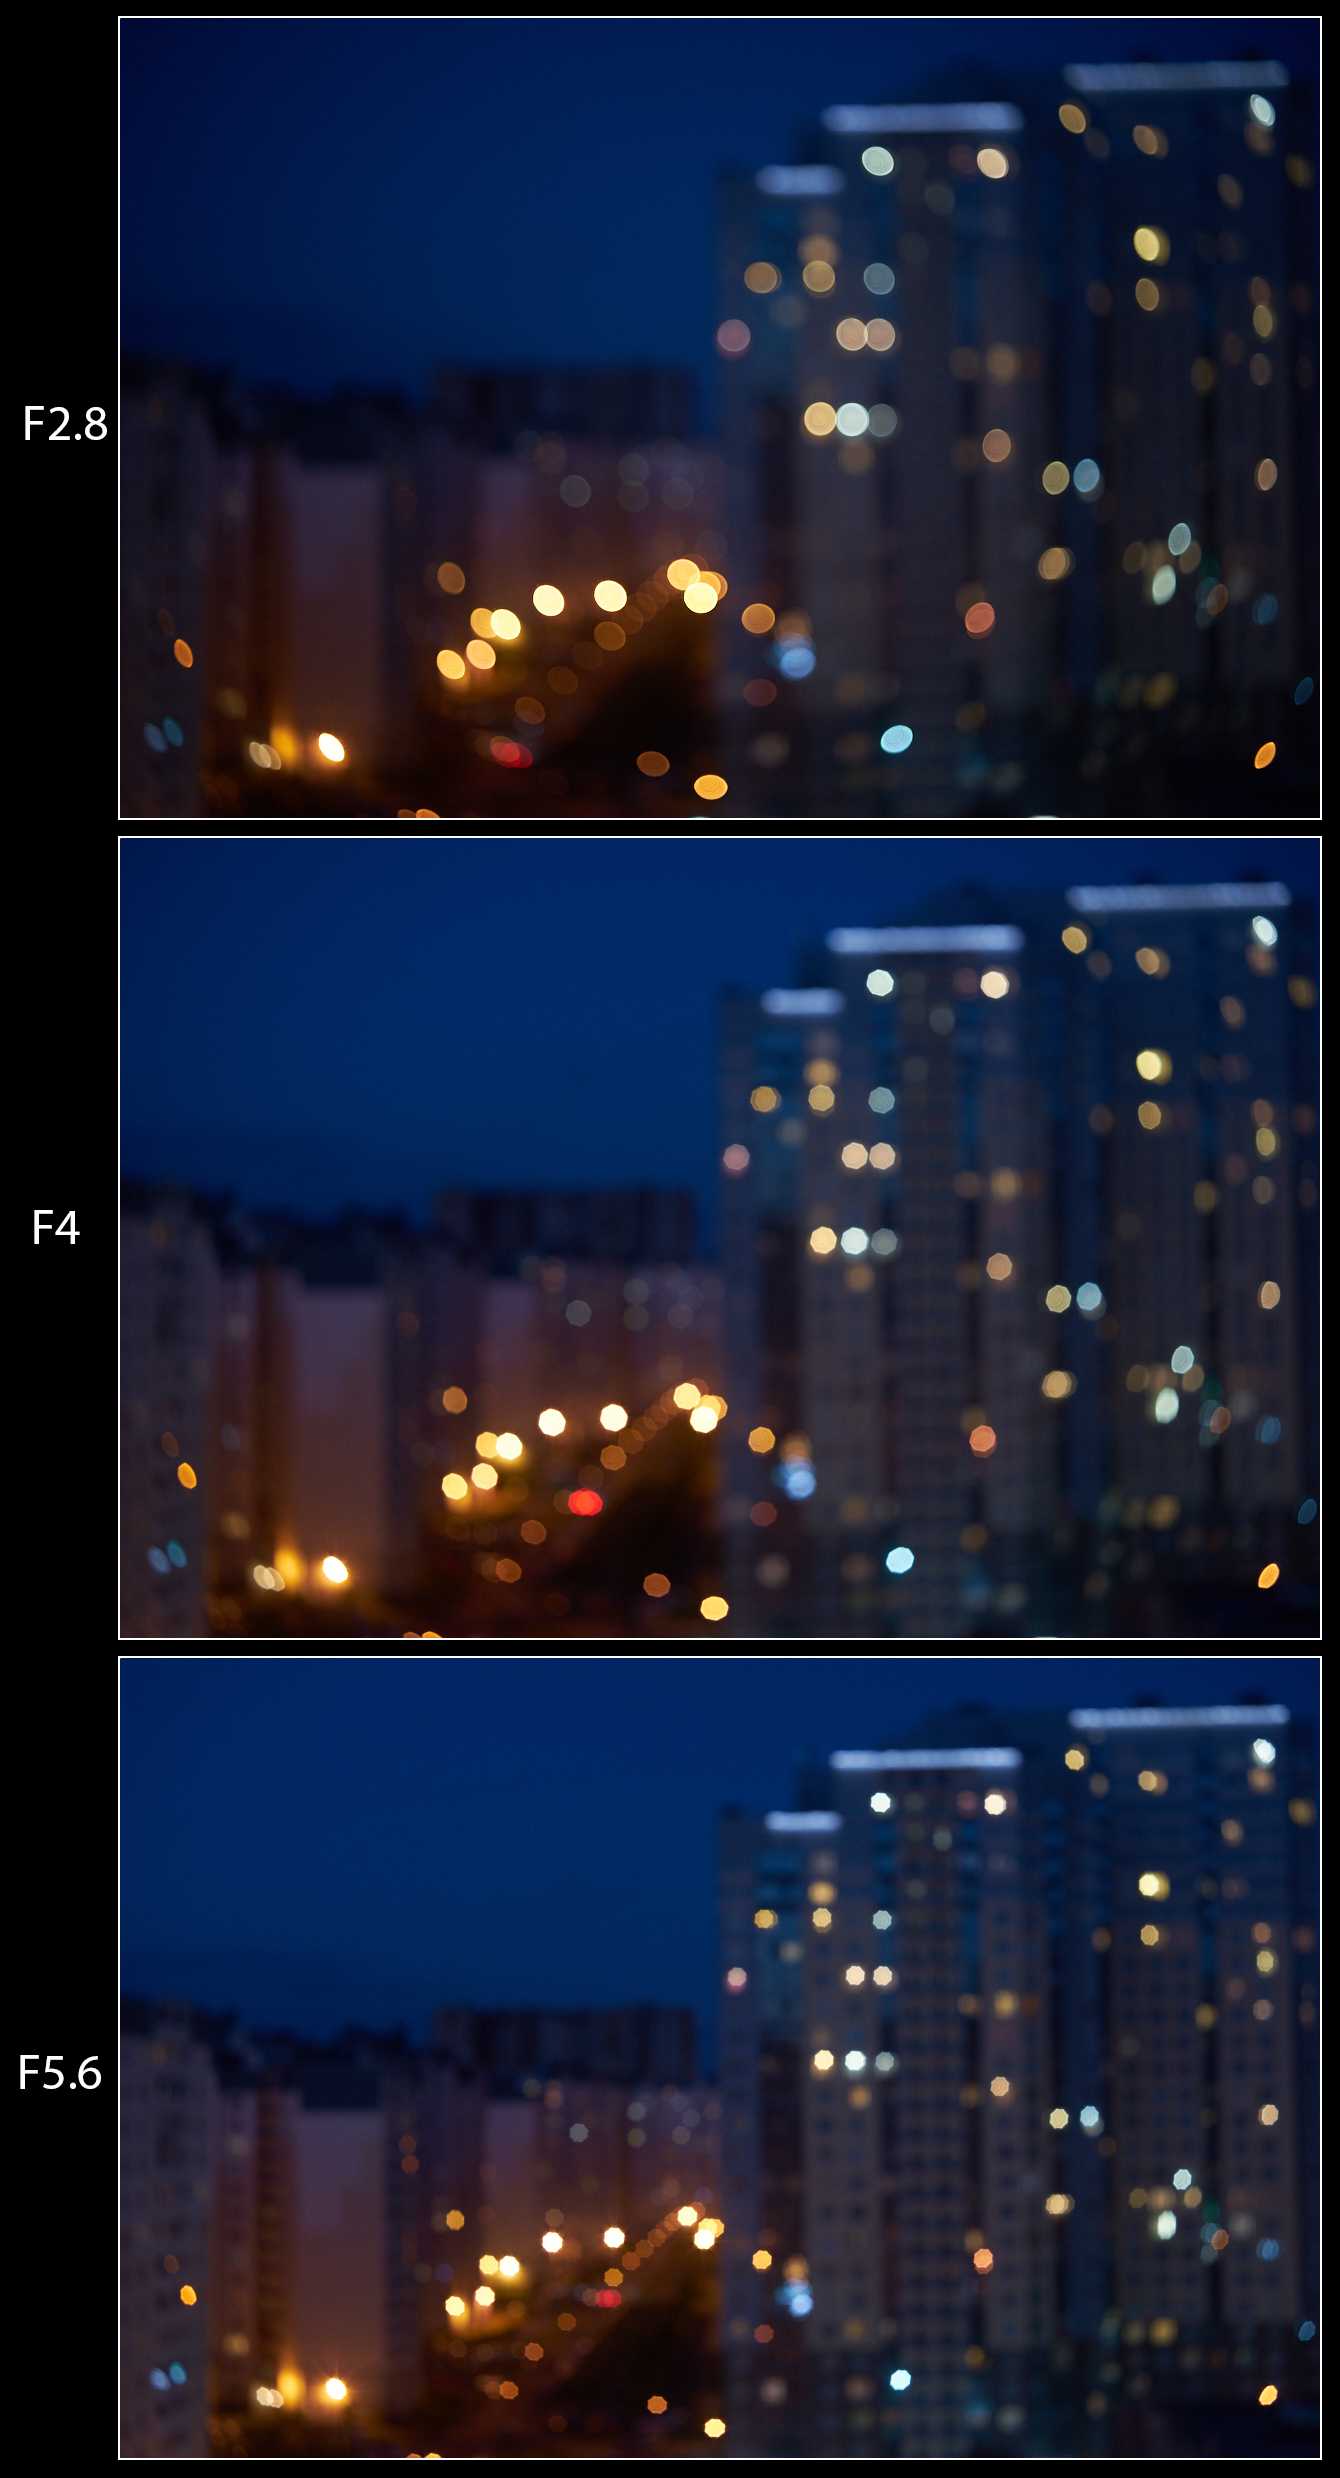
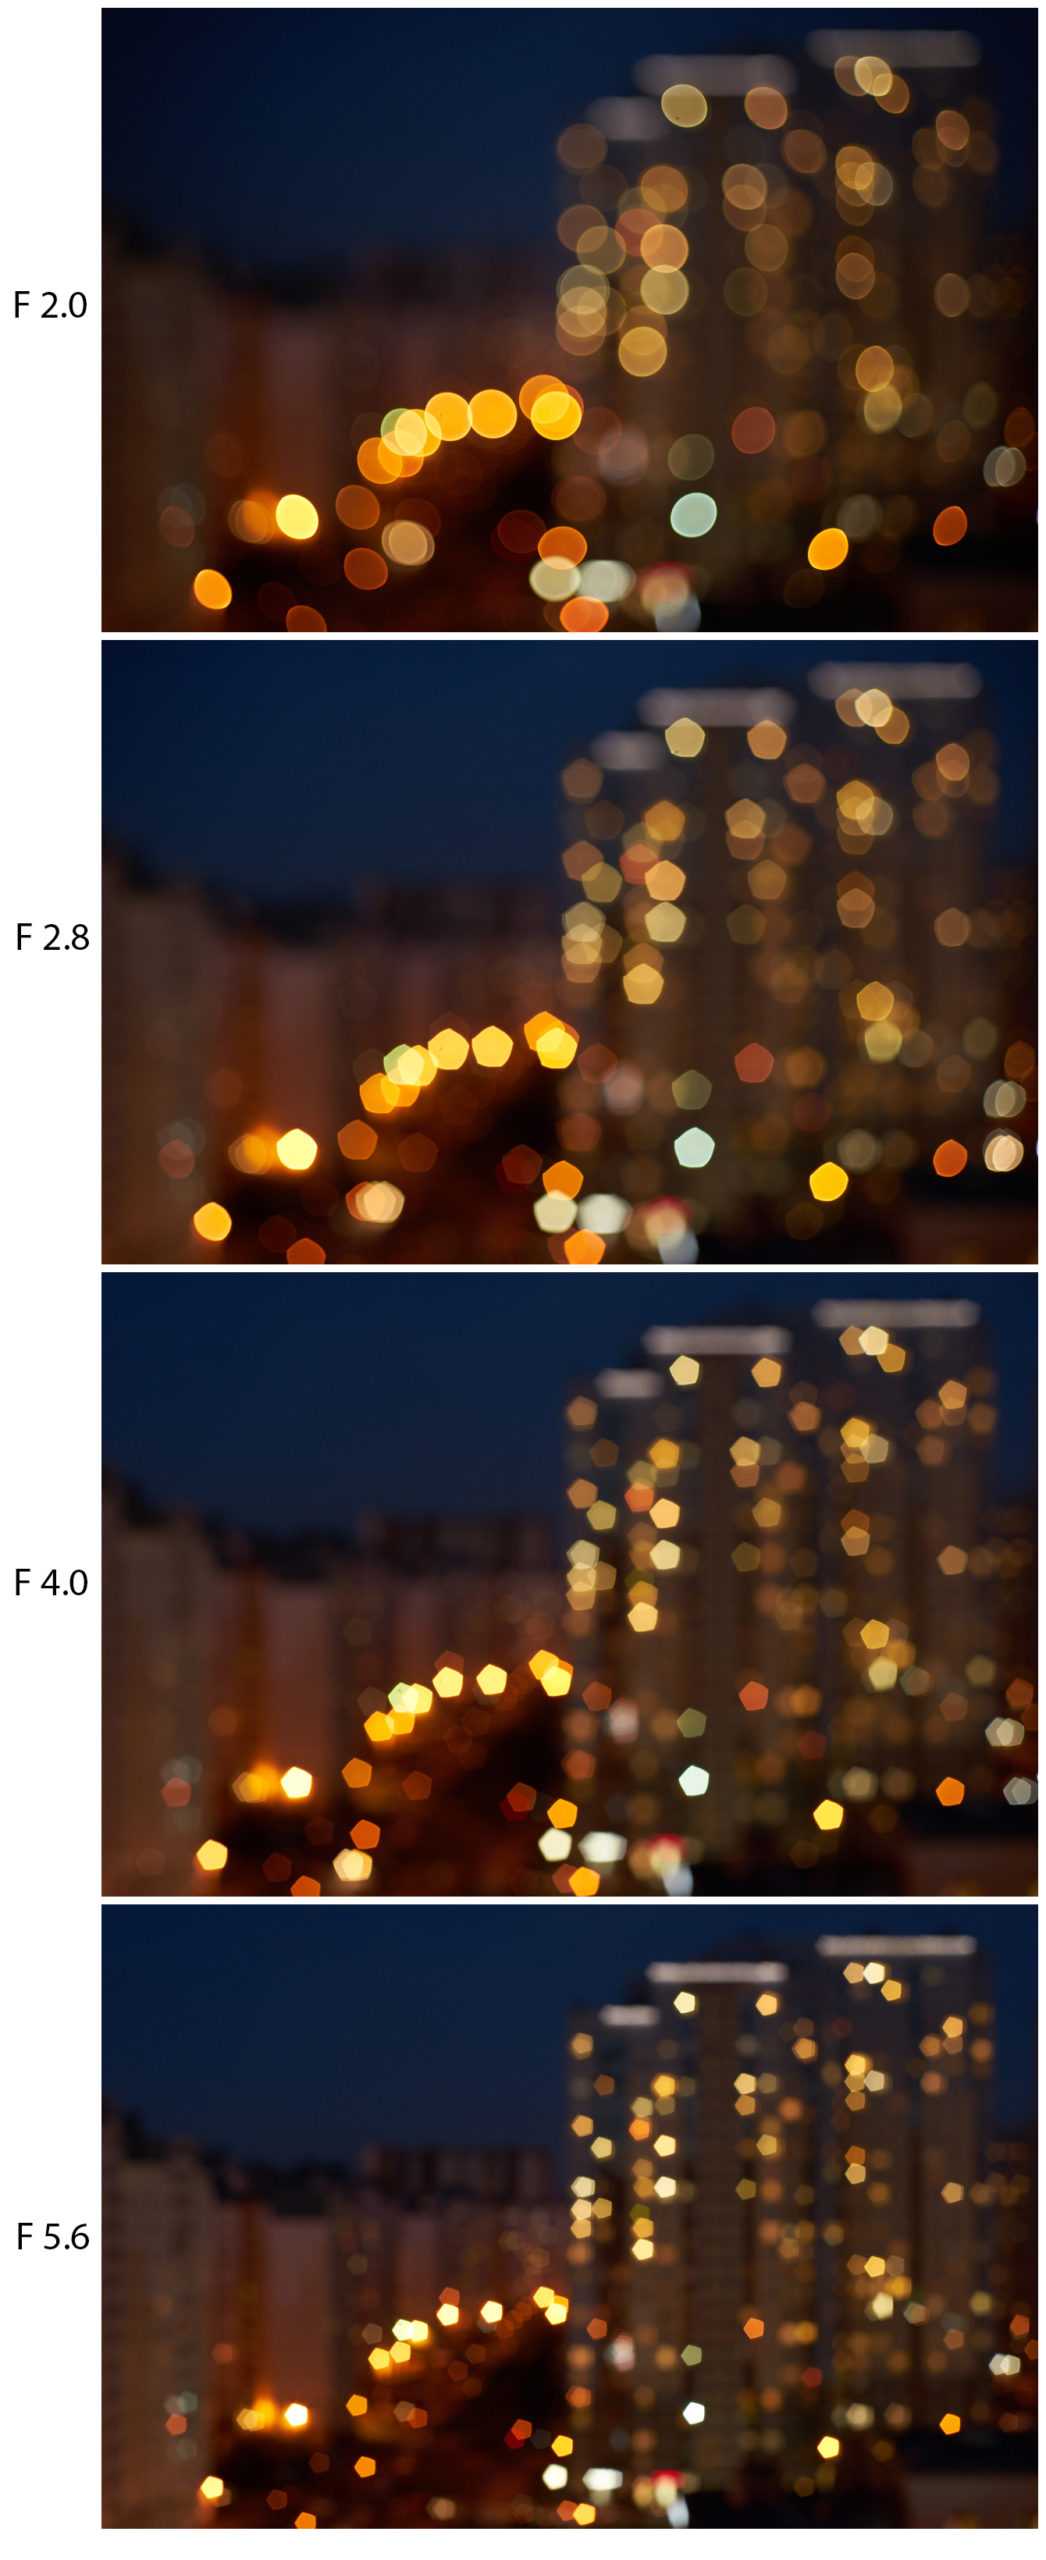
Light bubbles bokeh – infinity
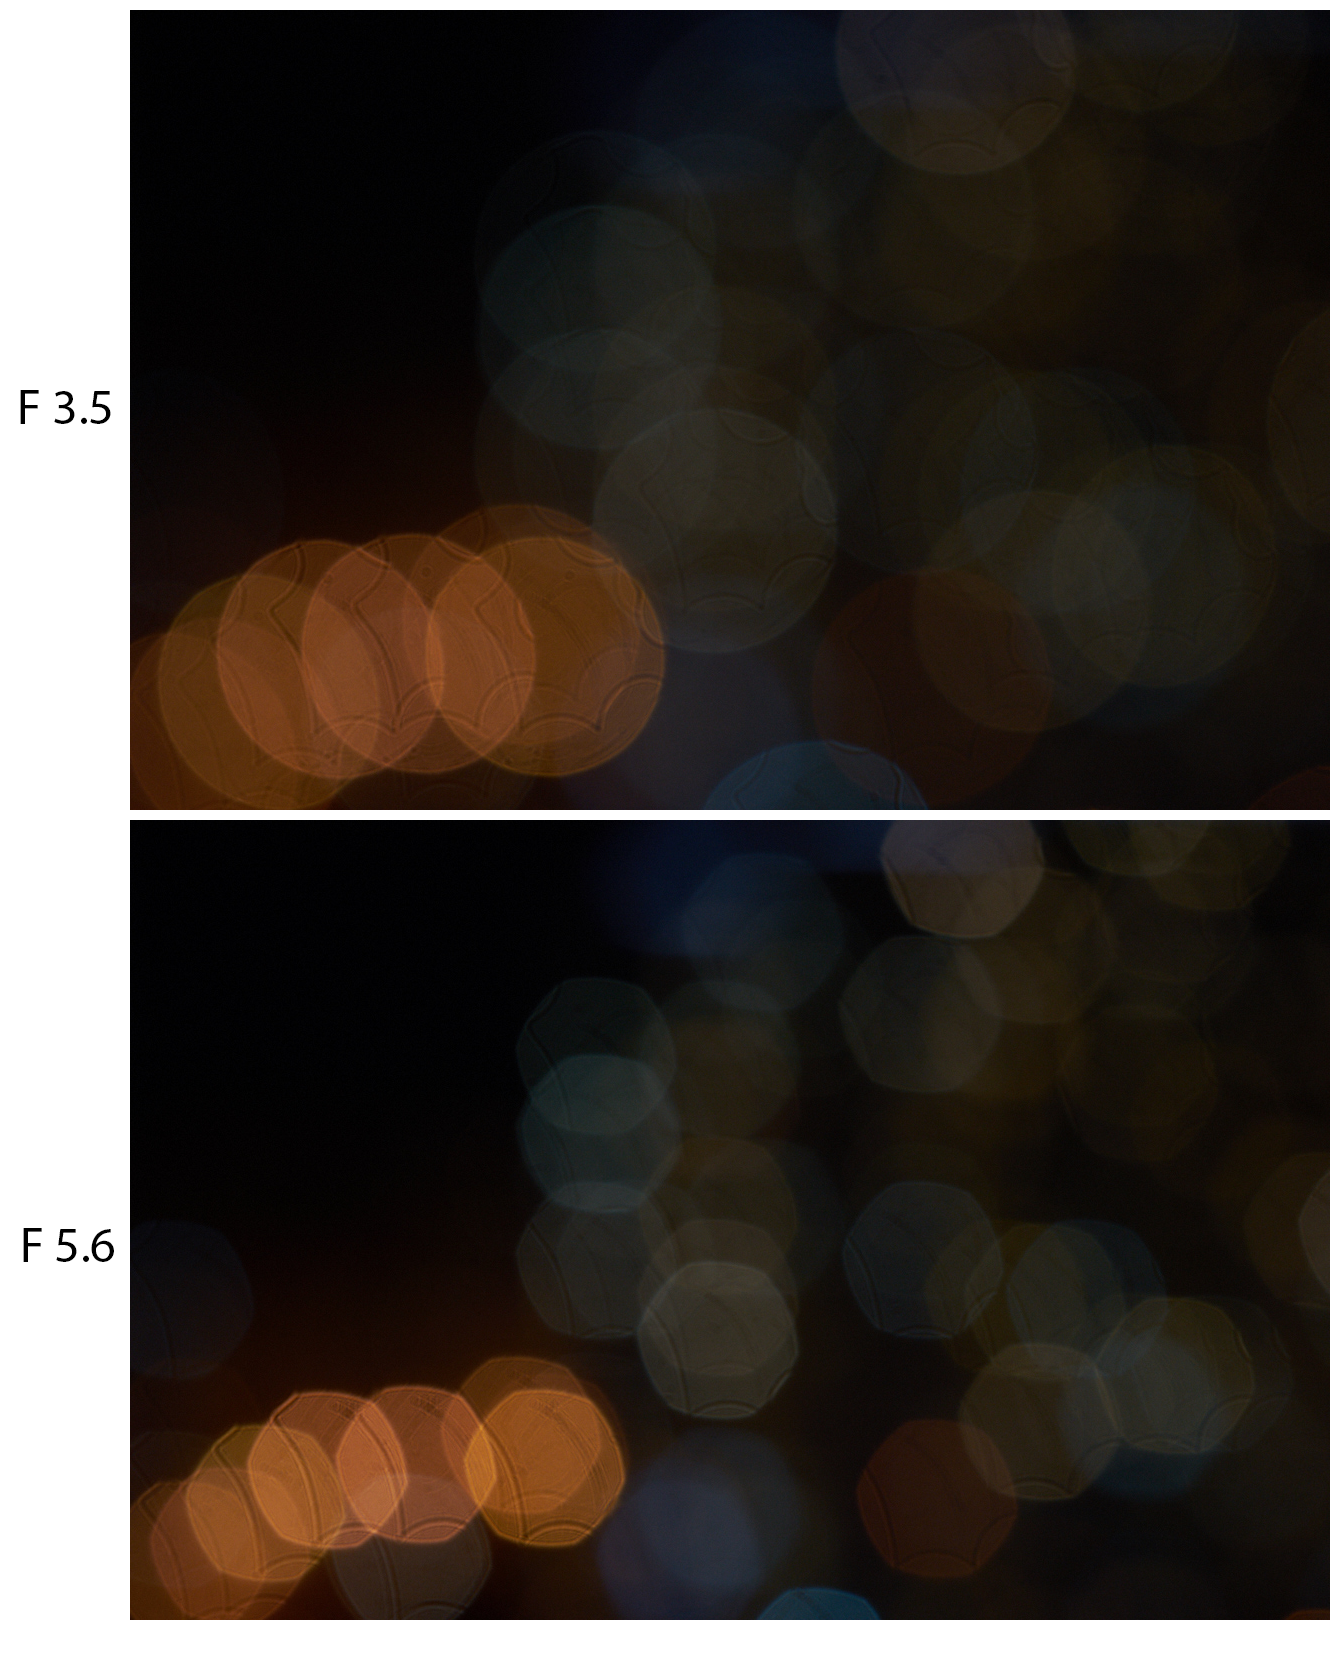
Note: that lines on the light-bubbles are the result of scratches on the front lens. (For those who know: yes, it looks close to another type of lines provided by separation of clued elements but it is not about this lens)
Test #2
Test conditions: lens was focused on 2m
Advantages
The first standard advantage of ‘knurled’ Minoltas – glass and metal only, no plastic or rubber. The second advantage – not so heavy as it can be expected with such a design. The third advantage – there is no optical weakness on closed apertures.
Disadvantages
only one – it has issues with sharpness if wide open. Absolutely not critical for the macro lens but it should be mentioned because modern macro lenses work good on fully opened apertures and amateurs are using that as universal tools – macro, portraits, interiors, anything… So, this Minolta can be used in such universal mode too, just need to remember about less of sharpness on F3.5.
Other
One other important goodie: true 1×1 macro is available with the original adapter.
The lens isn’t rare, it can be the convenient and cheap solution if a photographer needs to get a good macro for occasional sessions without big efforts and prices – auto-focus isn’t a must-have option for macro.
As a result
The nice macro-lens with a metal feeling in hands and ready for most of the photographer tasks are linked with 50mm macro distances. Even from the modern point of view.

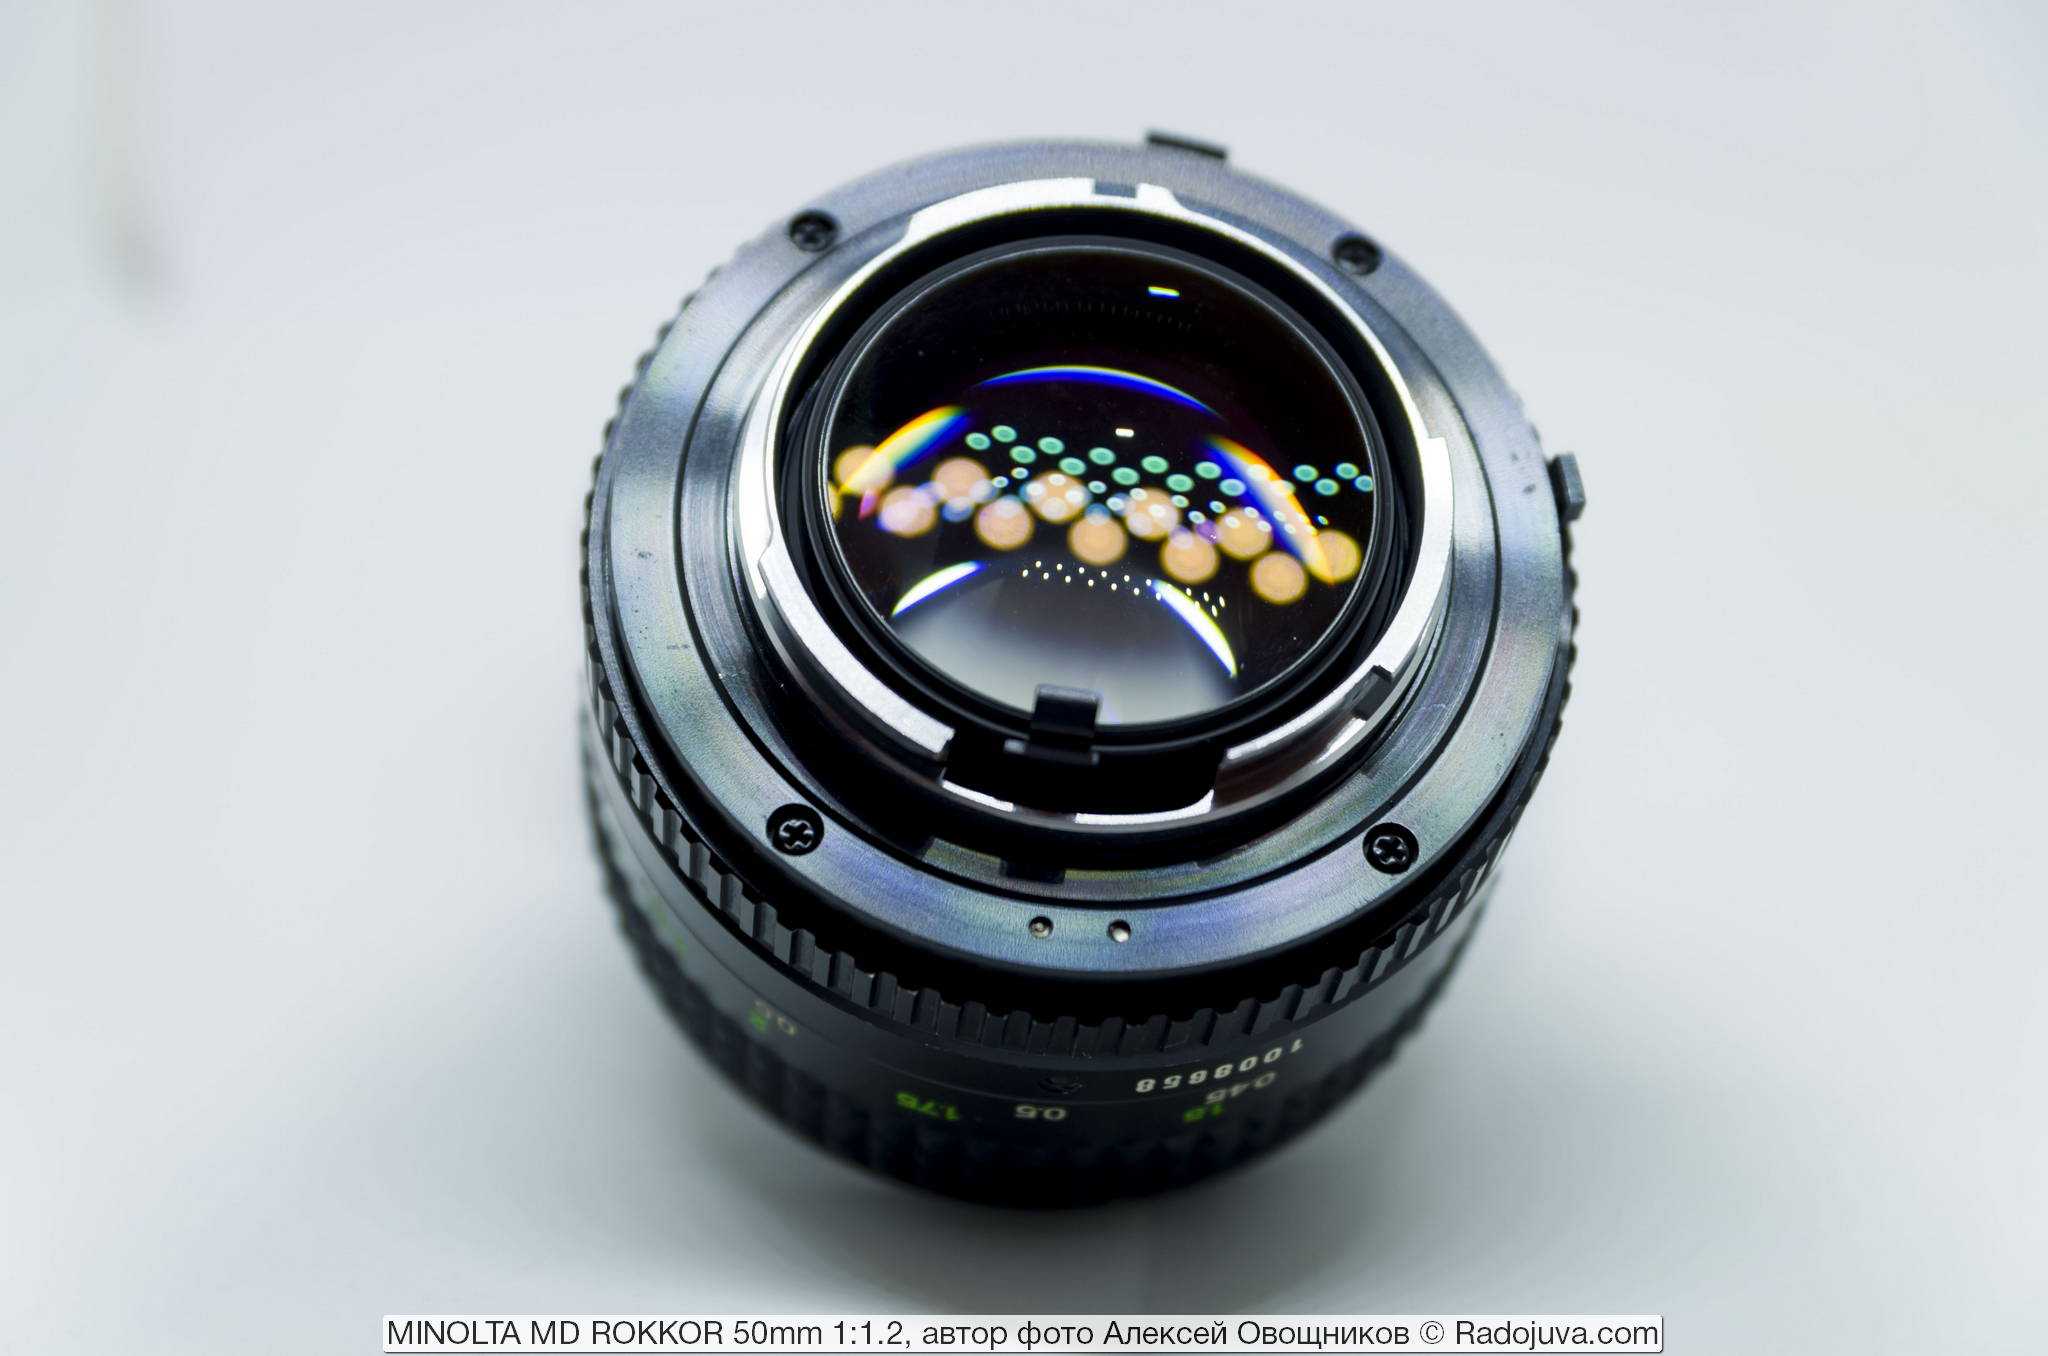
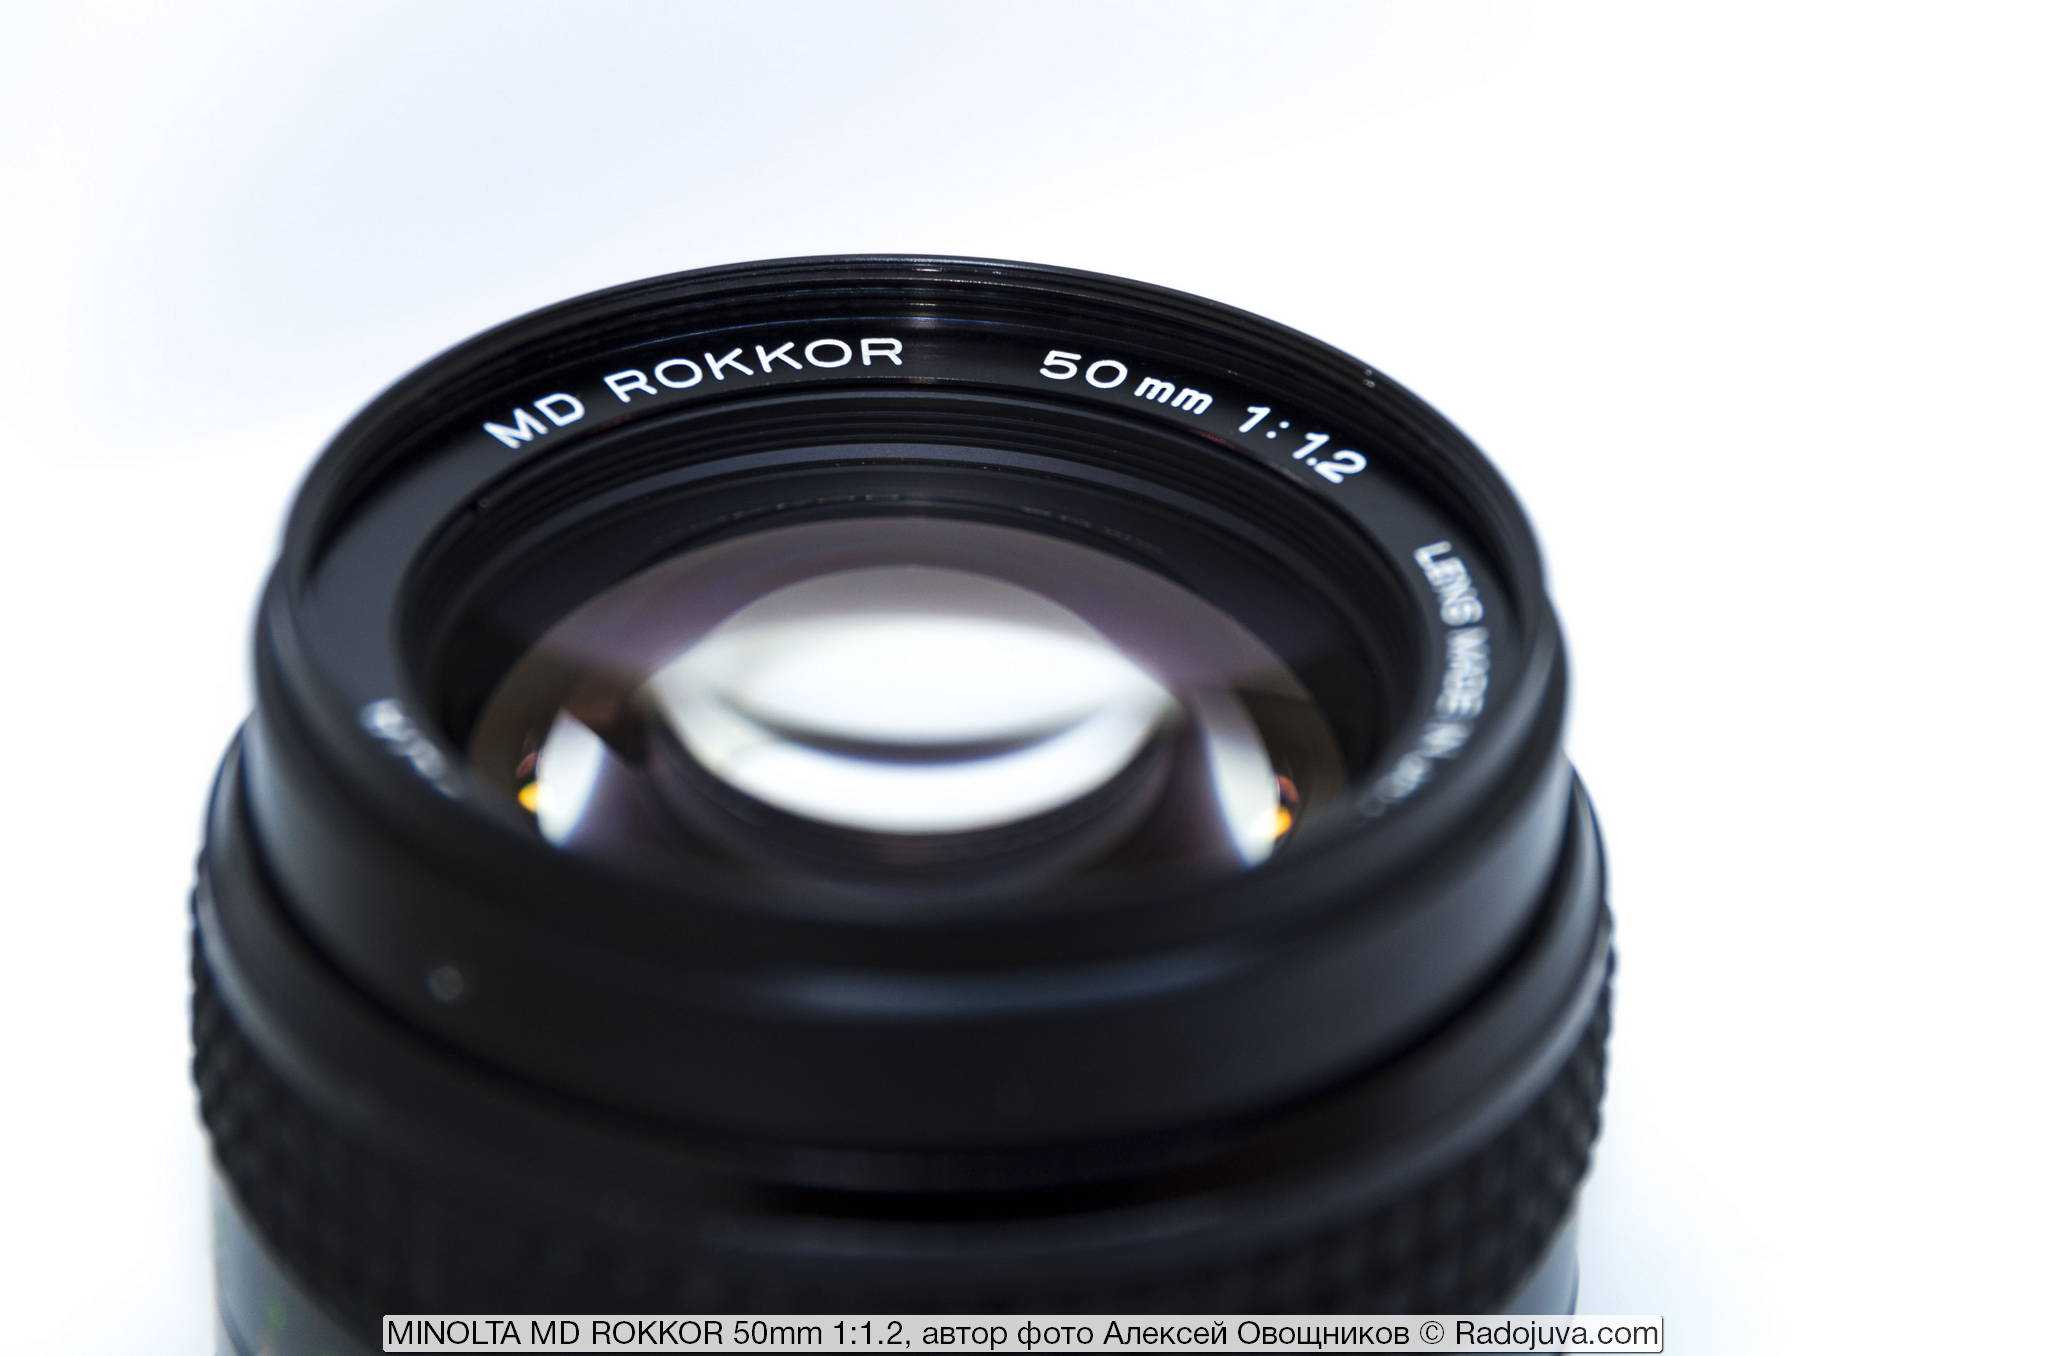
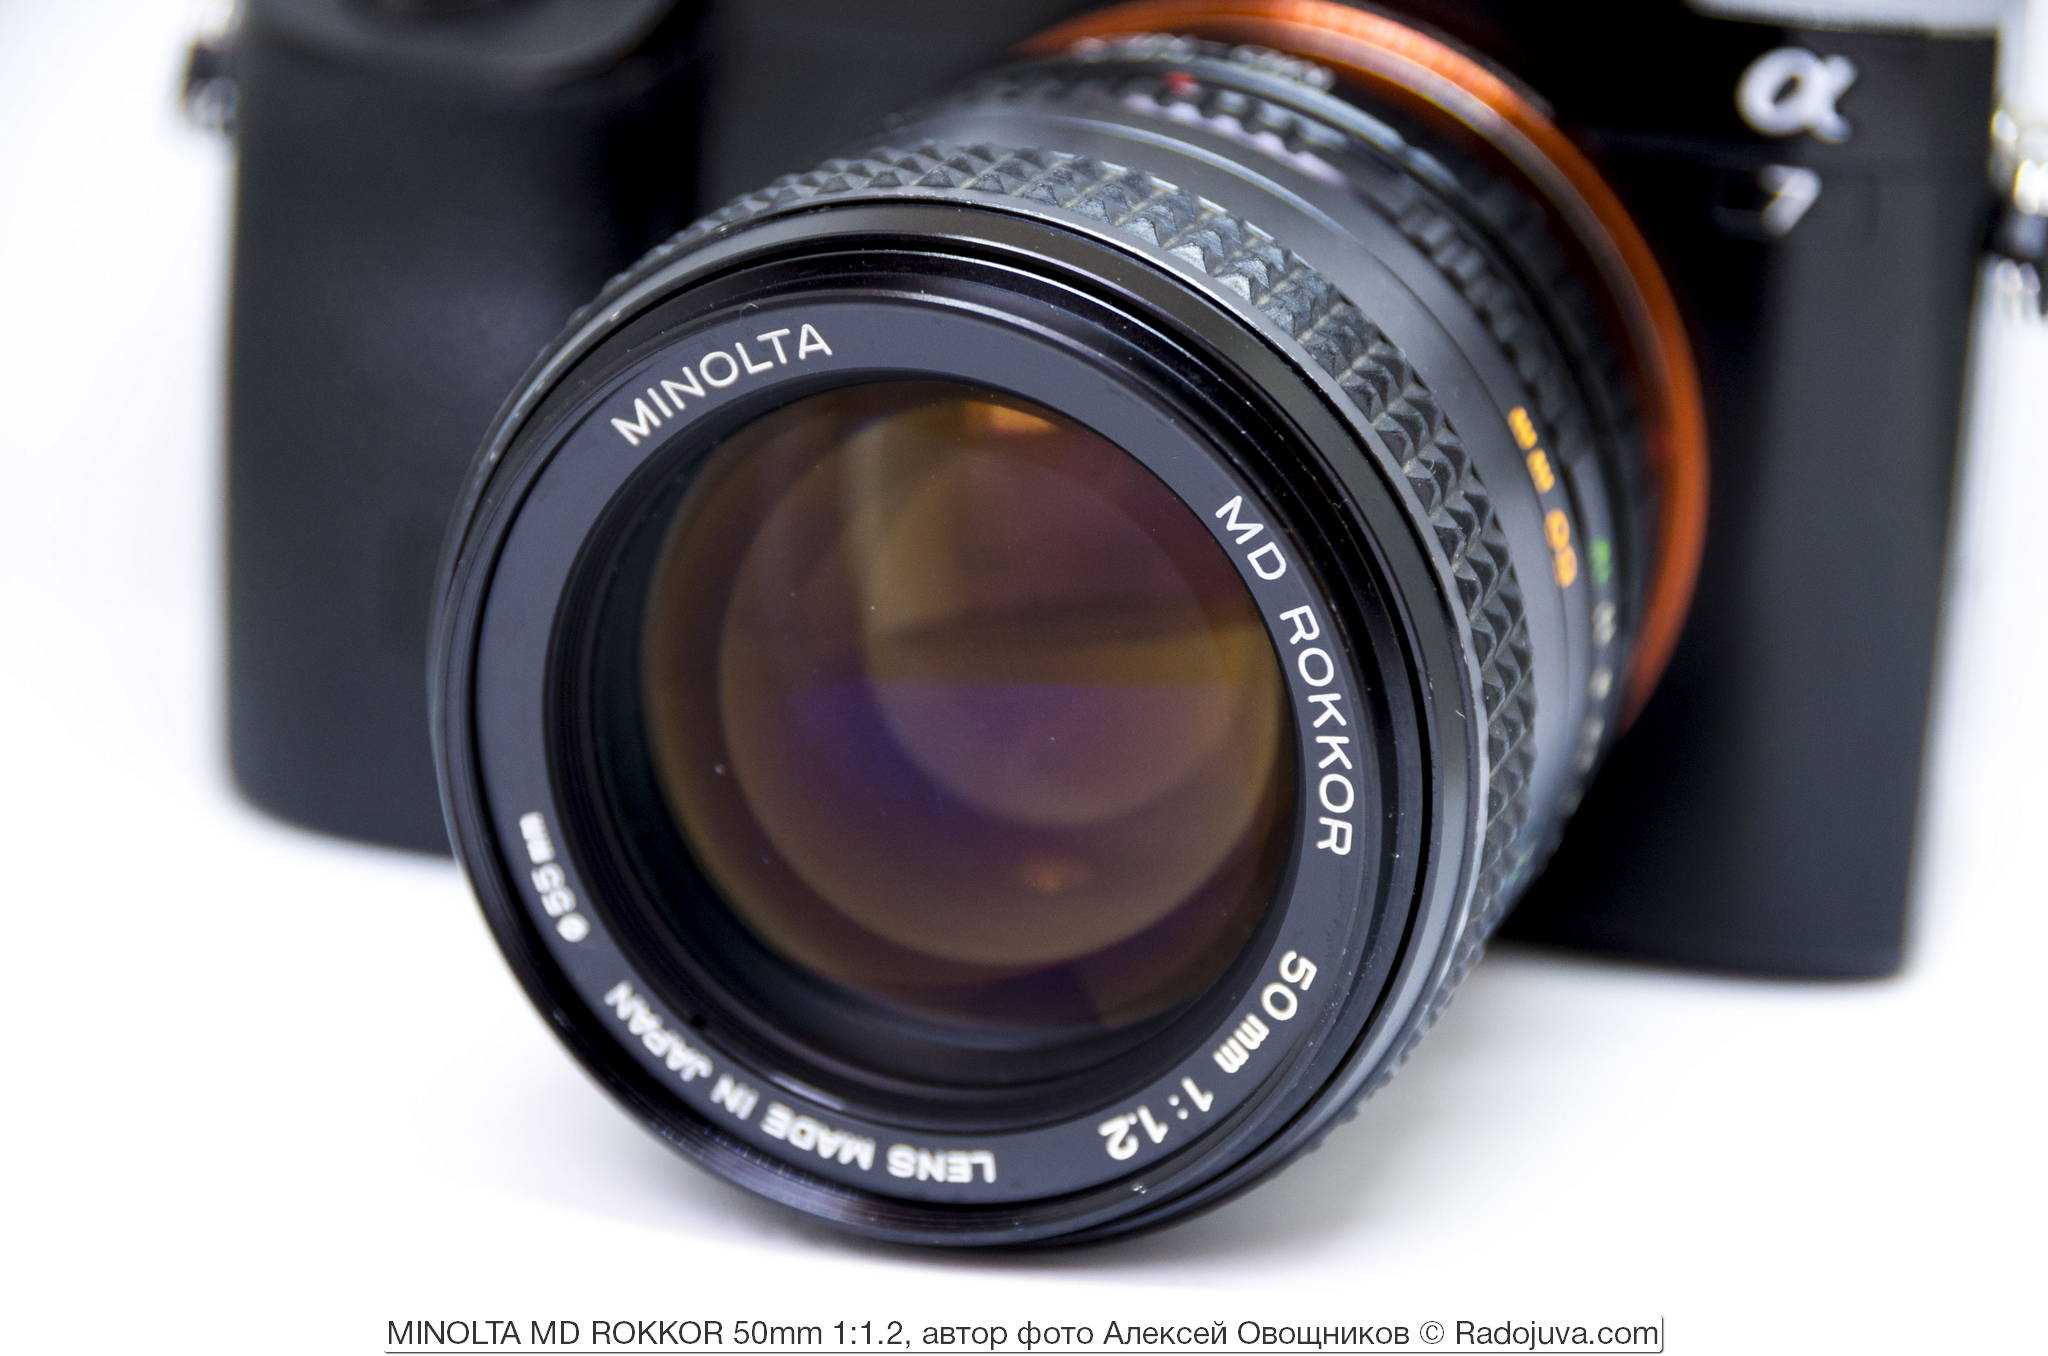
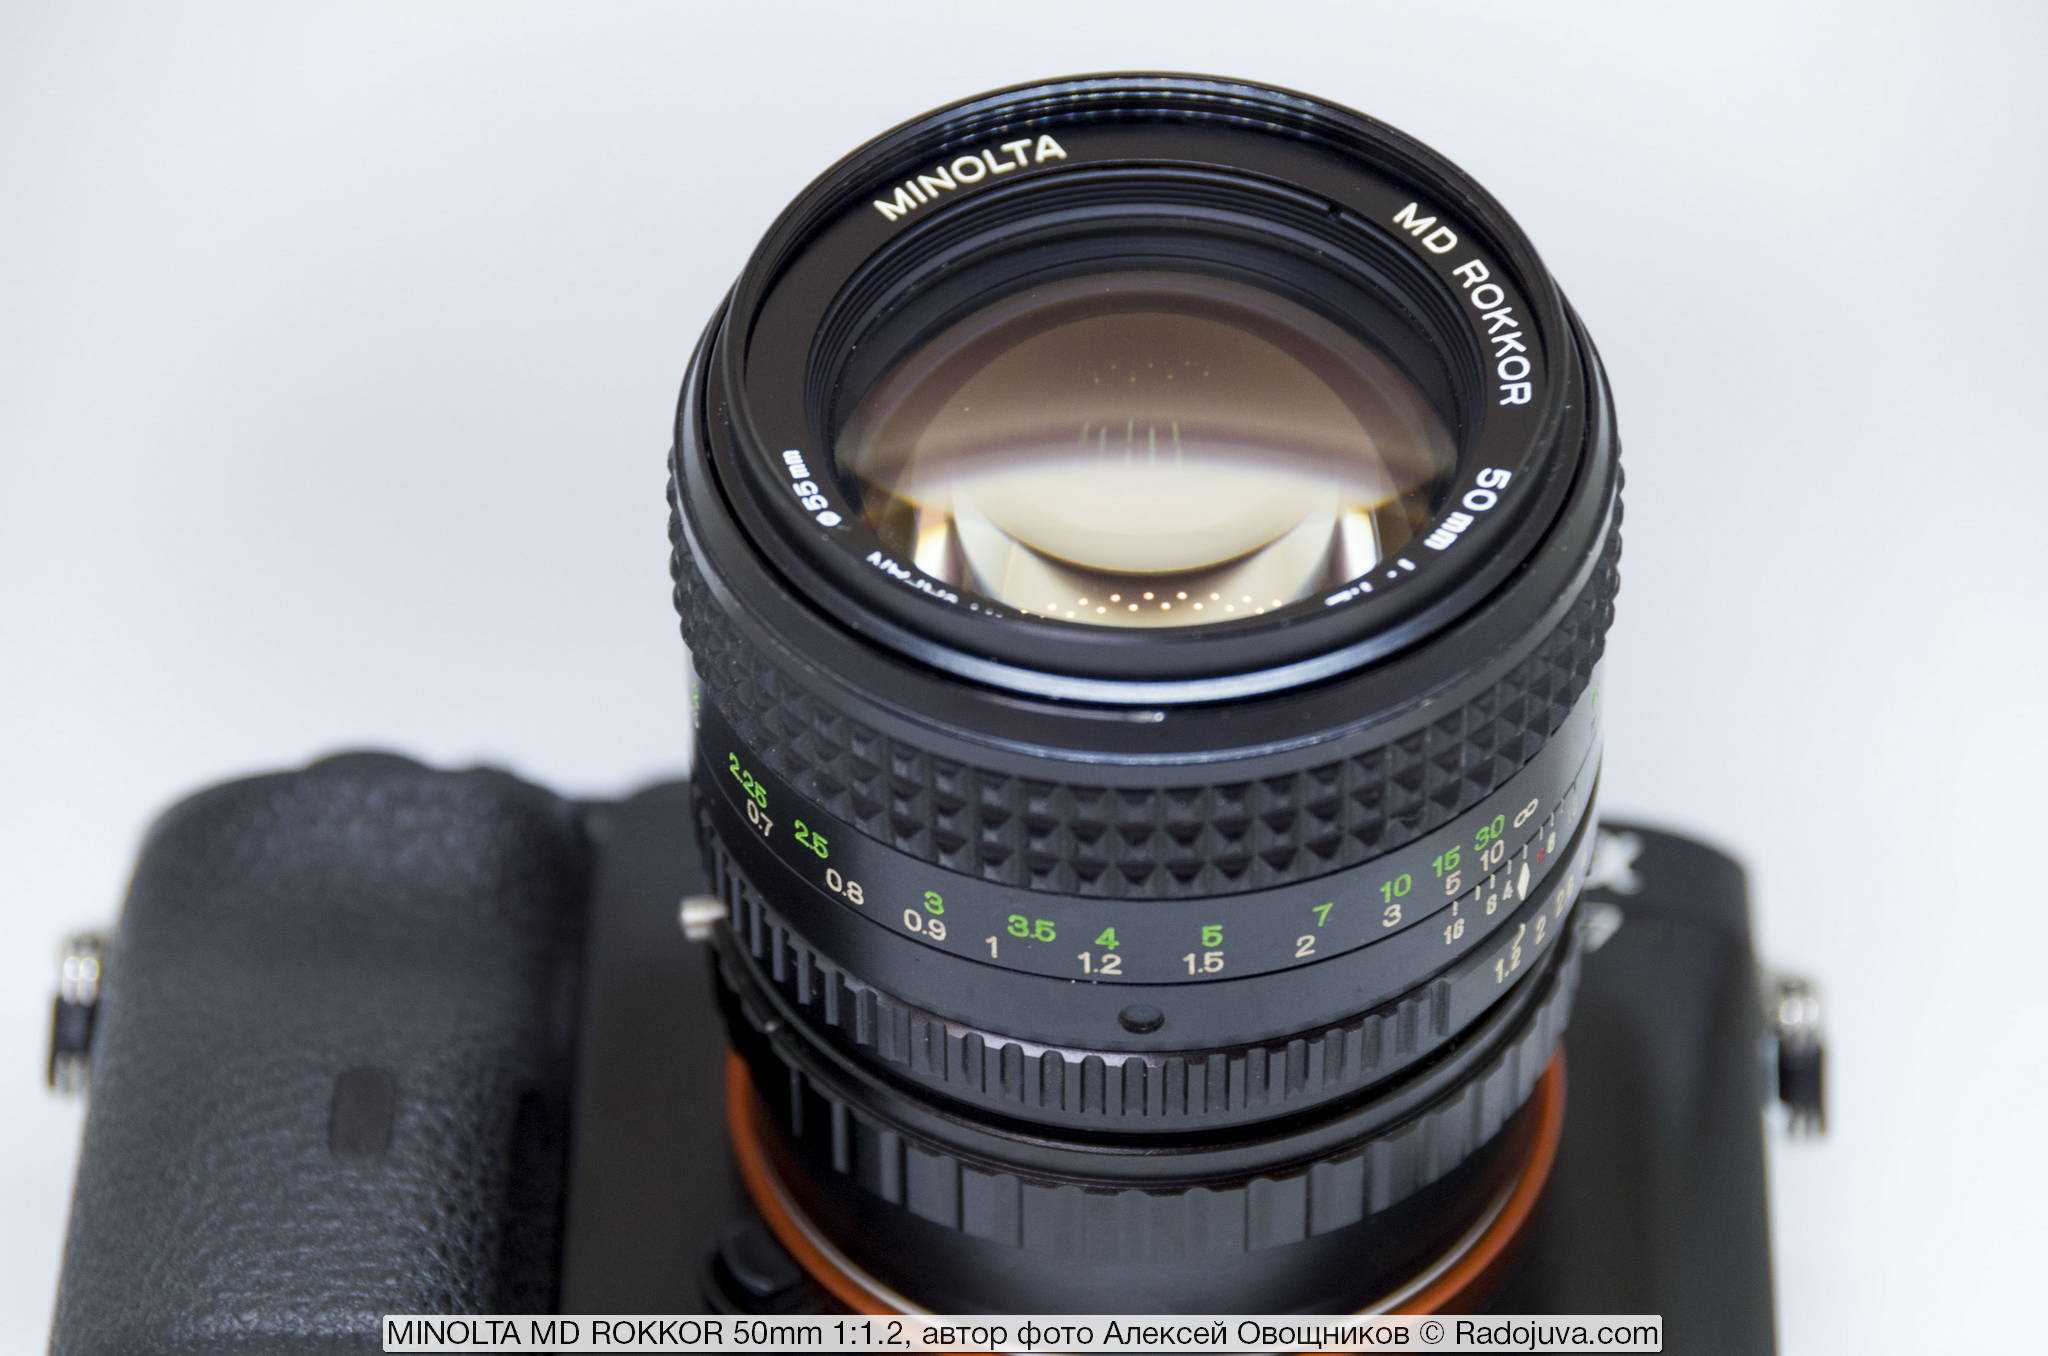
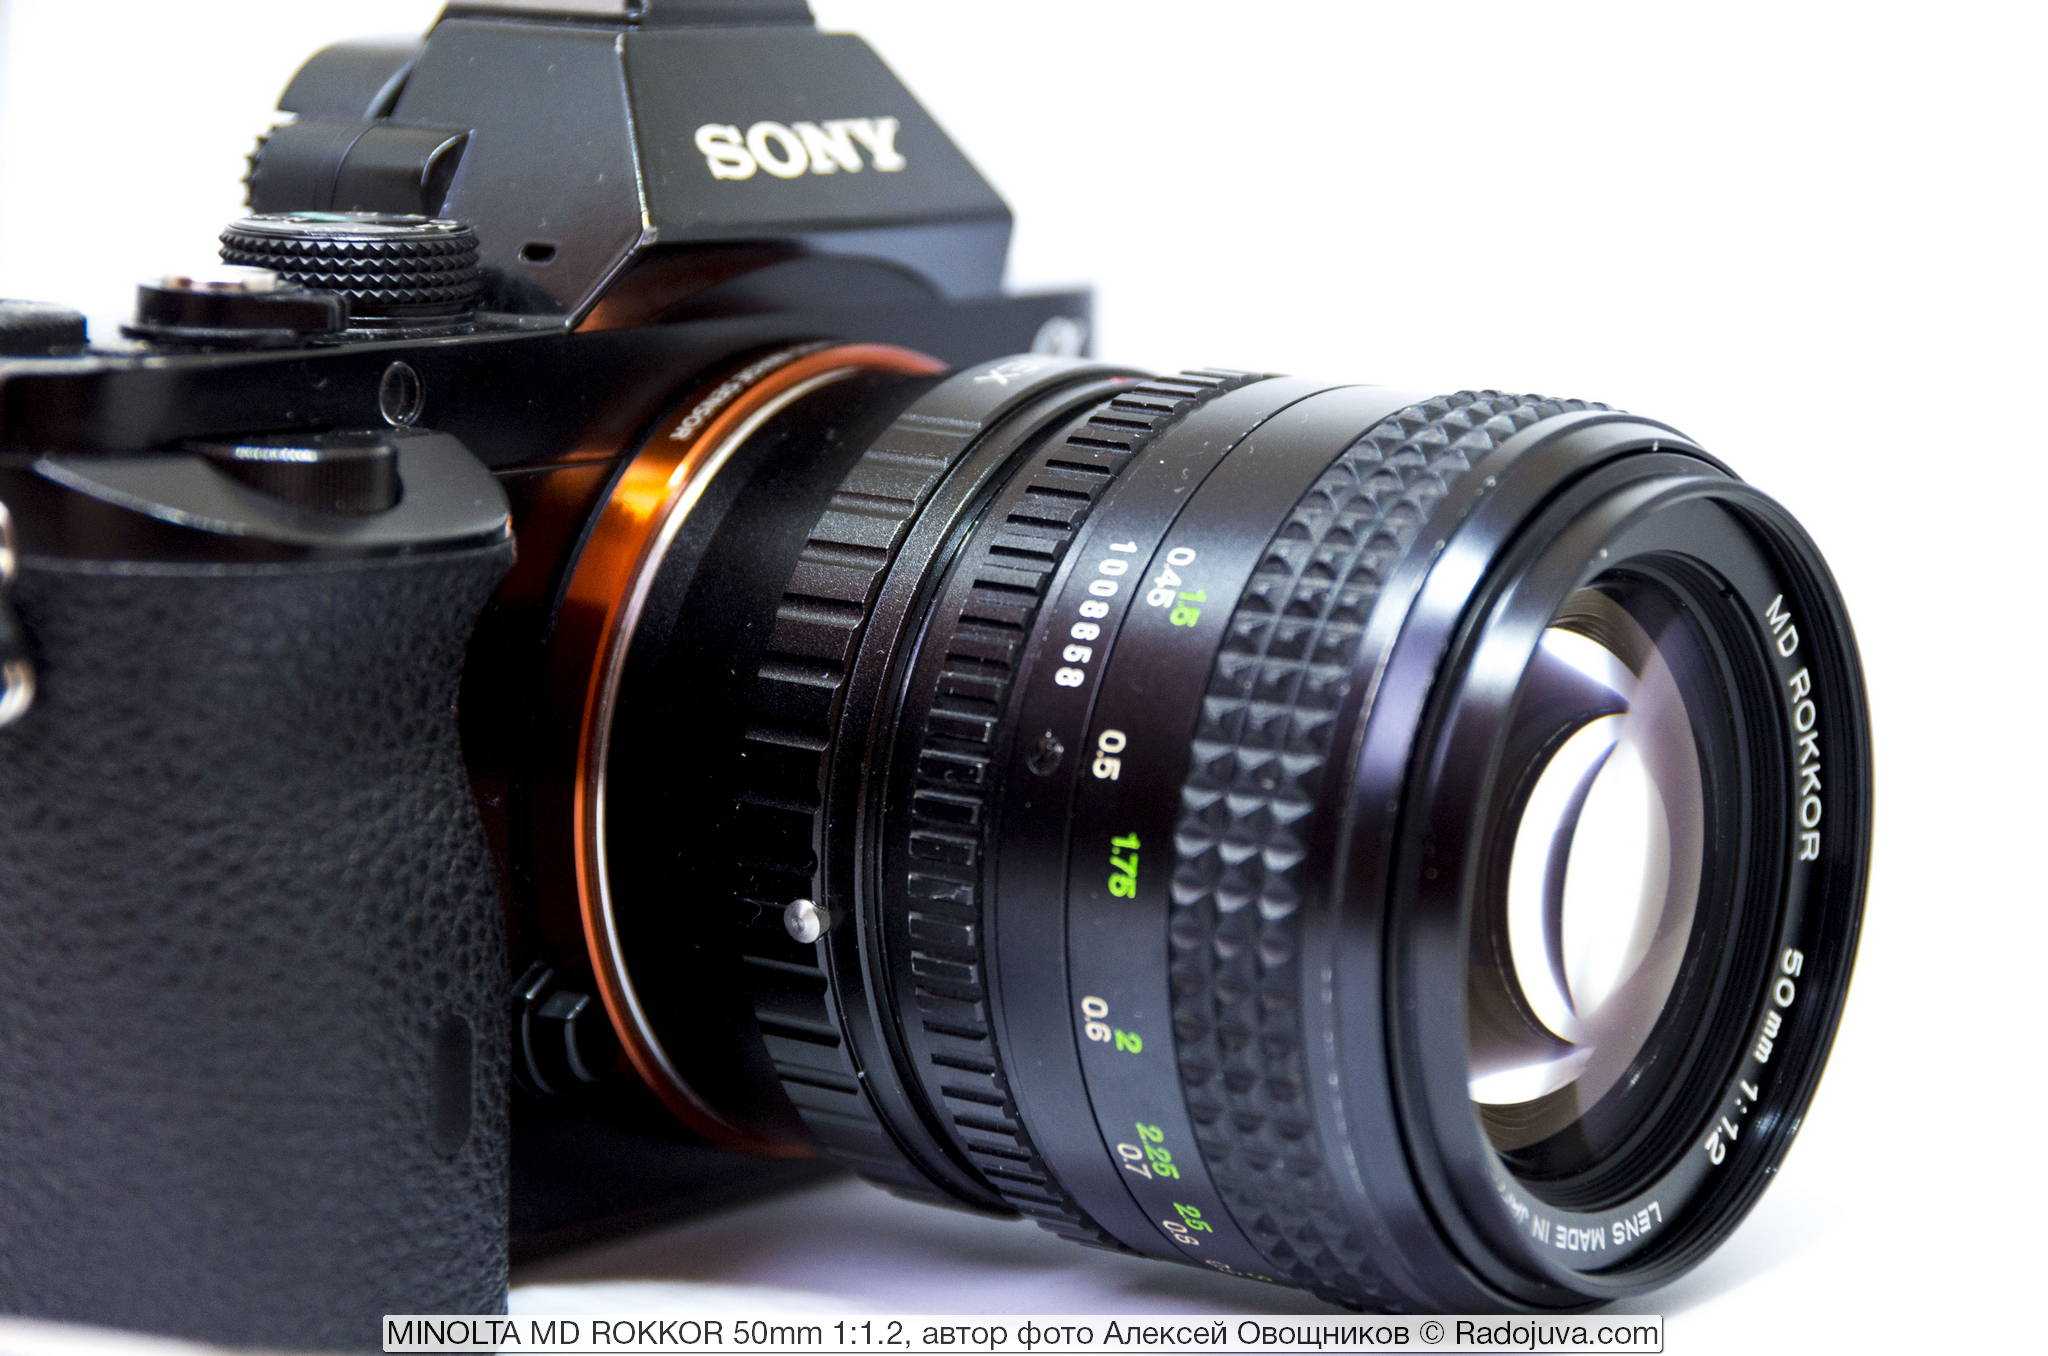
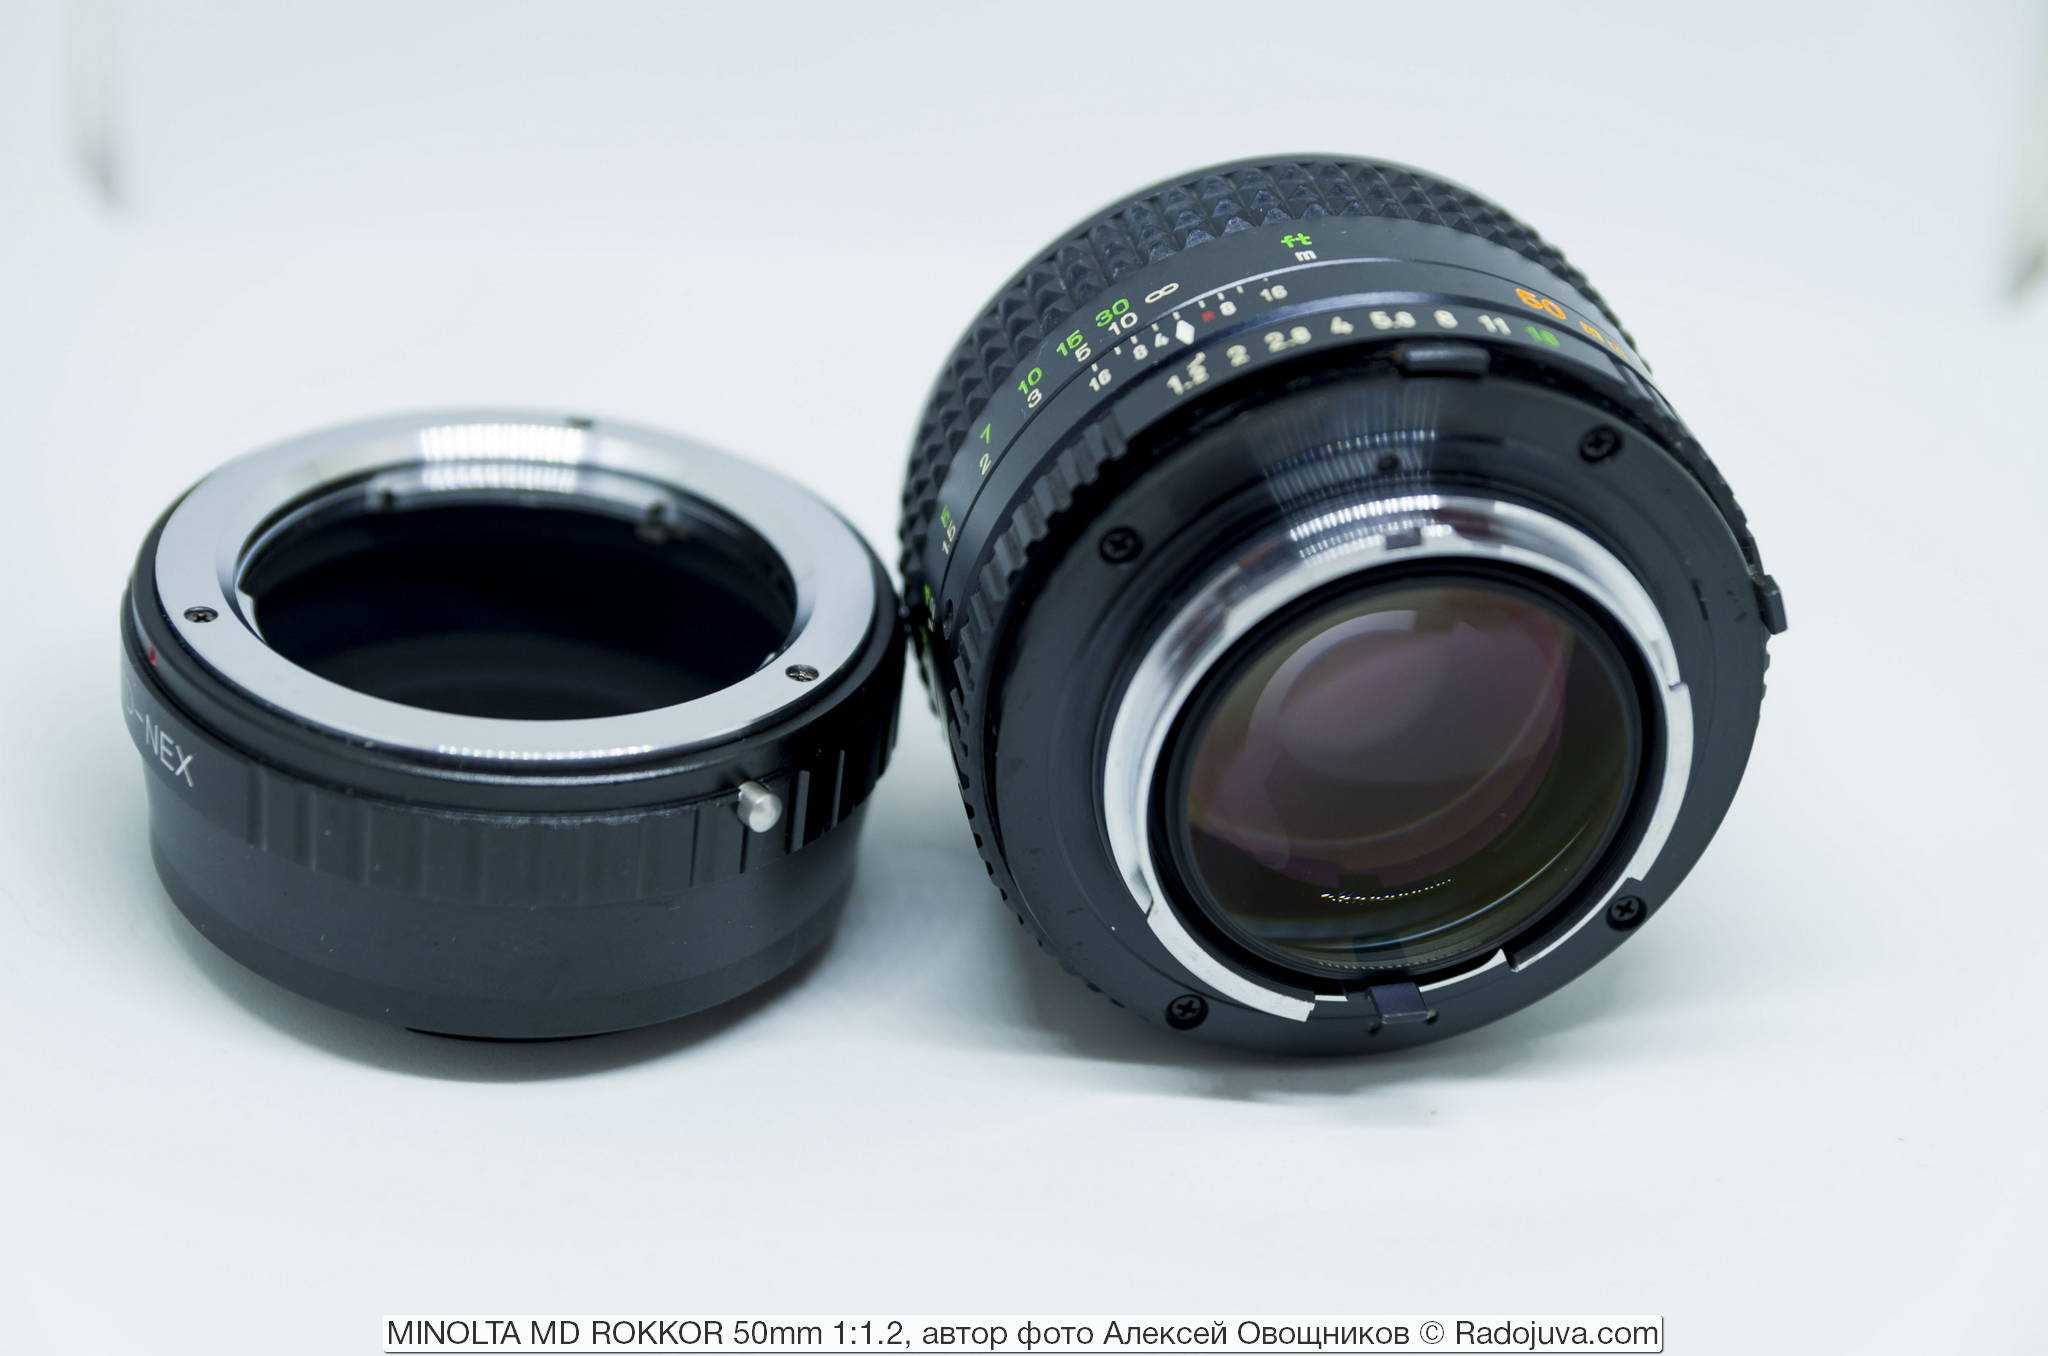
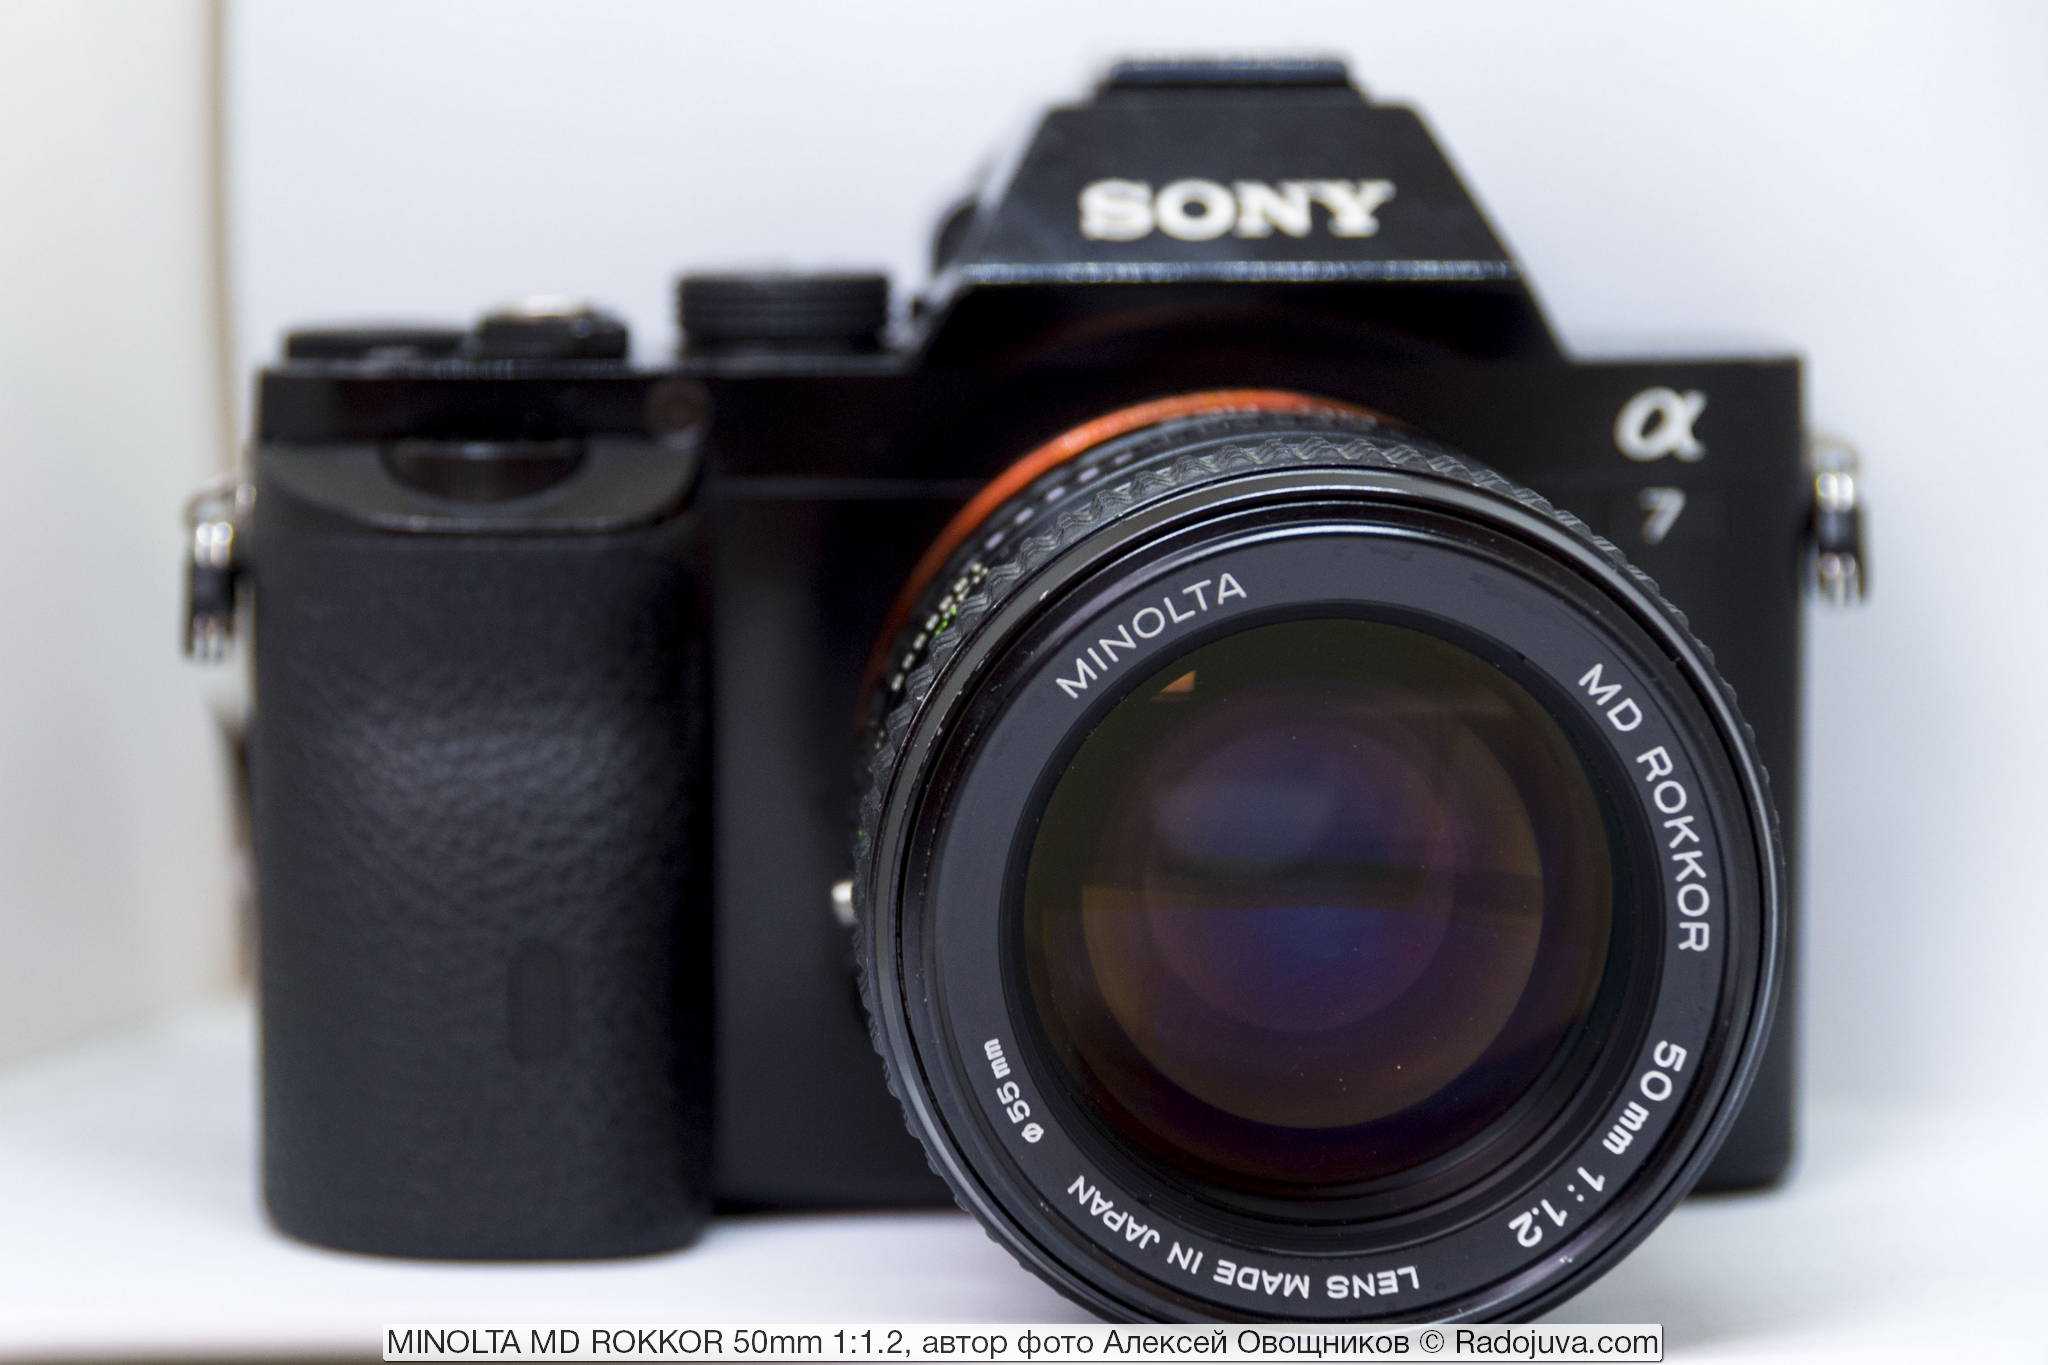
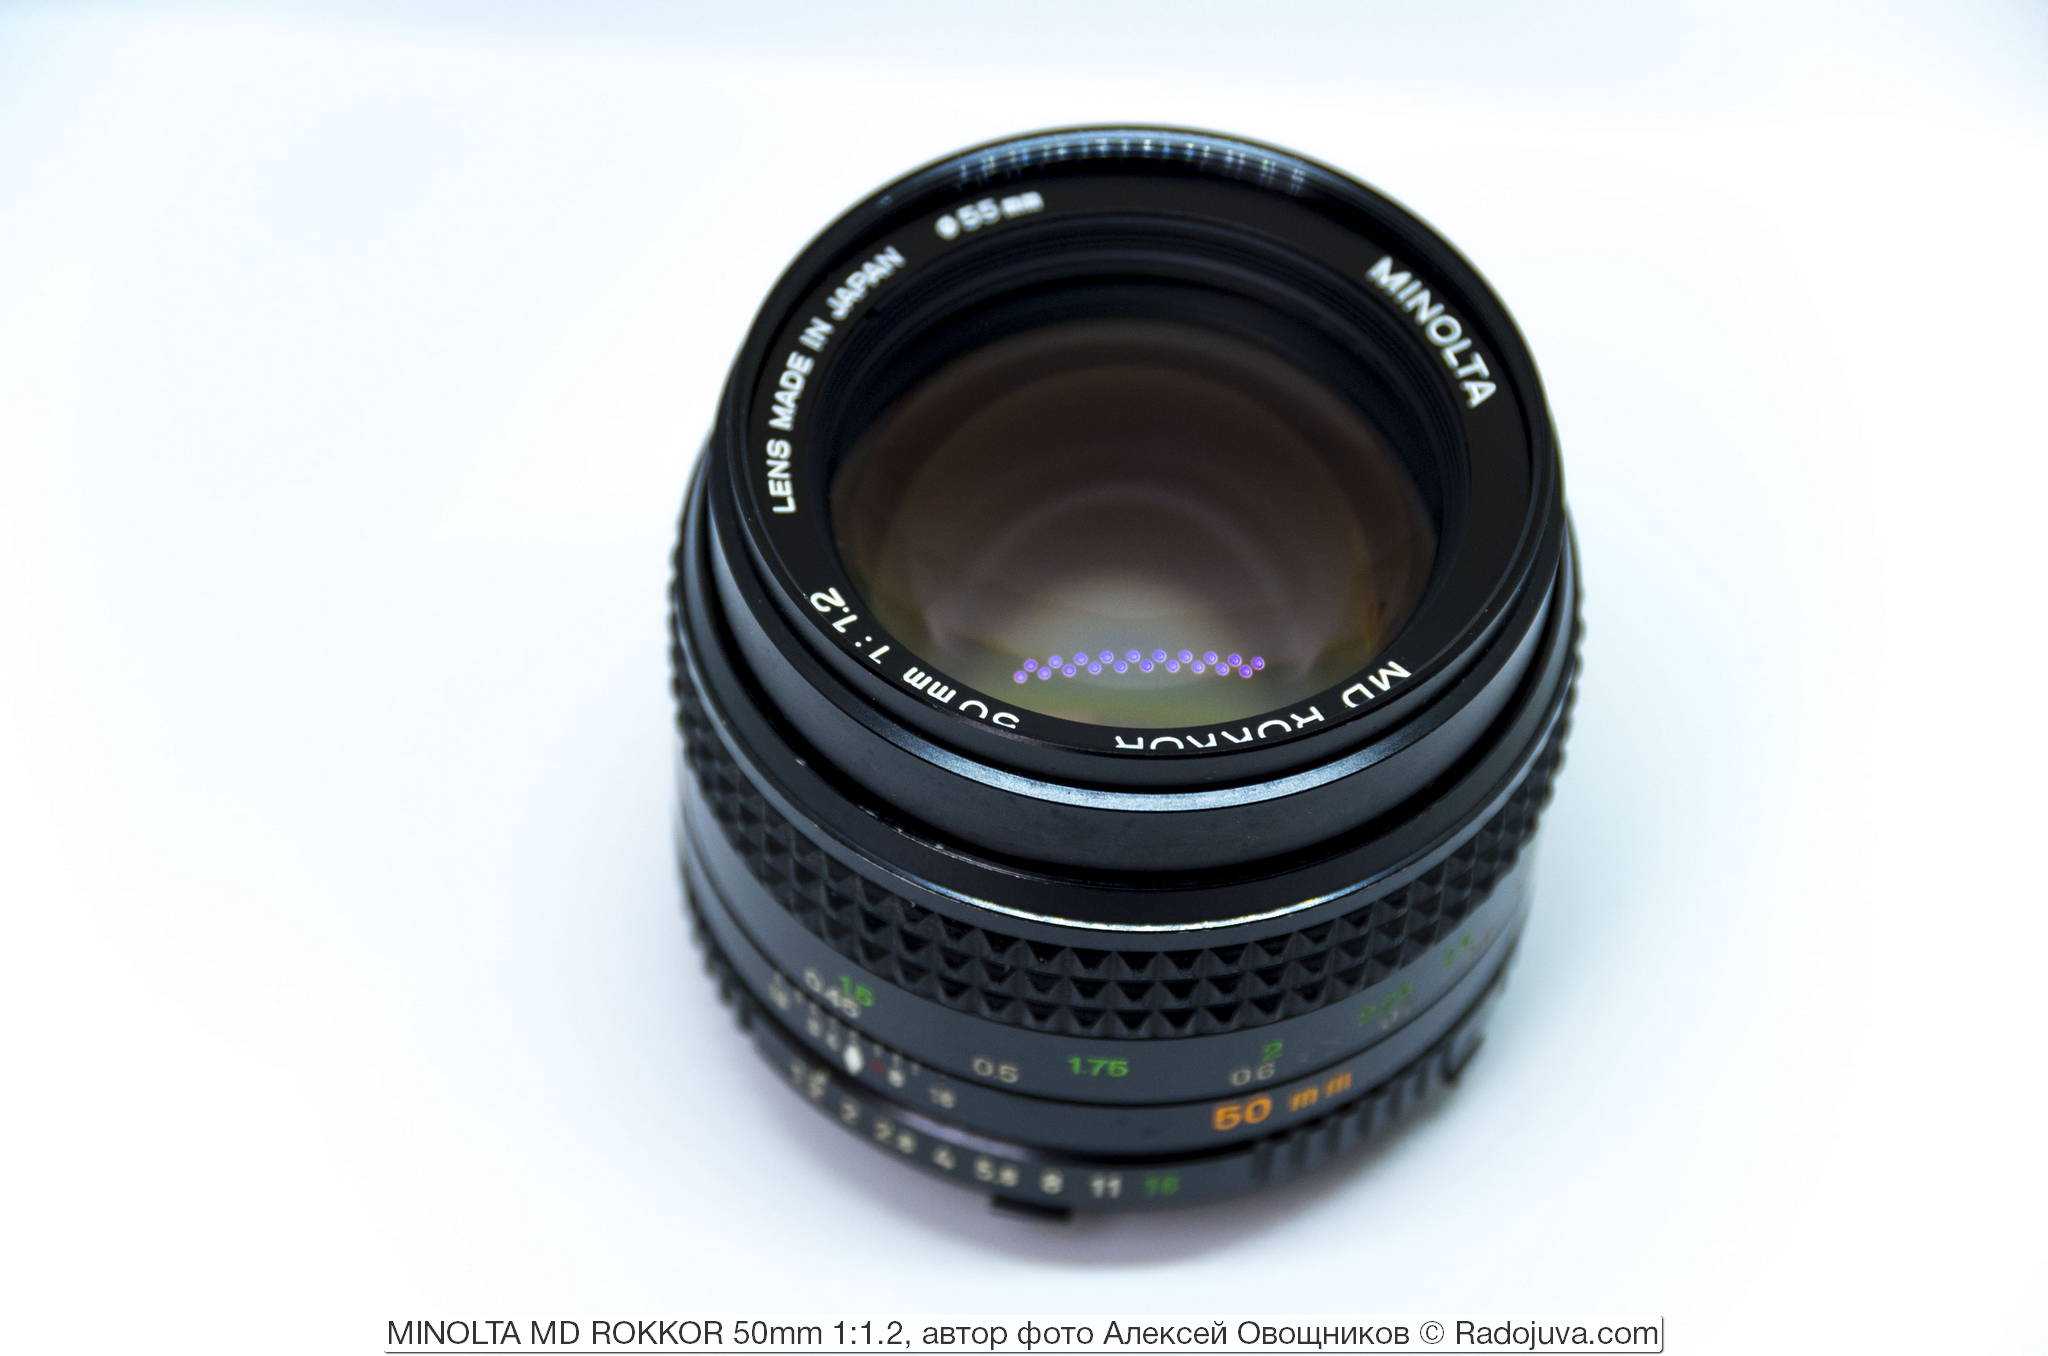
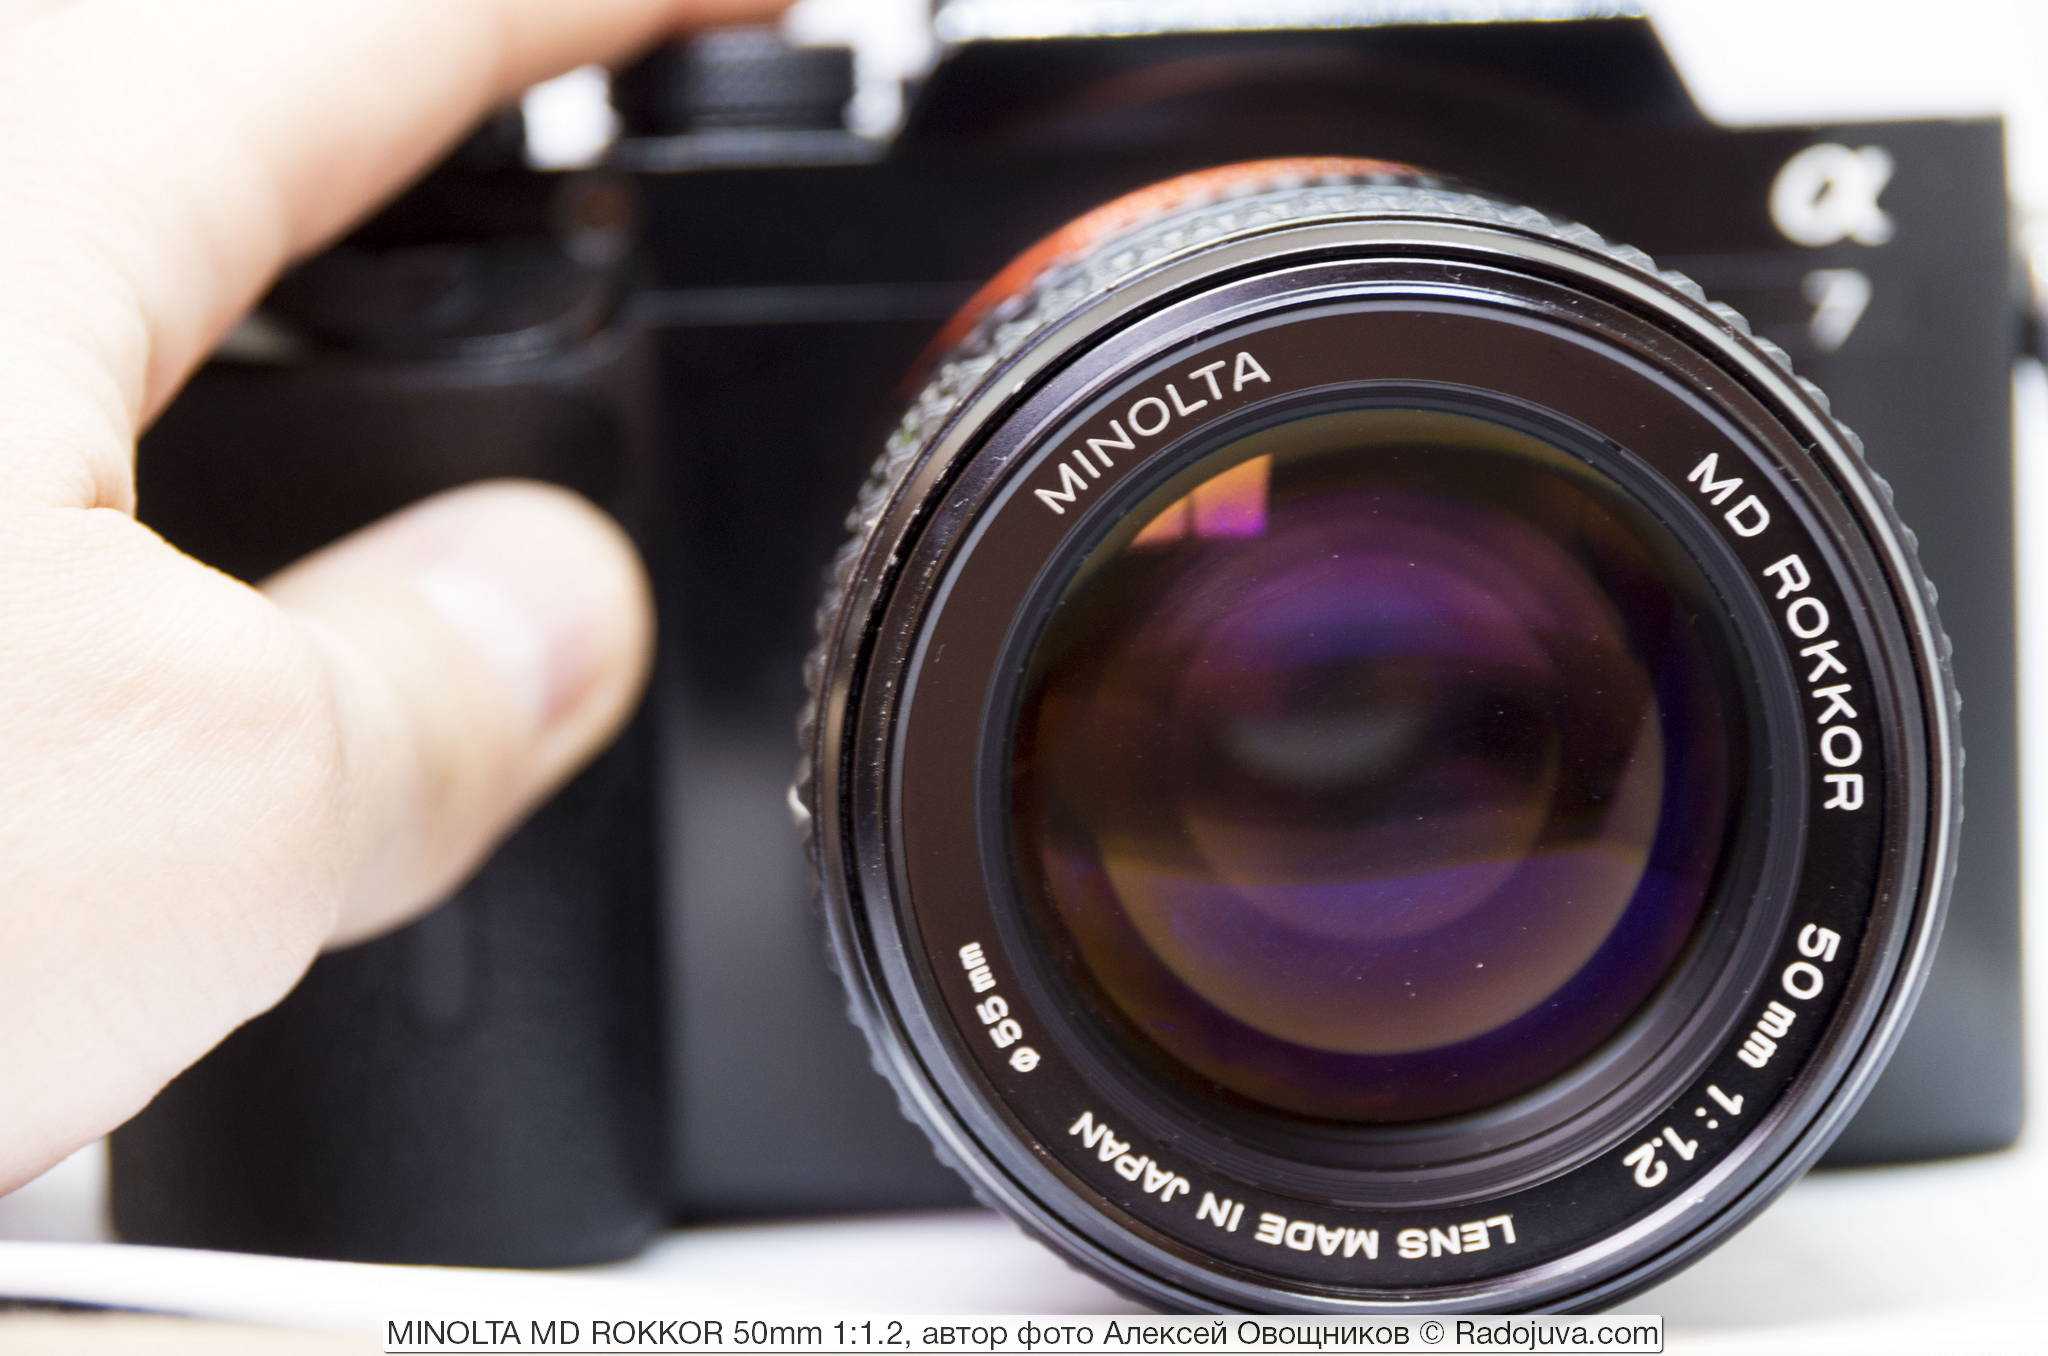
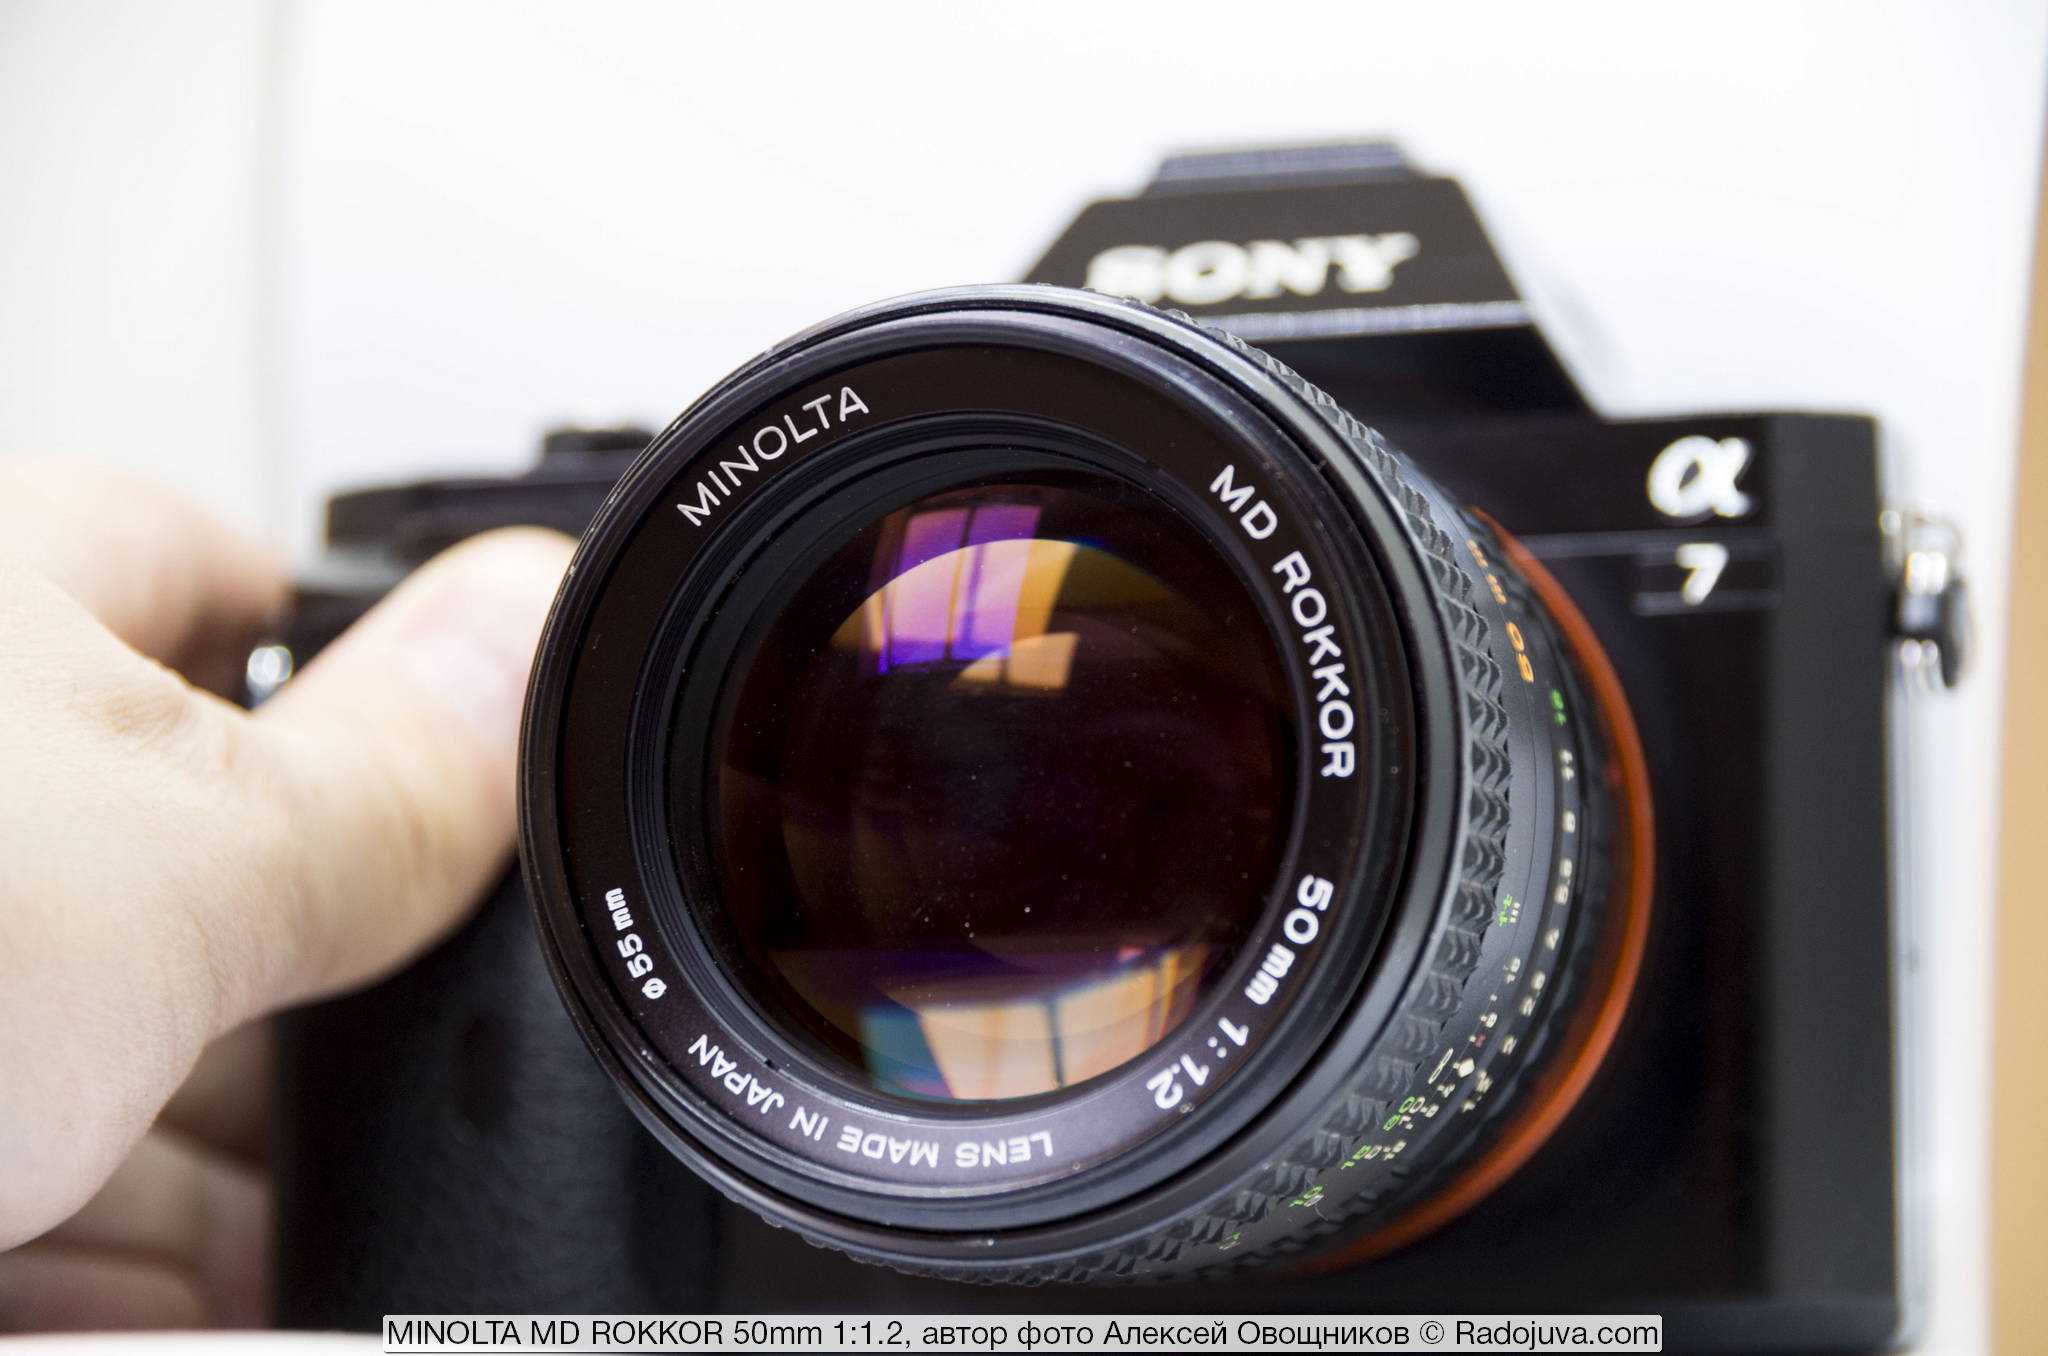
Minolta MD Rokkor 50mm 1:1.2 – final conclusion
Let me go straight to the positives. The lens is small and light for its parameters. This, by the way, feels good after 58mm 1.2. It has good sharpness at F2, and it becomes completely sharp across the entire field of the frame at F5.6. Quite a common result, even for lenses from the 1950-s. But I’ll clarify – you can shoot without worrying already starting from F2, a completely working aperture.
As for F1.2, be sure to experiment with portraits. I insist, because I myself have ceased to be afraid to use it at all – yes, there is a slight loss of contrast, but this is not a problem subject to subsequent digital processing. If to exclude softness, the lens keeps details very well even on F1.2.
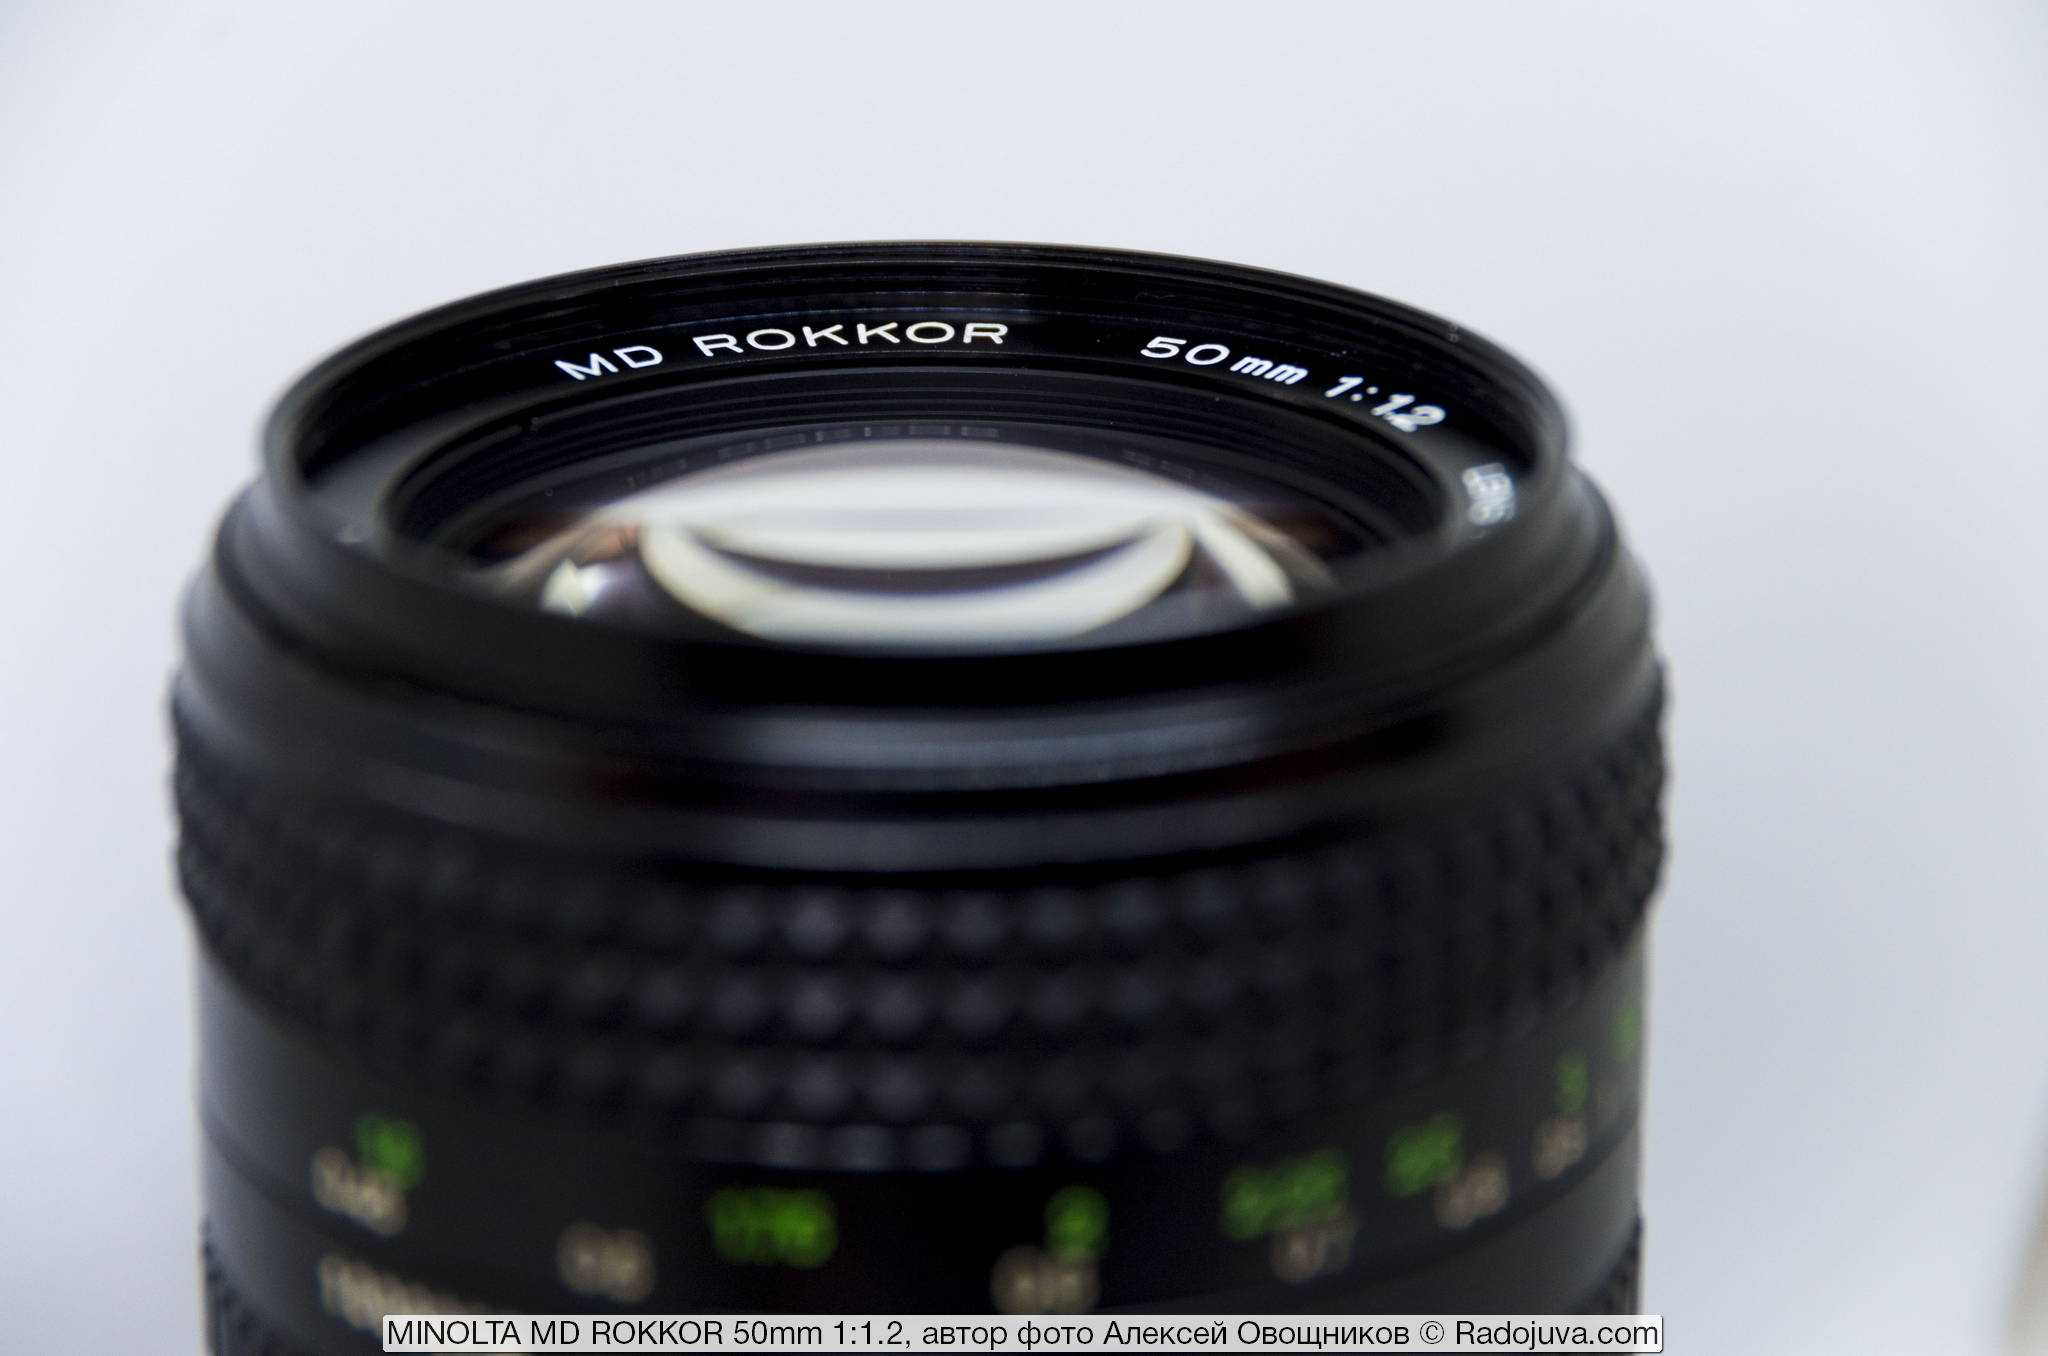
The second plus, no longer so obvious, is related to bokeh. The lens gives an absolutely Gaussian bokeh on wide aperture, but at F2-F4 it starts to look like it was painted with oil paints – some kind of brushstroke appear. I think it’s because the lens has 6 aperture blades and it doesn’t draw a usual circle but straight lines at different angles like brush strokes. Yes, I know that talking about bokeh is not a very good form, because only those who want to think about bokeh think about it. But in the case of such lenses, this can begin to play a noticeable role in the frame, even for the average viewer.
The lens also has disadvantages. They are all expected. I was even too lazy to do some tests, because the results were predictable in advance. Firstly, geometric distortions are slightly larger than lenses with f1.4 aperture (which, in turn, are inferior in this parameter to slower f1.7, and so on). This is not critical, yes, the barrel is noticeable but can be fixed in editors. Also noticeable is strong vignetting and chromatic aberration at F1.2. They are also corrected in the editor, but still this cannot be ignored.
Am I ready to recommend this lens? Yes, without a doubt. By optical design, the Rokkor MD-II version and the MD-III version without the word Rokkor are the same, so choose whichever you like.

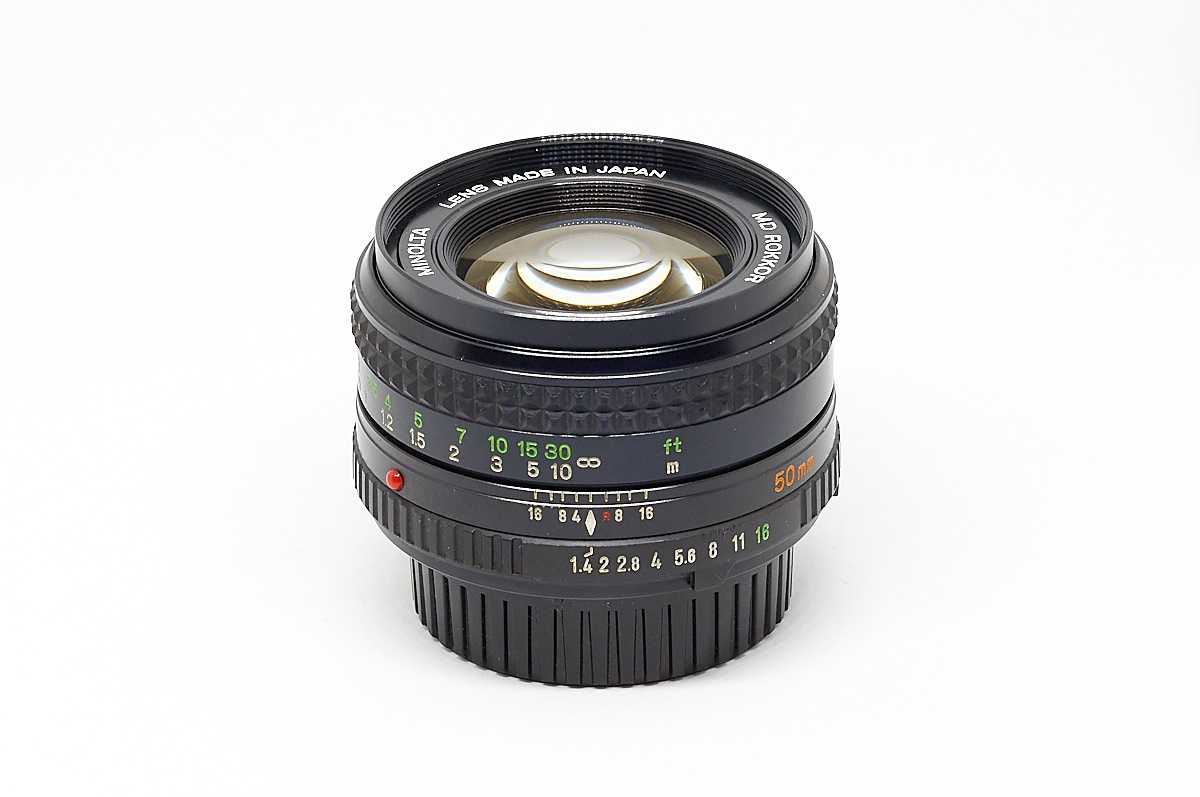
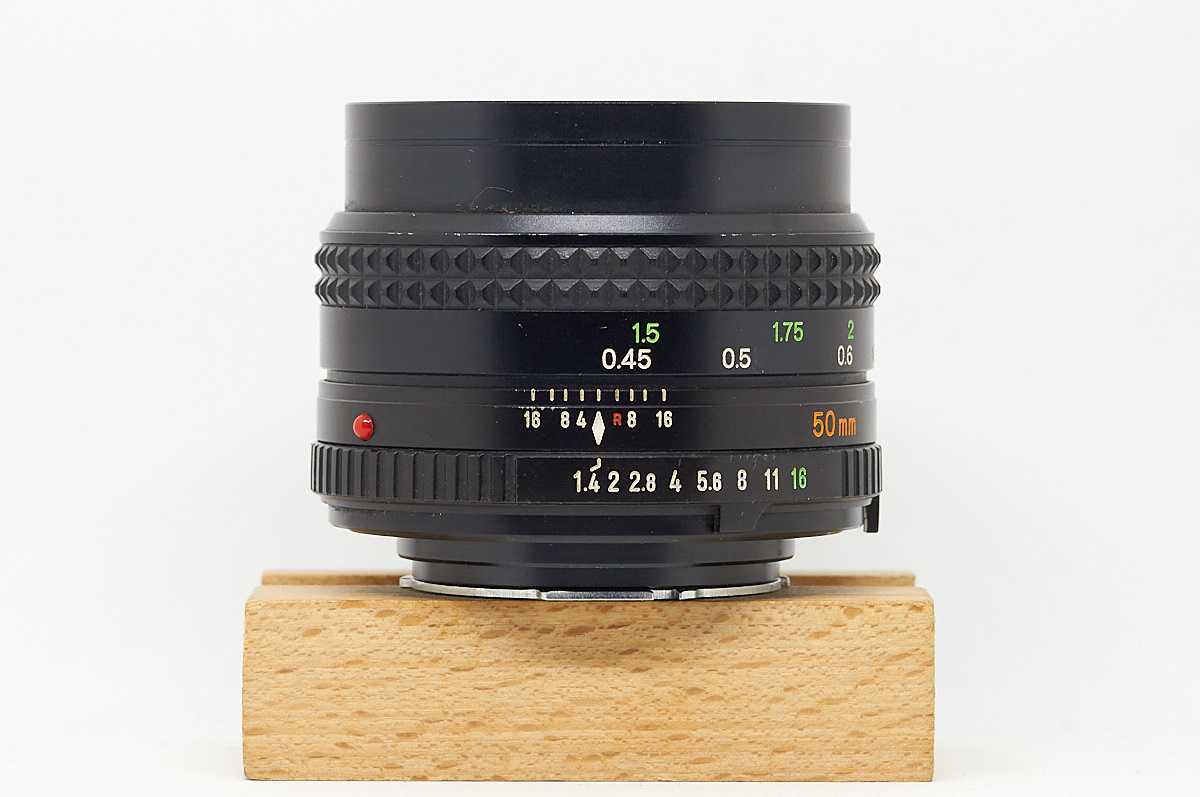
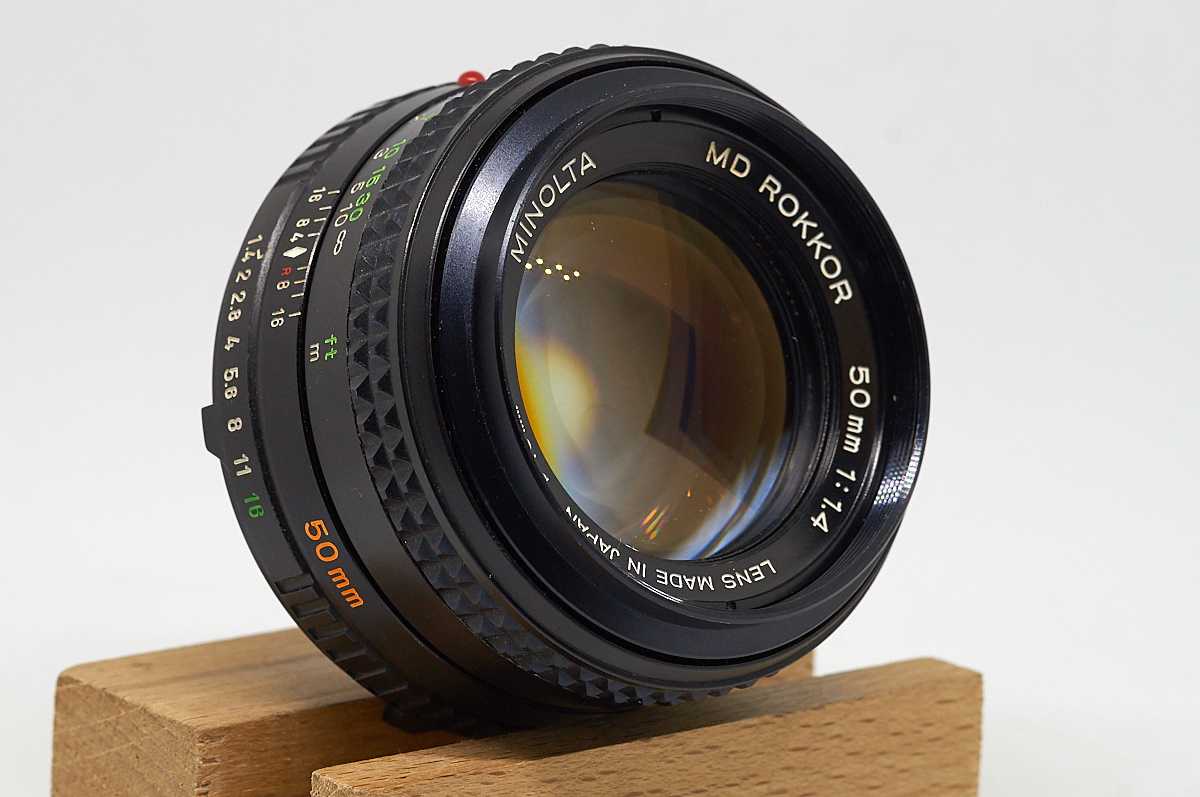
Minolta MD Rokkor 50mm 1:1.4 (3.5/5)
- Low contrast with nervous bokeh at f/1.4 so I use this aperture only when it is very dark.
- Improves at lot by f/2 were it is quite nice for portraits and closeups, for excellent results across most of the frame stop down to f/2.8
- Excellent for landscape images at f/8
- Very good built quality
There are two optically different (but similar) versions of the lens, you can tell them apart by the diameter of the filter thread, this version has a 55mm diameter and the younger one has a 49mm filter thread.flickr set | full resolution samples | test | my unfinished review
Get the lens at ebay.de | ebay.com | ebay.co.uk (affiliate links).
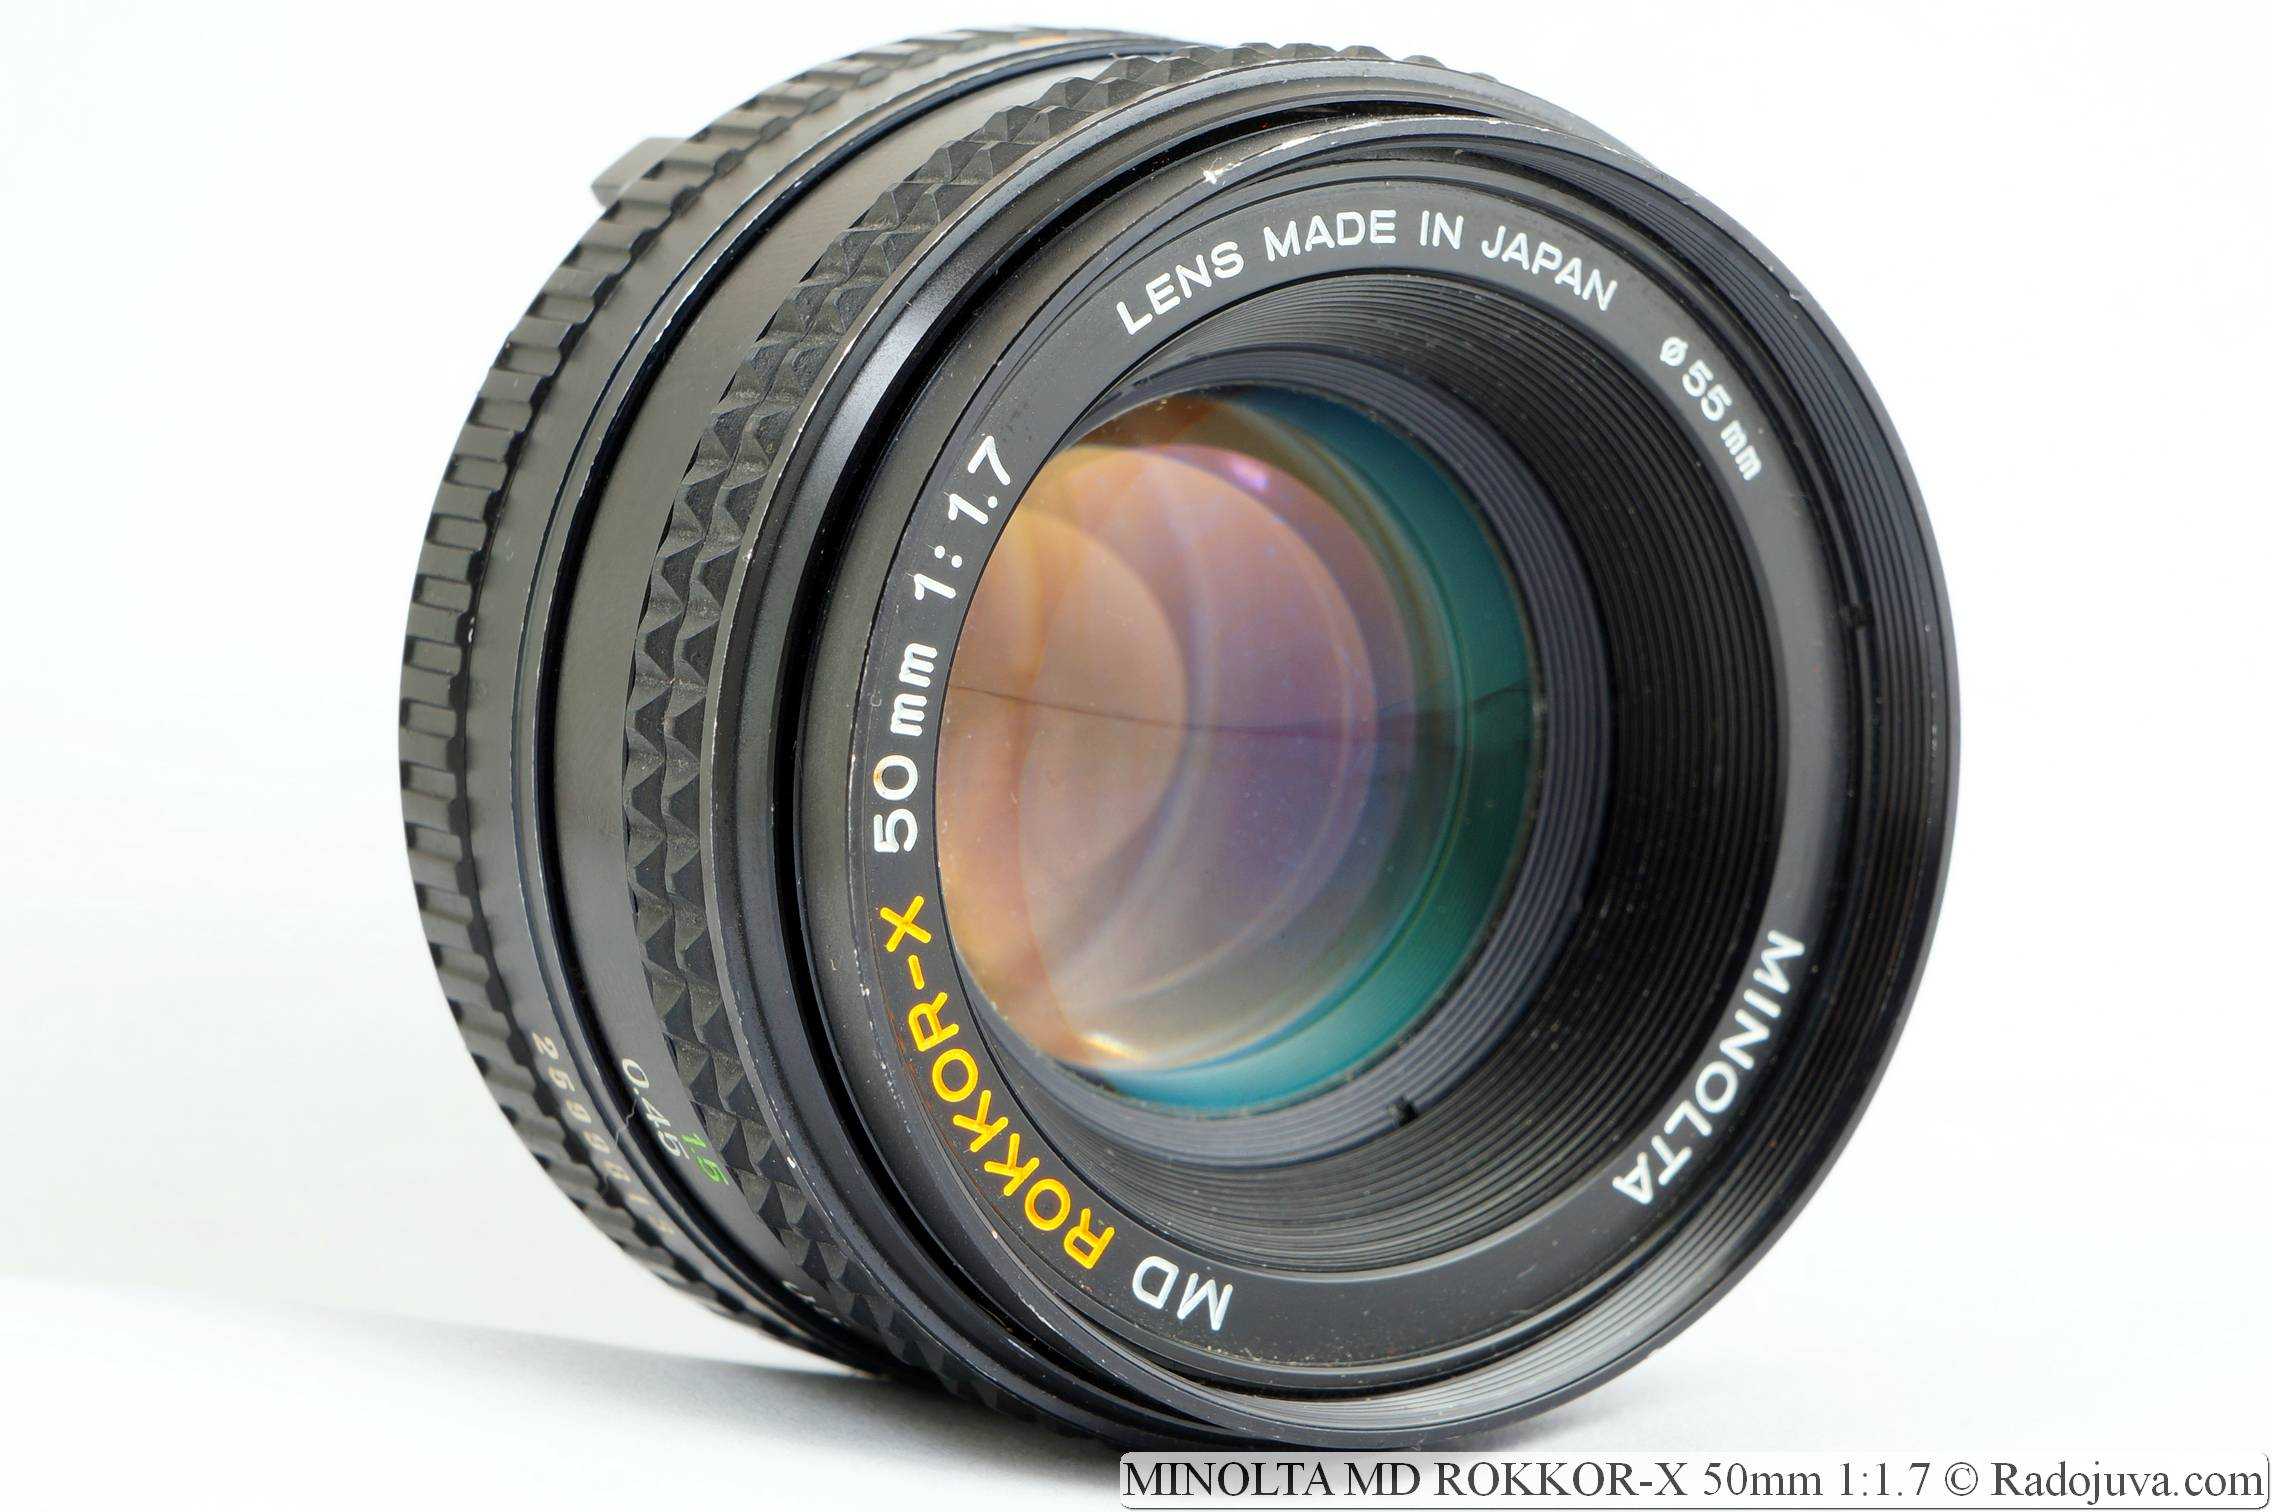
Minolta MD 50mm 1:1.7 (or Minolta MD 50mm F/1.7, New-MD, MD III design) – overall conclusion

Everything what were said about MD 50mmF1.4 can be applied to this fifty. Both lenses work quite the same. Reviewed 50mm 1:1.7 has a little less sharpness but the difference too small to find it on real pictures, only “head to head” comparisons can give you a chance to see such micro difference. Even more – this lens has an advantage in the corners, and it can be important in some cases. If you need to save a few yens for 50mm Minolta lens – buy this 50/1.7 instead of 50/1.4 and don’t care – nobody can differ real photos from this lens and from MD 50/1.4. Just one thing – if you planned to seriously play with bokeh and thin DOF, then you should prefer the faster model.

Chiyoko 50mm 1:2.8 sharpness
Сlose-distance resolution test, minimal distance
Testing methods description
- Target: 10-15 cm picture, printed on glossy photo paper
- Distance: 1.7m
- Camera: Sony A7II (24mpx, full-frame, tripod, remote control). M-mode, ISO fixed, WB fixed, SteadyShot – OFF.
- The test was repeated for every F-stop on every focus position with manual focus adjustment for each shot. That is to avoid the effect of field curvature.
- RAW processing: Capture One, default settings. All quality settings – 100%. Crops – 300×200 px
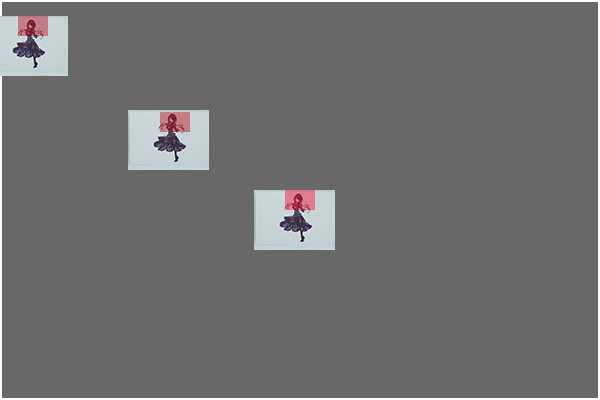
Original target image (printed in horizontal orientation on 10cm X 15cm glossy photo paper)
Testing methods description
- Target: cityscape
- Distance: > 200 meters to center focus point
- Camera: Sony A7II (24mpx, full-frame, tripod, remote control). M-mode, ISO fixed, WB fixed, SteadyShot – OFF. The focus point is on the center only.
- RAW processing: Capture One, default settings. All quality settings – 100%. Crops – 300×200 px
Conclusions
This lens is a very simple lens to service, but unfortunately due to the entombed OU the lens can’t be serviced if there is haze or fungus on any internal lens surface. Performance wise I cannot fault the lens, and it is really a splendid, if somewhat fortunate find for me. If you get a copy, please make sure there is nothing internal to the OU that needs cleaning, and make sure you store in a humidity controlled environment – I live in a high humidity environment so I cannot say if you are in a low humidity environment might it be ok – to make sure fungus doesn’t get a chance to grow on it.
Recommended on the above conditions. Stay away if there is fungus.
Minolta MC Rokkor QF 50mm 1:3.5 Macro sharpness
Testing methods description
- Target: 10-15 cm picture, printed on glossy photo paper
- Distance: 1.7m
- Camera: Sony A7II (24mpx, full-frame, tripod, remote control). M-mode, ISO fixed, WB fixed, SteadyShot – OFF.
- The test was repeated for every F-stop on every focus position with manual focus adjustment for each shot. That is to avoid the effect of field curvature.
- RAW processing: Capture One, default settings. All quality settings – 100%. Crops – 300×200 px
Original target image (printed in horizontal orientation on 10cm X 15cm glossy photo paper)


Testing methods description
- Target: cityscape
- Distance: > 200 meters to center focus point
- Camera: Sony A7II (24mpx, full-frame, tripod, remote control). M-mode, ISO fixed, WB fixed, SteadyShot – OFF. The focus point is on the center only.
- RAW processing: Capture One, default settings. All quality settings – 100%. Crops – 300×200 px
Minolta MD Zoom 35-70mm 1:3.5 (3.5/5)
- At f/3.5 the bokeh is rather busy and the contrast is reduced.
- At f/5.6 the bokeh is much smoother and image is very sharp
- The corner-performance is very good for a zoom lens, my Zeiss 4/24-70 had weaker corners.They are weakest at 35m and excellent from about 40mm.
I think it’s performance is remarkable for a zoom lens of it’s age and I like to use it for city trips when I prefer it’s versatility over the shallower DOF of prime lenses. The 1:4 macro mode at 70mm is handy as well.
There are three versions of this lens and according to artaphot.ch Version 1 is optically inferior. I can recommend this last generation which is the only one with the macro mode.
flickr | full resolution | test 35mm 50mm 70mm | my in-depth review
Get the lens at ebay.de or ebay.com | ebay.co.uk (affiliate links).
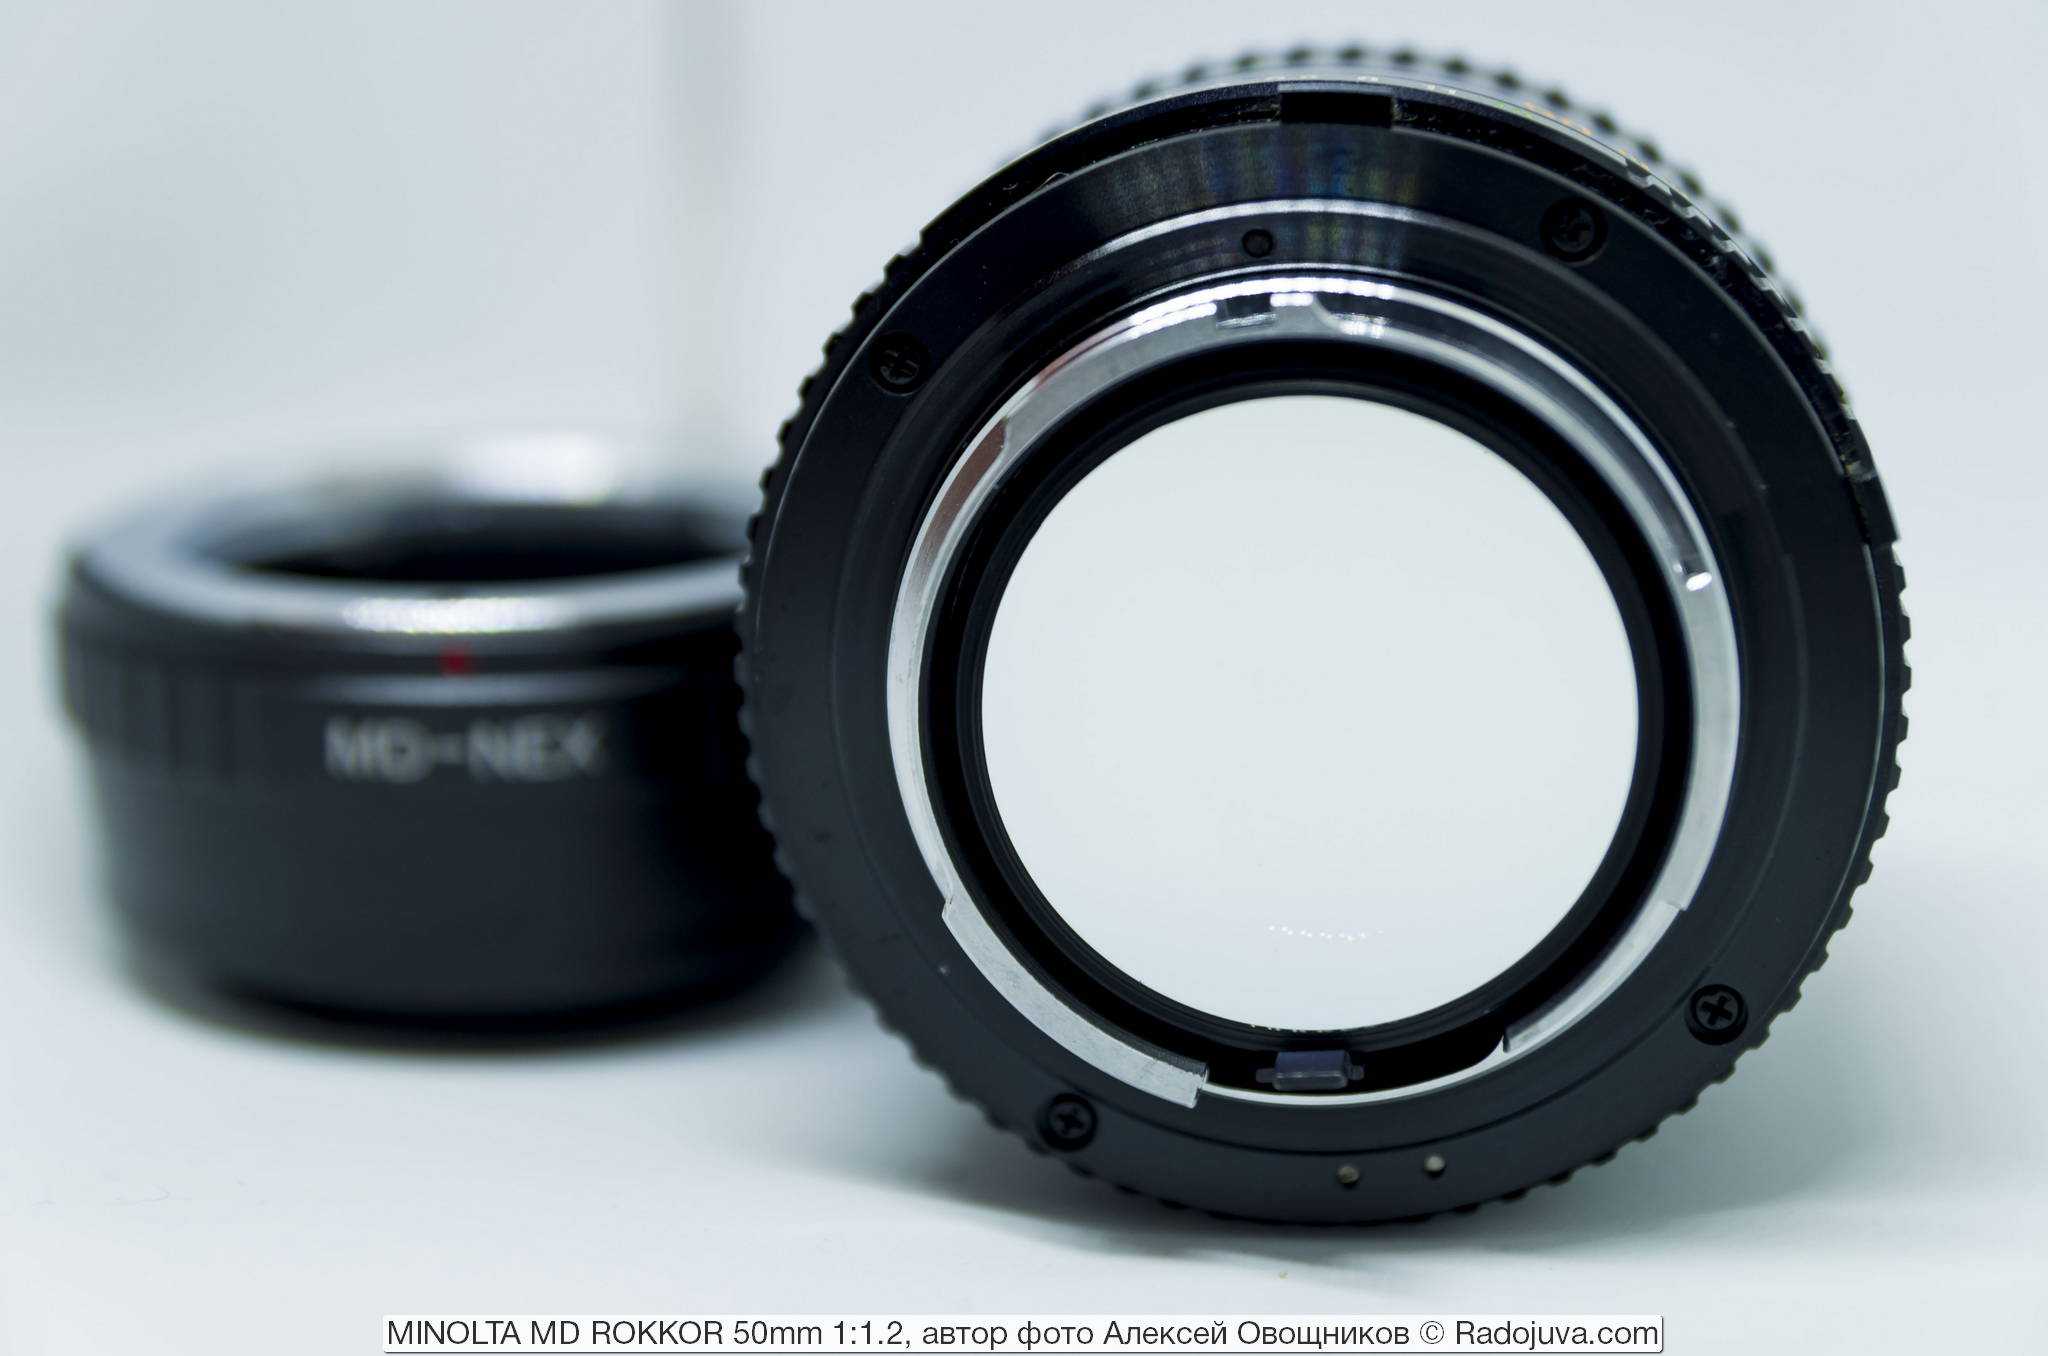
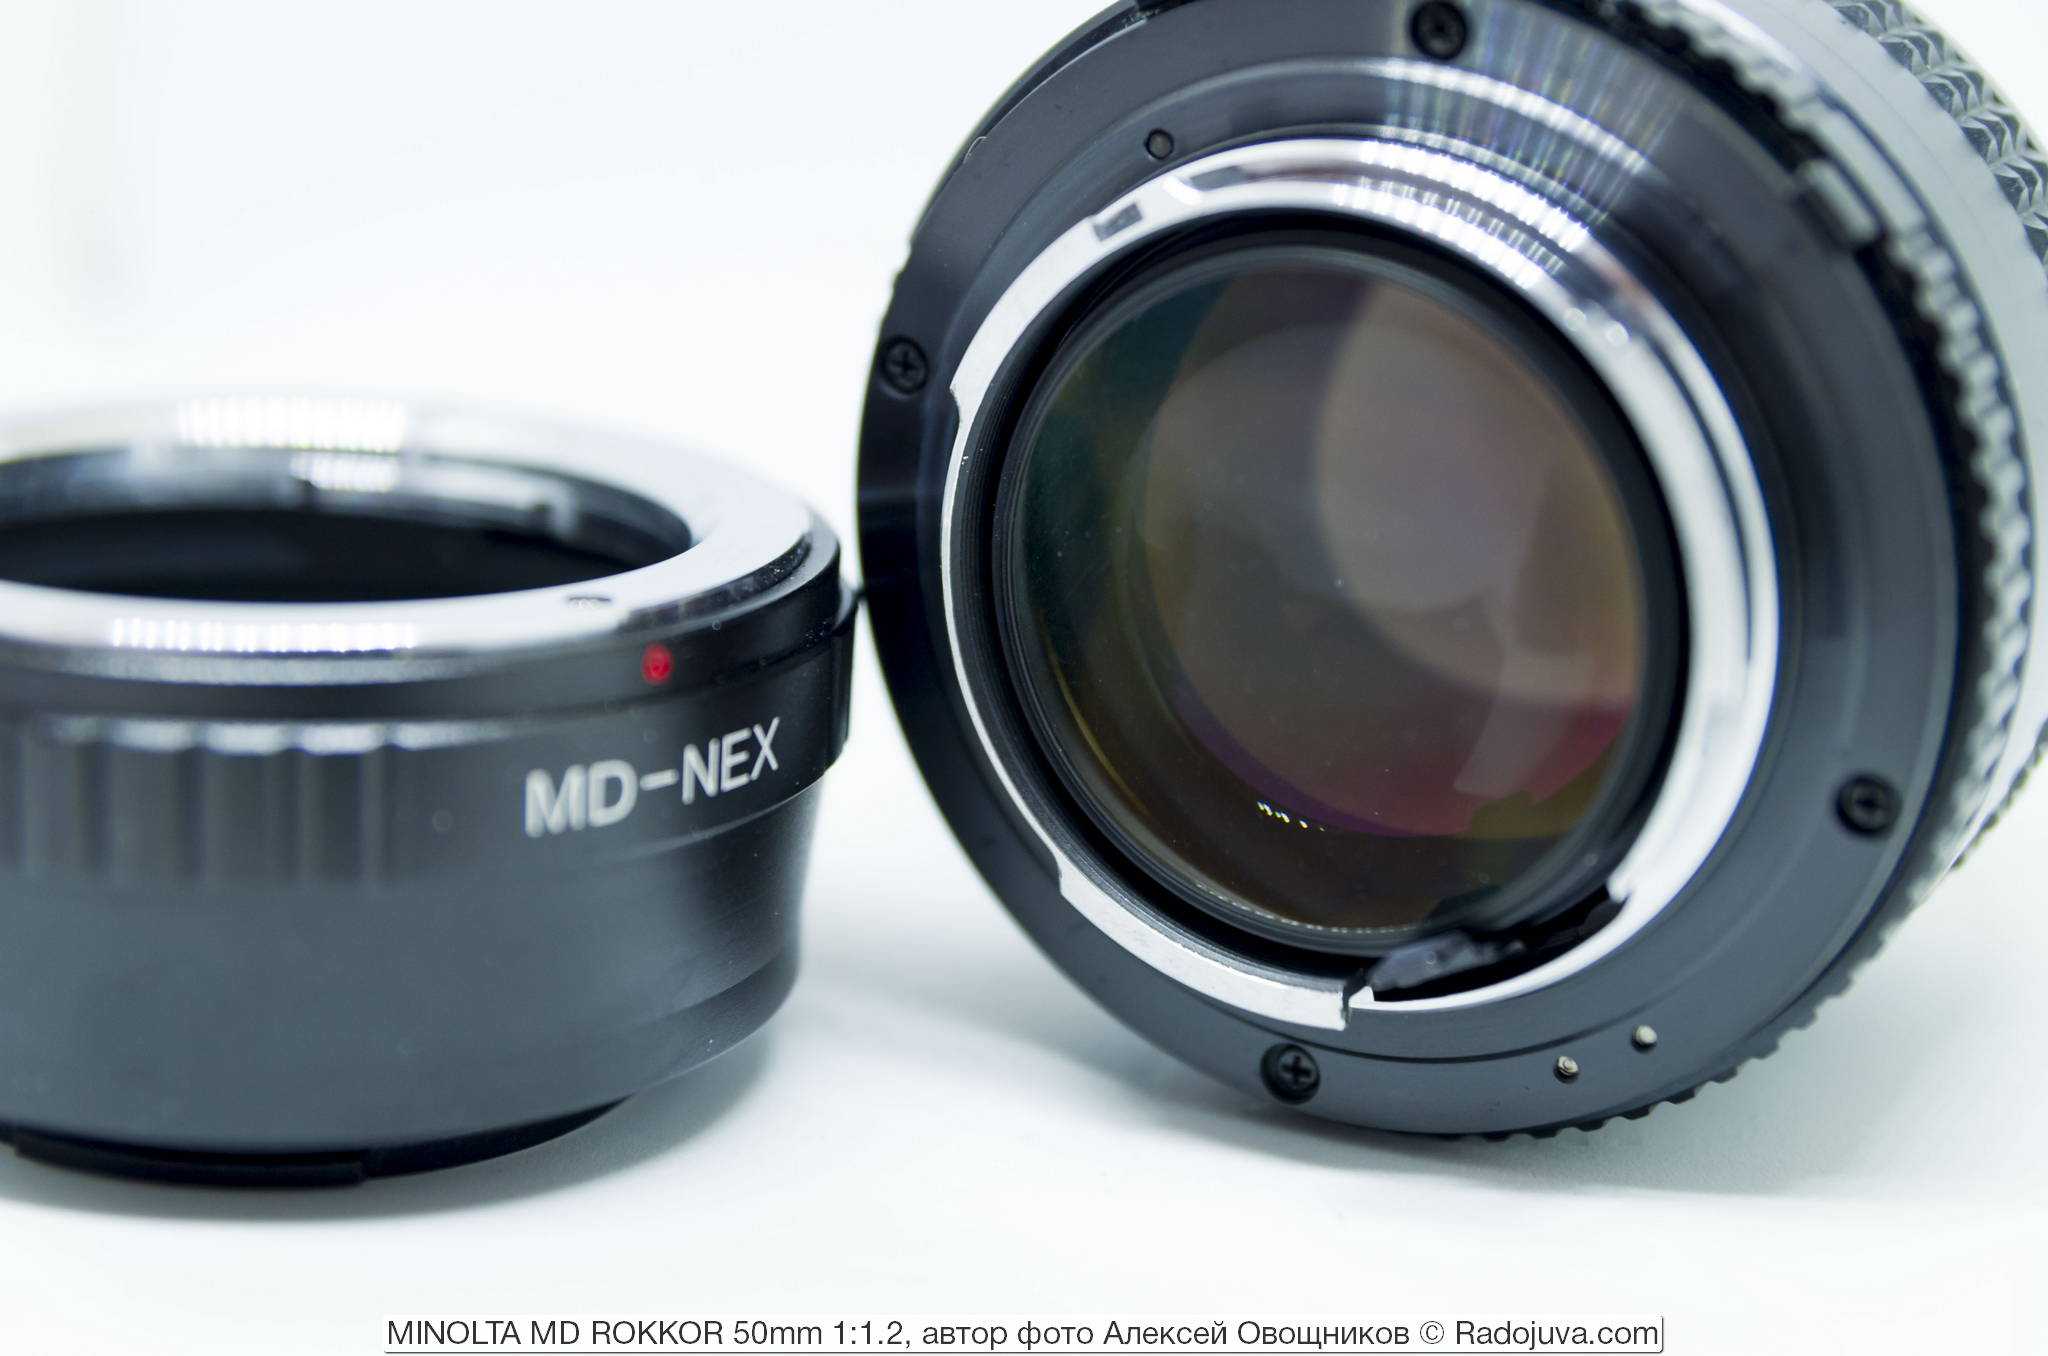
Adapters
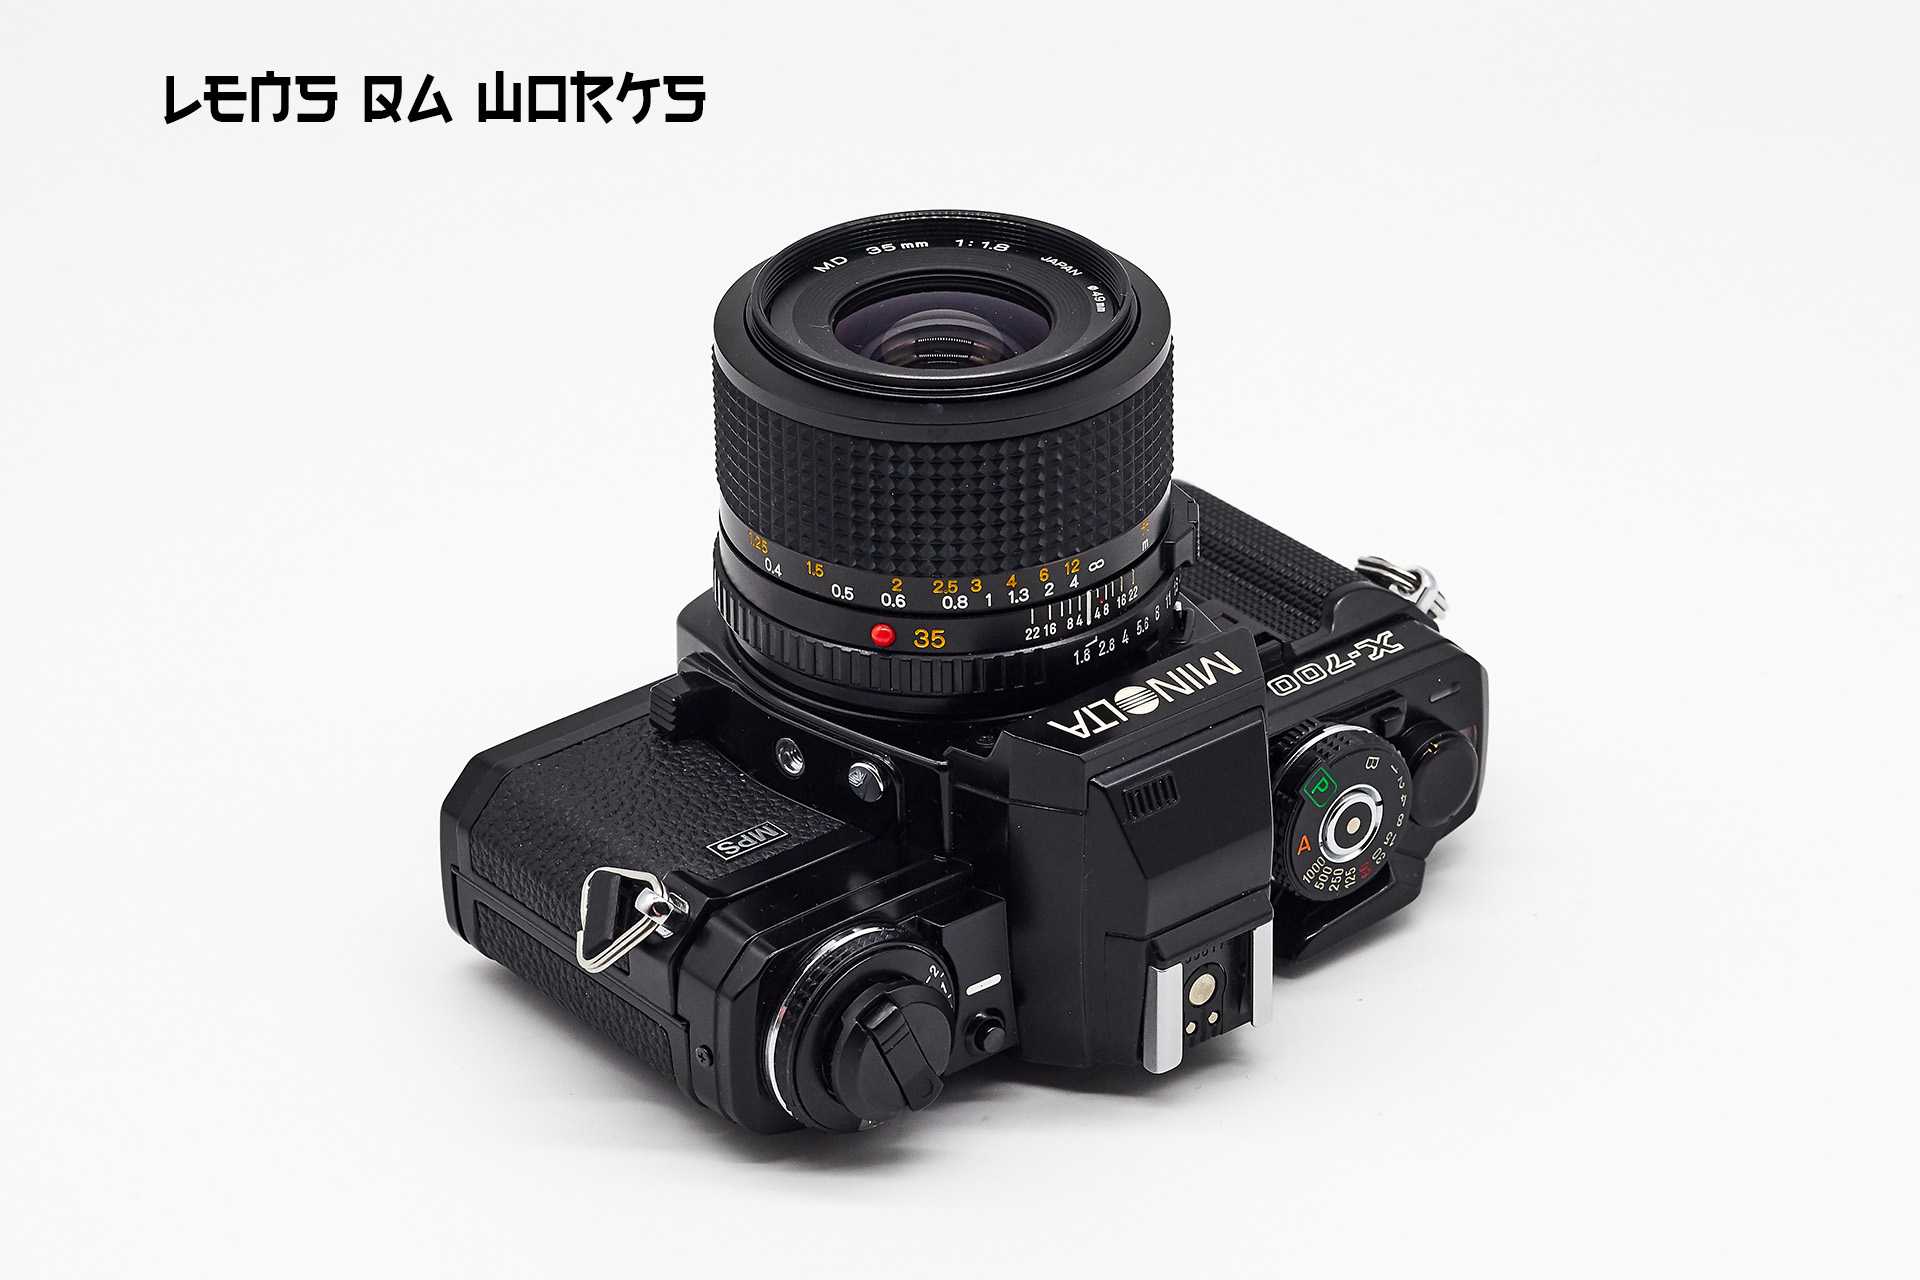
If you are still shooting film you can of course use any Minolta MC or MD lens on a wide range of old Minolta SR film-cameras like the Minolta XD-7 or X-700. No adapter needed.
Because of the flange-focal-distance of Minolta SR lenses all adapters for DSLR cameras either contain an optical element which will reduce image quality a lot or you lose infinity focus. I wouldn’t bother to use one of those adapters.
Mirrorless cameras have a much shorter flange focal distance and you can buy adapters for Fuji-X, Sony-E, Micro Fourthirds and Samsung NX. You won’t lose image quality to the adapter, you can focus at infinity but you have to turn the aperture- and focusing ring yourself. Your camera has no control over them.
I usually recommend Sony Alpha 7 cameras for the use with older manual lenses because they are the only ones with a full frame sensor and in my experience most older lenses work best on the larger sensor. But they still work very well on smaller format sensors as well, here are some of my older pictures all taken with a Sony Nex.
Here are links to adapters for Minolta SR to Sony E mount cameras: Amazon.com | Amazon.de (affiliate links).
I use an expensive Novoflex adapter (link to my review of the Canon FD version) but the cheaper ones usually work well enough but you have a higher chance of getting a faulty one. For more information about adapters check out our extensive Guide to Adapters.
How my ratings work
For all ratings please read ABOUT LENS RATINGS to understand how I weight different aspects.
- 1/5: This lens good for very few applications and comes with serious defects.
- 2/5: This lens comes comes with noticeable limitations like very soft corners, very high CA and I would only recommend it for very special purposes.
- 3/5: This is a good lens which is capable of producing very good results but you should expect some compromise like low contrast and bad corners at the widest aperture and noticeably less sharp corners.
- 4/5: This is an excellent lens with very few faults, it will be very sharp from corner to corner, have good (but not perfect) CA correction and nice or even excellent bokeh. Check out my Tokina 2.5/90 Macro review for a detailed review of such a lens.
- 5/5: A truly remarkable lens: it must show excellent sharpness even wide open, chromatic aberrations of every kind must reduced to a very low level, bokeh must be very good and mechanically it must be without fault as well. There are very few lenses which could earn this rating, think of a Zeiss Otus or CaNikons Super teles.
Useful information about Minolta lenses
Minolta Manual Lens Index – Very useful index of any manual Minolta lens ever made
Artaphot.ch – most content is in German but there are a few well documented tests of Minolta glass.
Rokkor.de – Useful for identifying different generations of Minolta lenses
Further articles
For an introduction to manual focusing check out MANUAL LENSES ON THE SONY A7 – A BEGINNERS GUIDE
The following two tabs change content below.
I have two hobbies: Photography and photographic gear. Both are related only to a small degree.
Latest posts by Phillip Reeve
- Review: Samyang AF 75/1.8 FE — April 12, 2021
- The FE-List now has 113 lenses on it — March 25, 2021
- Announced: Voigtlander 35mm F2 Apo-Lanthar — February 15, 2021
Chiyoko 50mm 1:2.8 aberrations
Test conditions: lens was focused on minimal distance 1m, plants are in 3m distance from the camera
Long-distance bokeh
Test conditions: the lens was focused on half distance on the scale (2m), buildings are on “infinity”-distance
Test#2
Test conditions: lens was focused on minimal distance on the scale (1m), buildings are on “infinity”-distance. This is a rare case for real photography but demonstrates the maximum possible level of blur
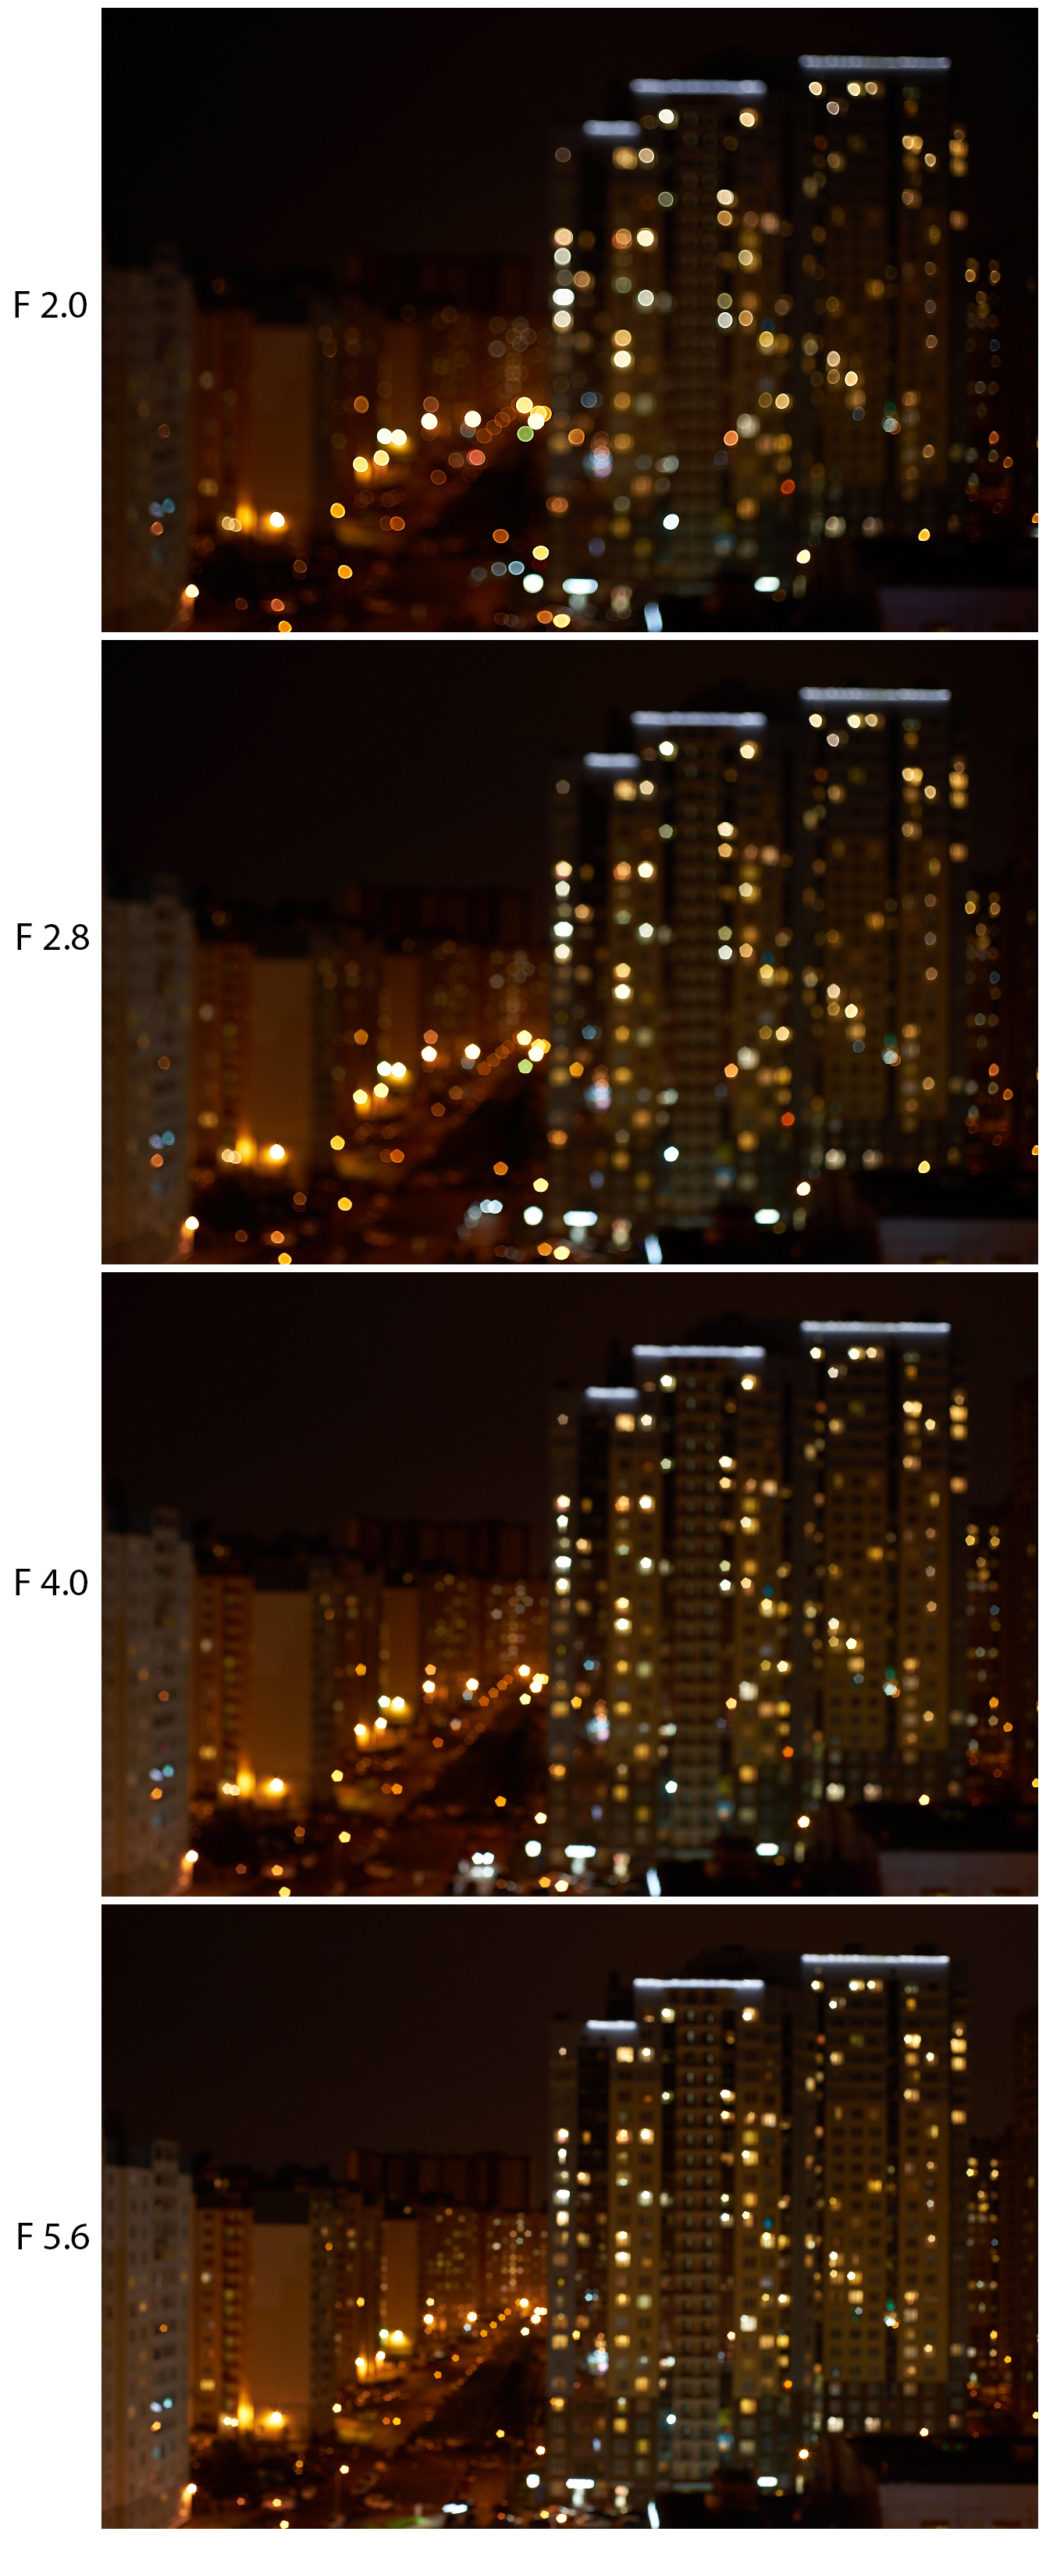
Light bubbles bokeh – long distance
The lens is on the minimal focusing distance 1m, lights are on infinity (cityscape)
This is a rare case for real photography but demonstrates the maximum possible level of blur

This is the cheapest, smallest, and lightest Super Rokkor 50mm lens. So, it expectable that it has low IQ in terms of sharpness and aberrations. But these aberrations allow this lens to draw beautiful pictures. On the other hand, it is slow enough. It may be recommended for real photography in two cases, the first: if old-school or historical -like view is needed – this would be one of the best choices. Second: the photographer likes experiments. So, this is the lens with very special character, but not for every day using from the modern point of view.
This is the first lens that was bought directly for review. I realize that I’m not going to use it during real photo-sessions.

Sharpness
f/2: Sharpness in the center is very good and the midframe area is sharp as well. Even the far corners have good resolution but contrast is very low.
f/2.8: The center and midframe region improves to excellent levels, contrast in the corners improves as well but it is still a bit low.
f/4-8: Excellent center and midframe region with very good corners.
f/11: Diffraction reduces image quality to very good levels
This is similar performance to most other 50s in the center but the corners sharpen up faster than with any other 50mm lens I have used.
Alternatives
- Minolta MC 1.2/58: many times as expensive and three times as heavy but it has very nice bokeh and a better portrait lens. It is also a very good lens for landscapes but it has more CA and you need to stop down to f/8 for very sharp corners.
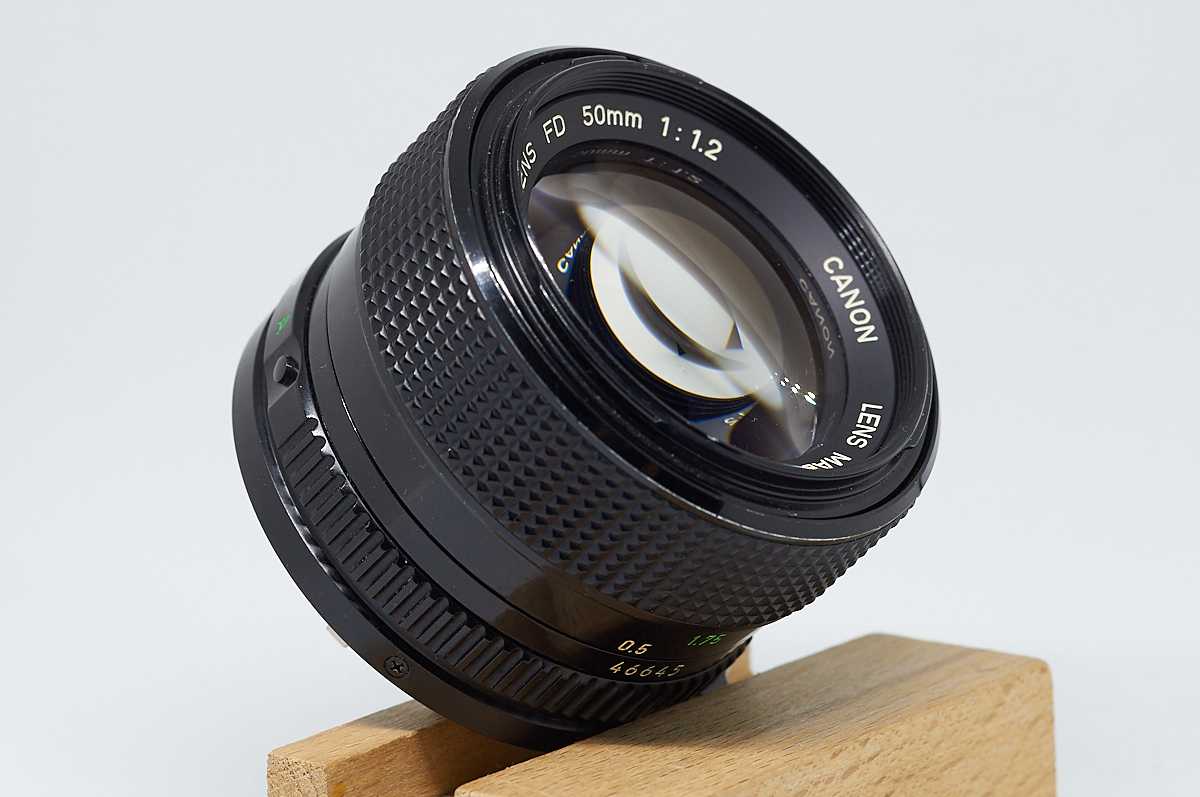
- Canon nFD 1.4/50: The Canon’s strengths is its faster aperture and the superior performance at f/1.4 (compared to other 1.4/50 lenses). It is also cheap and small. The Minolta 2/50 is a better landscape lens because the corners are sharper at wider apertures.
- Zeiss Planar 1.4/50 C/Y: This lens is also optimised for landscape photography and I see a little more micro contrast. But it is one of the most expensive classic 50mm lenses.
Conclusion
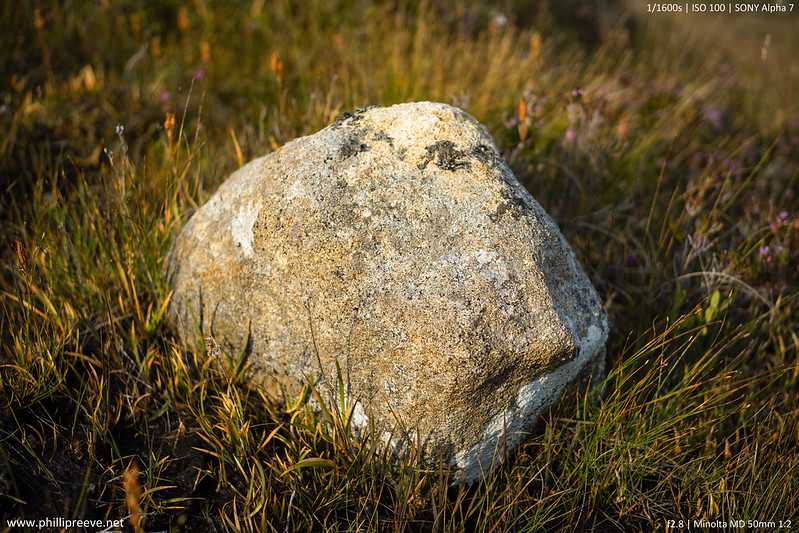
The Minolta MD 2/50 is my favorite hiking lens: It is small and very light weight and it is also one of my sharpest lenses. The corners improve faster than I am used to from other 50mm lenses, by f/2.8 they are very usable. Most other normal lenses need to be stopped down to f/5.6 to reach a similar performance. By f/8 the lens is very very sharp across the frame.

For portraits I prefer other 50mm lenses which have nicer bokeh but the bokeh is not so bad that it would really ruin a portrait.
So all in all a very good performer which is small, light and affordable. I wouldn’t recommend it as your only 50mm lens but it’s great as a small landscape lens. At current prices below $30 it offers great value.
If you consider buying one please use one of my affiliate links and support my work: Minolta MD 50mm 1:2 at ebay.de or ebay.com (affiliate links).
Also check out my Minolta SR-mount adapter guide.
Images Samples in full resolution
 Sony a7 | f/2.8 | note the sharpness in the lower right corner!
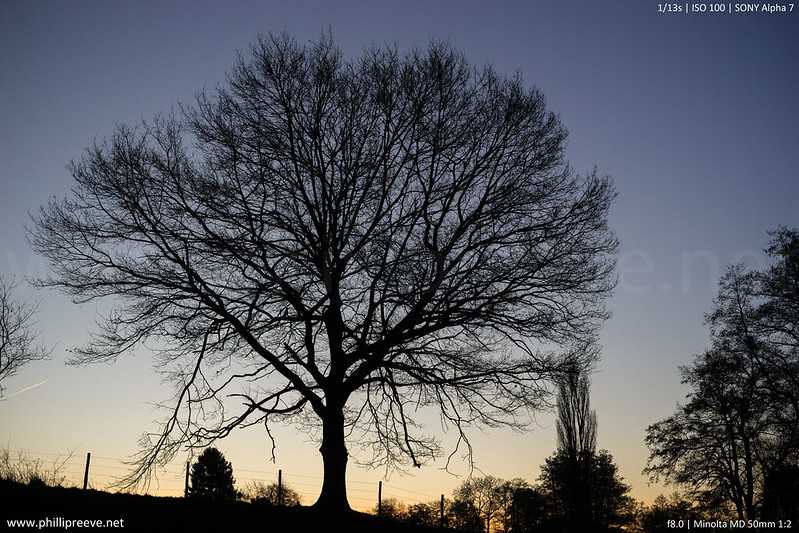 Sony a7 | f/8
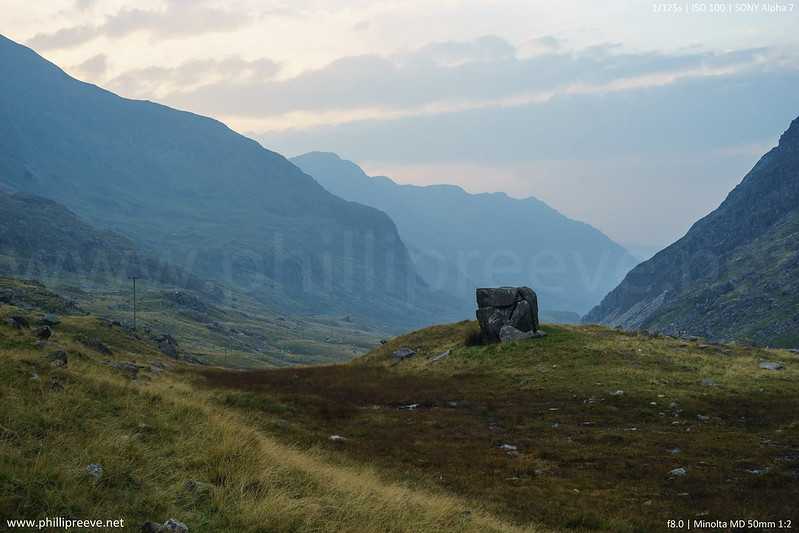 Sony a7 | f/8
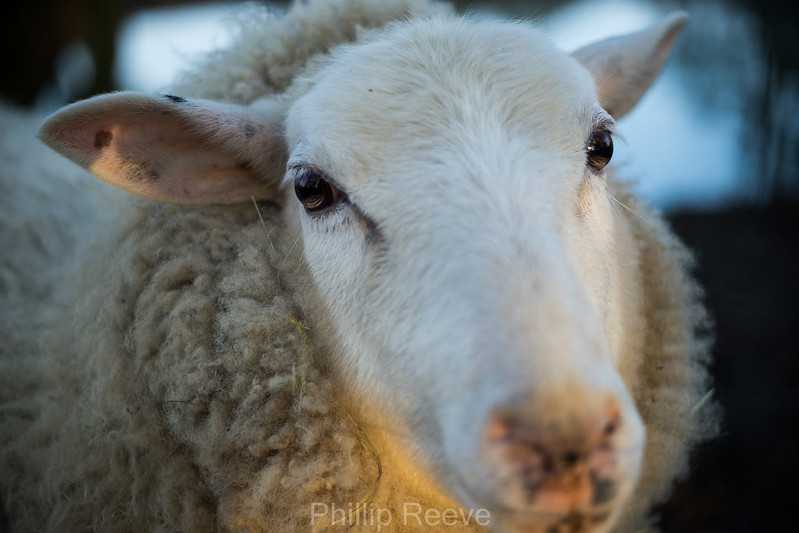
Sony a7 | f/2
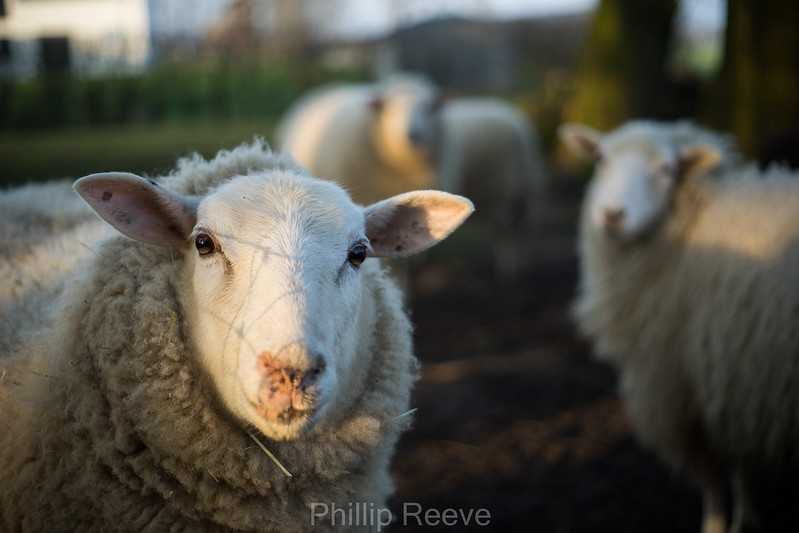 Sony a7 | f/2
You can find more images in this flickr set: Minolta MD 50mm 1:2 full resolution samples
Further Reading
For more Minolta lenses check out my Minolta list.
To learn about manual lenses in general this beginners guide for a7 users might be helpful.
The following two tabs change content below.
I have two hobbies: Photography and photographic gear. Both are related only to a small degree.
Latest posts by Phillip Reeve
- Review: Samyang AF 75/1.8 FE — April 12, 2021
- The FE-List now has 113 lenses on it — March 25, 2021
- Announced: Voigtlander 35mm F2 Apo-Lanthar — February 15, 2021
Disassembly
Disclaimer
All information in this blog is meant for sharing of experience and not as instruction, and is no substitute for diligent learning and assessment of competence. I have messed up my fair share of lenses, and will not be held responsible for any damage caused in the reader’s venture into this fascinating world of mechanical and optical marvel.
You should be conversant with lens repair techniques; beginners should read my earlier blog posts – the Lens Repair series (Lens Repair (1): Some Thoughts, Lens Repair (2): Major Parts of a Lens (Manual Focus), Lens Repair (3): Working from the rear…, Lens Repair (4): Coming from the front, Lens Repair (5): Helicoids) and Richard Haw’s excellent write-ups (Camera and Lens Repair Essentials, Best Practices (part 1), Best Practices (part 2), Best Practices (part 3) and Working with Helicoids).
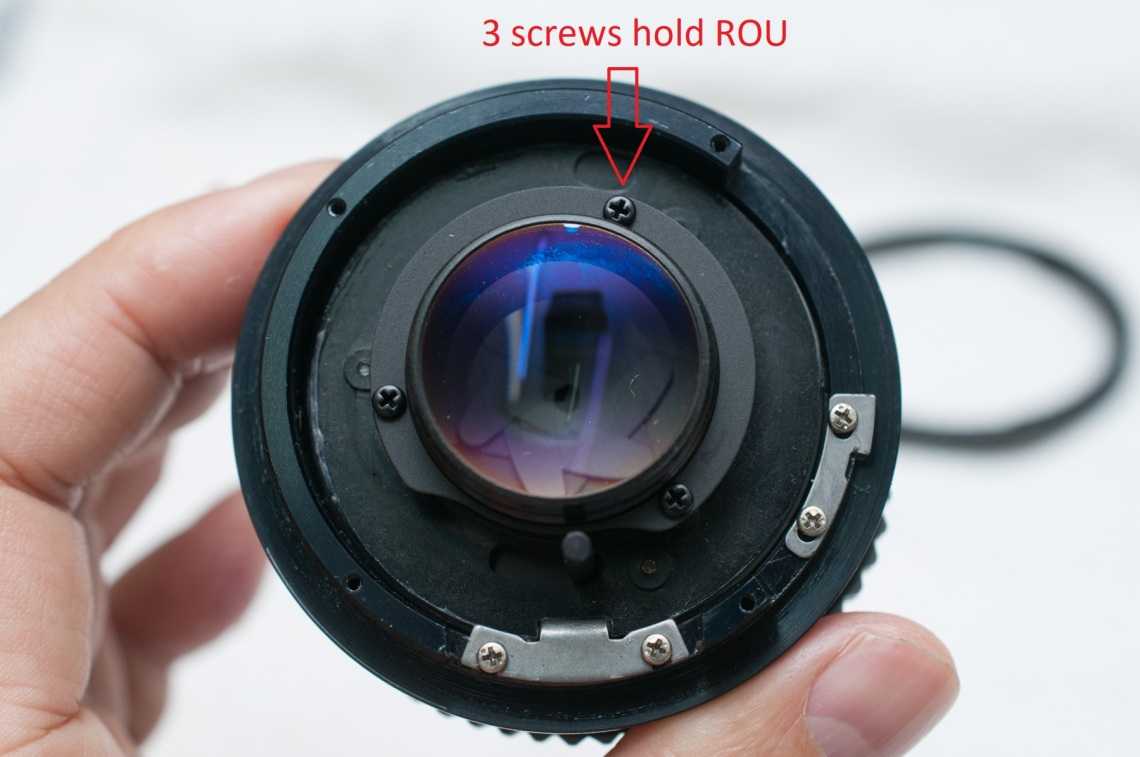
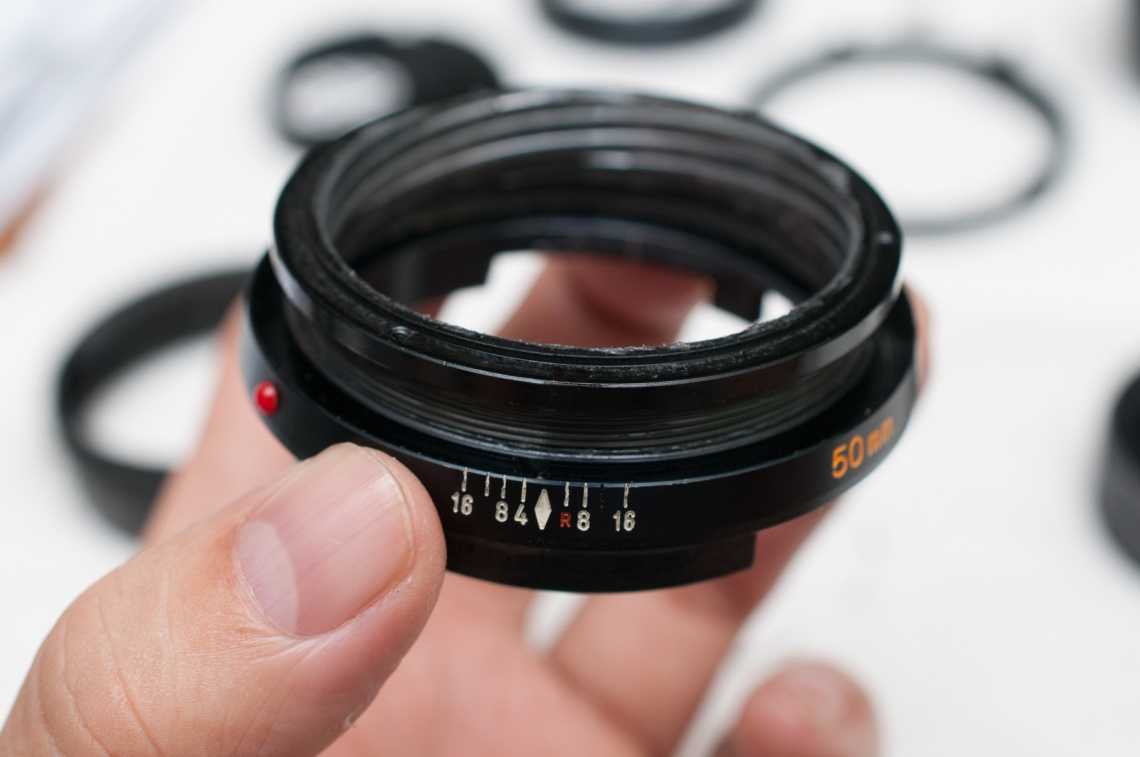
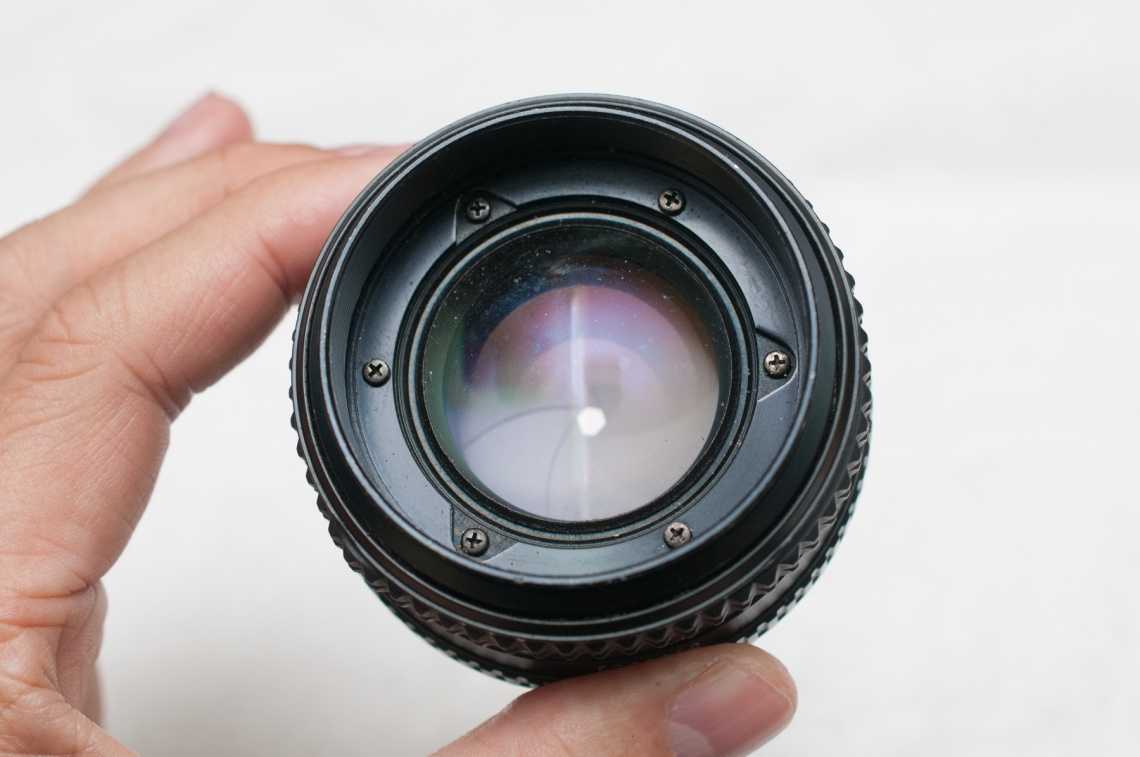 Since the lens did not come with a name plate, I can’t tell you how to remove it. But it could either be by rubber tool to unscrew the name plate, or simply prying it off. The former is likely. See the screws, remove the 3 that are holding the filter ring and take off the filter ring.
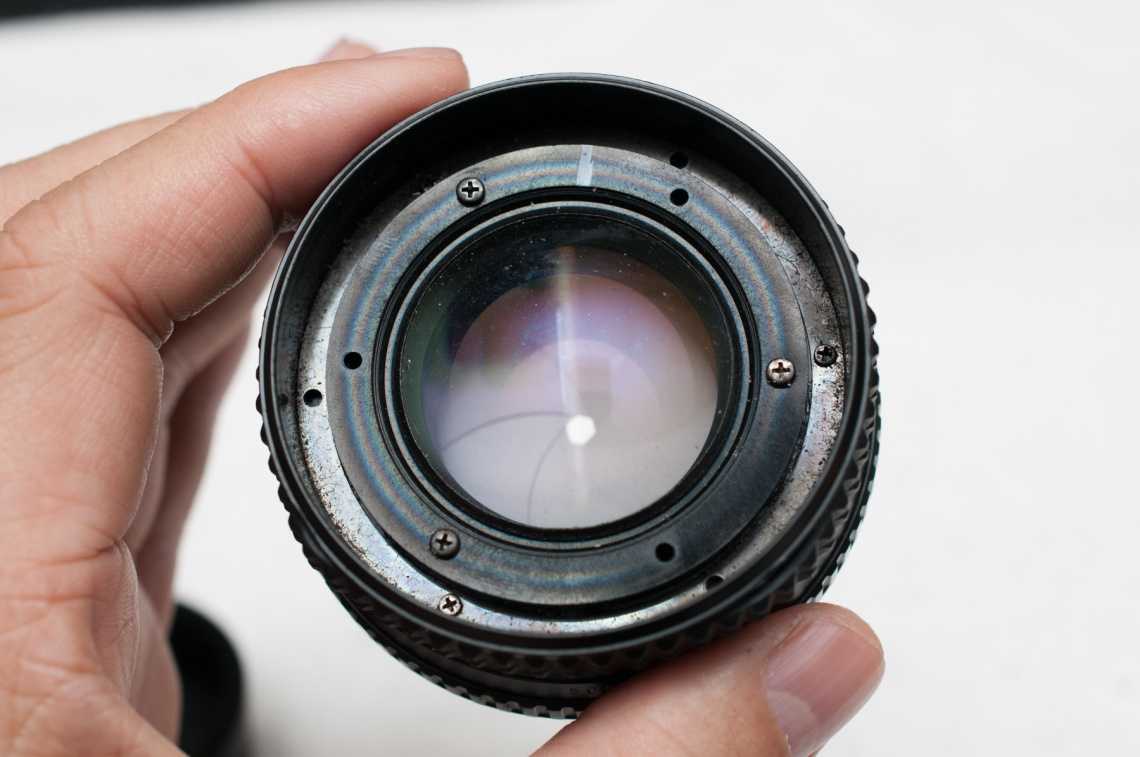 3 more screws and the front optical unit (FOU) can be lifted out. I usually use a marker to mark the location relative to the index line.
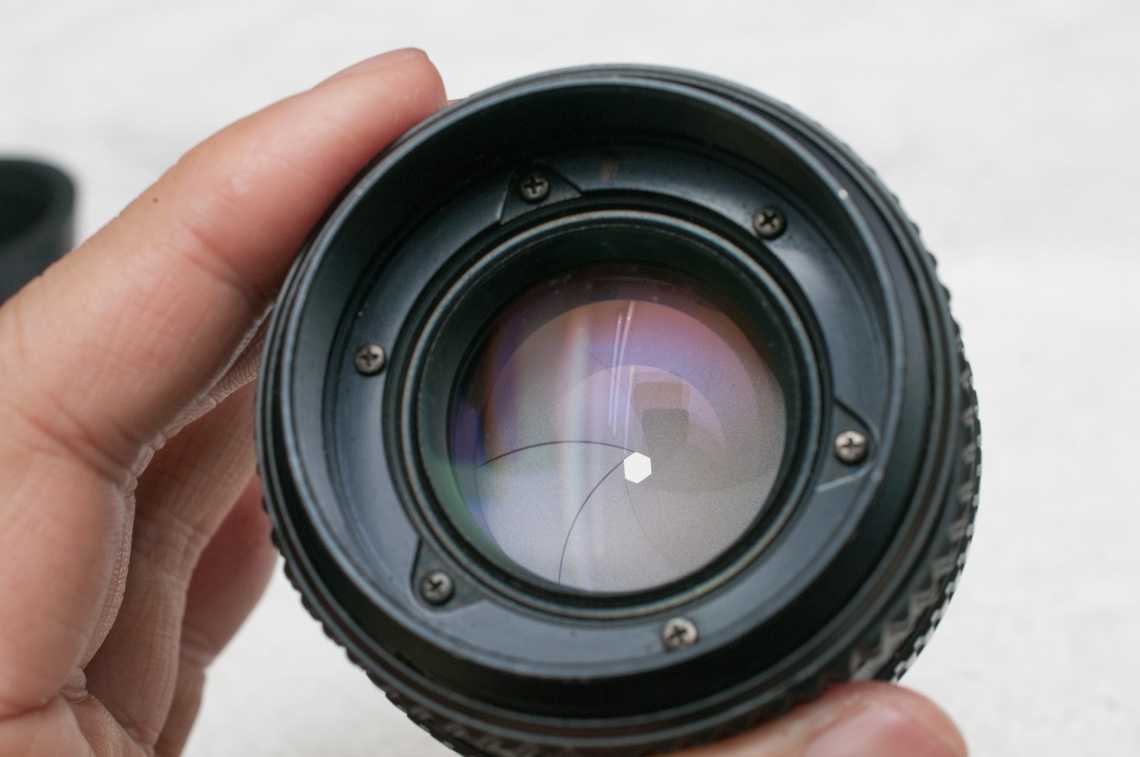
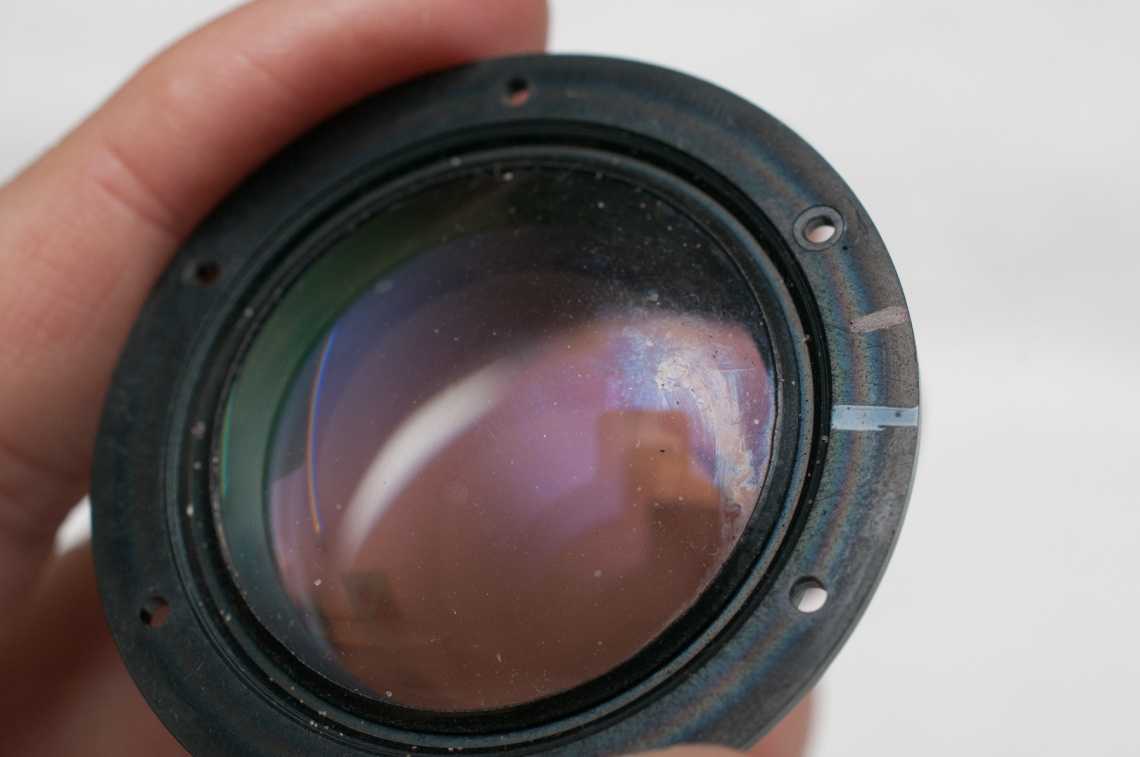 Well, a plastic case entombed the glass lenses. It was fortunate for me that the inner surfaces did not require any work. So I did external surface cleaning – the front of E1 was filthy with oil and finger prints. The oily smudges were likely to be from the helicoid grease.
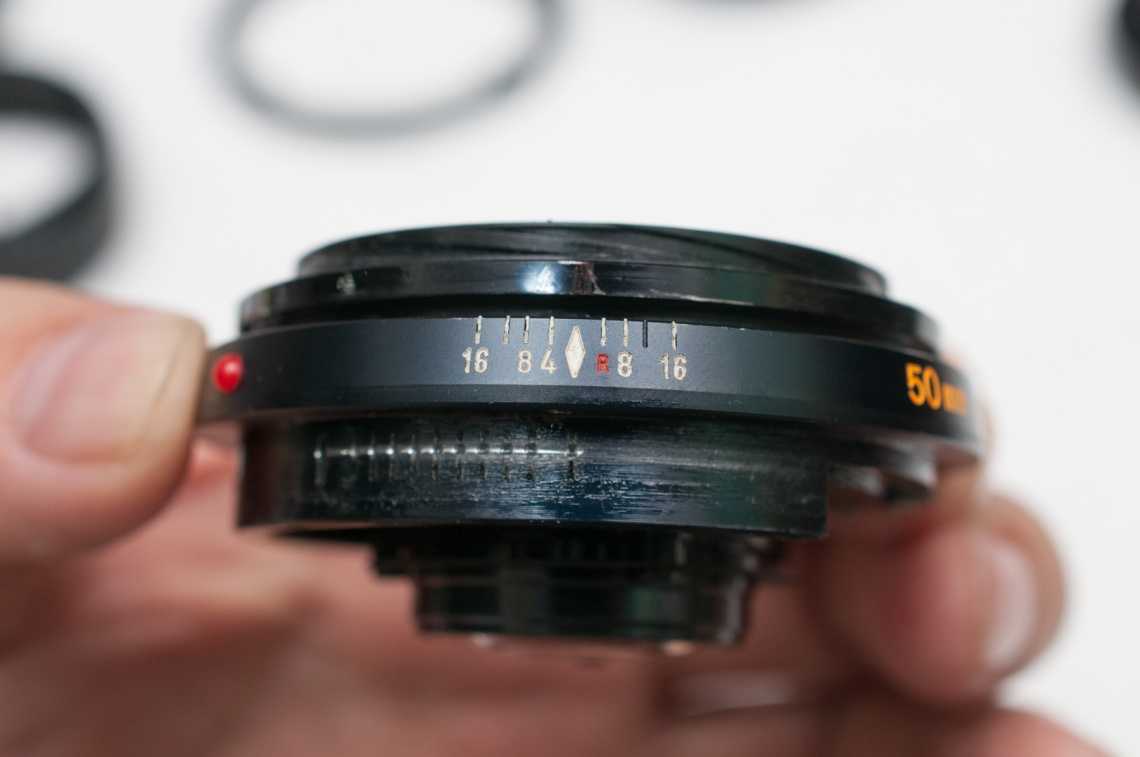
 3 more screws hold the FR. Ensuring the lens was at infinity, I removed the screws then the FR. Immediately mark the positions of OUH and FRH at infinity with respect to the lens index line.
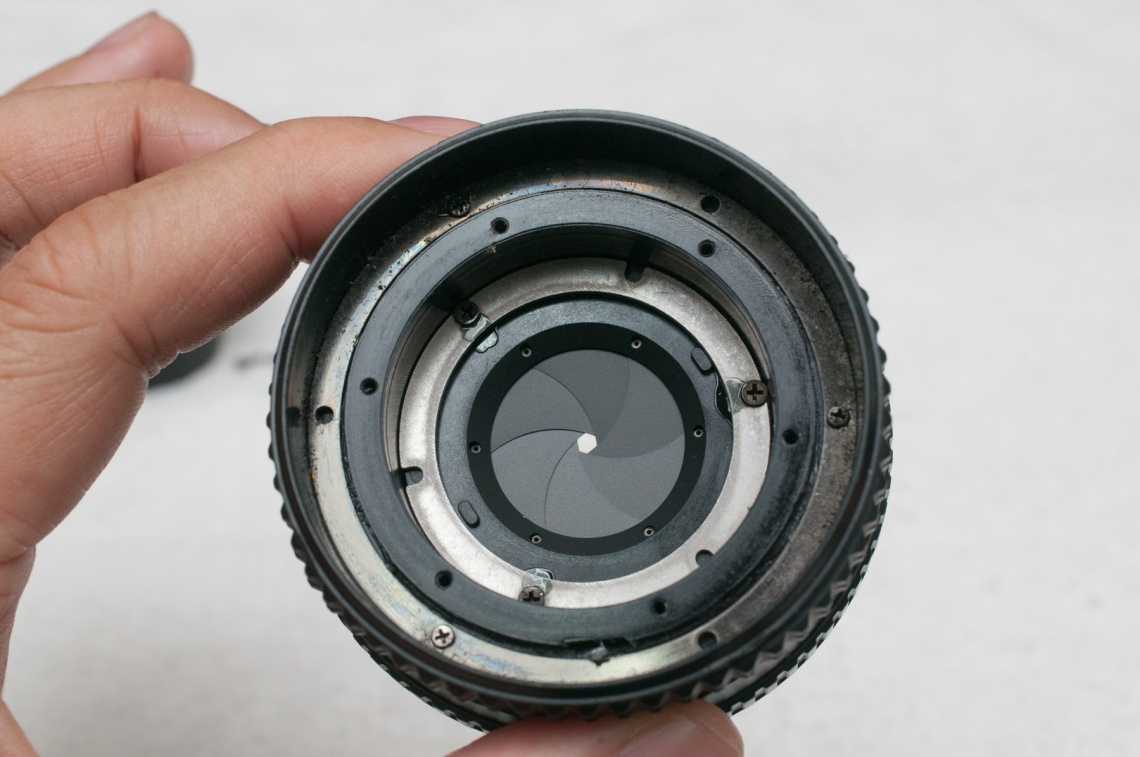
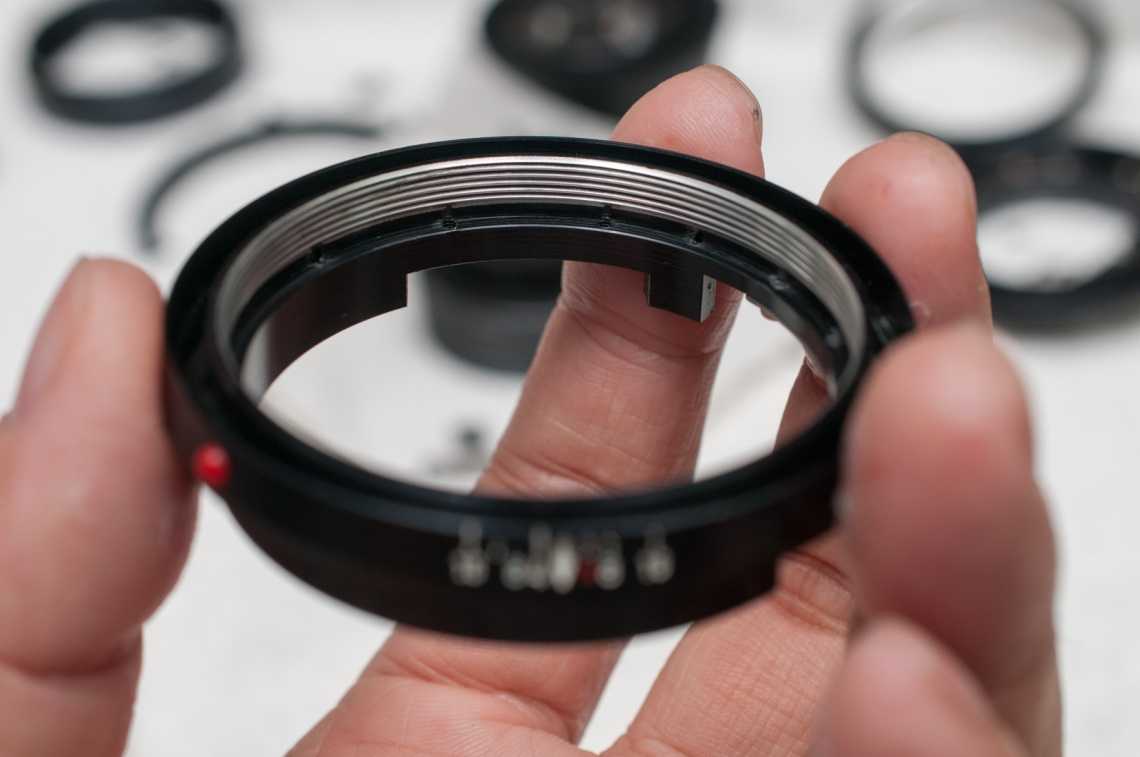
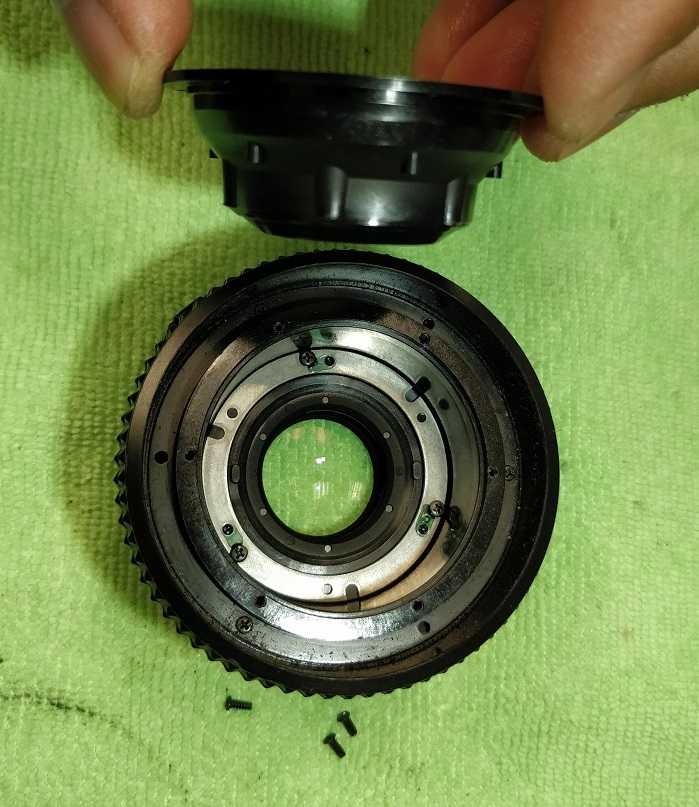
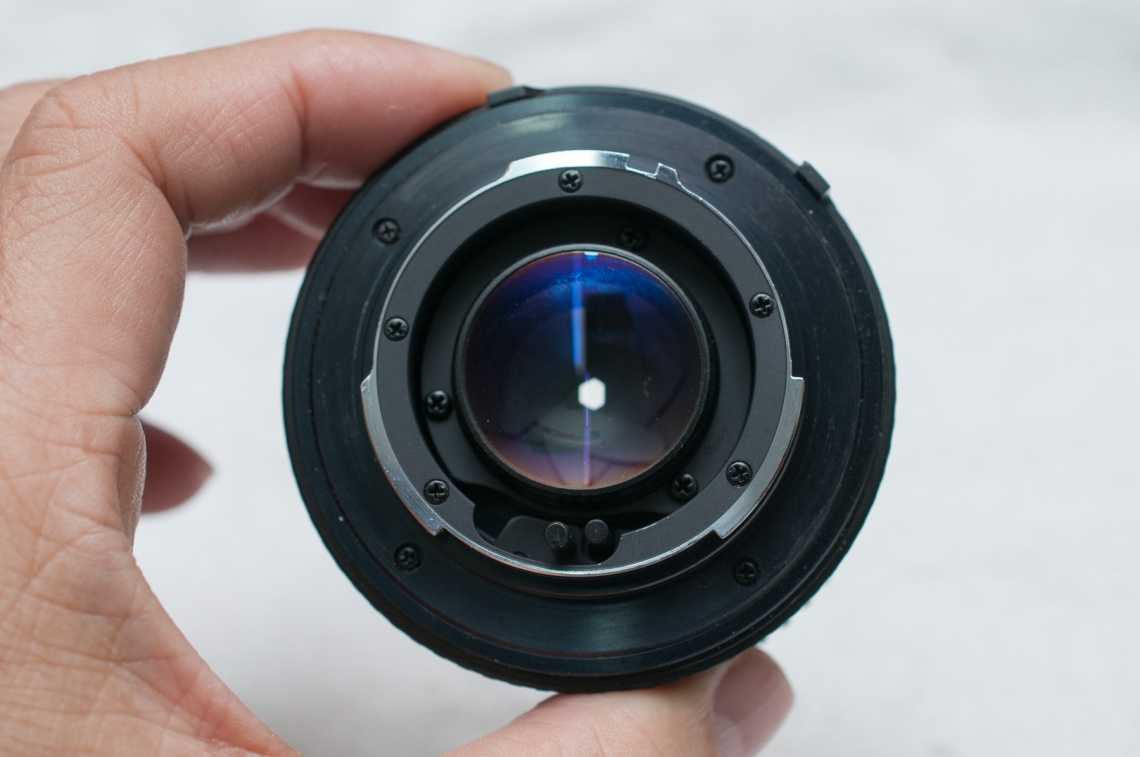 Coming from the rear, remove the 3 screws holding the bayonet mount. Remove it slowly, and watch for linkages.
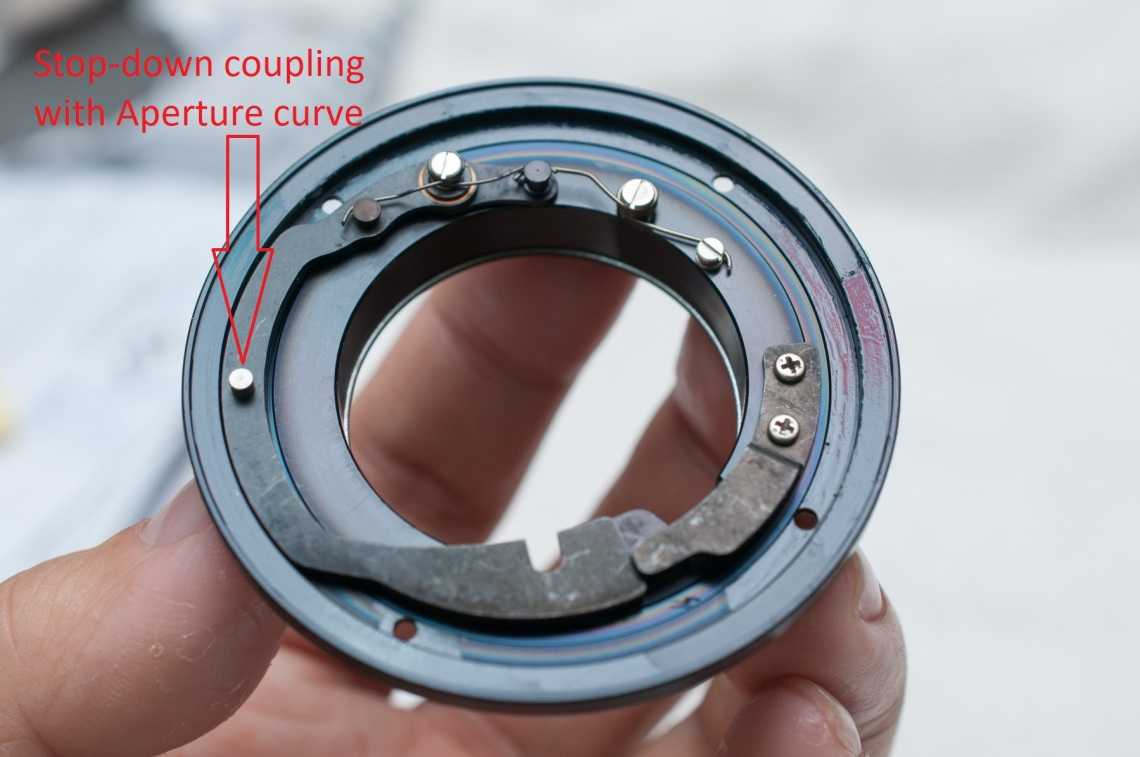 The post marked in this photo couples with the aperture curve (marked in the next photo) to constraint the movement of the stop-down lever, and thus control the size of the aperture opening according to the position of the AR. The slot at 6 o’clock is the stop-down lever coupling.
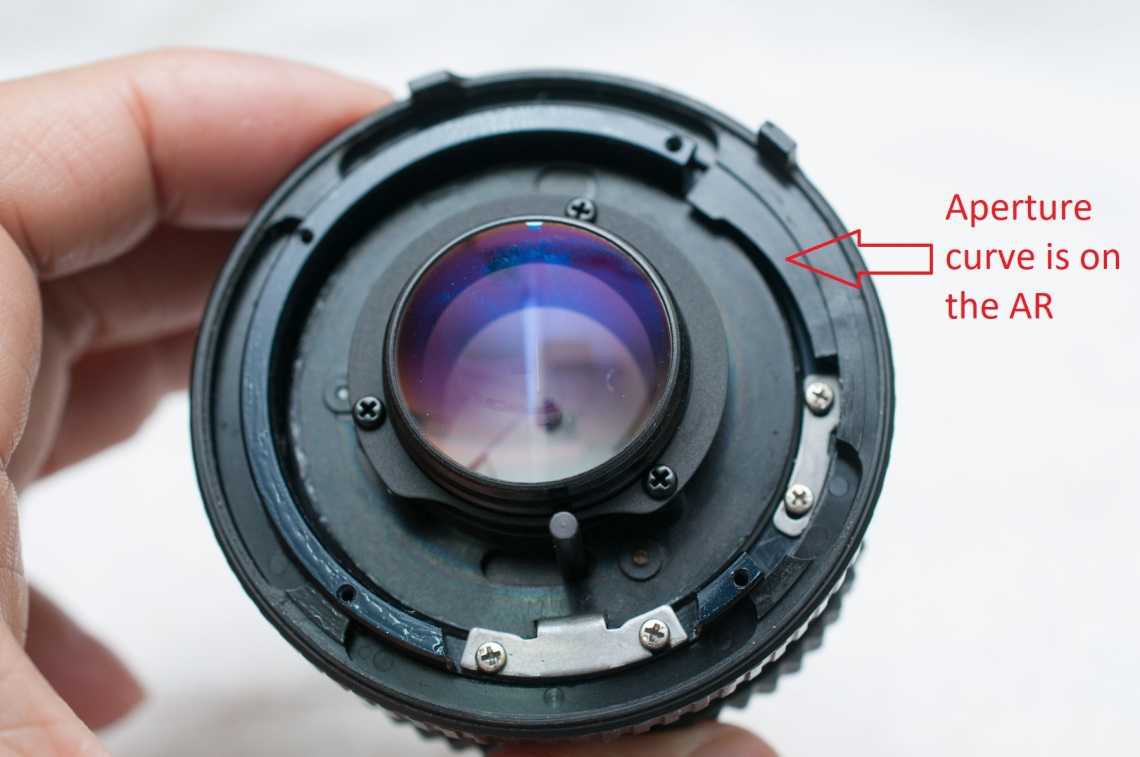 The aperture curve moves with the AR setting – this curve thus communicates the aperture setting to the stop-down lever. At 6 o’clock is the stop-down lever coupling post. Some oil was evident. So simple – and witness the clumsy Canon FD mount! At this point it is time to locate the AR detent ball bearing, before attempting to remove the AR. Knowing where it is helps prevent the ball bearing from flying off to oblivion.
 The little ball bearing. I have learned a fair bit about handling them and am no longer fearful of them tiny ball bearings; this one measured 1.28mm.
 Next I remove the 3 screws holding a shim, lift off the shim and then the ROU.
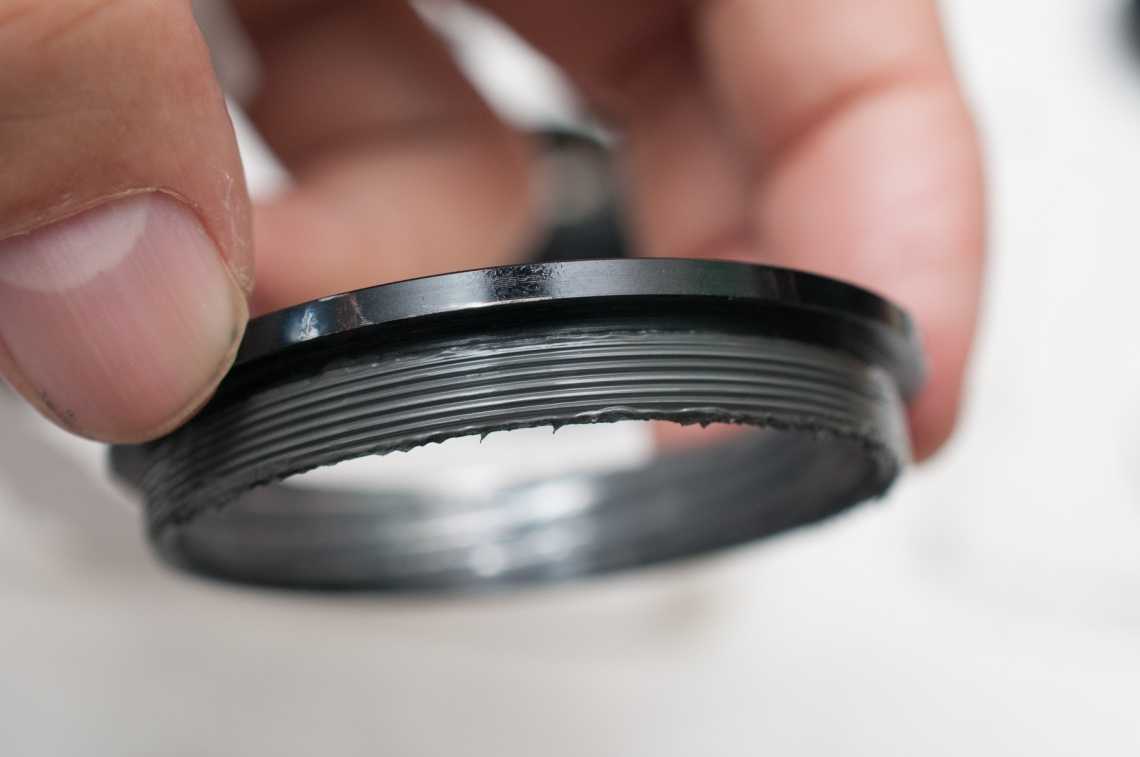
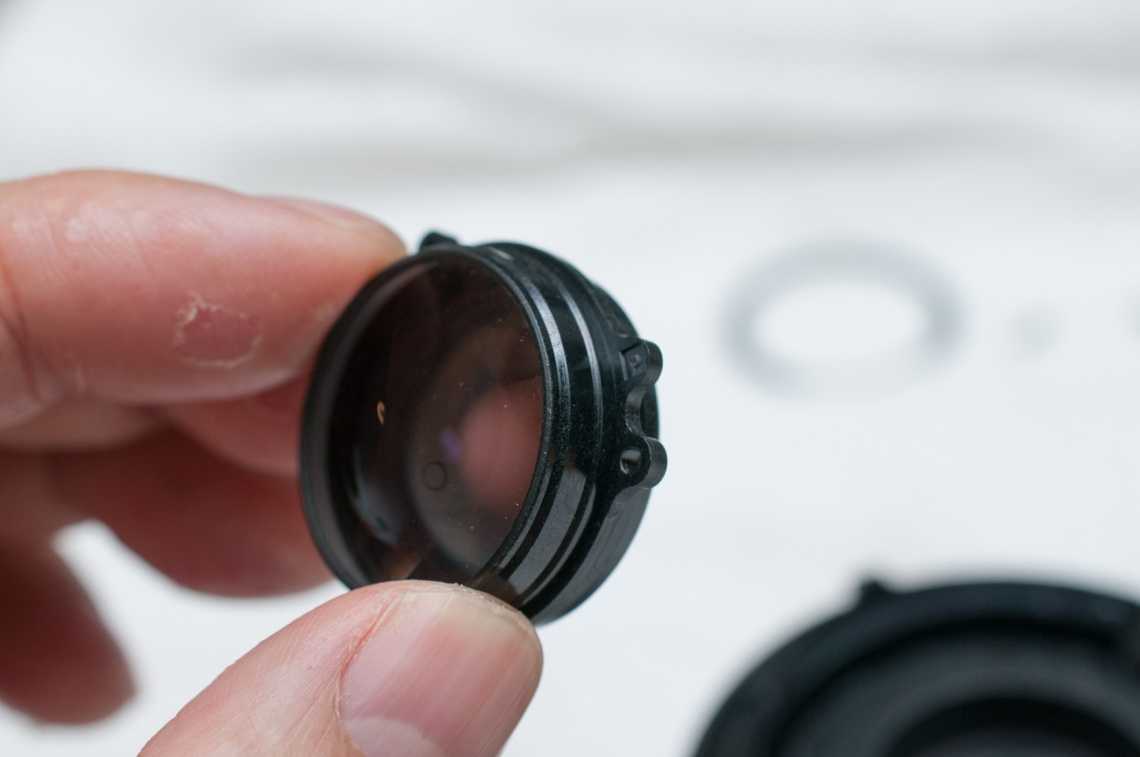 The ROU is encased. Impossible to separate further without resorting to cutting the OU open with a pen knife, after which is it impossible to put back in the alignment intended.
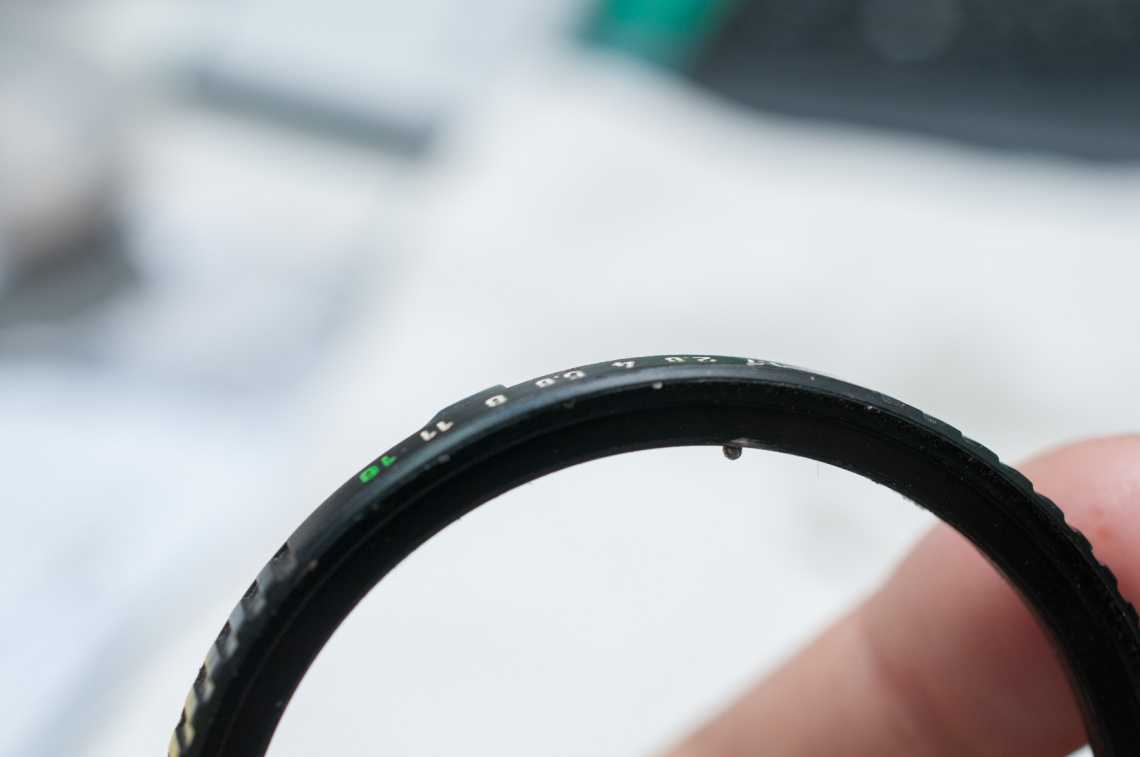
 (Don’t mind the ROU still in this photo) The FRH and OUH position at infinity should have been marked against index line (when the FR was removed). The grooves at the bottom part of the lens barrel are for the AR ball bearing detents. Now measure the length of the OUH against the rear barrel, and the FRH against the rear panel. Guess what? I did not measure (but should have).
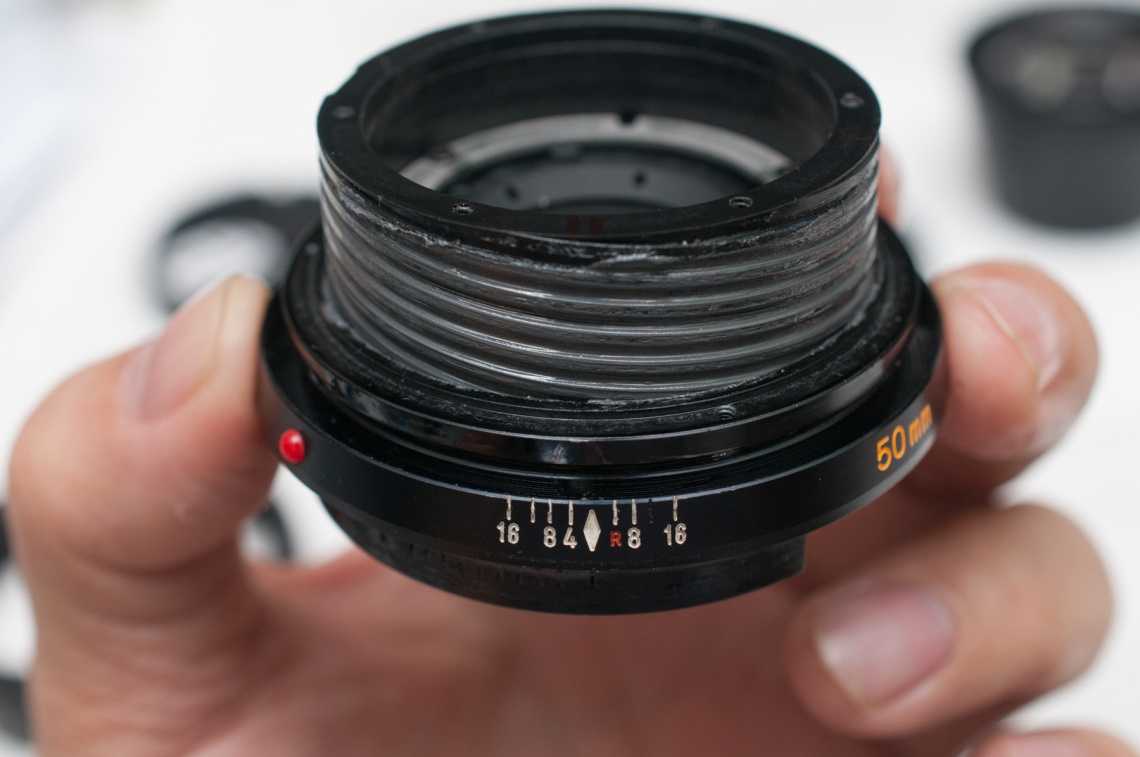 While holding the FRH in place rotate the OUH closewise (to left) slowly and noting when the OUH separates (4/5 turn). Mark this point – this is where you begin the installation of the OUH back to the FRH when you assemble the lens. Look at the yucky helicoid grease!
 FRH was separated at 4 4/5 turns CCW. Mark the separation point!
 FRH before cleaning.
 Cleaning of grease first by wiping then by lighter fluid, and soap water wash with tooth brush. Thoroughly dried the parts before re-assembly. After reassembly the lens was stored in dry cabinet to ensure all moisture is removed from the lens.
 After cleaning of external surfaces of OU, lens body, helicoids and re-greasing, the lens operates smoothly and gave good results, better than 50mm f/1.4 MD Rokkor (MD I), in my opinion.
MD-III
If you are working on a MD-III lens, do be aware that it too has encased OU. Photos below courtesy of Vu Banh, a friend and a member of the FB group Film Camera Repair Directory And Resources.
50mm f/1.7 MD, or commonly referred to as MD-III (without Rokkor designation). Plastic encased optical units as well.
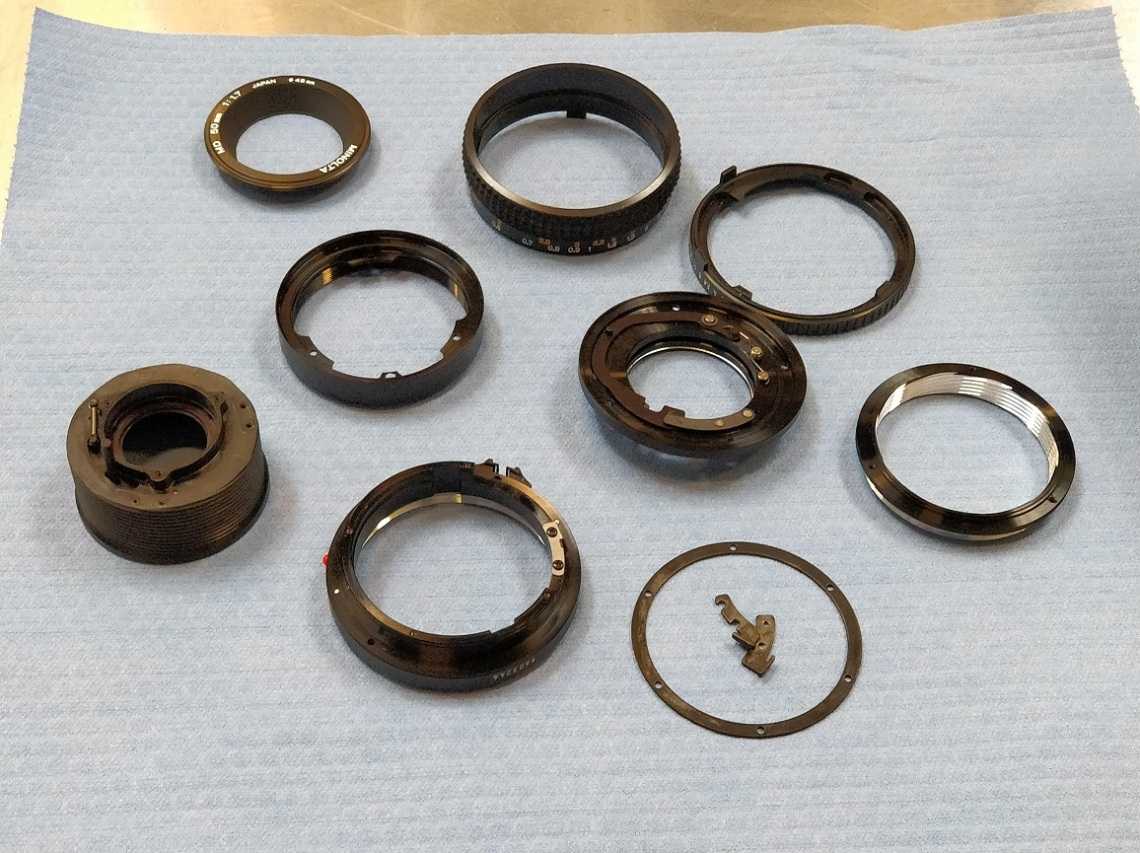
Mechanical parts of the MD-III 50mm f/1.7.
More photographs can be seen MD-III tear down by Vu Banh.
Minolta MD 50mm 1:1.2 sharpness
Сlose-distance resolution test
Testing methods description
- Target: 10-15 cm picture, printed on glossy photo paper
- Distance:10% longer than minimal focus distance marked on the lens
- Camera: Sony A7II (24mpx, full-frame, tripod, remote control). M-mode, ISO fixed, WB fixed, SteadyShot – OFF.
- The test was repeated for every F-stop on every focus position with manual focus adjustment for each shot. That is to avoid the effect of field curvature.
- RAW processing: Capture One, default settings. All quality settings – 100%. Crops – 300×200 px

Testing methods description
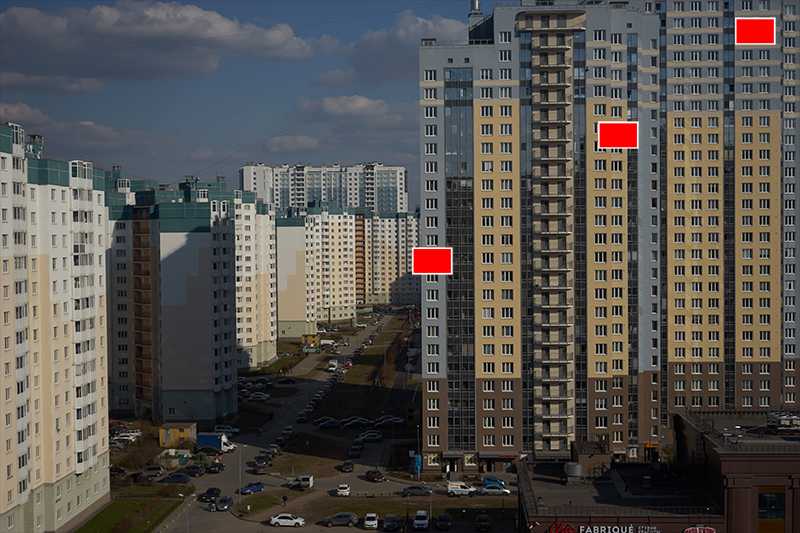
- Target: cityscape
- Distance: > 200 meters to center focus point
- Camera: Sony A7II (24mpx, full-frame, tripod, remote control). M-mode, ISO fixed, WB fixed, SteadyShot – OFF. The focus point is on the center only.
- RAW processing: Capture One, default settings. All quality settings – 100%. Crops – 300×200 px

Minolta 50mm f/1.7
I have 3 of these – a 50mm f/1.7 MC Rokkor-PF, a 50mm f/1.7 MD Rokkor (this lens) and a 50mm f1/.7 MD, along with a 55mm f/1.8 Auto Rokkor-PF. This would be what I would call the middle class normal lens; the top class being the 50/55mm f/1.2, the upper middle class 50/58mm f/1.4, and the budget class the 45/50mm f/2. I have used the f/1.7 range and am very fond of this group of lenses; with the MC Rokkor-PF a solid performer, while the MD Rokkor and MD have better colours in the photographs they produce. In comparison, I found the f/1.4 Rokkors to be not as consistent in performance and contrary to what some of my FB friends in Minolta Collectors say, I would pick up the f/1.7 anytime over a f/1.4. I must say this opinion is based on a 58mm f/1.4 MC Rokkor-PF and a 50mm f/1.4 MD Rokkor. I should add that for portraiture the 58mm f/1.4 MC Rokkor-PF is a very nice lens, with beautiful bokeh.

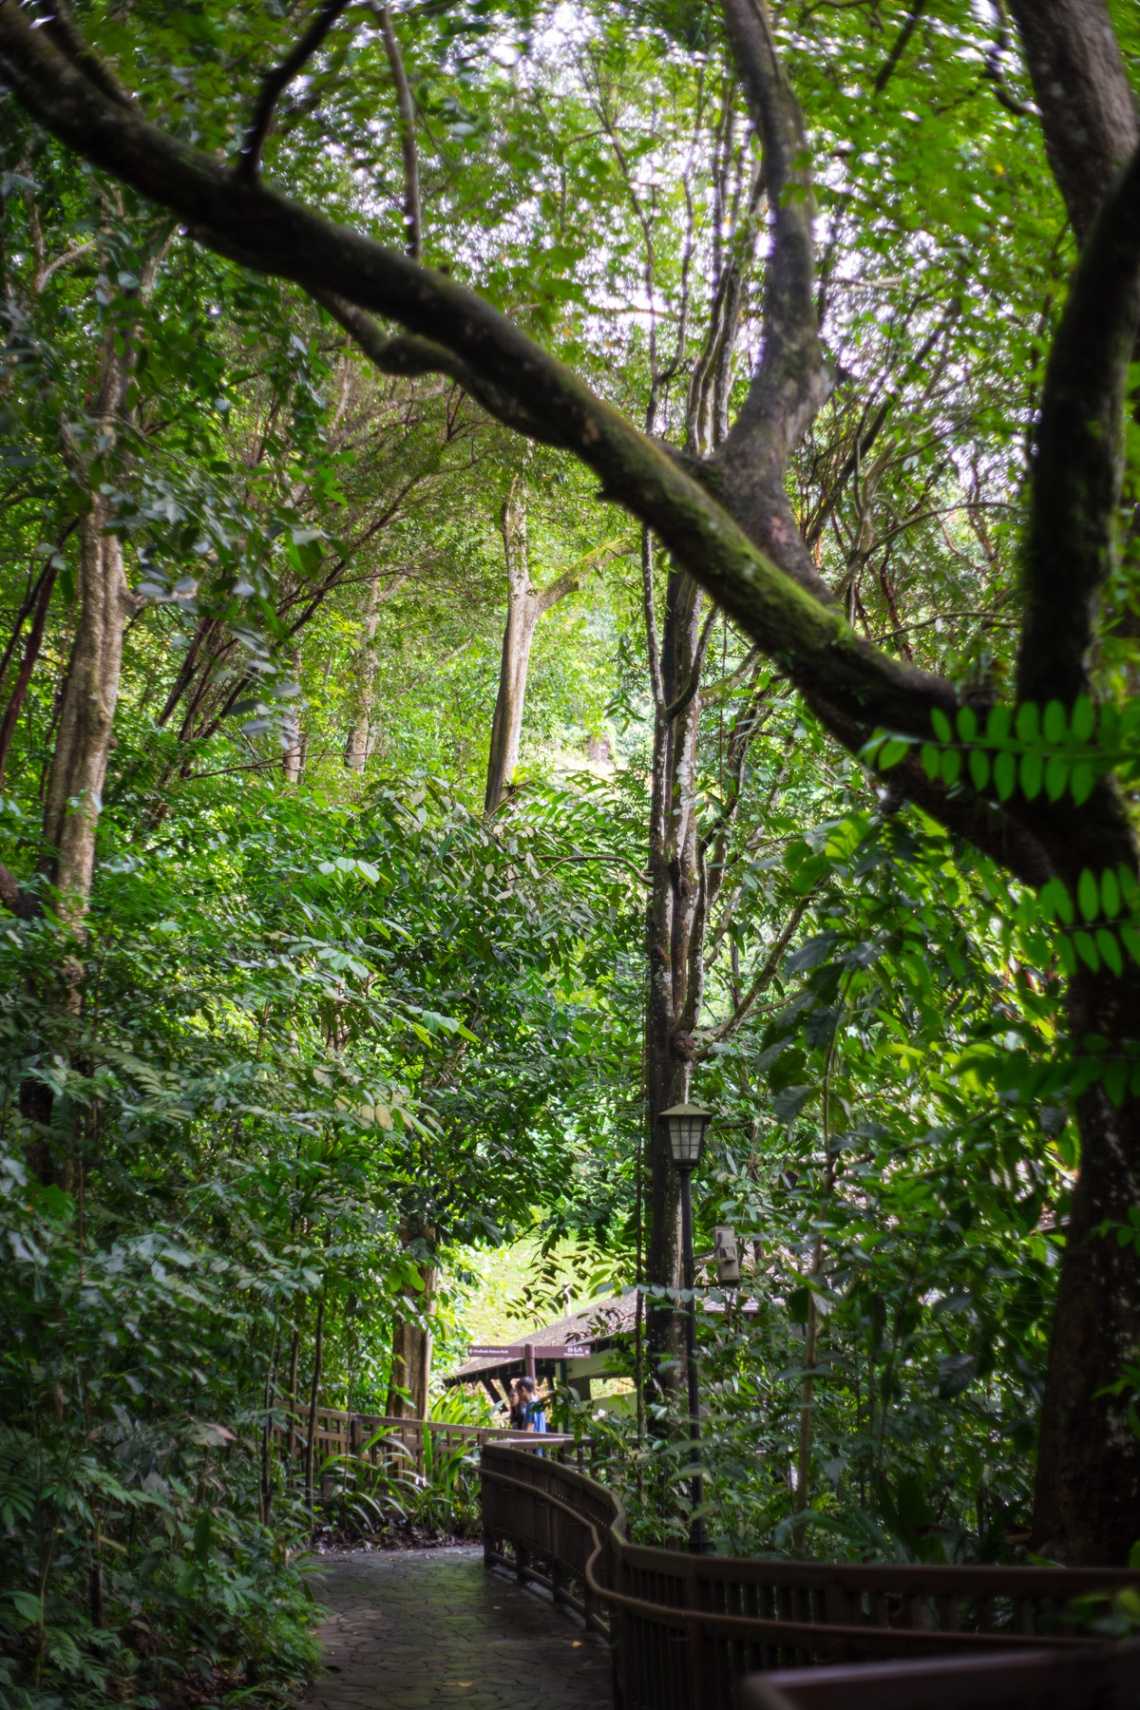 Hindhede Nature Park, Singapore.
 Bidadari Park, Singapore
Minolta MD Rokkor 50mm 1:1.4 MD I – final conclusion

Have you ever seen a bad fifty from Minolta? I haven’t. And this MDI 50/1.4 isn’t an exclusion.
The lens has enough resolution for portraits even wide-open, becomes great on F2.0, ready for landscapes from F4, and absolutely sharp over the whole frame on F5.6. It provides creme bokeh and light bubbles with contrast borders, this bokeh can be described as ‘classic’ – beauty and predictable without any pronounced features.
So, a photographer doesn’t need to spend any time researching the character of this lens – anyone can start to taken photos without any training – this Rokkor works as standard fifty with beautiful rendering and standard sharpness distribution over the frame. The lens isn’t rare for today and can be purchased for a reasonable price on auctions. Of course, it works fine with any digital mirrorless cameras, and with autofocus adapters too. Minolta has produced five 50mm F1.4 lenses for SR mount, and all of them got enough similar IQ, so, if you got this Rokkor 50mm 1:1.4 then you don’t need to search for something another on this focal distance among other SLR-lenses.

Minolta MD Rokkor 45mm 1:2.0 aberrations
Long-distance bokeh
Test conditions: the lens was focused on 0.6m, buildings are on “infinity”-distance

Test conditions: the lens was focused on 1.5m, buildings are on “infinity”-distance
Light bubbles bokeh
The lens is on the minimal focusing distance 1.5m, lights are on infinity (cityscape)
Minolta MD Rokkor 45mm 1:2.0 – final conclusion:

This is a small and pretty simple lens with not very common focal distance. Very good choice for photographers who likes a little bit wider than classical fifties. It is a nice performer in the middle and center, corners are good enough too, but this lens better to recommend for street or portraits than for landscapes. This feature with not perfect sharpness distribution over the whole frame may be one of the reasons for interesting bokeh rendering provided by the lens – quite ‘old-school’ if wide-opened, and if closed – with amazing pentagons because of the five-blades aperture.
A lot of fans have added these lenses into favorites and many people use it permanently without switching to other lenses. This lens is from ‘pancakes’ family, but I believe that it still too thick for this category, anyway, it is still smaller than an average 50mm lens, also very lightweight. It wouldn’t take much room in a photographer’s bag and unexpectedly can invert a simple scene into an amazing picture – looks very close to the ‘must-have’ lens, especially if to remember the price. In ‘heavy case of dependence,’ the lens has a chance to become the only lens for the owner.
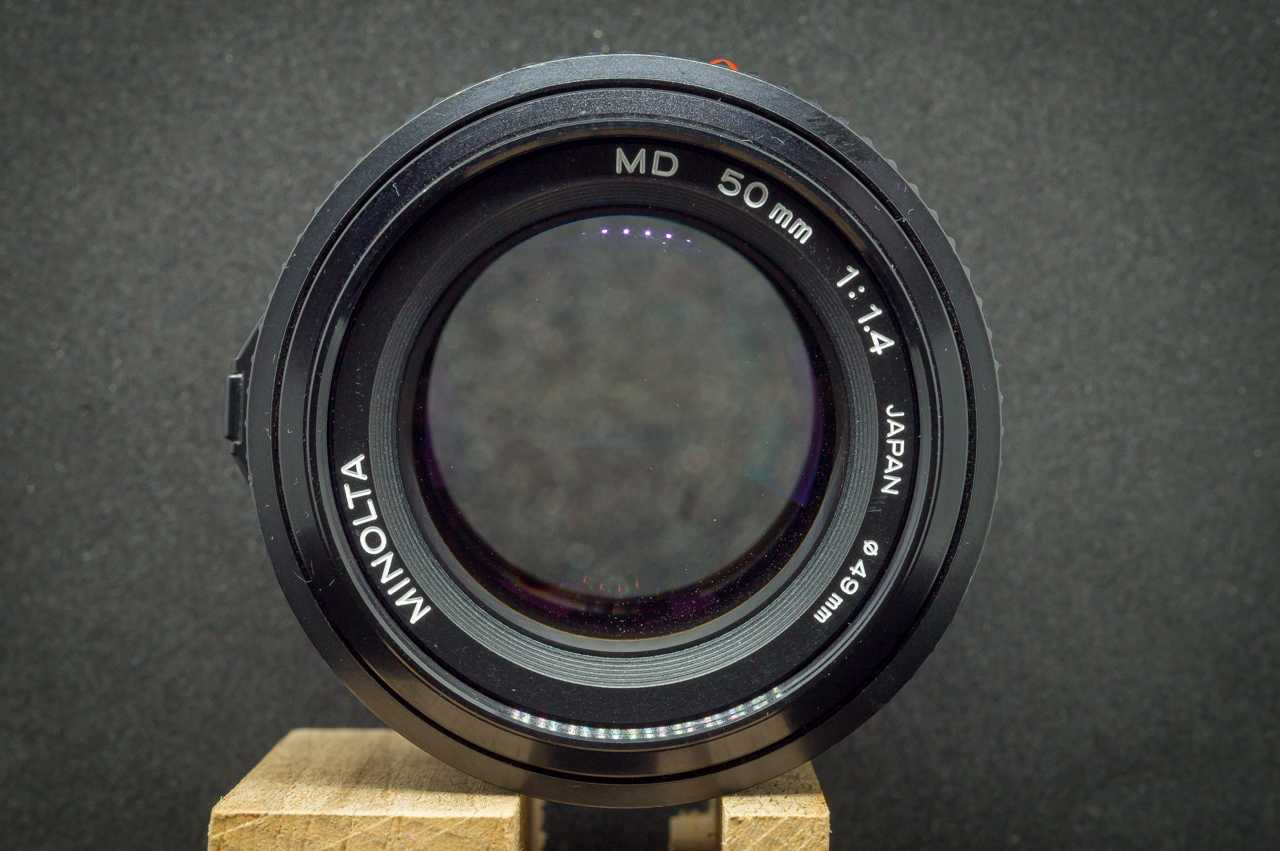
Minolta MD 50mm 1:1.4 (or Minolta MD 50mm F/1.4, New-MD, MD III design) – overall conclusion

I agree with people who think that this lens is the best 50mm lens in the world ever. It may be really true – the sharpest among other MD 50mm lenses, it has quite low aberrations and beautiful bokeh with a perfect and interesting character of smoothing. It’s very fast with F1.4 and provides thin DOF of course. The combination of characteristics makes this lens in my eyes the ideal around 50mm – it can be used in any style of photos on any aperture with no doubts. One more thing – it is better than previously reviewed MD 50mm F 1.2 in all aspects, except presented F1.2 of course. And it works great even wide open. If you are choosing the first Minolta lens – buy this 50/1.4 and you will be inspired into MD lenses at all.