Canon EOS-1Ds | это… Что такое Canon EOS-1Ds?
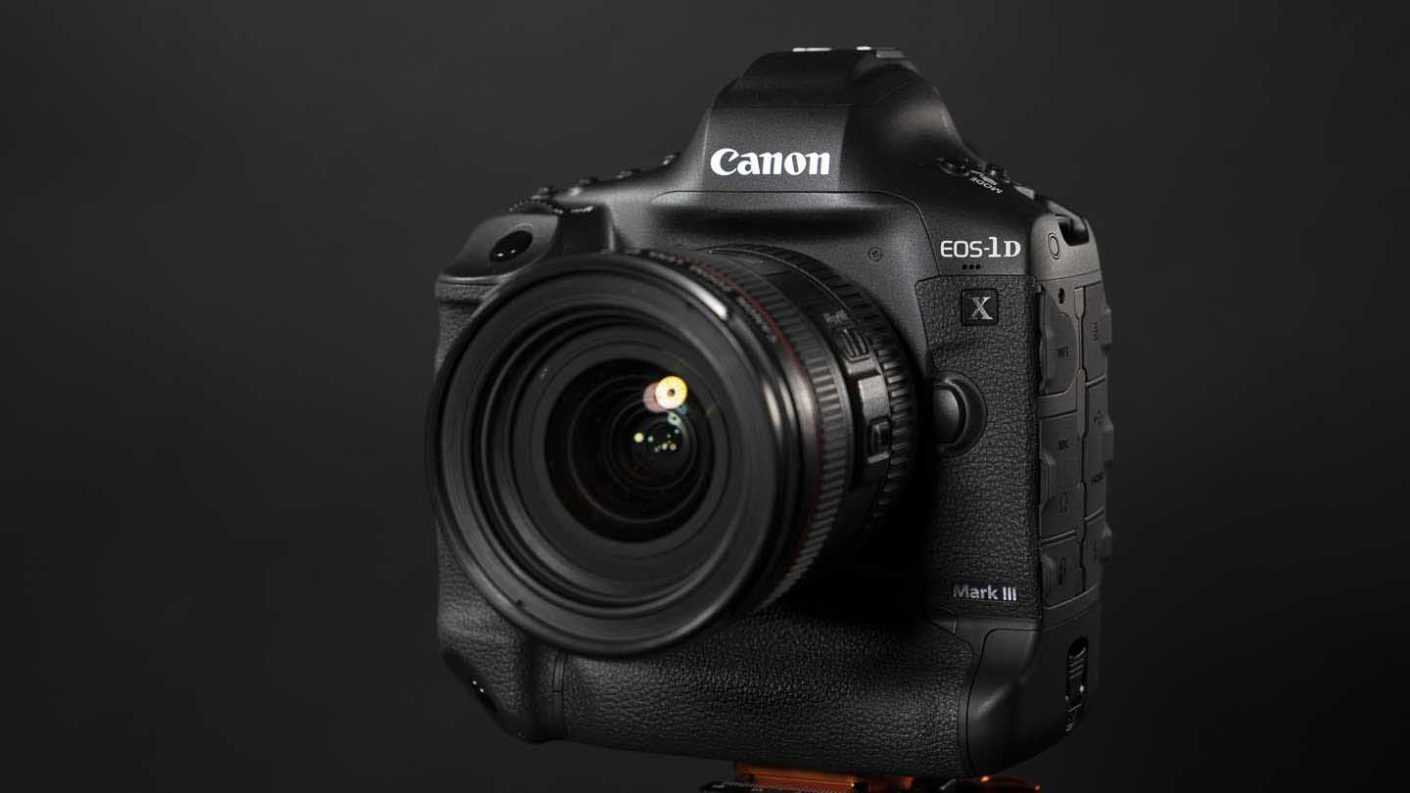
Canon EOS-1Ds — профессиональный полнокадровый цифровой зеркальный фотоаппарат серии EOS компании Canon с 11,4-мегапиксельной матрицей. Ориентирован на профессиональных фотографов. На рынке был заменён камерой Canon EOS-1Ds Mark II.
Описание
EOS-1Ds представляет собой профессиональную однообъективную цифровую зеркальную камеру (DSLR) со светочувствительной полноразмерной (35-мм) КМОП-матрицей (CMOS) с кроп-фактором 1,0. Размеры матрицы: 35,8 × 23,8 мм. Разрешение матрицы: 11,4 млн пикселей.
Корпус камеры водо-/пыленепроницаемый, аналогичный фотоаппарату Canon EOS-1D.
Совместимость
EOS-1Ds совместим с объективами EF (кроме EF-S) и фотовспышками Speedlite.
| п • о • рЦифровые фотоаппараты Canon EOS | ||||||||||||||||||||||||||||||||||||||||||||||||||||||||||||||||||||||||||||||||||||||||||||||||||||||||||||||||||||||||||||||||||||||||||||||||||||||||||||||||||||||||||||||||||||||||||||||||||||||||||||||
|---|---|---|---|---|---|---|---|---|---|---|---|---|---|---|---|---|---|---|---|---|---|---|---|---|---|---|---|---|---|---|---|---|---|---|---|---|---|---|---|---|---|---|---|---|---|---|---|---|---|---|---|---|---|---|---|---|---|---|---|---|---|---|---|---|---|---|---|---|---|---|---|---|---|---|---|---|---|---|---|---|---|---|---|---|---|---|---|---|---|---|---|---|---|---|---|---|---|---|---|---|---|---|---|---|---|---|---|---|---|---|---|---|---|---|---|---|---|---|---|---|---|---|---|---|---|---|---|---|---|---|---|---|---|---|---|---|---|---|---|---|---|---|---|---|---|---|---|---|---|---|---|---|---|---|---|---|---|---|---|---|---|---|---|---|---|---|---|---|---|---|---|---|---|---|---|---|---|---|---|---|---|---|---|---|---|---|---|---|---|---|---|---|---|---|---|---|---|---|---|---|---|---|---|---|---|---|
|
||||||||||||||||||||||||||||||||||||||||||||||||||||||||||||||||||||||||||||||||||||||||||||||||||||||||||||||||||||||||||||||||||||||||||||||||||||||||||||||||||||||||||||||||||||||||||||||||||||||||||||||
| беззеркальные фотоаппараты с байонетом EF-M: EOS M (июль 2012) | ||||||||||||||||||||||||||||||||||||||||||||||||||||||||||||||||||||||||||||||||||||||||||||||||||||||||||||||||||||||||||||||||||||||||||||||||||||||||||||||||||||||||||||||||||||||||||||||||||||||||||||||
| ранние модели (совместно с Kodak): EOS DCS 3 (июль 1995) • EOS DCS 1 (декабрь 1995) • EOS D2000 (март 1998) • EOS D6000 (декабрь 1998) | ||||||||||||||||||||||||||||||||||||||||||||||||||||||||||||||||||||||||||||||||||||||||||||||||||||||||||||||||||||||||||||||||||||||||||||||||||||||||||||||||||||||||||||||||||||||||||||||||||||||||||||||
| нет видео LiveView съёмка видео видео, откидной дисплей FF — полнокадровые модели |
Metering system / zones
Just like the EOS-1D/1V the 1Ds has a 21-zone evaluative metering system.
This provides several metering modes: evaluative, partial, spot, center-weighted
average, AF point-linked spot and Multi-spot metering (plus flash E-TTL
and TTL). The diagram on the left, above shows how these areas equate
to the portions of the viewfinder view and AF points, in AF point-linked
spot metering mode one meter zone serves several AF points.
| 21 metering zones over the viewfinder view image |
21 zone meter sensor |
| C.Fn 13 allows you to choose the number of AF points as well as whether spot metering follows the AF point or stays in the center of the frame. |
ISO Sensitivity / Noise levels
To measure noise levels we take a sequence of images of a GretagMacBeth ColorChecker chart (controlled artificial daylight lighting). The exposure is matched to the ISO (ie. ISO 200, 1/200 sec for consistency of exposure between cameras). The image sequence is run through our own proprietary noise measurement tool (version 1.4 in this review). Click here for more information. (Note that noise values indicated on
the graphs here can not be compared to those in other reviews.)
Canon EOS-1DS Mark II Sharpness parameter
The cameras default sharpness level is 0, essentially no sharpening applied to the image at all. In reality almost all photographers are will use a setting of 1 or 2 (especially for JPEG output) with this in mind we used a setting of 1 for our noise measurement tests. This makes the test more representative of real world results and is a fairer comparison to the other cameras here, all of which apply a normal level of sharpening to their images. You can see the difference sharpening makes to noise levels in the last graph on this page.
Canon EOS-1Ds Mark II vs. Nikon D2X vs. Canon EOS 20D
-
Canon EOS-1Ds Mark II: Canon 50 mm F1.4 lens, Aperture Priority
(F4), Manual WB,
Sharpness 1, 50 mm F1.4, JPEG Large / Fine
- Nikon D2X: Nikkor 50 mm F1.4 lens, Aperture Priority, Manual WB,
Default Parameters, High ISO Noise Reduction ‘Normal’, JPEG Large / Fine
-
Canon EOS 20D: Canon 50 mm F1.4 lens, Aperture Priority
(F4), Manual WB,
Parameters 1 (default), 50 mm F1.4, JPEG Large / Fine
|
Canon EOS-1Ds Mark II ISO 50 (L) , 1/50 sec, F4 |
Nikon D2X n/a | Canon EOS 20Dn/a |
|---|---|---|
|
Canon EOS-1Ds Mark II ISO 100, 1/100 sec, F4 |
Nikon D2X ISO 100, 1/100 sec, F3.5 |
Canon EOS 20D ISO 100, 1/100 sec, F4 |
|
Canon EOS-1Ds Mark II ISO 200, 1/200 sec, F4 |
Nikon D2X ISO 200, 1/200 sec, F3.5 |
Canon EOS 20D ISO 200, 1/200 sec, F4 |
| Canon EOS-1Ds Mark IIISO 400, 1/400 sec, F4 |
Nikon D2X ISO 400, 1/400 sec, F3.5 |
Canon EOS 20D ISO 400, 1/400 sec, F4 |
|
Canon EOS-1Ds Mark II ISO 800, 1/800 sec, F4 |
Nikon D2X ISO 800, 1/800 sec, F3.5 |
Canon EOS 20D ISO 800, 1/800 sec, F4 |
|
Canon EOS-1Ds Mark II ISO 1600, 1/1600 sec, F4 |
Nikon D2X ISO 1600, 1/1600 sec, F3.5 |
Canon EOS 20D ISO 1600, 1/1600 sec, F4 |
|
Canon EOS-1Ds Mark II ISO 3200 (H) , 1/3200 sec, F4 |
Nikon D2X ISO 3200, 1/3200 sec, F3.5 |
Canon EOS 20D ISO 3200, 1/3200 sec, F4 |
As you can see the EOS-1Ds Mark II has a progressive increase in noise that only really becomes intrusive at ISO 3200 (indicated as ‘H’ on the status LCD). At these higher sensitivities noise appears more as color blotching (chroma noise) which is a typical characeteristic of Canon’s CMOS sensor (very similar to the EOS 20D also shown here). What is impressive is the camera’s ability to hang on to detail even at ISO 3200, much more so than the EOS 20D or D2X.
We compared the noise characteristics of Nikon D2X and Canon EOS-1Ds Mark II in our review of the D2X, since then we have improved our noise test to include the black patch on the chart. This reveals that while the D2X has a very similar mid-tone noise profile as the EOS-1Ds Mark II its shadow noise is noticeably higher (this can be seen clearly in the crops above). There are two other significant differences; the D2X’s noise appears mostly as monochromatic ‘luminance’ noise (more like film grain) where as the EOS-1Ds Mark II has more chroma noise (see second graph below) which does look more digital / video-like. The last difference is detail, the D2X has a fairly strong noise reduction algorithm (see the bottom of this page of our D2X review to see the difference) which smooths away detail at higher sensitivities.
Luminance noise graph
Indicated ISO sensitivity is on the horizontal axis of this graph, standard
deviation of luminosity on the vertical axis. Gray refers to the middle gray patch, Black refers to the black patch.
Chroma noise graph
Indicated ISO sensitivity is on the horizontal axis of this graph, standard
deviation of chroma (from the gray patch)
on the vertical axis.
Exposure / Focus / Metering / Drive modes
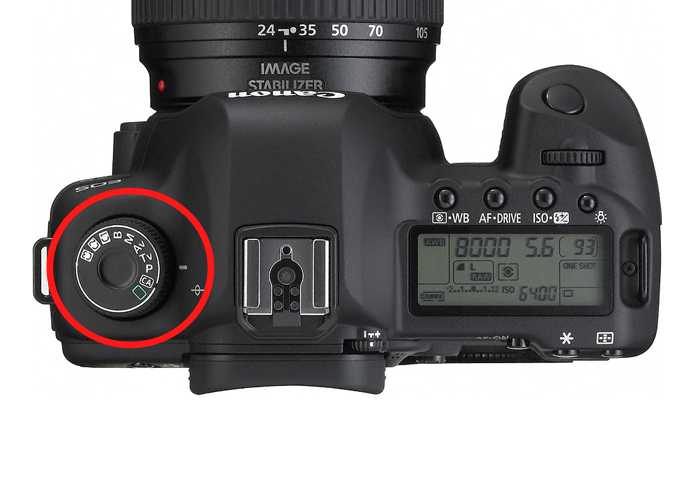
Exposure modes
| Mode | Description |
| P |
Program AE (Shiftable) *1 |
| Av |
Aperture Priority Auto *2 |
| DEP |
Depth-of-field AE This unique Canon EOS feature allows you to select two focus points in a scene and the camera will then select the correct aperture and focus distance to ensure both subjects are in focus (within the focus field) in the final shot. On the EOS-1D this is carried out by focusing (half-press of the shutter release) on the first subject, then focusing on the second subject (again, another half-press) and then recompose the scene and fully depress the shutter release. The camera indicates which subject you’re focusing on with a DEP-1 / DEP-2 display on the top LCD and viewfinder status bar. |
| M |
Manual Exposure *3 In this mode you select the aperture and the shutter speed from any available combination. Main dial (top) selects shutter speed, quick command dial (rear) selects aperture. A half-press of the shutter release will activate the cameras meter and the relative exposure difference (+/- 3 EV) will be indicated on the viewfinder meter (right of the viewfinder screen). A difference of exposure of more than 3 EV is indicated by either an up or down pointing arrow. |
| Tv |
Shutter Priority Auto *4 |
| Bulb |
Bulb Exposure The EOS-1Ds has a dedicated Bulb exposure mode. In this mode you can select the aperture by rolling the main dial (top) then press and hold the shutter release for the length of exposure you require (normally in conjunction with a remote release). During the exposure the top display gives a readout of the exposure length in hours, minutes and seconds. |
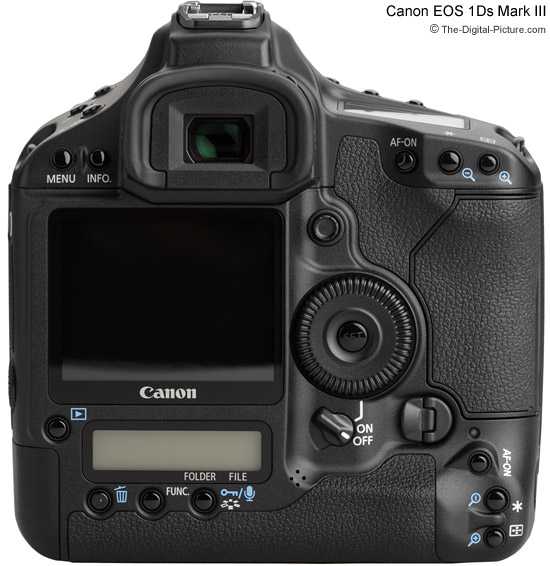
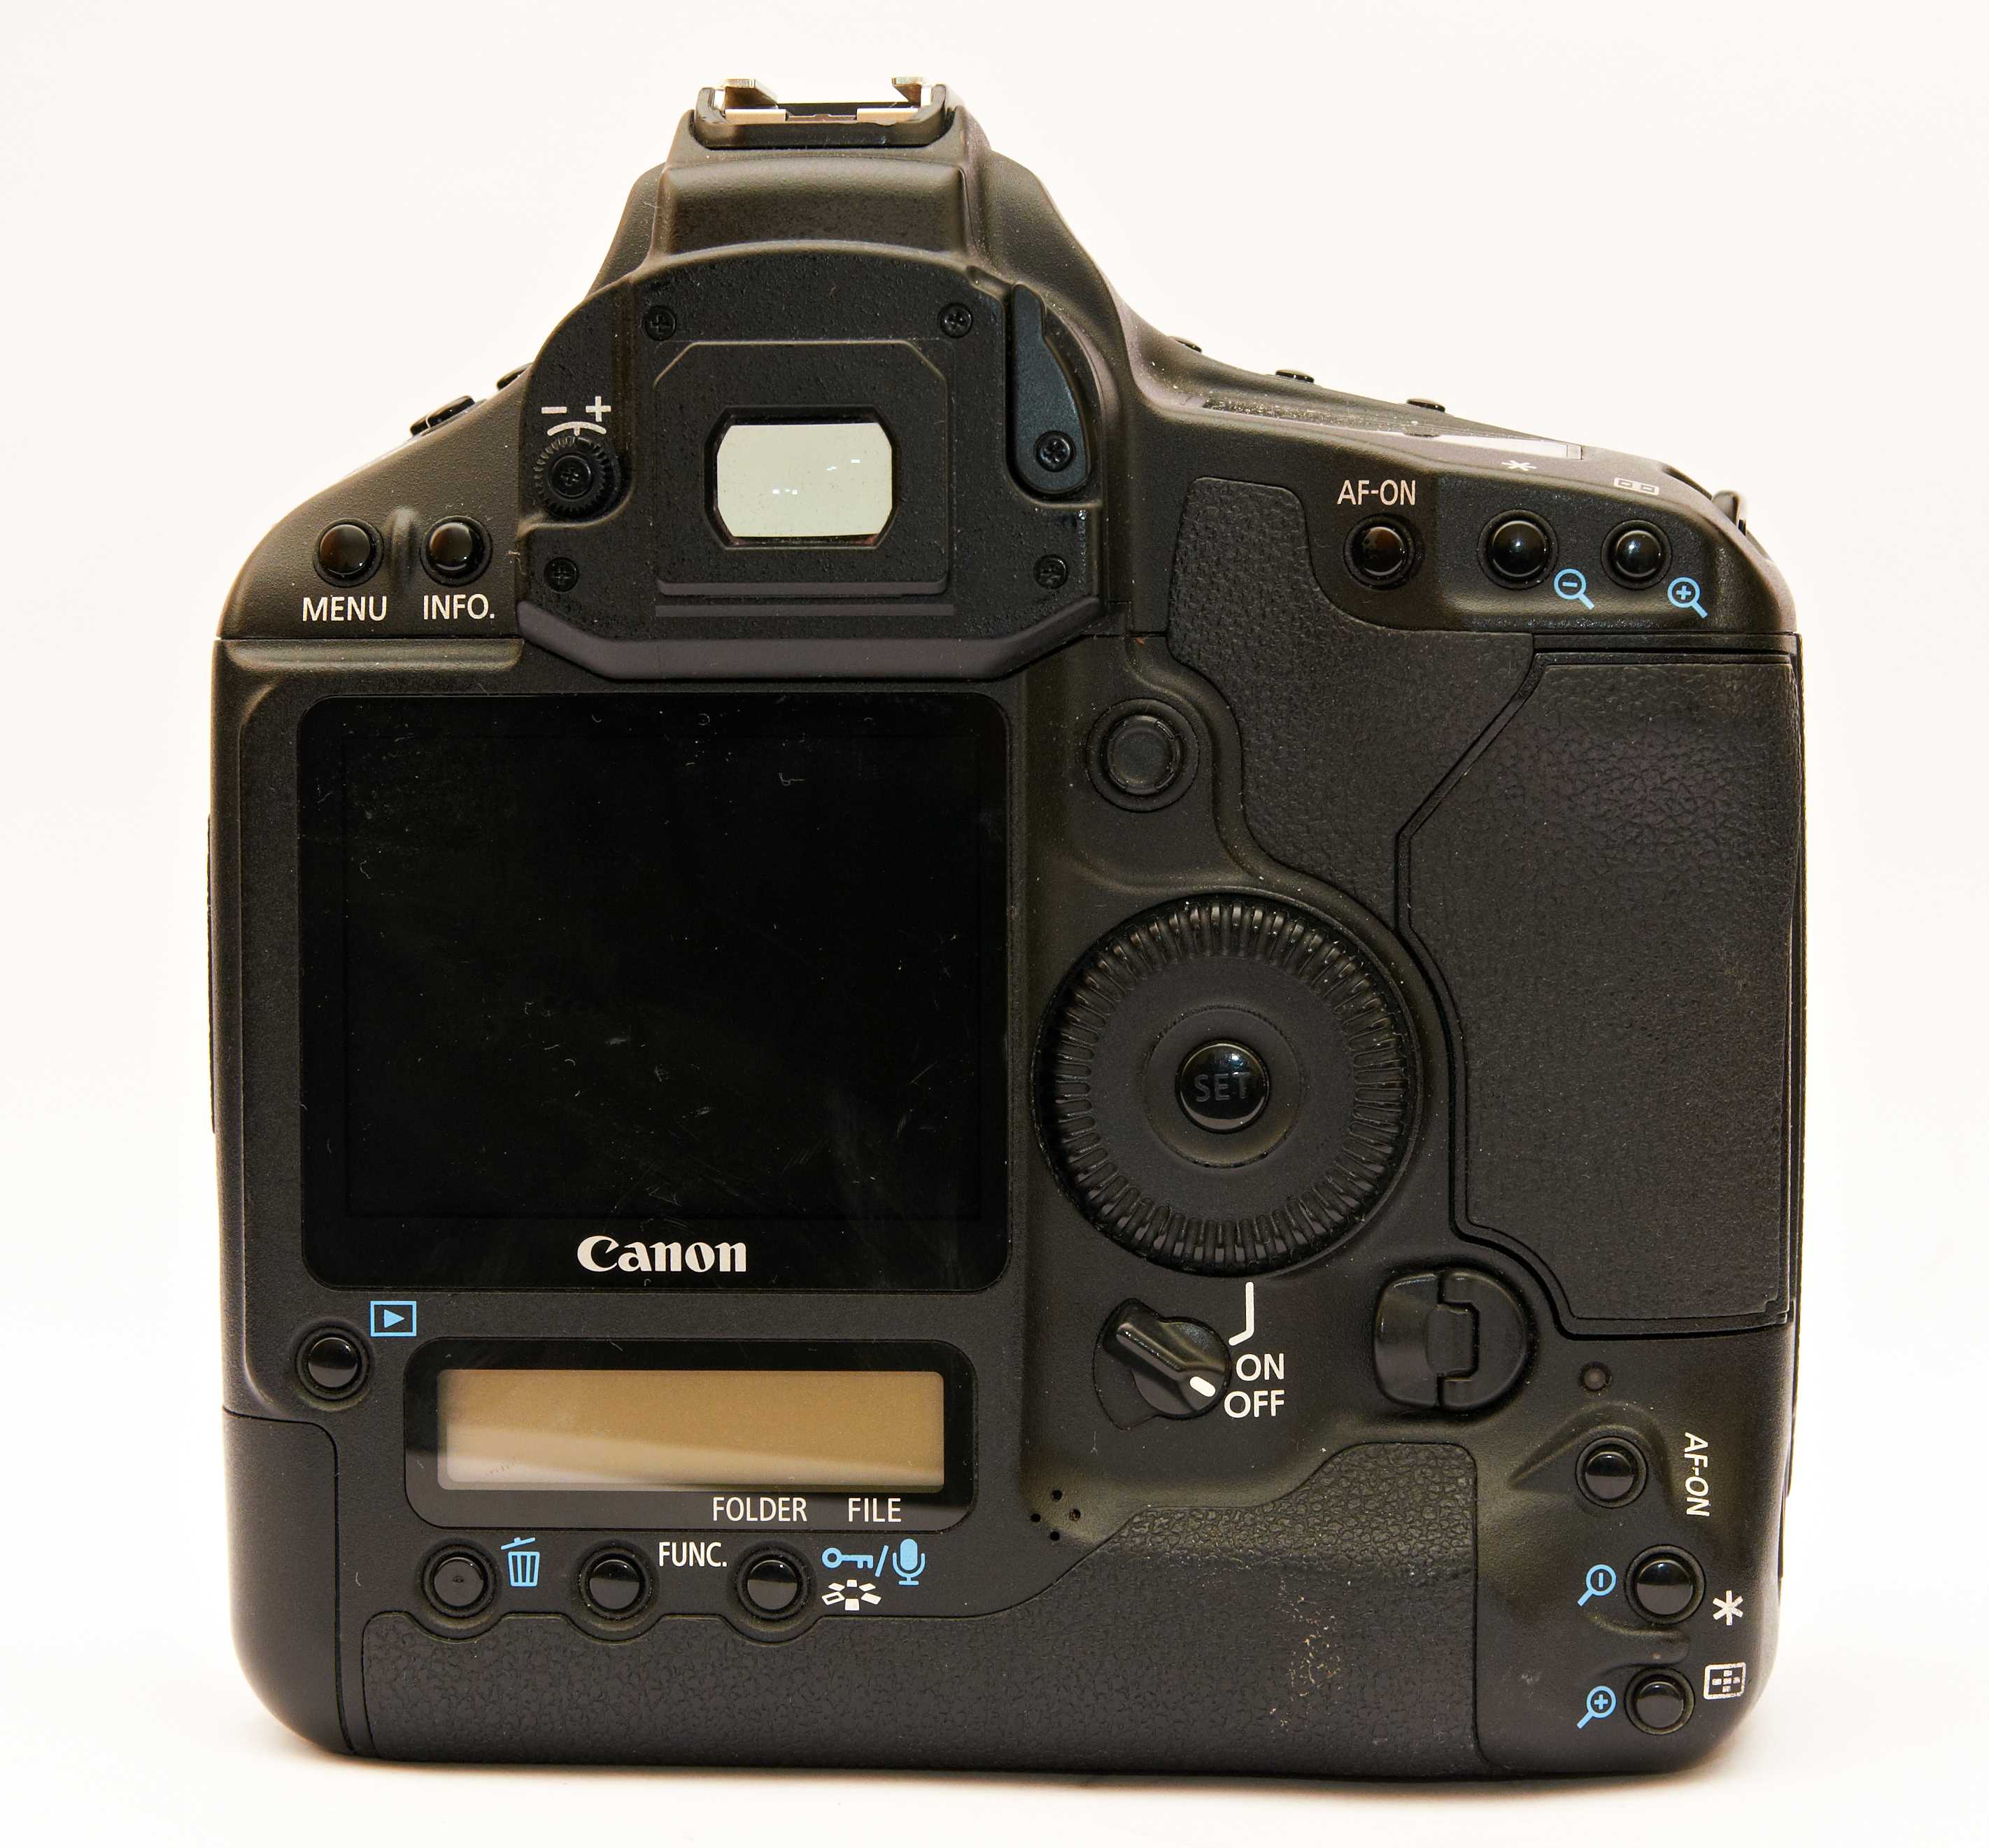
Rear of Camera Controls
On the left we have a group of ‘digital controls’ surrounding
the two inch LCD monitor, below this there’s a status LCD which again
shows information which pertains to the digital side of the camera. On
the right is the familiar quick control dial (which can be disabled in
record mode but is always active in display or menus), power switch and
CF compartment release knob.
On the left side of camera rear (surrounding LCD
monitor / LCD status panel):
| Button / combination |
||
| Protects / un-protects current image. Hold for 2 seconds: the camera will begin recording a voice annotation (which will be ‘attached’ to the current image) |
No function |
|
| Enter / leave camera menu |
Menu mode: Select menu pages |
|
| No function |
Display mode: Browse through images Menu mode: Select / change menu options |
|
|
Enters or leaves display mode (playback) which initially displays |
Select display mode: Single image with histogram Single image 2 x 2 thumbnail index 3 x 3 thumbnail index Folder view |
|
| Display mode: Show Erase options: OK Cancel ALL |
Erase mode: Select one of the three erase options |
|
| No function |
Select image quality / size setting: RAW (or RAW+JPEG) JPEG Large/Fine JPEG Large/Standard JPEG Small/Fine |
|
| No function |
Select white balance setting: Auto Sunny Shade Cloudy Incandescent Fluorescent Flash Custom WB (manual preset) PC-1, PC-2, PC-3 (personal WB) K(elvin) temperature (2800-10000 K) |
|
| WB + Display | Show white balance bracketing setting |
Select white balance bracketing: +/- 1,2 or 3 steps (3 frames) |
| Quality + WB |
Hold for 2 seconds: camera settings reset (everything reverts to |
No function |
|
MAGNIFY Display + Assist |
Press and hold the DISPLAY button in combination with the AF Assist button (see below) to enter magnify mode. Personal function 30 must be enabled. |
No function |
On right side of camera rear:
| Button / combination |
|
| Assist button — pressed in combination with AF point select button reverts to a pre-registered AF point. Press in combination with the DISPLAY button to magnify the image in playback mode (Personal function 30 must be set). |
|
| AE Lock — lock exposure as it is currently metered, this allows you to then recompose the image and shoot. |
|
| Enter AF point select mode: Main dial dial (top) used to select AF points horizontally, quick command dial (rear) used to select AF points vertically. |
|
| Quick control dial switch — enables or disabled quick control dial for shooting mode. When enabled the quick control dial can be used to quickly set exposure compensation. This switch has no effect in menu or playback modes. |
|
| Power camera on / off: Speaker icon (camera beeps to confirm AF lock or manual focus accuracy) On (normal powered on mode) Off (camera will continue writing images out of buffer if there are any) |
| C.Fn 4 allows you reprogram the function of the shutter release and AE Lock buttons to various combinations of AF / AE Lock. |
Image Quality / Specific Issues
Nothing can really prepare you for the huge resolution
delivered in the huge EOS-1Ds images, as seems to be Canon’s philosophy
the default sharpening levels are very low (default sharpening parameter
is zero), however create a new parameter set with slightly higher sharpening
or apply an Unsharp mask to images and detail leaps out of the image.
Noise levels are also very good (as we had come to expect
from Canon’s CMOS sensor), better than the EOS-D60 at higher sensitivities
but not quite as ‘buttery smooth’ at ISO 100 (odd because the EOS-1Ds
pixel pitch is larger). With an sRGB color matrix selected colors are
vivid, if a little ‘red strong’, but that can of course be adjusted for
or avoided completely by using the Adobe RGB color matrix.


Sharpening images
As mentioned above the EOS-1Ds has a fairly soft default sharpening level.
Below you will find a comparison of this default level, a sharpening level
of 2 and a Unsharp mask of the original ‘default’ image. The first two
images were created from a RAW file using the Canon File Viewer utility.
Settings:
ISO 100 / Color matrix: 2 (sRGB — Portrait) / Large (output from FVU quality
3)
| Sharpening 0 (default) 1,488 KB JPEG |
Sharpening 2 1,790 KB JPEG |
Photoshop Unsharp Mask Amount 100%, Radius 0.6 1,372 KB JPEG |
Lens aberrations — the implications for a full size 35 mm sensor
The EOS-1Ds has a full size 35 mm sensor, that means it’s using more
of the glass of a lens than previous digital SLR’s which ‘cropped’ a portion
of the center of the lens (the ‘sweet spot’ as it’s sometimes known).
This means that the 1Ds is more likely to reproduce lens effects which
are normally to be found near the edges of the lens, such as chromatic
aberrations. In addition to this the interaction of the lens and microlenses
on the sensor surface, especially at high angle of incidence (wide angle
lenses) can introduce or amplify such artifacts.
Chromatic aberrations
Even using the best of Canon’s L lenses we couldn’t get away from the
occasional chromatic aberration effect, that said it does require a particular
high contrast situation (such as branches against a sky background) to
be apparent. Also because of the 3:2 ratio of the image these artifacts
are more likely to be visible on the left or right edges of the frame.
Settings:
Parameters: Standard / Color matrix: 1 (sRGB) / Large, Fine
| Canon EF 28-70 mm F2.8 L @ 28 mm ISO 100, 1/200 sec, F7.1 5,384 KB JPEG |
Canon EF 17-35 mm F2.8 L @ 17 mm ISO 400, 1/80 sec, F7.1 5,361 KB JPEG |
Vignetting / Light fall off
One other phenomenon which film photographers will be aware of but up
D-SLR users haven’t had to be concerned about is vignetting / light fall
off at wide apertures. The thumbnails below are provided to give an impression
of the visibility of fall off which now occurs because of the full 35
mm size sensor. Note that this effect is not unique to the EOS-1Ds, it’s
a well known and documented phenomenon in the film world. It is most noticeable
at wide angle and maximum aperture and will vary depending on the lens.
Canon EF 28-70 mm F2.8 L @ 28 mm
| Canon EOS-1Ds | Canon EOS-D60 | |
| F2.8 | ||
| F5.6 | ||
| F11 |
Canon EF 28-70 mm F2.8 L @ 70 mm
Night Exposures
The EOS-1Ds provides timed long exposures up to 30 seconds,
beyond that we must use Bulb exposure mode with a remote release. The
1Ds has noise reduction which when enabled (menu option) reduces noise
in exposures with a shutter speed of one second or longer. It does so
by taking a second equal exposure with the shutter closed and uses the
noise information gathered from this exposure to remove noise from the
first. Our experience of taking night exposures with the 1Ds was very
positive, it produces great results up to and beyond the maximum timed
exposure of 30 seconds.
| Canon EF 50 mm F1.4 ISO 100, 10 sec, F16 3,761 KB JPEG |
Canon EF 50 mm F1.4 ISO 100, 10 sec, F8 3,838 KB JPEG |
The fifteen minute exposure
Not the most creative shot ever but it was really a test more than anything,
the image below was taken using Bulb exposure mode and a remote release.
The shutter was opened for fifteen minutes, the camera then took a further
fifteen minute exposure afterwards. The result however is very impressive.
There are a few small white speck ‘hot pixels’ but nothing that would
distract from the overall image. Note the star trails…
Exposure / Focus / Metering / Drive modes (cont.)
Auto Focus modes
| Mode | Description |
| One Shot |
One Shot AF |
| AI Servo |
AI Servo AF In this mode the camera constantly refocuses on a moving subject. If the subject is moving at a constant rate towards or away from the camera the focus system will ‘predict’ the new focus distance. This is especially successful when AF point selection is set to auto (the camera can use all 45 focus points to track a moving subject). In this mode the focus confirmation light only indicates if focus can not be achieved (it blinks). |
| P.Fn 13 allows you to switch AI Servo auto focus between focus-priority (default) and shutter release-priority. |
|
| C.Fn 20 can be used to change the AI Servo tracking sensitivity (standard, slow, moderately slow, moderately fast, fast) so that focusing isn’t thrown off if (example) something crosses the path of the lens. |
Metering modes
| Mode | Description |
|
Evaluative |
|
|
Partial Partial metering is more effective for strongly backlit subjects, metering is weighted at the center of the frame covering 8.5% of the viewfinder area. |
|
|
Spot Spot metering is useful for metering very precisely a single subject or area within a scene. The metering is weighted at the center of the frame covering 2.4% of the viewfinder area. With AF points limited to 11 or 9 (custom function 13 is 1 or 3) the metered spot will follow the AF point. |
|
|
Center-weighted Average In this mode the entire frame is metered but more emphasis (weight) is placed on the center portion of the frame. |
| P.Fn 2 allows you to disable any of the metering modes. |
Drive modes
| Mode | Description |
|
Single frame |
|
|
Continuous *1 Press and hold the shutter release and the camera shoots until the buffer is full. As soon as there is space in the buffer (images have been written out to the CF card) the next shot will be taken. |
|
|
Self-timer 10-sec delay Camera pauses 10 seconds before taking shot. Countdown is displayed on the top LCD. |
|
|
Self-timer 2-sec delay Camera pauses 2 seconds before taking shot. Countdown is displayed on the top LCD. |
| *1 | P.Fn 19 allows you reprogram the continuous frame rate to approx. 3, 2, or 1 fps. |
Looking through the viewfinder the camera displays the
capacity of the buffer as a two digit numeric (right side of the viewfinder
display). This buffer burst capacity for the EOS-1Ds is always 10 without
shots taken, this is for JPEG or RAW images at any sensitivity.
| P.Fn 20 allows you to limit the number of shots in continuous mode, when this setting is enabled the camera will only shoot the specified number of frames for any single press-and-hold of the shutter release button. |
Top of Camera Controls: Right Side
Right side of camera controls
| Button / combination |
||
| Acquires a flash exposure lock, attached flash will pre-flash and meter for the correct flash output. Also used in Multi-spot metering mode to select a meter point. |
No function |
|
| Illuminates top or rear LCD status panels with blue LEDs for six seconds. |
No function |
|
| Select exposure compensation: +/-3 EV in 1/3 or 1/2 EV steps *1 |
||
| AE Lock — lock exposure as it is currently metered, this allows you to then recompose the image and shoot. |
||
| Enter AF point select mode: Main dial dial (top) used to select AF points horizontally, quick command dial (rear) used to select AF points vertically. |
Tone curve
Just like the EOS-1D the EOS-1Ds has the ability to load
custom tone curves. The curves defined for the EOS-1Ds have four control
points which define the curve used to translate the RAW linear data into
the final image (gamma space). Note that the modification of this curve
now takes place on a logarithmic scale, this is much easier to work with
and understand. You can modify color channels individually (R, G or B)
or just luminance (RGB linked).
This gives the photographer the ability to shoot subtly
different tonal balances for different situations. For example it may
be useful to produce a tone curve used for shooting products under studio
lighting and another for shooting a sporting event under stadium lighting.
Or it could simply be used to produce a standard ‘look’ the photographer
requires.
Settings:
ISO 400 / Color matrix: 1 (sRGB) / Small, Fine JPEG
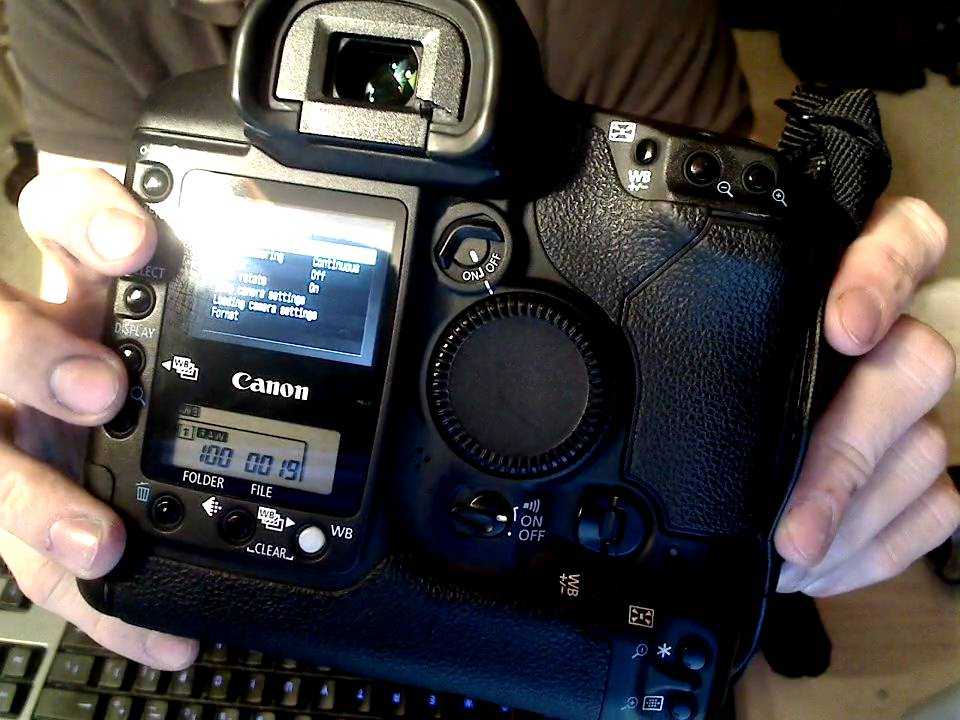
LCD monitor playback view
The EOS-1Ds features five different types of display in playback mode.
For record review (the image displayed immediately after the shot is taken)
you can select from either of the first two views shown below (Single
or Single with Histogram). When shooting a burst of continuous shots the
EOS-1Ds will by default display the last frame of the burst, however if
you press the DISPLAY button while the camera is writing images it will
display each image as it is saved.
Enter playback mode by pressing the DISPLAY button. In playback mode
the default display is ‘single image’, each of the other displays can
be selected in play mode (press the DISPLAY button) by holding the DISPLAY
button and rotating the main dial. The new Enlarged feature is accessed
by holding the DISPLAY button and pressing the AF Assist button once.
Note: Apologies for the average quality of these
captures (compared to our usual), the EOS-1Ds does not have a video-out
connector and so LCD captures must be made by taking a picture of the
LCD screen.
| Single image display / Record review display. Shutter speed, Aperture, Image size / quality. Use the quick control dial and SELECT button to browse. |
Press and hold the protect / sound record button and you can ‘attach’ a voice recording of up to 30 seconds. (Recorded as WAV format, 8 Khz, 8-bit). |
| Histogram and detailed information display with exposure details, histogram and AF point display (enabled). Use the quick control dial and SELECT button to browse. |
2 x 2 thumbnail display. Exposure and image size / quality information relates to currently selected image. Use the quick control dial and SELECT button to browse. |
| 3 x 3 thumbnail display. Exposure and image size / quality information relates to currently selected image. Use the quick control dial and SELECT button to browse. |
Folder display. Use the quick control dial and SELECT button to choose current folder or create a new folder. |
| This is the new Enlarged mode, hold the DISPLAY button and press AF assist to enter. Press DISPLAY again to exit. Image must have been shot with personal function 30 enabled. |
Hold down the SELECT button while in Enlarged mode and roll the quick control dial to move around the enlarged image. |
| To delete an image press the DELETE button and let go, this enters delete mode. Now press and hold the DELETE button, roll the quick command dial to select OK, Cancel or ALL. |
When scrolling through images in one of the thumbnail views images ‘scroll
on’ from the bottom right or top left corner (depending on the direction).
It may also have been useful if there were a way to scroll through a page
of four or nine images at a time.
Resolution Chart Comparison
Shots here are of the PIMA/ISO 12233 standard resolution
test chart (more of which are available in our comparison
database). This resolution chart allows us to measure the actual performance
of the lens and sensor system. It measures the ability of the camera to
resolve lines at gradually higher resolutions and enables us to provide
a definitive value for comparison purposes. Values on the chart are 1/100th
lines per picture height. So a value of 15 equates to 1500 lines per picture
height.
Studio light, cameras set to auto, all settings factory
default. Aperture selected for optimum sharpness. Exposure compensation
+0.7 EV to +1.3 EV. Sigma SD9 image processed with default parameters.

| Canon EOS-1Ds | Canon EOS-D60 |
| Sigma SD9 | Fujifilm S2 Pro (12 mp size) |
| Canon EOS-1Ds | Canon EOS-D60 |
| Sigma SD9 | Fujifilm S2 Pro (12 mp size) |
| Canon EOS-1Ds | Canon EOS-D60 |
| Sigma SD9 | Fujifilm S2 Pro (12 mp size) |
| Canon EOS-1Ds | Canon EOS-D60 |
| Sigma SD9 | Fujifilm S2 Pro (12 mp size) |
| Canon EOS-1Ds | Canon EOS-D60 |
| Sigma SD9 | Fujifilm S2 Pro (12 mp size) |
Beyond our chart? Almost
Clearly the EOS-1Ds has resolution beyond our standard resolution chart
when shot normally, however we can shoot the chart from a farther subject
distance so that the chart is exactly half its normal size (2032 x 1352
on the 4064 x 1704 frame — indicated by the red box in the thumbnail below).
This allows us to measure resolution up to 4000 LPH. When reading the
crops below values on the chart now represent 1/200th lines
per picture height. So a value of 15 equates to 3000 lines per picture
height.
Measurable findings (three measurements taken for each camera):
| Camera | Measurement | Absolute Res. | Extinction Res. |
| Canon EOS-1Ds |
Horiz LPH | 2400 | * 2600 |
| Vert LPH | 2000 | * 2600 | |
| 5° Diagonal LPH | 2000 | n/a | |
| Canon EOS-D60 |
Horiz LPH | 1600 | * 1800 |
| Vert LPH | 1400 | 1800 | |
| 5° Diagonal LPH | 1000 | n/a | |
| Sigma SD9 |
Horiz LPH | 1550 | >2000 |
| Vert LPH | 1550 | >2000 | |
| 5° Diagonal LPH | 1000 | n/a | |
| Fujifilm S2 Pro (12 mp size) |
Horiz LPH | 1800 | 2000 |
| Vert LPH | 1700 | 2000 | |
| 5° Diagonal LPH | 1000 | n/a |
* Visible moiré artifacts
Definition of terms:
| LPH | Lines per Picture Height (to allow for different aspect ratios the measurement is the same for horizontal and vertical) |
| 5° Diagonal | Lines set at 5° diagonal |
| Absolute Resolution | Still defined detail (below Nyquist frequency*) |
| Extinction Resolution |
Detail beyond camera’s definition (becomes a solid gray alias) |
| n/a | Not Available (above the capability of the test chart) |
| n/v | Not Visible (not visible on test results) |
* Nyquist frequency defined as the
highest spatial frequency where the sensor can
still faithfully record image detail. Beyond the Nyquist frequency aliasing
occurs
As expected the EOS-1Ds made a joke of our standard resolution
chart when shot at normal subject distances (filling the frame), however
a cunning step back and some careful shooting and we can get some real
measurements.
The resolution of the EOS-1Ds goes beyond anything we’ve
previously tested, it’s the new king of the resolution chart, but as you
would expect with 11 million pixels at its disposal. What’s amazing is
that this leap in resolution and pixel count has been produced almost
effortlessly*, Canon have simply delivered far more than we had expected
by the end of 2002.