
Resolution & Noise
If we proportionally enlarge a frame of the Nikon D100 up to the maximum
frame of the FujiS2Pro using the same lens Nikkor 24-85 1:3.5-4.5
D, the advantage of the Super CCD in resolution won’t be noticed.
Resolution chart (enlarged twice in HTML tag) for f = 24 mm, f/d
= 8, frame center.
The Super CCD matrix has a lower noise level. In the same conditions
at the same ISO the frames of the Fuji S2Pro are less noisy. Below you
can see shots (1:1) taken for the whole ISO range available. The minimal
sensitivity of the FinePixS2Pro is 100, and Nikon D100 has it 200. The
maximum one of the Nikon is 2 steps higher than that of the Fuji.
|
FinePix |
D100 |
|
iso 100, 1 s, f/d 8 |
|
|
iso 200, 0.5 s, f/d 8 |
iso 200, 0.5 s, f/d 8 |
|
iso 800, 0.125 s, f/d 8 |
iso 800, 0.125 s, f/d 8 |
|
iso 1600, 0.06 s, f/d 8 |
iso 1600, 0.05 s, f/d 8 |
|
iso 1600+2 steps, 0.015 s, f/d 8 |
Write a comment below. No registration needed!
Overall Image Quality / Specifics
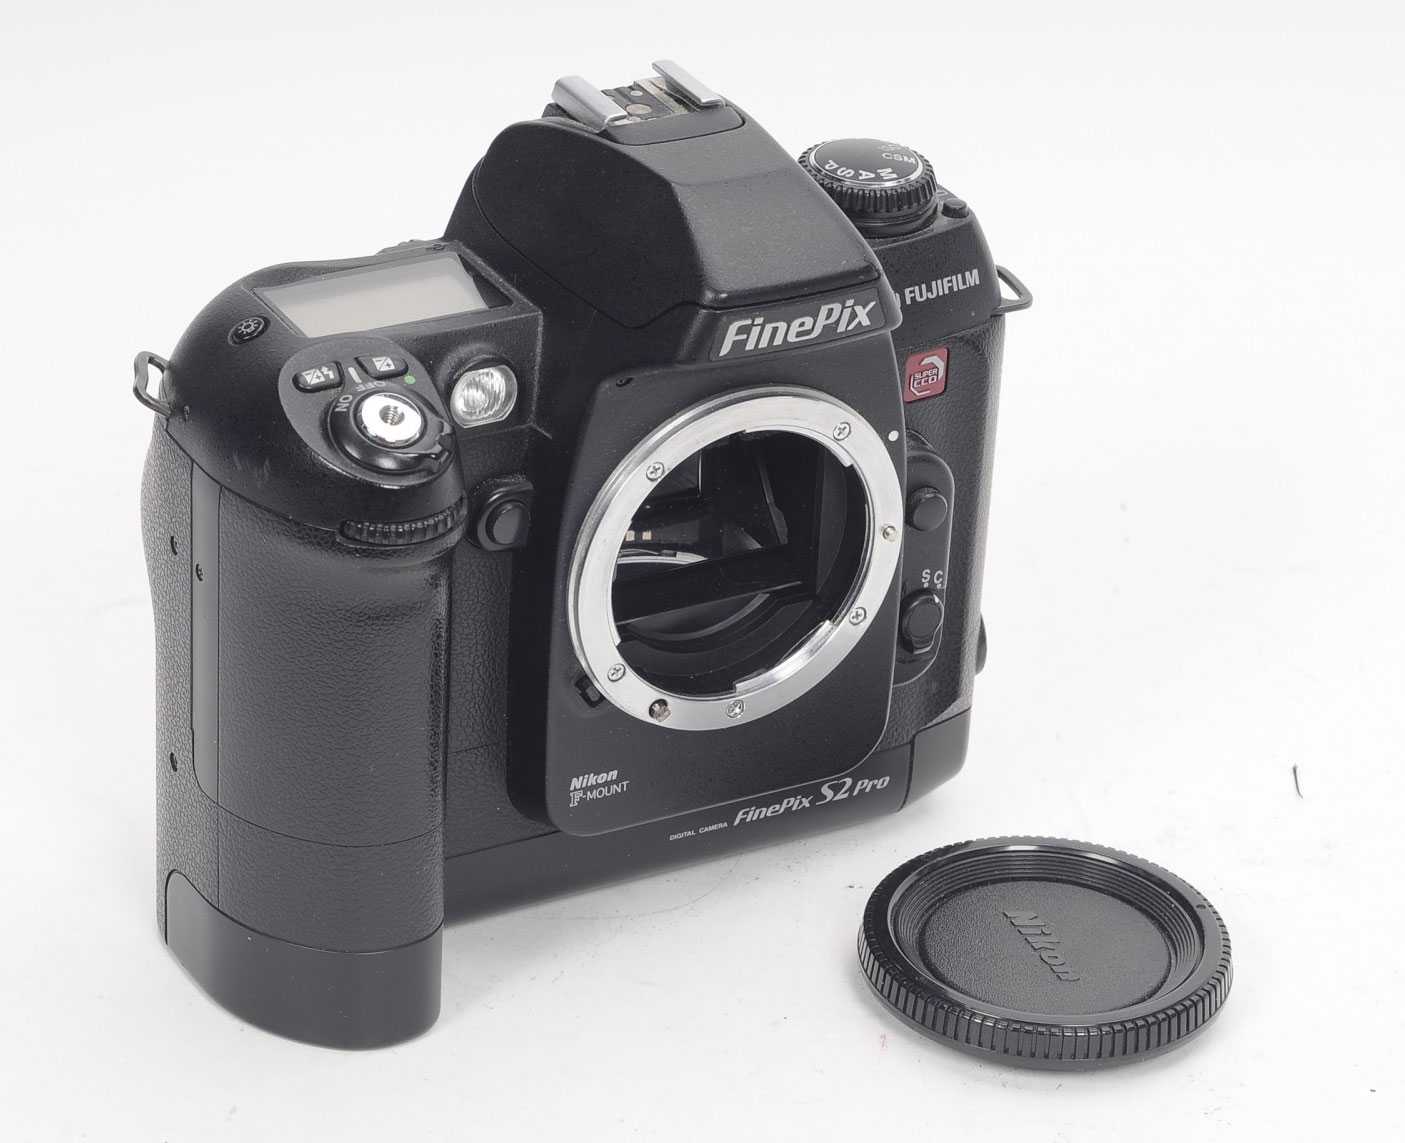
Superb, that’s about the only word to describe the S2 Pro’s
image quality. Fujifilm have really pulled out all the stops to concentrate
on what really matters, the final image quality. Images are well exposed,
show great tonal range, have excellent colour and resolution. With the
S2 Pro Fujifilm have gone a long way to justifying their SuperCCD design
(which always seems to perform better in their D-SLR’s than their consumer
cameras).
After performing my own resolution tests I soon discovered
that although the 12 mp resolution delivers a larger image it doesn’t
deliver any more resolution than the 6.1 mp mode. Add to this the storage
penalty you’ll pay shooting at 12 mp (4 MB JPEG’s) and it’s clear to see
that the 6.1 mp mode is the way to go. In 6.1 mp mode the S2 Pro is more
than a match for the current batch of $2000 six megapixel digital SLR’s.
Sharp, clean and detailed at 6.1 mp
As mentioned above the S2 Pro’s 6.1 mp mode produces very
nice, sharp and low noise images. The S2 Pro produces the 6.1 megapixel
image by first ‘processing’ the SuperCCD RAW data to a 12 megapixel image
and then downsampling to the 6.1 megapixel size. Anyone who has downsampled
an image in Photoshop will tell you that this process alone improves sharpness
and reduces noise, and it seems to work just as well in the S2 Pro.
| ISO 200, 1/750 sec, F5.3, 6.1 mp (2,396 KB) |
ISO 400, 1/60 sec, F4.0, 6.1 mp (2,230 KB) |
SuperCCD Moiré
As we expected there is still some moiré visible
in both 12 and 6 megapixel resolution images (more so at 12 megapixel).
This moire only occurs on 45 degree detail such as hair, wires, gratings
etc. It appears that the 45 degree pixel layout of the SuperCCD is to
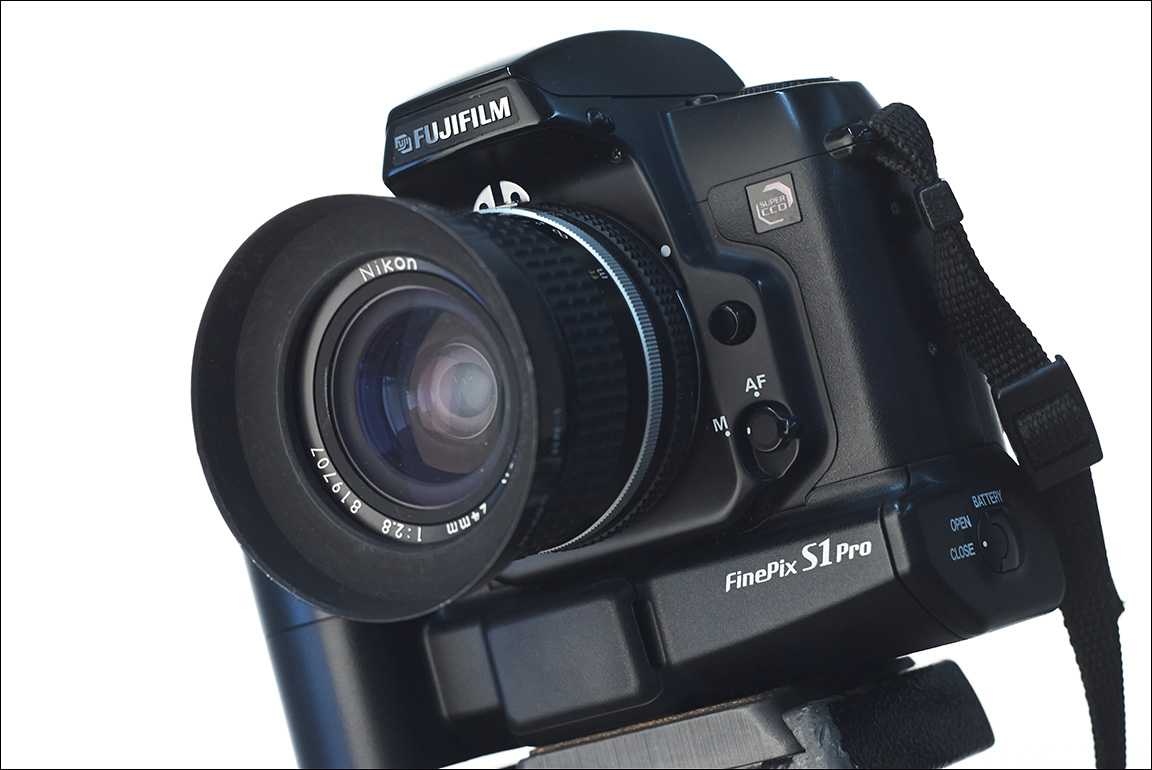
blame. That said it is definitely less than the S1 Pro and far less than
the consumer SuperCCD digital cameras. Many 6 megapixel images didn’t
exhibit any moiré. We also found that RAW converted images had
far less moiré than the equivalent JPEG image.
White balance
The S2 Pro’s Auto white balance worked well under natural
light, it also made a good attempt under artificial light however there
were slight but noticeable casts under incandescent or fluorescent light
in Auto mode. The pre-programmed white balance settings were ‘almost there’,
it would have been nice to have an in-camera fine tuning facility as we’ve
seen on Nikon digital’s for some time. Manual white balance preset offered
the most accurate and consistent results under different light sources.
Settings:
Color/Tone/Sharpening: Normal, ISO 100, Nikkor 24 — 85 mm F3.5 — 4.5 G,
1.4 mp JPEG Fine (~700 KB)
| Daylight: Auto | Daylight: Cloudy / Sunny | Daylight: Manual |
| Incandescent: Auto | Incandescent: Incandescent | Incandescent: Manual |
| Fluorescent: Auto | Fluorescent: Fluorescent 3 / / |
Fluorescent: Manual |
RAW
A RAW image file is quite different than TIFF or JPEG. RAW files contain
the pure raw data as it comes from the CCD, typically 12-bits represent
one pixel of the CCD array. No in-camera processing is applied to this
data, this is left to conversion software used at a later date. In addition
to the raw CCD data the header of a RAW file will also contain exposure
and setting information such as selected white balance, tone, sharpening
etc. all of these parameters are used by the raw conversion software to
produce the final image.
RAW image files can be seen as a ‘digital negative’, they are untouched
by the camera processing algorithms and are therefore open to improved
image processing facilitated by the additional processing power of a desktop
computer and ever improving processing algorithms. At the time of writing
this review there are only two applications available for RAW conversion
of S2 Pro RAW files, both from Fujifilm. It will be interesting to see
if any third party companies produce RAW conversion software which can
handle S2 Pro RAW files (especially considering the honeycomb SuperCCD
layout).
S2 Pro RAW files have the .RAF file extension, interestingly they contain
a 1440 x 960 JPEG which can be viewed by certain image viewers (works
with ACDSee). This JPEG is no doubt used by the camera for playback and
magnification. At the moment there is no facility to extract this JPEG
but it would be useful, perhaps in a third party application.
RAW File Converter EX
RAW File Converter EX is the extended RAW converter from Fujifilm. It
is part of the ‘Hyper Utilities’ suite which is an extra cost (£129.99
in the UK). Personally I feel that EX should be a standard part of the
S2 Pro kit, Converter LE offers no control at all. EX offers no thumbnail
browsing, multi file selection (although you can drag multiple files),
no zoom or other ‘normal’ features.
Having used many different RAW conversion packages from different manufacturers
I can say that I don’t feel that RAW File Converter EX is worth the money,
especially considering what you get for free from other manufacturers.
The problem is that without Converter EX you don’t have any useful RAW
conversion options. Lets hope those third party converters turn up soon.
Converter EX allows you to select your output bit depth and color space
at the time you drop an image or group of images onto the application.
Note that you can only select Adobe RGB with a 16-bit TIFF output (each
one 71,103 KB). Good news is that Fujifilm are correctly tagging these
TIFF files with the Adobe RGB color space (Photoshop recognizes it). There
is also a special Fujifilm RGB color space. sRGB color space output is
available only with 8-bit TIFF files. There is no option to convert RAW
files directly to JPEG.
The main window for Converter EX is split into two sections. On the left
is a preview of the RAW image (as it will be at the time of output) along
with the output image size (you can select any of the four standard image
sizes). On the right are the custom settings options, leave ‘Camera Setting’
checked and Converter EX will simply convert the image according to the
settings recorded in the RAW file at the time of exposure.
Check ‘Custom setting’ to alter various settings. You can choose a predefined
tone curve or make your own, select a predefined white balance (which
can be fine tuned), use a gray picker white balance or enter a color temperature
white balance. You can define sharpness, color and sensitization (digital
exposure compensation). These custom settings can then be saved into setting
files to be used on batches of images later.
RAW Conversion Performance
The test machine used was a desktop PC with dual Athlon 1592 Mhz (1900+)
CPU’s 1 GB of RAM running Windows XP. Software used was RAW File Converter
LE and EX. Five RAW images were run through the RAW conversion software,
the time taken was then divided by five to calculate an approximate time
taken per image.
| Software |
Output image |
Color space |
Image adjustments | Time taken per image |
| Converter LE | 4256 x 2848 8-bit TIFF |
sRGB | None | 29.2 sec |
| Converter EX | 4256 x 2848 16-bit TIFF |
Adobe RGB | None | 31.6 sec |
| Converter EX | 4256 x 2848 8-bit TIFF |
sRGB | None | 30.2 sec |
| Converter EX | 3024 x 2016 8-bit TIFF |
sRGB | None | 29.6 sec |
| Converter EX | 4256 x 2848 8-bit TIFF |
sRGB | Tone, WB, Color, Exp. | 29.6 sec |
FinePixViewer 3.1
FinePixViewer is a sophisticated image browsing, display and organizational
tool designed to be the center of your digital imaging workflow. FinePixViewer
can perform several functions: Image transfer from camera / card reader
(‘Automatic Save’), Automatic Renaming of images based on EXIF information
and a custom filename pattern, Resizing, Rotation, Format Conversion and
even cropping of individual images.
Other features not covered below include printing of individual images
or index sheets, DPOF marking of images (requires removable media either
in a connected camera or via a card reader), launching of RAW File Converter
LE / EX, slideshow and video conference (consumer level FinePix cameras
only — not S2 Pro).
There are several different possible view configurations available, the
one shown below is perhaps the most complex. On the left is a tree folder
list, next to this the image list (in Detail mode in this case), next
to this the ‘Playback Pane’ which provides a larger image view as well
as exposure information, on the right is the FinePix Internet service
pane (we won’t cover this here but this is basically a photo sharing /
finishing service). Note that you can customize
the ‘look’ of the viewer window.
Other view examples: Small
thumbnail view (no Playback Pane), Details
view (no Playback Pane).
Full Image View
Double click on an image (or select Open from the right-click menu) and
a new window will open with a full size display. From here you view the
image at different zoom levels and pan around it. You can save the image
to a different format / location, print it, crop, add text, resize and
rotate the image. Closing the Image View will prompt you to apply any
changes back to the original image.
Automatic Rename
The Automatic Rename feature can be accessed by selecting one or more
images and right clicking. Automatic Rename allows you to rename and/or
change the format of selected images (JPEG Fine, Normal or Basic, TIFF
or BMP). You can choose to leave the images where they are or move them
to a particular directory (new directories can be created based on the
date of the image). The new filename can be made up of a pattern which
includes date information extracted from the EXIF header of the image.
Batch Resize
Batch resize allows you to resize selected images to a particular image
size or predefined VGA or QVGA. During the resize the output image format
can also be selected (JPEG Fine, Normal or Basic, TIFF or BMP). Images
can be output to the current directory (overwriting the original) or to
a new directory.
Batch Rotation
Batch rotation can be used to rotate selected images through 90, 180
or 270 degrees. Once more you can choose to output the rotated images
into a different format (if required) and you can select the output directory.
Sadly this rotate feature DOES NOT perform lossless JPEG rotation on JPEG
files, rotating a 2 MB file produced a 1.4 MB file proving that the image
is decoded, rotated and re-encoded. I can not recommend using FinePixViewer
for image rotation.
Information Batch Edit
Information Batch Edit allows you to attach comments or copyright messages
to a selection of images in a batch. Unusually it also allows you to change
the date / time stamp in the EXIF header, I’m not sure why you would want
to do so unless you had set the camera date incorrectly, even then this
function wouldn’t fully solve the datestamp.
Automatic
Save
On the right side of the toolbar is the button for Automatic Save. This
feature can be used to automatically transfer a batch of images from the
camera (when in USB Downloading or 1394 Downloading mode) or from a card
reader. Before beginning an Automatic Save you must have the correct directory
selected in the tree view pane, it’s a shame you can’t configure Auto
Save to copy / move all images from a default drive. Below you can see
the available settings for Auto Save, these include renaming, resizing,
format change and automatic creation of directories depending on image
EXIF data.
CD
Album Maker
On the right side of the toolbar is the button for CD Album Maker. This
utility will create a folder which can be written directly to the root
directory of a CD-R and will provide a web browser based album which will
auto run when inserted into a Windows PC. Note that RAW and TIFF files
can not be added to a CD Album. One or more ‘albums’ can be added to the
CD Album before it is created. There are also various
options which can be set before creation of the CD Album.
Example CD Album
Continuous drive mode
To test continuous mode the camera had the following
settings: Manual Focus, Manual Exposure (1/350s, F3.5), ISO 400. No matter
what image output setting the shooting rate was always 2.0 fps (+/-0.5
fps). Instead of testing the shooting rate I instead measured three different
parameters:
-
Number of frames — How many shots can be taken before the buffer
fills -
Next shot — How soon after a burst of shots you can take the
next shot -
Full write — How long a burst of shots takes to be processed
and written to the CF
The media used for these tests was a 512 MB Viking Type
I Compact Flash card.
| Image | Number of frames |
Next shot *1 |
Full write *1 |
| CCD-RAW | 7 | 8.0 sec | 61.7 sec |
| 12 mp JPEG Fine | 8 | 2.6 sec | 27.4 sec |
| 6.1 mp JPEG Fine | 8 | 2.3 sec | 14.8 sec |
| 6.1 mp JPEG Normal | 8 | 2.2 sec | 10.8 sec |
| *1 | This is dependent on the speed of the CF card and size of the image (higher ISO = more noise = larger JPEG size), although these timings should be fairly typical. |
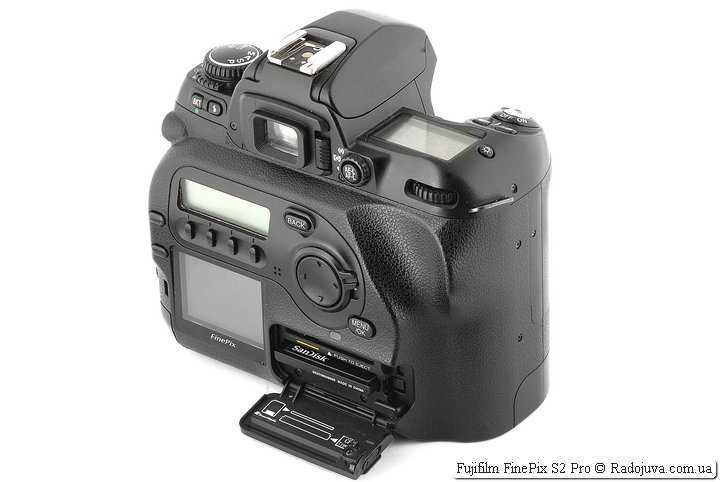
The S2 Pro utilizes a parallel buffer writing system,
this ensures that that when there are images in the internal buffer they
are being written out to the storage card no matter what the camera is
doing. This means that in the case of JPEG files the camera has already
written one frame away by the end of the 7 frame burst and so we get 1
additional frame (8 instead of 7). Writing performance is even more impressive
when you consider that each 4256 JPEG Fine file is over 4 MB in size.
A consistent if not blistering performance, the maximum
frame rate of 2 frames per second will no doubt limit the use of this
camera in sports environments, but its ability to quickly process and
write images means that you’re almost never left waiting after shooting
a burst of continuous frames.
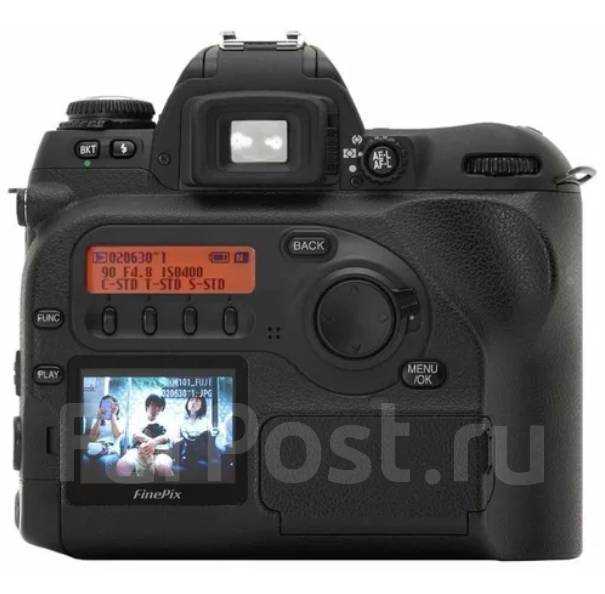
Image settings: Color, Tone and Sharpening
Via the very convenient rear display panel you can quickly
control Color, Tone and Sharpening applied to the image before it is turned
into its final image type. These ‘filters’ are only applied to JPEG and
TIFF files, for RAW files the image settings are simply stored in the
file header to be applied later.
Settings:
ISO 100, Nikkor 50 mm F1.4 D @ F8.0, 1.4 mp JPEG Fine (~700 KB)
Image setting: Color
The Color image setting controls the saturation of color in the final
image. You can choose for more or less color saturation or even a black
and white mode (which does produce nice B&W shots).
| Color: Standard | Color: High | Color: Original |
| Color: B&W |
Image setting: Tone
Tone changes the contrast balance of the image, with hard providing more
contrast and the original setting producing a flatter image.
| Tone: Standard | Tone: Hard | Tone: Original |
Image setting: Sharpening
The S2 Pro has three sharpening settings, the Standard setting provides
good sharpness and detail rendition without any visible sharpening artifacts.
The Hard setting provides a much sharper looking image at the expense
of visible ‘halo’ sharpening artifacts around dark detail and enhanced
noise visibility. The Off setting produces a very soft image without any
in-camera sharpening.
Settings:
ISO 100, Nikkor 50 mm F1.4 D @ F8.0, 6.1 mp JPEG Fine
White balance
The S2 Pro’s Auto white balance worked well under natural
light, it also made a good attempt under artificial light however there
were slight but noticeable casts under incandescent or fluorescent light
in Auto mode. The pre-programmed white balance settings were ‘almost there’,
it would have been nice to have an in-camera fine tuning facility as we’ve
seen on Nikon digital’s for some time. Manual white balance preset offered
the most accurate and consistent results under different light sources.
Settings:
Color/Tone/Sharpening: Normal, ISO 100, Nikkor 24 — 85 mm F3.5 — 4.5 G,
1.4 mp JPEG Fine (~700 KB)
| Daylight: Auto | Daylight: Cloudy / Sunny | Daylight: Manual |
| Incandescent: Auto | Incandescent: Incandescent | Incandescent: Manual |
| Fluorescent: Auto | Fluorescent: Fluorescent 3 / / |
Fluorescent: Manual |
Timings & File Sizes
The S2 Pro proved to be a very quick and capable digital
SLR. Power on times are instant, as soon as you’ve turned the power switch
you can take a shot. The display of a Postview image after taking a shot
was in line with what we’ve seen elsewhere. Storage card write performance
also proved to be very impressive, important considering some of the very
the large files sizes the S2 Pro can generate. Perhaps the only delay
could be the amount of time taken to load the full resolution image in
play mode (up to 4 seconds).
Timing Notes: All times calculated as an average
of three operations.
The media used for these tests were:
- 512 MB Viking Type I Compact Flash card
- 512 MB Lexar 16x Pro Type I Compact Flash card
- 1 GB IBM Microdrive Type II Compact Flash card
| Action | Details | Time, seconds (Viking CF) |
Time, seconds (Lexar 16x CF) |
Time, seconds (Microdrive) |
| Power: Off to On | <0.1 | <0.1 | <0.1 | |
| Power: On to Off *1 |
<0.1 | <0.1 | <0.1 | |
| Record: Postview *2 | JPEG 12 mp |
1.8 | 1.8 | 1.8 |
| Record: Postview *2 |
JPEG 6.1 mp |
1.8 | 1.8 | 1.8 |
| Record: Postview *2 |
RAW | 1.8 | 1.8 | 1.8 |
| Play: Image loaded *3 |
JPEG 12 mp |
3.7 | 4.0 | 4.3 |
| Play: Image loaded *3 |
JPEG 6.1 mp |
2.1 | 2.3 | 3.1 |
| Play: Image loaded *3 |
RAW | 1.0 | 1.0 | 1.2 |
| Play: Thumbnail view 3 x 3 |
0.9 | 0.9 | 2.1 |
| *1 | Assuming all buffered images have been written out to storage card, otherwise camera will remain ‘on’ until images have been written away. |
| *2 | Time taken from the shutter release being pressed to the review image being displayed on the LCD monitor. This is one of our standard timing tests for D-SLR’s, however the S2 Pro doesn’t even access the storage card before displaying the Postview image so it wasn’t affected by different storage cards. This 1.8 second delay appears to be the amount of time it takes the camera’s CPU to perform the SuperCCD interpolation. |
| *3 |
This is the amount of time taken to complete |
RAW vs. JPEG
The following tests were performed by taking the exact same scene first
as JPEG and then as RAW. The RAW images were then converted to TIFF using
Converter EX. These TIFF files were used for the crops you see below,
however they are far too large to provide for download so high quality
JPEG copies are the only option we can provide for your own comparison.
Due to bandwidth constraints it is also not possible to provide the original
.RAF files (which are in excess of 12 MB each).
Resolution chart
Below you will find crops from shots of our standard ISO resolution chart.
First at the 4256 x 2848 (12 mp) resolution and then 3024 x 2016 (6.1
mp). As described above the JPEG’s are straight from the camera, RAW files
converted using Converter EX.
4256 x 2848 (12 mp) image size
| JPEG (4,442 KB) | RAW (as a 2,630 KB JPEG) |
At the full 12 megapixel image size it’s clear to see that the additional
processing power (and time taken) to convert the RAW to TIFF has a positive
effect on image quality and resolution. A S2 Pro RAW file converted at
this resolution almost produces maximum resolution on our resolution chart
(in both horizontal and vertical directions). There are also quite noticeably
less moiré, jaggies and sharpening artifacts in the RAW converted
image.
3024 x 2016 (6.1 mp) image size
| JPEG (2,318 KB) | RAW (as a 1,367 KB JPEG) |
Conclusion — Pros
- The new resolution leader for six megapixel D-SLR’s (SuperCCD performs
well) - Good colour and tonal balance, good dynamic range
- Very low image noise even at high sensitivities (new noise reduction
system) - Superb Nikon 3D matrix metering
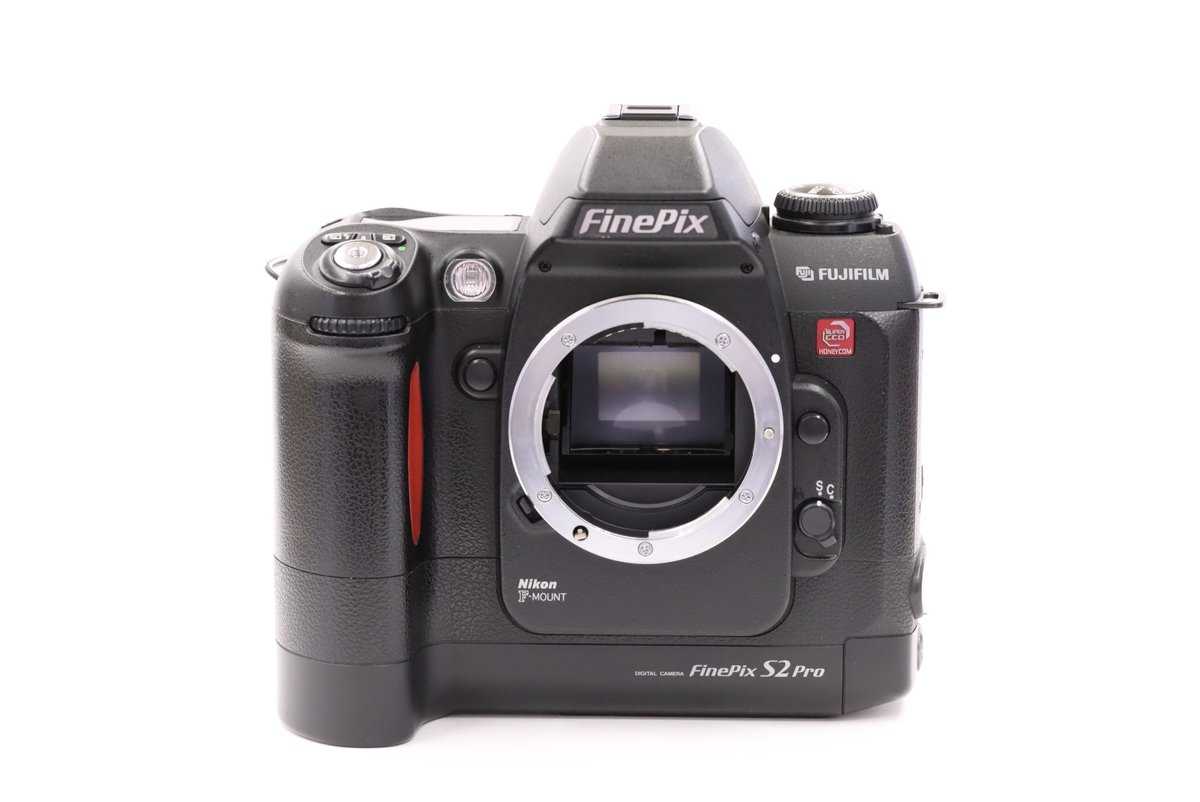
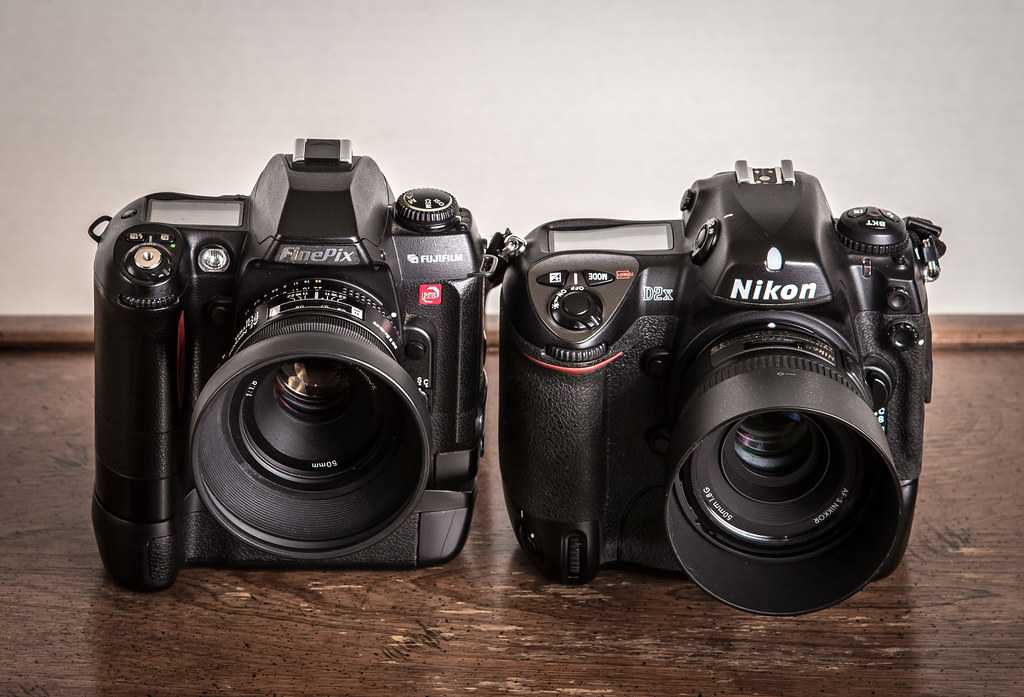
- More robust body (thanks to the use of the F80/N80)
- Body bigger than D100 yet still feels compact and comfortable in your
hand - Good design points, the rear panel is useful for quickly changing
settings - Good range of ISO sensitivities, would have been nice to have 1/2
EV increments - Control over image processing (color, tone, sharpening), more steps
would be nice - Fast operation, instant power up and no delays in menus or playback
- Excellent auto focus, works well even in low light, AF assist lamp
- RAW mode option, although included Converter LE is very basic
- Full Nikon F mount lens compatible (better with D and G type lenses)
- IBM Microdrive compatible
- Grid lines in viewfinder display
- Top panel LCD illuminated
- Custom functions to control camera operation
- Firewire (IEEE 1394) connectivity
- High speed CF interface (>1.5 MB/sec)
- Built-in PC Sync terminal
- Good battery life despite the dual battery setup
- Good value for money
Night Exposures
The S2 Pro appears to be able to handle night exposures
quite well, with timed exposures of up to 30 seconds and a Bulb mode for
longer exposures. As you can see in the first sample below a 30 second
exposure is no problem with hardly any visible noise or ‘hot pixels’.
Settings:
Color/Tone/Sharpening: Normal, ISO 100, Nikkor 17 — 35 mm F2.8 D, 6.1
mp JPEG Fine
| ISO 100, F8.0, 30 secs, 6.1 mp (2,291 KB) |
Five minute exposure
This is a test we first carried out with Canon’s EOS-D60 (which
produced amazing results), the S2 Pro also manages to put in a very
impressive performance. Yes, there is some visible noise but considering
the length of the exposure the camera does do a very good job at capturing
the overall scene (colour is surprisingly good).
Settings:
Color/Tone/Sharpening: Normal, ISO 100, Nikkor 50 mm F1.4 D, 6.1 mp JPEG
Fine
| ISO 100, F11.0, 5 minutes (Bulb), 6.1 mp (2,312 KB) |
Battery life
The S2 Pro is fairly unique in the fact that it splits
its power requirements in two. The first set of batteries are two CR123A
type Lithium batteries which are used to power the photographic side of
the camera (metering, LCD panel, AF). The second set of batteries are
four AA type batteries (NiMH recommended), these power the digital side
of the camera, the sensor, processor, LCD monitor and storage system.
During our every day shooting battery life proved to be very good, the
AA’s lasted and lasted, indeed the spare set I took along were almost
never required. So far the camera still has the same set of CR123A’s it
was delivered with, it looks as though these will last far longer.
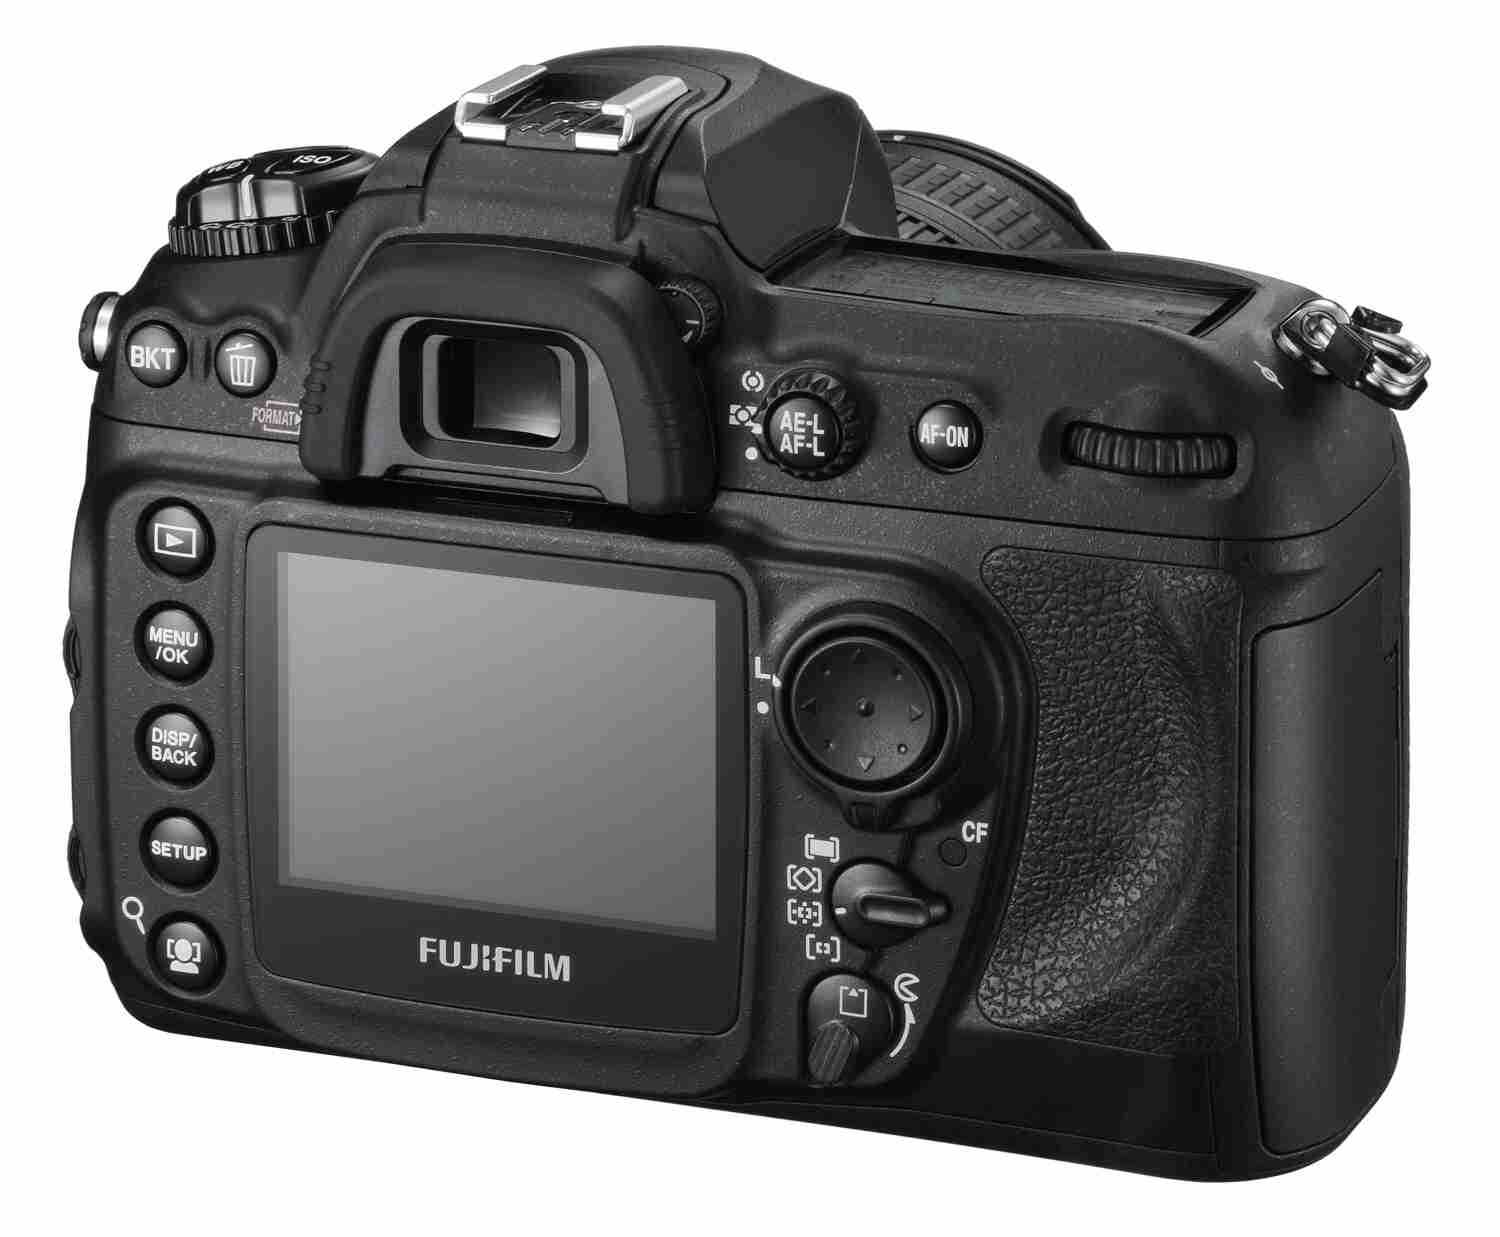
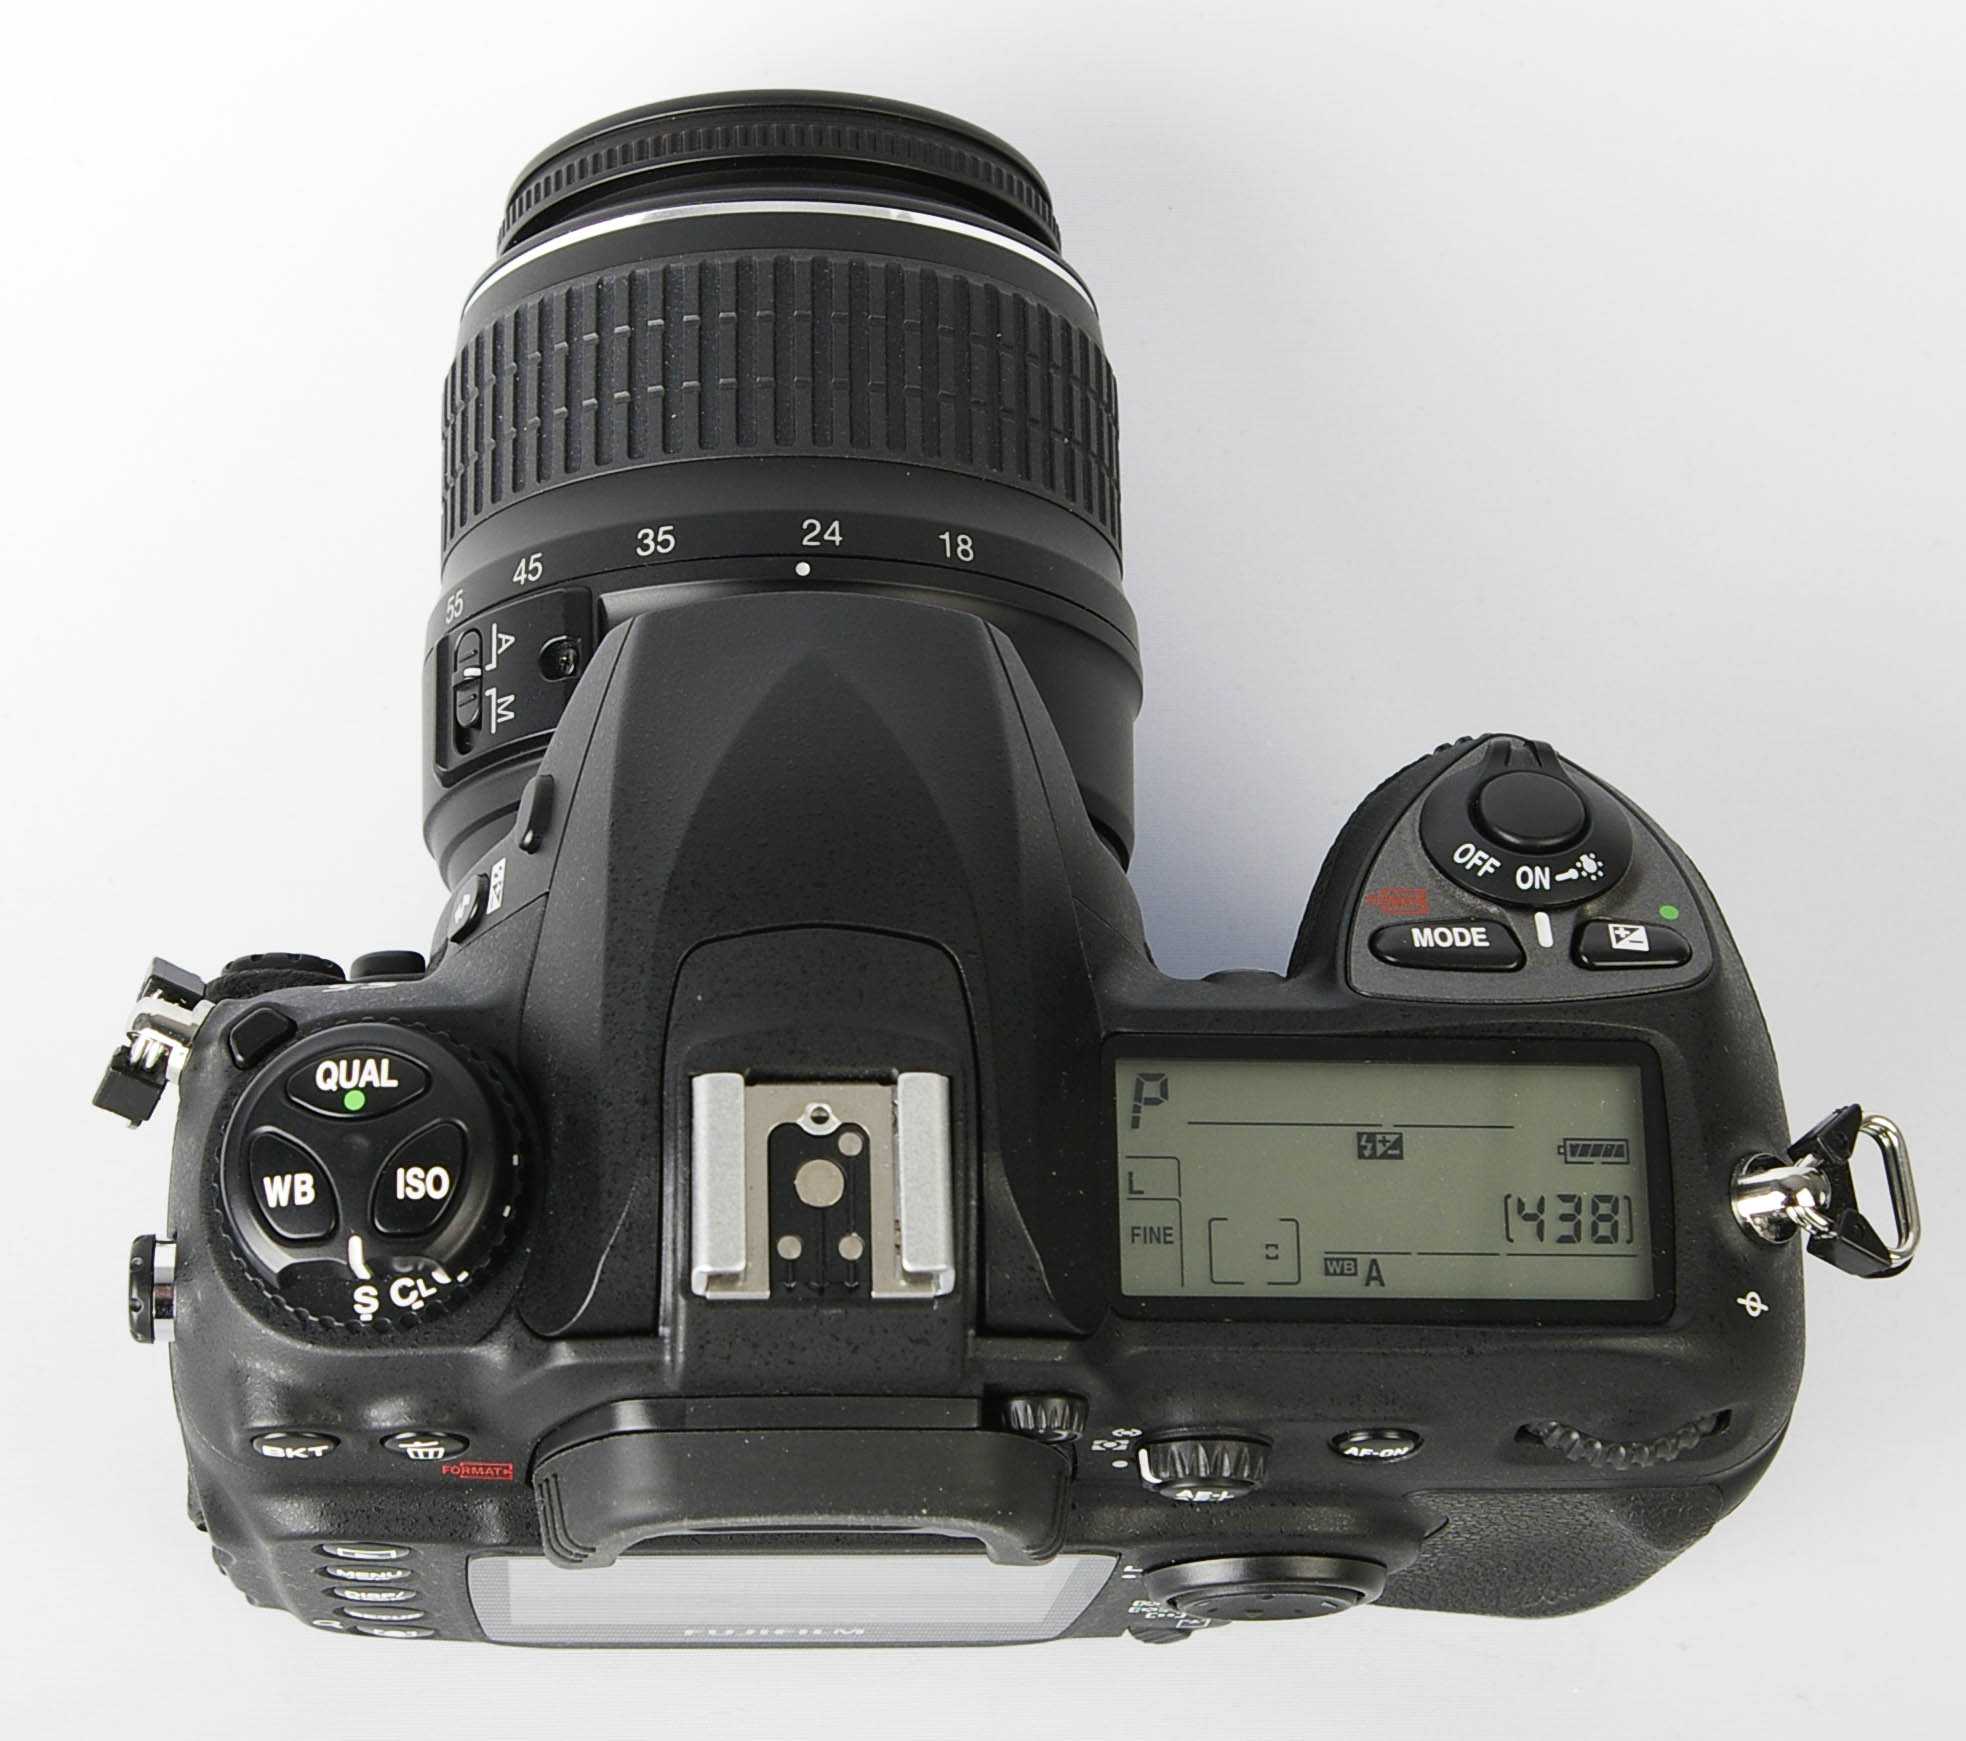
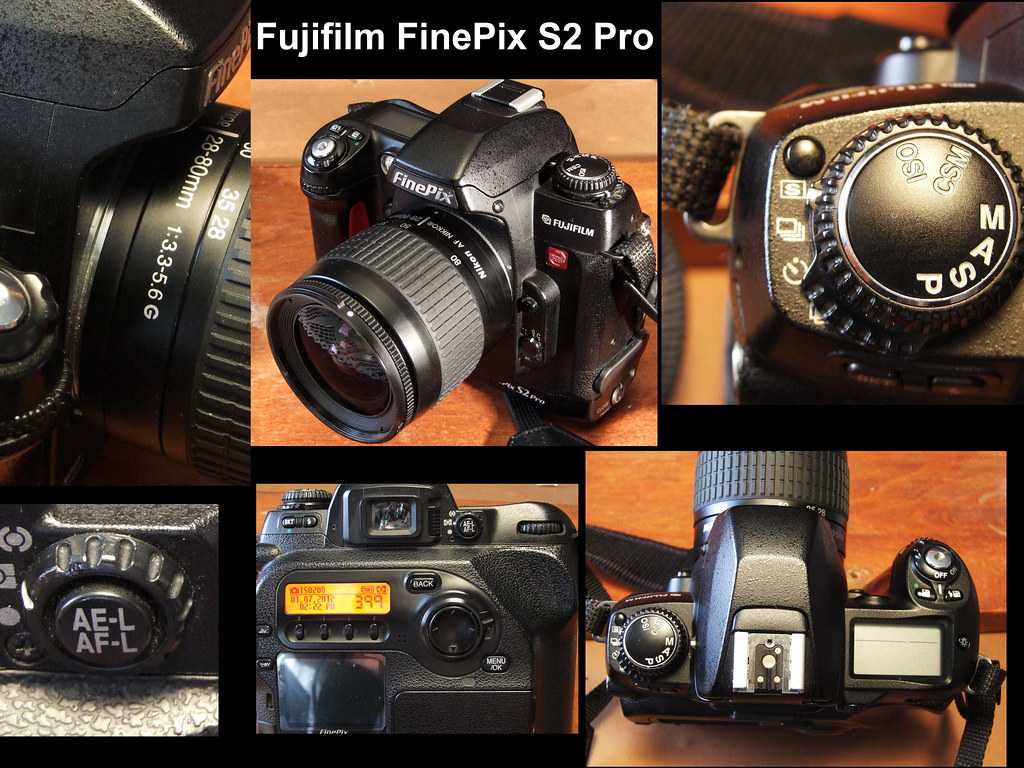
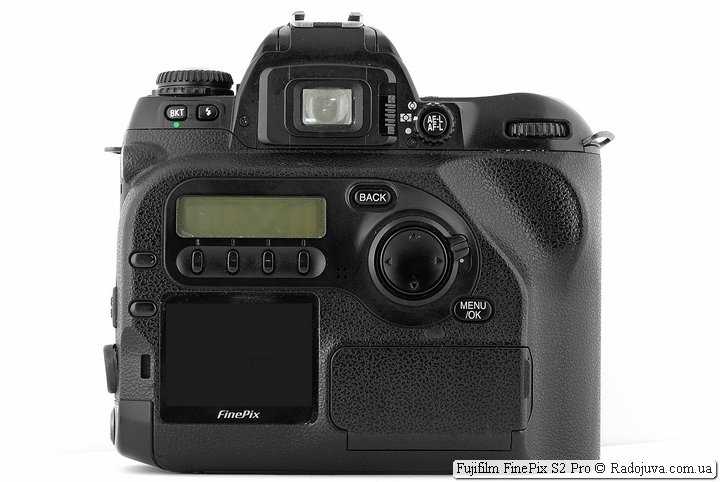
Top of camera controls (right)
|
Top of the camera on the right side are the two sub and main command |
Power switch
| Symbol |
Mode |
| OFF |
Camera Off |
| ON |
Camera On Switches camera on, this is virtually instant, there’s no perceptible delay between turning the dial to the On position and being able to shoot. |
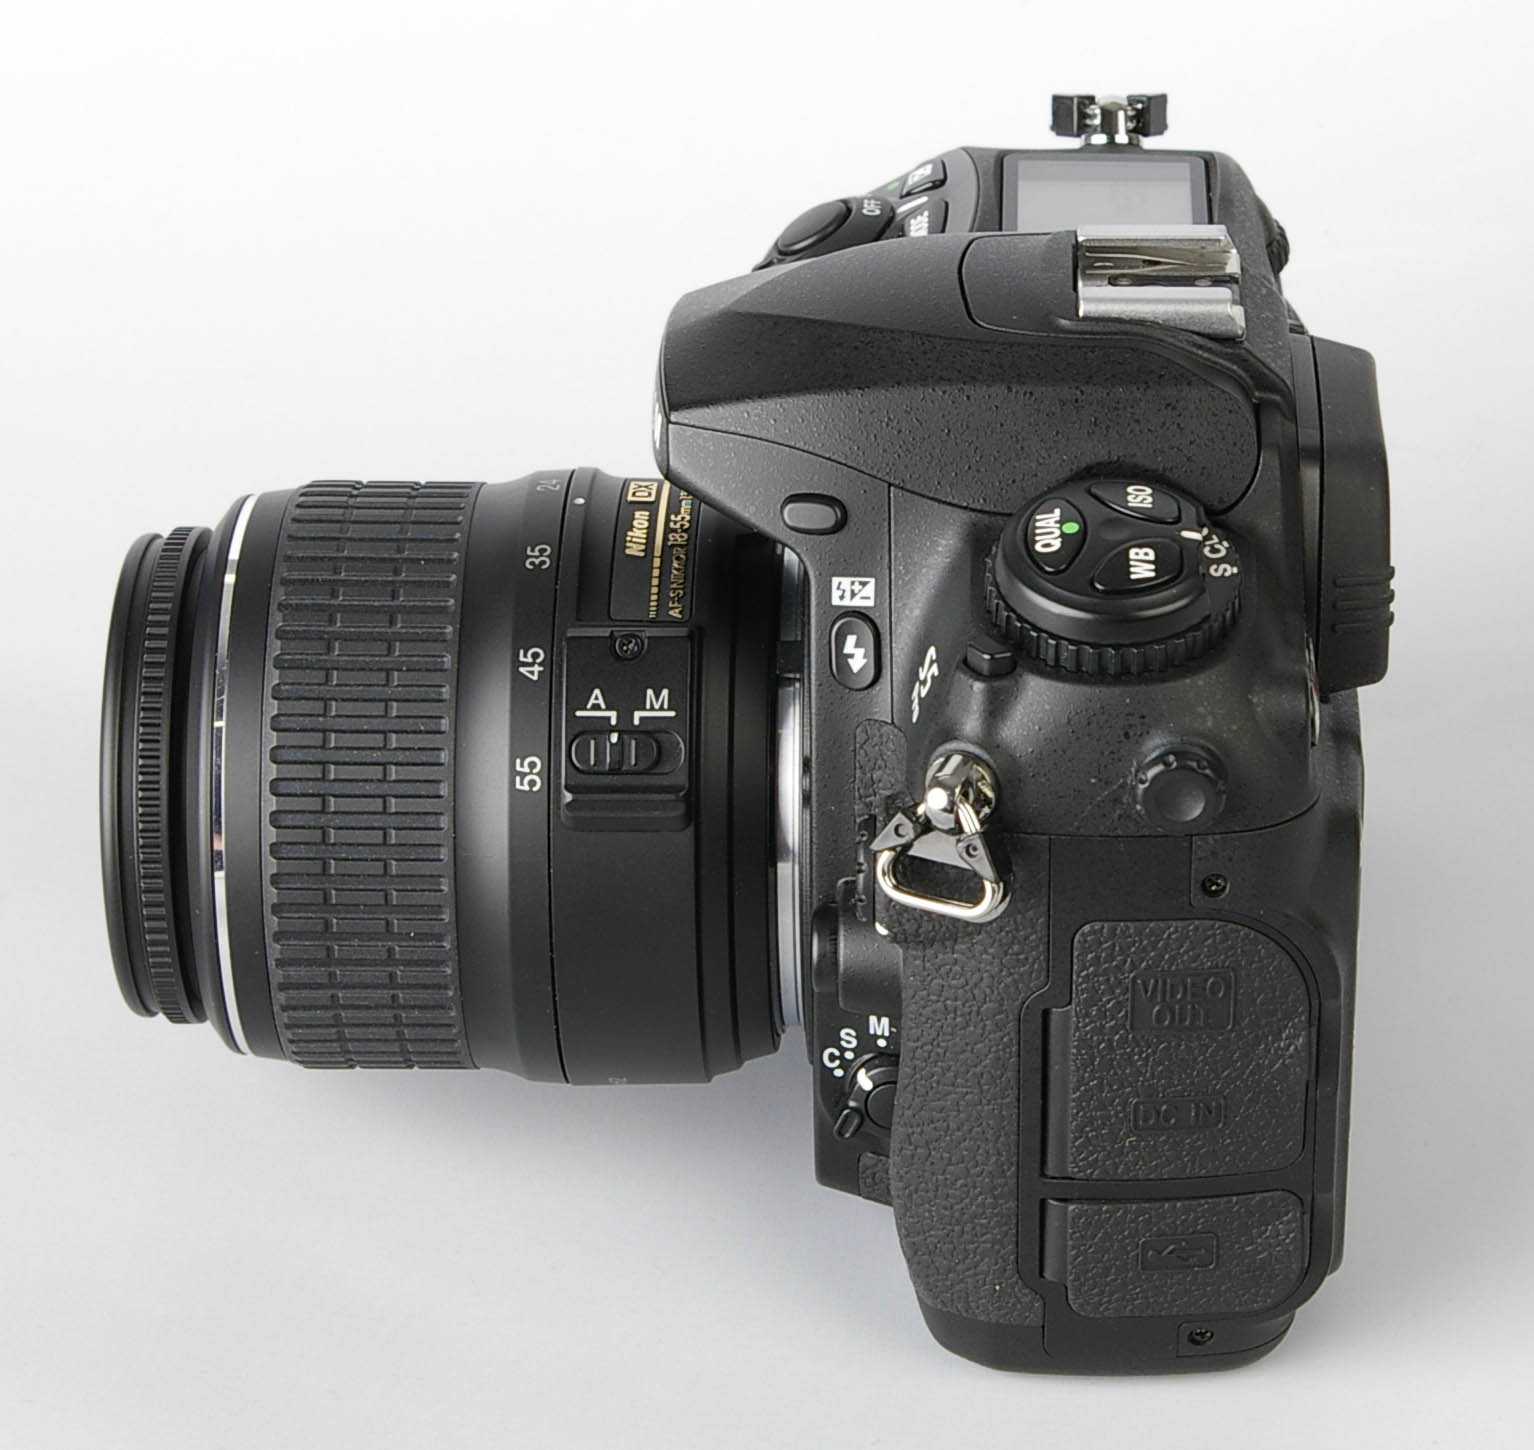
Autofocus
Single Point
The auto focus performance here is , as stated previously – limited very much by the individual lens attached. Screw drive lenses will be slower where as a lot of the AF-S lenses will be faster.
There are 5 AF points to choose, much like my beloved Nikon D50.
With the 28-70mm lens, the focus was medium speed, but very confident in good to average lighting. Low light the camera and lens combination does struggle.
Continuous
Not sure how valuable this might be. I did use it in a limited capacity when shooting images of the flower in this post. It did keep track of the flower and stayed in focus with a light breeze moving the flower. As far as tracking sports or some such, I would not expect anything spectacular.
Manual Focus
I will use manual focus on occasion, but usually only with adapted manual focus lenses..
It is good enough to get the job done.
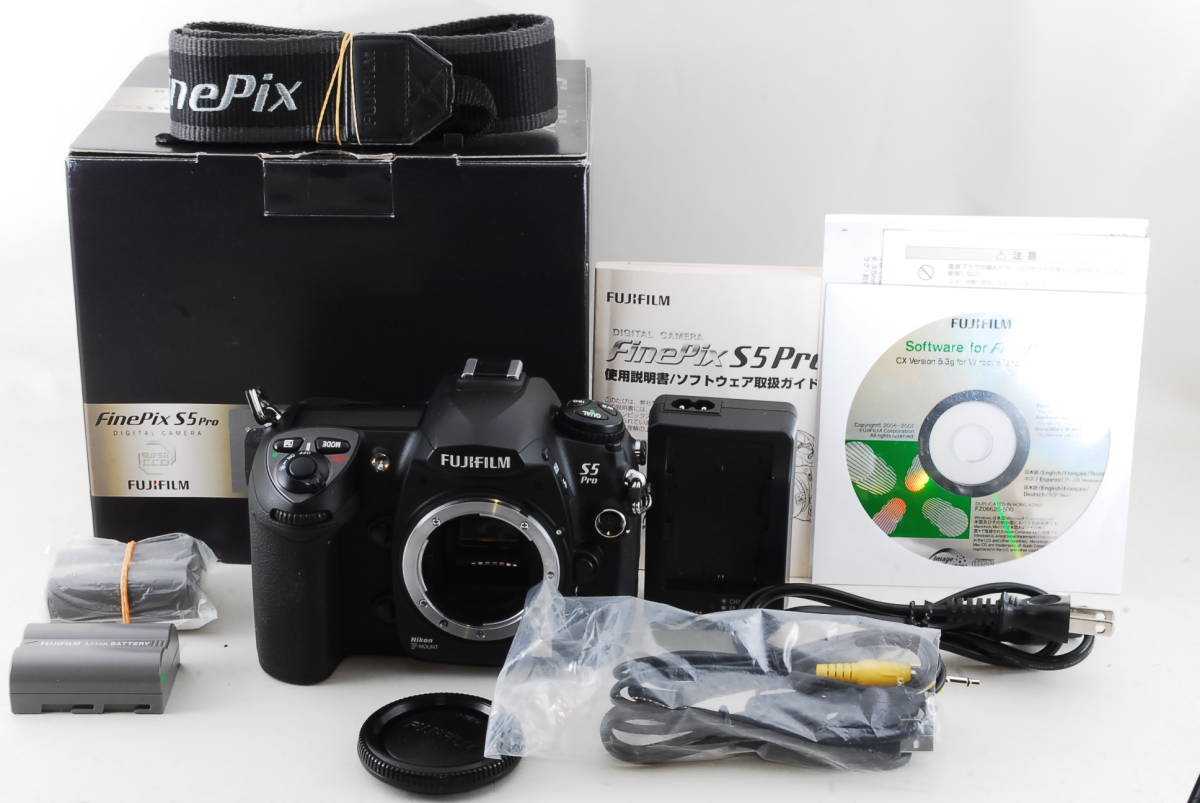
Battery and Battery Life
This is a double edged sword for me…one that I really like but also there is some oddity here in the way it is implemented.This camera uses 4 AA batteries along with 2 CR123A batteries (somewhat optional).
It can use AA alkaline or NiMh rechargeables. The main purpose of the AA batteries is image processing.The CR123A Lithium batteries are for powering camera operations like metering and auto focusing as well as powering the built in flash. Fuji was smart and allow for the AA batteries to power all the functions of the camera when the CR123A are depleted or not present.From my research, the combination of both batteries should allow for ~600 images to be captured. With the AA alone, that drops to ~400 images captured per charge.


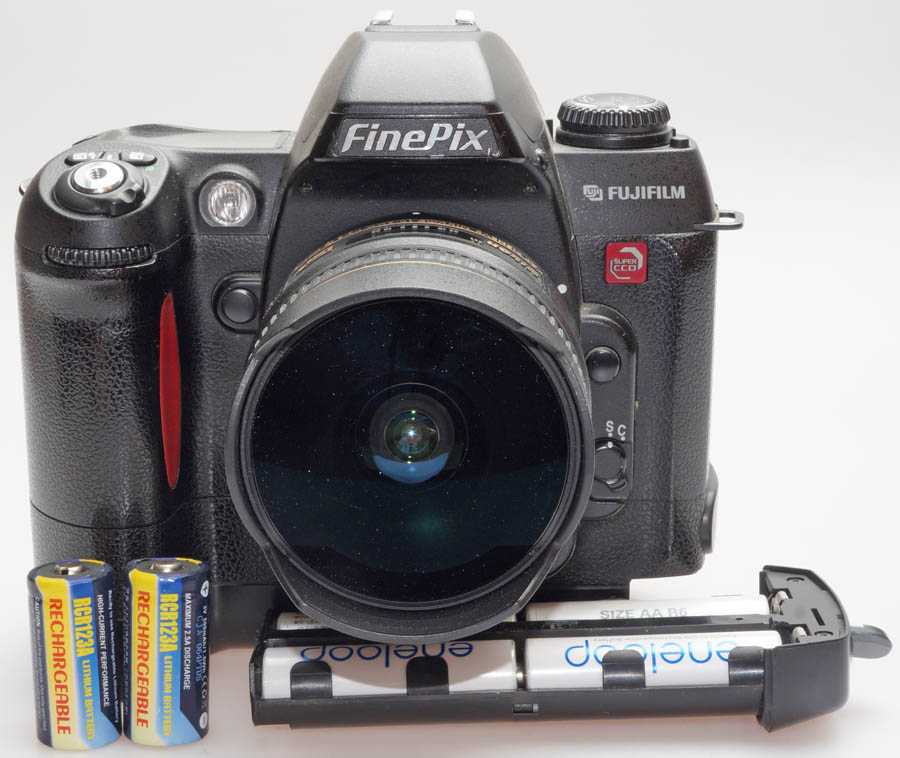


The other caveat is that the manual for the S2 Pro states that without the CR123A, camera functions may not be stable, so it is best to run with all batteries in place.
While I understand the processing needs of the modern camera and the need for larger capacity and more powerful batteries – there is something refreshing though about having a camera that can run on batteries that can be found at just about any store. I do miss those days of convenience and availability sometimes.
Stabilization VR/VC/OIS
Back in 2002, there was no f-mount camera with in body stabilization (and there still isn’t one – gotta go Z mount if you want in body stabilization from Nikon), so lens VR was how that was accomplished. If you are using this camera and need VR, then you’ll be shopping for compatible lenses with stabilization in them. I used to own the Nikon 55-200VR back when I had a D50 and D300 and it was a capable optic for its time.
Overall conclusion
Once more Fujifilm’s D-SLR turns out to be the dark horse
of the D-SLR race. The S2 Pro goes a long way to satisfying Fujifilm’s
claims about SuperCCD, although it’s my opinion that the SuperCCD design
works far better in a D-SLR (large sensor size) than a consumer camera.
The S2 Pro delivers great results from the word go, you have the 6.1 mp
resolution mode for the majority of shots and the larger 12 mp mode when
you need a big image straight from the camera for big prints.
In the 6.1 mp mode the S2 Pro delivers crisp, clean and
detailed images which look great at 100%, anything that looks good at
100% will print well. The fact that the camera always generates the 12
mp image from the honeycomb SuperCCD and then down-samples appears to
be the key to image sharpness. In addition to this Fujifilm’s progressive
noise reduction system keeps noise low even at higher sensitivities.
Color is of course very good, although it’s disappointing
not to be able to get Adobe RGB color space JPEG’s straight out of the
camera. I was also disappointed with the bundled RAW Converter LE and
thought that the additional cost RAW Converter EX wasn’t worth the money
(although without it you’ll be hunting for third party solutions). Other
annoyances include 1/2 EV steps for exposure compensation or shutter speed
/ aperture selection and the fact that the camera is still electrically
‘two halves’ requiring two different types of battery.
Positive physical assets include Firewire (IEEE 1394)
connectivity and a PC Sync socket, the later of which will go down very
well with studio photographers. The S2 Pro has pluses and minuses, but
I’m glad to report that the major plus is its image quality, and after
all that’s what matters at the end of the day. Despite its slightly higher
price the S2 Pro still offers great value for money.
Highly Recommended
So which one should I buy? A question I
get asked several times a day, and I wouldn’t like to say. In a new addition
to my reviews (after the amount of feedback I normally get) I’ve added
a link to a specific forum in which you can discuss the review or ask
me specific questions which I’ve not answered in these pages.
Please support this site if you decide to buy
If you make a decision to order the Fujifilm FinePix S2 Pro you can help
to support this site and future articles / reviews by buying directly
from one of our official retail partners:
Night Exposures
The S2 Pro appears to be able to handle night exposures
quite well, with timed exposures of up to 30 seconds and a Bulb mode for
longer exposures. As you can see in the first sample below a 30 second
exposure is no problem with hardly any visible noise or ‘hot pixels’.
Settings:
Color/Tone/Sharpening: Normal, ISO 100, Nikkor 17 — 35 mm F2.8 D, 6.1
mp JPEG Fine
| ISO 100, F8.0, 30 secs, 6.1 mp (2,291 KB) |
Five minute exposure
This is a test we first carried out with Canon’s EOS-D60 (which
produced amazing results), the S2 Pro also manages to put in a very
impressive performance. Yes, there is some visible noise but considering
the length of the exposure the camera does do a very good job at capturing
the overall scene (colour is surprisingly good).
Settings:
Color/Tone/Sharpening: Normal, ISO 100, Nikkor 50 mm F1.4 D, 6.1 mp JPEG
Fine
| ISO 100, F11.0, 5 minutes (Bulb), 6.1 mp (2,312 KB) |